Audiovox VOD10 Operation Manual
Audiovox VOD10 - Car - Overhead LCD Monitor Manual
 |
UPC - 044476065569
View all Audiovox VOD10 manuals
Add to My Manuals
Save this manual to your list of manuals |
Audiovox VOD10 manual content summary:
- Audiovox VOD10 | Operation Manual - Page 1
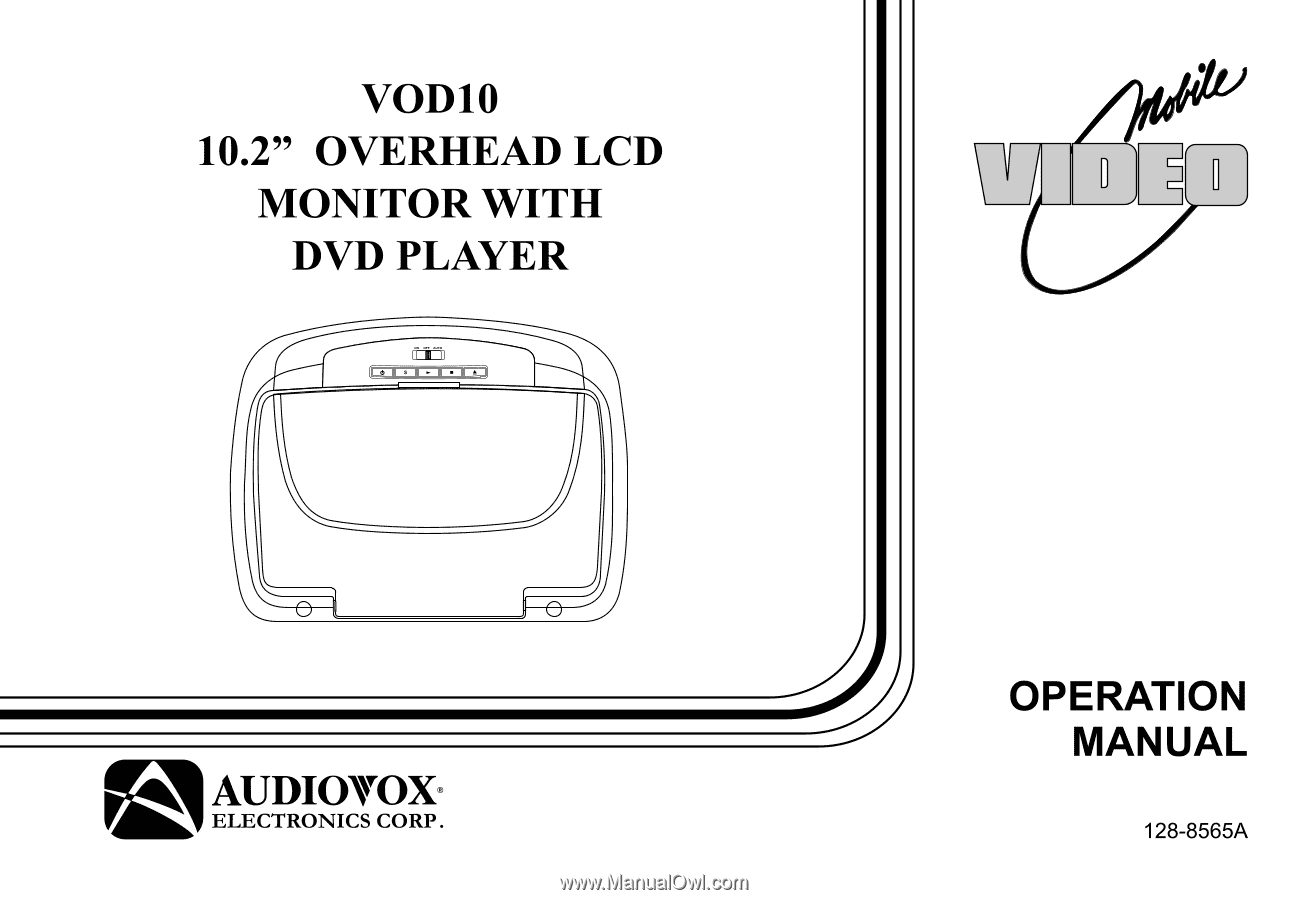
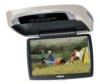
VOD10 10.2" OVERHEAD LCD MONITOR WITH DVD PLAYER OPERATION MANUAL 128-8565A - Audiovox VOD10 | Operation Manual - Page 2
Audiovox Technical Support at 1-800-225-6074. When connecting power and ground in a mobile video installation control, rear or side observation or navigation. If the LCD panel or video monitor is used for television reception, video or DVD play, the LCD panel or video monitor must be installed - Audiovox VOD10 | Operation Manual - Page 3
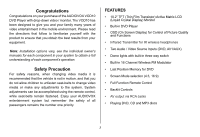
for IR wireless headphones • Two Audio / Video Source Inputs (DVD, AV1/AUX) • Dome lights with built-in three way switch • Built-in 16 Channel Wireless FM Modulator • Last Position Memory for DVD • Screen Mode selection (4:3, 16:9) • Full Function Remote Control • Backlit Controls • AV output - Audiovox VOD10 | Operation Manual - Page 4
PLAY to start playback 4 from the beginning of the DVD. 5 6 5. EJECT () Control 7 This control is used for ejecting disc from the disc compartment. Provide additional interior illumination. 10 8. Ventilation Openings 11 1. POWER ( ) Control Used to turn the system on/off (standby). 2. - Audiovox VOD10 | Operation Manual - Page 5
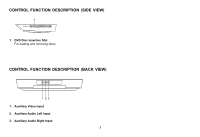
CONTROL FUNCTION DESCRIPTION (SIDE VIEW) 1 1. DVD Disc insertion Slot For loading and removing discs. CONTROL FUNCTION DESCRIPTION (BACK VIEW) 1 23 1. Auxiliary Video Input 2. Auxiliary Audio Left Input 3. Auxiliary Audio Right Input 5 - Audiovox VOD10 | Operation Manual - Page 6
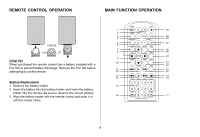
remote control has a battery installed with a Pull Tab to prevent battery discharge. Remove the Pull Tab before attempting to use the remote. Battery Replacement with the remote control and push it in until the holder clicks. POWER EJECT 1 M1 M2 30 2 SOURCE 3 TV DVD MUTE 29 4 DVD SOURCE - Audiovox VOD10 | Operation Manual - Page 7
the unit and the Remote Control. ** Function not available in this model. 1. POWER* Press this button to turn the unit ON and OFF. 2. MONITOR SELECT M1 Button - Set the remote control code to allow control of the unit in M1 mode. M2 Button** - Set the remote control code to allow control of the unit - Audiovox VOD10 | Operation Manual - Page 8
SCAN BACKWARD (7) Press to search in a backward direction. Press repeatedly to change the search speed from 2, 4, 8, 16 times and normal speed. 12. ON/OFF Turns the FM Modulator power on/off. 17. IRT ON/OFF (Optional) Turns the Infrared Transmitter on or off for IR wireless headphones. 18. NEXT (:) - Audiovox VOD10 | Operation Manual - Page 9
disc to disc. 22. SETUP Press to display the Setup menu which allows the user to change the DVD player options such as LANGUAGE, VIDEO, RATING & MISC. Note: The unit must be set to DVD mode by pressing the DVD button prior to pressing the SETUP button. 23. SUBTITLE Press to display and select the - Audiovox VOD10 | Operation Manual - Page 10
enlarge the picture when playing a DVD disc. Press ZOOM button DVD player perform Once Q1- Enlarge the DVD Mode Select Button Switches certain function keys on the remote control for DVD function. 29. MUTE Press this button to mute the audio for wireless FMM, IR headphones and wired headphones - Audiovox VOD10 | Operation Manual - Page 11
the desired adjustment and press ENTER. 4) Use the cursor buttons p or q or the +or - buttons to change the settings. Press ENTER when the adjustment is finished. SYSTEM MENU PICTURE CONTROL FMM OSD LANGUAGE SOURCE DEFAULT DVD SCREEN MODE PICTURE CONTROL BRIGHTNESS CONTRAST COLOR TINT RESET 11 - Audiovox VOD10 | Operation Manual - Page 12
ON/OFF options - Turns the wireless FM Modulator on or off. FMM SELECT option - Selects the wireless FM Modulator Frequency (CH1 88.1MHz, CH2 7MHz, Ch15 90.9MHz, CH16 91.1MHz) SYSTEM MENU PICTURE CONTROL FMM OSD LANGUAGE SOURCE DEFAULT DVD SCREEN MODE FMM FMM ON FMM OFF FMM SELECT OSD LANGUAGE - Audiovox VOD10 | Operation Manual - Page 13
off then on, the unit will power up in whatever source was last selected. • Unit is set to source default DVD on as the default mode of operation MENU PICTURE CONTROL FMM OSD LANGUAGE SOURCE DEFAULT DVD SCREEN MODE SOURCE DEFAULT DVD ON OFF SCREEN MODE SELECT This allows the user to change the - Audiovox VOD10 | Operation Manual - Page 14
and options that let you customize your DVD player. For example, you can set a language for the on-screen display or prevent children from viewing DVD playback of adult DVD Titles. Using the Setup Menu 1. Press the DVD button and then the SETUP button on the remote. The Setup Menu appears on the - Audiovox VOD10 | Operation Manual - Page 15
the player will play and display on the screen the original language contained in the disc. DVD VIDEO SETUP TV Display The TV Rating Subtitle Audio Misc English French Spanish German Italian Chinese Japanese Thai Language TV display 4:3 16:9 Video TV type Rating Misc DVD TV Type The TV - Audiovox VOD10 | Operation Manual - Page 16
DVD RATING SETUP Language Parental : 6.Adult Parental Video Change Password This item allows you to limit the content of movie playback from G to Adult. The lower the value, the more strict the control. 1. G Rating Misc 2. PG 3. PG - 13 4. R 5. NC - 17 6. Adult The rating level can only - Audiovox VOD10 | Operation Manual - Page 17
Load Factory Video Rating Screen Saver Off On Misc Playing DVDs 1. Press the DISPLAY button on the remote control to display the status banner. The banner includes title, chapter, angle, audio, subtitle and time. 2. Title Selection Press numeric(0~9) buttons to initiate a change of title - Audiovox VOD10 | Operation Manual - Page 18
discs that have been encoded in MP3 format can be played on DVD player. The DVD player plays the songs in the order they were burned on to the to begin track playback. Skipping Songs Use the Next (:) button on the remote control to move to the next song. Use the Previous (9) button to move to - Audiovox VOD10 | Operation Manual - Page 19
Repeat: play repetitively Repeat function has 4 options : Off, Single, Folder, All. Move cursor to Repeat function and press ENTER, Each time ENTER is pressed the unit will cycle through the available options. Off/Single/Folder/All are displayed in that order. Repeat default is Off; Off Single - Audiovox VOD10 | Operation Manual - Page 20
Clear program Music Playing Region 1- USA, Canada Region 2- Japan, Europe, South Africa, Middle East, Greenland Region 3- S. Korea, Taiwan, Hong Kong, Parts of South East Asia Region 4- Australia, New Zealand, Latin America (including Mexico) Region 5- Eastern Europe, Russia, India, Africa Region - Audiovox VOD10 | Operation Manual - Page 21
's headliner. Note: the following Discs CANNOT be used with this player : • MiniDisc • Laserdisc • CD-1, CD-ROM, DVD-ROM, Super Audio CD (SACD), DVD Audio, JPEG To load and Play a Disc Press the Power button to turn the unit on. Select DVD mode and insert the disc (label facing upwards) into the - Audiovox VOD10 | Operation Manual - Page 22
screen downward until a comfortable viewing angle is reached. The hinge friction will hold the screen in position while the system is in use. 2. Pressing the power button* on the unit or the remote control will turn the system on and off. When in use the internal backlighting will illuminate the - Audiovox VOD10 | Operation Manual - Page 23
Installation Guide for wire connections. Do not leave the vehicle unattended with the dome light switch in the ON position, as this could result in a discharged battery. ACCESSORIES WIRELESS HEADPHONES The VOD10 includes a built-in infrared transmitter for use with the supplied wireless headphones - Audiovox VOD10 | Operation Manual - Page 24
player to dry out. Make sure your DVD is connected properly. Make sure all cables are securely inserted into the appropriate jacks. If you are using the 2-channel IR headphones, make sure you turn on the IR headphone power, make sure the correct channel (A-B) is selected. Make sure the Modulator - Audiovox VOD10 | Operation Manual - Page 25
PROBLEM Not allowed at the moment Picture is distorted No forward or reverse scan SOLUTION The feature or action cannot be completed at this time because: 1. The disc's software restricts it. 2. The disc's software doesn't support the feature (e.g., angles) 3. The feature is not available at the - Audiovox VOD10 | Operation Manual - Page 26
REPLACEMENT PARTS Remote Control 136-4840 SPECIFICATIONS LCD Backlighting Edge Light Tube Resolution 1440 x 234 Pixels Video Output 1.0Vp-p @ 75 ohms Power Source 12V DC Dimension L x W x H 11.0" x 9.5" x 1.7" 289mm x 243mm x 44mm Specifications subject to change without notice. 26 - Audiovox VOD10 | Operation Manual - Page 27
) without charge for parts and repair labor. A game controller, if supplied, is similarly warranted for (90) days. To obtain repair or replacement within the terms of this Warranty, the product is to be delivered with proof of warranty coverage (e.g. dated bill of sale), specification of defect - Audiovox VOD10 | Operation Manual - Page 28
© 2009 Audiovox Electronics Corp., Hauppauge, NY 11788 128-8565A
-
 1
1 -
 2
2 -
 3
3 -
 4
4 -
 5
5 -
 6
6 -
 7
7 -
8
-
9
-
10
-
11
-
12
-
13
-
14
-
15
-
16
-
17
-
18
-
19
-
20
-
21
-
22
-
23
-
24
-
25
-
26
-
27
-
28
 |
 |