Audiovox VOH682A Installation Guide
Audiovox VOH682A - VOH 682A - LCD Monitor Manual
 |
UPC - 044476742057
View all Audiovox VOH682A manuals
Add to My Manuals
Save this manual to your list of manuals |
Audiovox VOH682A manual content summary:
- Audiovox VOH682A | Installation Guide - Page 1
VOH681A Drop Down Video Monitor VOH682A Drop Down TV / Video Monitor ON OFF AUTO OPEN Installation Guide - Audiovox VOH682A | Installation Guide - Page 2
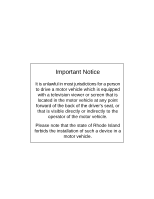
Important Notice It is unlawful in most jurisdictions for a person to drive a motor vehicle which is equipped with a television viewer or screen that is located in the motor vehicle at any point forward of the back of the driver's seat, or that is visible directly or indirectly - Audiovox VOH682A | Installation Guide - Page 3
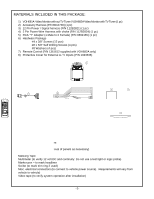
) 4) 2 Pin Power Wire Harness with choke (P/N 112B2824) (1 pc) 5) RCA "Y" Adapter (1 Male to 2 Female) (P/N 0892165) (1 pc) 6) Hardware Package #4 x 3/8" Screws (12 pcs) #8 x 5/8" Self Drilling Screws (4 pcs) #8 Washers (4 pcs) 7) Remote Control (P/N 1361612 supplied with VOH682A only) 8) Protective - Audiovox VOH682A | Installation Guide - Page 4
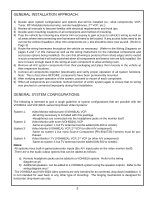
headphone jacks can be added to a VOH681A system. Refer to the wiring diagram on p6. b) Additional speakers can be added to a VOH682A system using the speaker outputs. Refer to the wiring diagram on p7. -The VOH681A and VOH 682A video systems are only intended for an overhead, drop down installation - Audiovox VOH682A | Installation Guide - Page 5
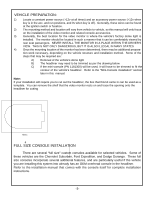
trimmed to fit the contour of the vehicle's headliner. Refer to the "Mini-Console installation" section later in this manual. Note: If your installation will require you to cut out the headliner, the box that this kit came in can be used as a template. You can remove the shelf that the video monitor - Audiovox VOH682A | Installation Guide - Page 6
in a vehicle with the mini console (part number 1181300), this console may need to be trimmed to fit the contour of the vehicle headliner. 1) In this installation, the video monitor is mounted directly to the overhead crossmember in the roof using the mounting screw bosses. These screw bosses - Audiovox VOH682A | Installation Guide - Page 7
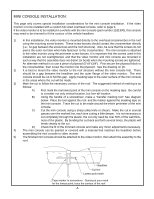
MOUNTING THE MINI CONSOLE Roof Roof support Headliner 5"x9"x3/4" Plywood Block or Optional VOHBKT (4) #8x1" self drilling screws (not supplied) Mini-Console Video unit (4) #8 Flat washers (not supplied) (4) #8x3/4" self tapping screws (not supplied) -5- - Audiovox VOH682A | Installation Guide - Page 8
on the Video Monitor. 6) Connect the wired RF Modulator and / or the remote headphone jacks to the video monitor if those options are being included. 7) Connect power harness to vehicle's electrical system by tapping into an accessory hot line. 8) Reinstall PCB cover using the 2 screws. 9) Verify - Audiovox VOH682A | Installation Guide - Page 9
on the Video Monitor. 6) Connect the wired RF Modulator and / or the remote headphone jacks to the video monitor if those options are being included. 7) Connect power harness to vehicle's electrical system by tapping into an accessory hot line. 8) Reinstall PCB cover using the 2 screws. 9) Connect - Audiovox VOH682A | Installation Guide - Page 10
the video monitor require three connections to the vehicle's wiring. There are two common types of dome light circuits used, positive wire be connected to the door pin switch wire, as the additional current draw of the Monitor's lights may not be supported by the output of the vehicles body control - Audiovox VOH682A | Installation Guide - Page 11
the source component harness. Picture, but no sound -Push and hold the volume up button until sound is heard over headphones. If problem is limited to the dash radio, verify radio is tuned to the correct channel, and that power to the wired RF modulator is on. (Refer to instructions with modulator - Audiovox VOH682A | Installation Guide - Page 12
© 2001 Audiovox Electronics Corp. 150 Marcus Blvd. Hauppauge, NY 11788 128-5622B
-
 1
1 -
 2
2 -
 3
3 -
 4
4 -
 5
5 -
 6
6 -
 7
7 -
8
-
9
-
10
-
11
-
12
 |
 |

VOH681A Drop Down Video Monitor
VOH682A Drop Down TV / Video Monitor
Installation Guide