Behringer GUITAR AMPLIFIER GTX60 Manual - Page 7
Application Example, Installation
 |
View all Behringer GUITAR AMPLIFIER GTX60 manuals
Add to My Manuals
Save this manual to your list of manuals |
Page 7 highlights
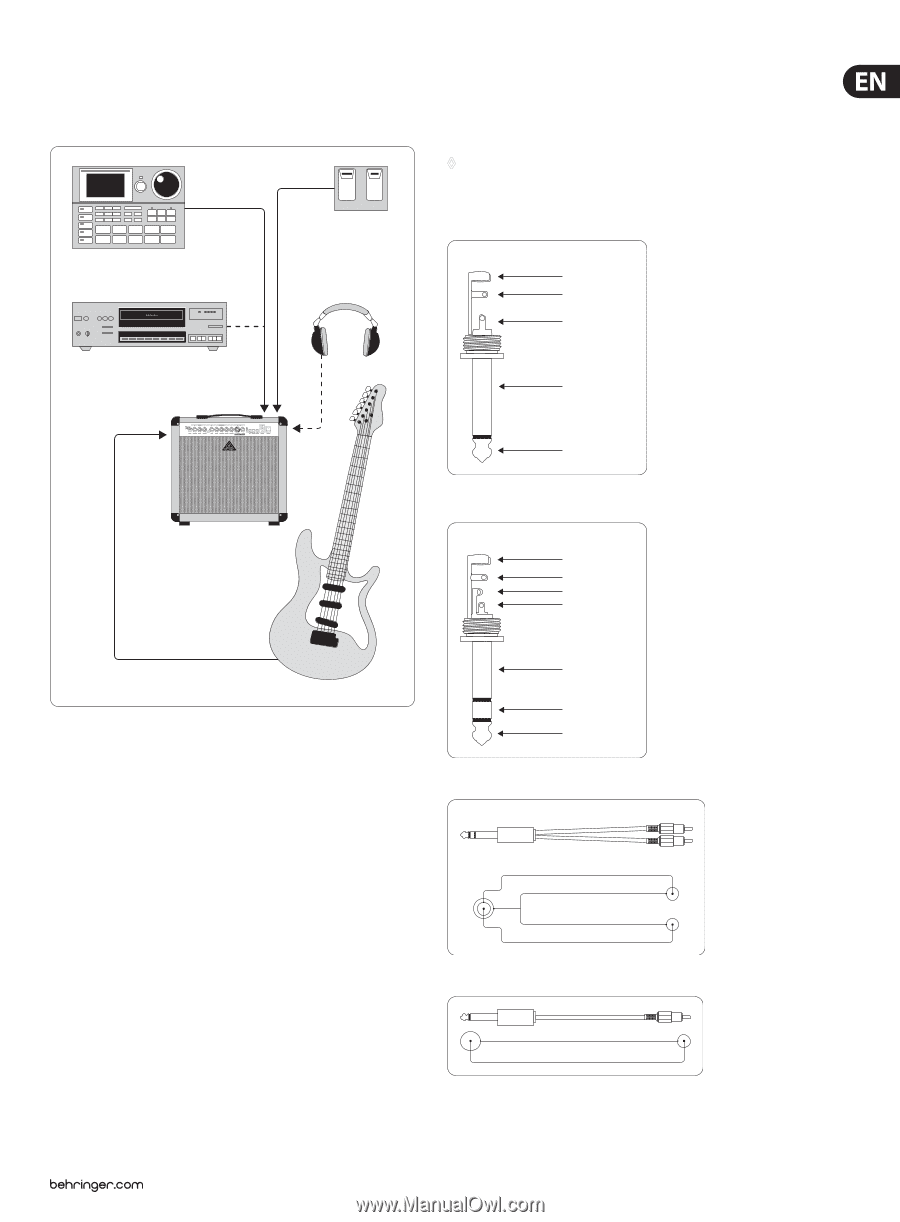
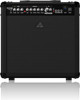
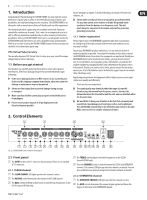
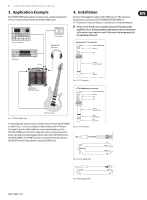
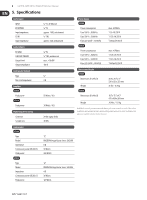
7 GUITAR AMPLIFIER GTX60/GTX30 User Manual 3. Application Example The GUITAR COMBO features plenty of connectors for a wealth of applications. Here is an example of how flexible your GUITAR COMBO can be: Drum Computer Footswitch BEHRINGER HPS3000 4. Installation Except for the headphones output and the CD IN input (1/4" TRS connectors), all audio inputs and outputs on the BEHRINGER GUITAR COMBO are 1/4" TS connectors. Please see Chapter 5, "Specifications" for more information. ◊ Please ensure that the unit is installed and operated only by people qualified to do so. During installation and operation the user must have sufficient electrical contact to earth. Electrostatic discharge may affect the operation of the unit. Unbalanced ¼" TS connector strain relief clamp sleeve tip CD Player CD In sleeve (ground/shield) BEHRINGER VIRTUBE GTX60 tip (signal) Fig. 4.1: 1/4" TS connector ¼" TRS headphones connector strain relief clamp sleeve ring tip sleeve ground/shield Fig. 3.1: GTX60 standard setup Electric Guitar ring right signal tip left signal For practicing in the rehearsal room or at home, please wire your GUITAR COMBO as shown in fig. 3.1. Connect a CD player or drum machine to the CD IN input. If you want to practice with headphones, connect your headphones to the LINE OUT/PHONES jack. The built-in loudspeaker will be muted automatically. Connect the dual footswitch supplied with the unit to the FOOTSWITCH jack on the GUITAR COMBO. The CHANNEL footswitch switches between the channels. The IN/OUT footswitch turns the effect on and off (GTX60 only). Fig. 4.2: 1/4" TRS connector R L tip ring sleeve sleeve R sleeve L tip tip Fig. 4.3: Stereo adapter cable sleeve tip Fig. 4.4: Mono adapter cable sleeve tip
-
 1
1 -
 2
2 -
 3
3 -
 4
4 -
 5
5 -
 6
6 -
 7
7 -
 8
8 -
 9
9 -
 10
10
 |
 |