Behringer SO400 Manual
Behringer SO400 Manual
 |
View all Behringer SO400 manuals
Add to My Manuals
Save this manual to your list of manuals |
Behringer SO400 manual content summary:
- Behringer SO400 | Manual - Page 1
showing your confidence in us by purchasing the BEHRINGER SUPER OCTAVER SO400. This is the ultimate octaver with polyphonic input and the capability of creating octaves 1 and 2 octaves below the original tone. Take off with ultra-stable octaver sounds plus an aggressive Drive mode for fat overdrive - Behringer SO400 | Manual - Page 2
SUPER OCTAVER SO400 ◊ The SO400 has no On/Off switch. It is operable as soon as you insert a plug into one of the IN connectors. Disconnect the plug, if you don't use the SO400. In doing so, you can extend the life time of the battery. The SERIAL NUMBER is located at the underside. ◊ In rare - Behringer SO400 | Manual - Page 3
Services US Inc. 18912 North Creek Parkway, Suite 200 Bothell, WA 98011, USA Phone: +1 425 672 0816 SUPER OCTAVER SO400 complies with the FCC rules as mentioned in the following paragraph: This equipment has been tested and used in accordance with the instructions, may cause harmful interference to
-
 1
1 -
 2
2 -
 3
3
 |
 |

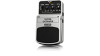
SUPER OCTAVER SO400
Ultimate Octaver Effects Pedal
Thank you for showing your confidence in us by purchasing the BEHRINGER SUPER OCTAVER SO400. This is
the ultimate octaver with polyphonic input and the capability of creating octaves 1 and 2 octaves below the
original tone. Take off with ultra-stable octaver sounds plus an aggressive Drive mode for fat overdrive sounds.
1.
Controls
(1)
The
MODE
switch selects one of the
following operation modes:
POLY
: Single octave sound
which allows to play treble tones
without effect over bass tones with
octave effect.
OCT 2
: Heavy octave sound, adds a
second octave to the first one.
DRIVE
: Adds an overdrive effect to
the original and the octaved signal.
(2)
The
DIRECT
control adjusts the
level of the original input signal
(and the DIR OUT connector).
In DRIVE mode it adjusts total volume.
(3)
The
OCT 1
control adjusts the level
of the generated signal one octave
below the original signal.
(4)
The function of this knob depends on
the position of the MODE switch
(1)
:
POLY>RANGE:
Defines the frequency range in which the input signal triggers the octave effect.
OCT 2>OCT 2:
Controls the volume of the second octave.
DRIVE>DRIVE:
Controls the depth of the overdrive effect.
(5)
The blue
ON/BATT
LED illuminates when the effect is activated. It also serves as a battery level indicator.
(6)
Use the footswitch to activate/deactivate the effect.
(7)
The ¼" TS connector (
GTR IN
) is optimized for guitars. Use connector BASS IN
(9)
for optimized
bass guitar performance.
(8)
The ¼" TS connector (
OUT A
) connects to your amp.
(9)
The ¼" TS connector (
BASS IN
) is optimized for bass guitars. Use connector GTR IN
(7)
for
optimized guitar performance.
(10)
The ¼" TS connector (
DIR OUT
) passes the unaffected input signal through, as long as the effect
is inactive. Thus OUT A is muted. When the effect is active, the effects signal is sent through OUT A
while the DIR OUT carries the input signal. The volume of the DIR OUT signal is depending on the
DIRECT control’s setting. This output configuration is useful when different effects should be added
to the input signal and the effect signal, after the octave pedal’s output.
◊
If the DIR OUT connector is not in use, the unaffected input signal and the effect signal
are both sent out through OUT A, depending on the effect activation.
Use the
DC IN
connection at the front of the unit to plug in a 9 V power supply (not included).
The
BATTERY COMPARTMENT
is located underneath the pedal cover. To install or replace the 9 V battery
(not included), press the hinges with a ballpoint pen and remove the pedal cover. Be careful not to scratch the unit.
(2)
(10)
(8)
(5)
(6)
(7)
(9)
(4)
(3)
(1)