Behringer X V-AMP Quick Start Guide - Page 7
X V-AMP LX1-X Controls - lx1 x
 |
View all Behringer X V-AMP manuals
Add to My Manuals
Save this manual to your list of manuals |
Page 7 highlights
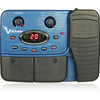
12 X V-AMP LX1-X X V-AMP LX1-X Controls (1) (2) (3) (4) (5) (6) (15) (14) ADJUST 1 2 3 4 GAIN / VOLUME STORE COPY CONFIGURATION PHONES AMP + FX FX ONLY TUNER PEDAL ASSIGN SPEED EFFECT VOLUME WAH TA P 2ND FUNCTION CONFIGURE NOISE G. BASS EQ PRESENCE COMPR. MODUL. DELAY PEDAL REVERB BYPASS/TUNER (12) (13) (18) (16) (7) (8) (9) (10) (11) (17) (21) (20) (19) (22) 13 Quick Start Guide (EN) Controls (10) PEDAL ASSIGN. Press DELAY (9) and REVERB (11) (16) DOWN. Use this footswitch to dial down presets simultaneously to assign a function to the EXPRESSION (99 - 00, downwards). Keep the footswitch depressed PEDAL ("PA" is shown in the display). At the same time, longer to skip through the presets downwards. Control Elements (1) ADJUST: Used to perform various adjustments. one of the right-hand LEDs in the display is blinking (speed, effect, volume, wah). Now you can assign one of (17) UP. Use this footswitch to dial up presets the following functions to the pedal: (00 - 99, upwards). Keep the footswitch depressed longerto skip through the presets upwards. GAIN. Use this control to regulate the drive of the amp simulation, i.e. the degree of distortion. Use it when none of the keys (3), (5), (7), (9) or (11) are blinking. VOLUME: If you hold the TAP key (12) depressed, using ADJUST lets you adjust the volume of a preset. • Speed: to dial up the SPEED parameter of an effect, hit the respective effect module key ( (7) or (9)) and then briefly press TAP: SPEED, TAP and effect key LEDs are blinking • Effect: To modify effect parameters "mix", "depth", "feedback" and "decay" using the pedal, (18) EXPRESSION PEDAL. The expression pedal controls (among others) the Wah Wah effect. The switch located beneath the pedal switches the Wah Wah on and off in this case. PEDAL ASSIGN lets you assign another function to the pedal (e. g. volume, effect intensity etc.). See also (10). (2) STORE. The presets on the X V-AMP are saved using the STORE key. If the STORE key lights up, it means that a preset has been changed but has not yet been stored. By keeping the STORE key depressed (longer than 2 seconds), the newly edited preset is stored. When the press the effect module key of your choice and then modify the desired parameter (either using Adjust or Adjust + TAP): the EFFECT LED blinks in the display (2nd Function and the effect key where applicable) (19) LINE OUT/PHONES. You can take the audio signal of your X V-AMP at the LINE OUT/PHONES connector. You can either connect your headphones to the X V-AMP, or connect the X V-AMP to a mixer. STORE LED is no longer lit up, the stored preset shown in the display is now active. (3) NOISE G. The NOISE GATE is active and can be edited when the key LED is lit up. The threshold can be • Volume: If you want to use the expression pedal to control the volume, hold TAP and briefly move ADJUST. The 2nd FUNCTION and VOLUME LEDs blink (20) MONO AMP OUT. Connect the input of your guitar amp here. In contrast to the LINE OUT/PHONES signal, this signal is reproduced with a level that is 20 dB lower. (21) INSTRUMENT INPUT. This is the 1/4" jack input of your controlled by using ADJUST. When the ADJUST control is turned all the way to the left, the NOISE GATE is off and the LED is no longer lit up. (4) CONFIGURE. By simultaneously pressing NOISE G. • Gain: To use the expression pedal to control GAIN in a preset, you only have to quickly modify GAIN X V-AMP. Connect your instrument here. Always use high-quality 1/4" mono jack cables. using ADJUST (VOLUME LED blinks); then, use the pedal to modify GAIN (22) AC IN. Connect the enclosed power supply to the AC IN connector. As soon as you plug the power supply into (3) and COMPR. (5), you get to the configuration menu. Use the COMPR. or NOISE G. keys to alternate between indi-vidual operating modes. This way, you can implement a global setting on your • Wah Wah: Pressing the expression pedal automatically selects the wah function. The Wah LED blinks the mains, your X V-AMP is automatically "on". X V-AMP that lets you adjust to different studio and live situations. (11) REVERB. Press this key to set up REVERB. A reverb effect lets you simulate room characteristics in the Check Out behringer.com for Full Manual (5) COMPRESSOR. Press this key to get to the compressor menu. Use the ADJUST control to regulate "ratio", or use TAP + ADJUST to regulate "attack". When the ADJUST control is turned all the way to the left, the COMPRESSOR is off and the LED is no longer lit up. overall sound. You can choose between 4 different reverb types: Ambience, cathedral, spring and reverb. The FX/AMPS control lets you select between reverb and cathedral, and if you keep TAP pressed at the same time, then you can additionally select between spring and ambience (second layer). (6) BASS EQ. Simultaneously press COMPR. (5) and MODUL. (7) (both LEDs are blinking) to control bass frequencies in a preset. Use ADJUST to increase or decrease low frequencies. Keep TAP pressed while turning ADJUST to determine if you want to affect only the deepest frequencies (ADJUST turned all the way to the left) or if you also want to affect higher bass frequencies. (12) The TAP key performs several functions: • GAIN/VOLUME: Use ADJUST to determine the amount of distortion (GAIN). If you keep TAP pressed while you move ADJUST, you control the volume of a preset instead. When editing effect blocks, ADJUST lets you access the second function layer for parameter settings (7) MODULATION. After you press this key (its LED blinks), • FX/AMPS control and 2nd FUNCTION: you can select one of the eight modulation effects by Hitting TAP lets you select the second layer of the using the FX/AMPS control (14) : Chorus, flanger, phaser, effects and AMP simulations (gray) pitch bend, tremolo, rotary, auto wah and P-funk'n. You get to the second-layer effects (gray) by keeping the TAP key depressed while you are turning the FX/AMPS control; the 2nd FUNCTION LED lights up. ADJUST controls the effect ratio in the preset. The speed • Speed: Keep hitting the TAP key in the rhythm of a song, and the selected effect (delay or modulation effect) adjusts itself automatically to the tapped rhythm parameter is adjusted using TAP. By hitting MODUL. (7) (13) 2nd FUNCTION. As soon as any second-layer function again, or by selecting a different parameter, you quit. on the FX/AMPS control is dialed up, 2nd FUNCTION (8) PRESENCE. You activate PRESENCE by simultaneously LED lights up. pressing MODUL. (7) and DELAY (9) (both LEDs are blinking). Starting at the middle setting of the ADJUST control (neutral), the share of PRESENCE (high frequencies) can be lowered or increased in a preset. Keeping TAP pressed while you turn ADJUST allows you to determine the center frequency of the filter. (14) FX/AMPS. A LED on the FX/AMPS control indicates the current AMP model. If the 2nd FUNCTION LED is also lit up, you're dealing with one of the second-layer AMP models (gray); if not, then one of the first-layer AMP models is selected (white). By turning FX/AMPS (and by holding tap, if necessary), you can switch to another AMP model. (9) DELAY. Pressing this key adjusts DELAY. A delay lets you create a lag in the input signal similar to an echo. Use ADJUST to regulate the intensity; when you keep TAP pressed while you turn ADJUST, you set up feedback. The rhythm in which you tap at the TAP key determines the time between individual echos. (15) The DISPLAY indicates which preset has been selected and gives information on the modifications done during editing. When the TUNER is activated, the DISPLAY indi-cates which tone is played on the instrument you connected to your X V-AMP.
-
 1
1 -
 2
2 -
 3
3 -
 4
4 -
 5
5 -
 6
6 -
 7
7 -
 8
8 -
 9
9 -
 10
10 -
 11
11 -
 12
12 -
13
-
14
 |
 |
