BenQ SW321C User Manual - Page 22
Connect the power cable to the monitor., Organize the cables., Connect-to and turn-on the power.
 |
View all BenQ SW321C manuals
Add to My Manuals
Save this manual to your list of manuals |
Page 22 highlights
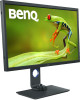
And place the Hotkey Puck G2 on the monitor stand or to another desired place as illustrated. For more information on Hotkey Puck G2, see Hotkey Puck G2 and its basic operations. Quick Start Guide 7. Connect the power cable to the monitor. Plug one end of the power cord into the socket labelled on the rear of the monitor. Do not connect the other end to a power outlet just yet. 8. Organize the cables. Route the cables via the cable management hole. 9. Connect-to and turn-on the power. Plug the other end of the power cord into a power outlet and turn it on. Picture may differ from product supplied for your region. 22 How to assemble your monitor hardware
-
 1
1 -
2
-
3
-
4
-
5
-
6
-
7
-
8
-
9
-
10
-
11
-
12
-
13
-
14
-
15
-
16
-
 17
17 -
 18
18 -
 19
19 -
 20
20 -
 21
21 -
 22
22 -
 23
23 -
 24
24 -
 25
25 -
 26
26 -
 27
27 -
28
-
29
-
30
-
31
-
32
-
33
-
34
-
35
-
36
-
37
-
38
-
39
-
40
-
41
-
42
-
43
-
44
-
45
-
46
-
47
-
48
-
49
-
50
-
51
-
52
-
53
-
54
-
55
-
56
-
57
-
58
-
59
-
60
-
61
-
62
-
63
-
64
-
65
-
66
-
67
-
68
 |
 |

22
How to assemble your monitor hardware
And place the Hotkey Puck G2 on the monitor stand or
to another desired place as illustrated.
For more information on Hotkey Puck G2, see
Hotkey
Puck G2 and its basic operations
.
7. Connect the power cable to the monitor.
Plug one end of the power cord into the socket labelled
on the rear of the monitor. Do not connect the
other end to a power outlet just yet.
8. Organize the cables.
Route the cables via the cable management hole.
9. Connect-to and turn-on the power.
Plug the other end of the power cord into a power
outlet and turn it on.
Picture may differ from product supplied for your region.
Quick Start Guide