Beretta SV10 Prevail III Beretta SV10 Perennia/Preveil User Manual
Beretta SV10 Prevail III Manual
 |
View all Beretta SV10 Prevail III manuals
Add to My Manuals
Save this manual to your list of manuals |
Beretta SV10 Prevail III manual content summary:
- Beretta SV10 Prevail III | Beretta SV10 Perennia/Preveil User Manual - Page 1
PERENNIA -7-- T7.1 Manuale di Istruzione Instruction Manual - Beretta SV10 Prevail III | Beretta SV10 Perennia/Preveil User Manual - Page 2
FOR FUTURE REFERENCE. ANY TRANSFER OF THIS SHOTGUN SHOULD INCLUDE A COPY OF THIS MANUAL. IF YOU LEND, GIVE OR SELL THE FIREARM TO ANYONE, BE SURE THE INSTRUCTION MANUAL ACCOMPANIES IT AS A SAFETY AND OPERATIONAL REFERENCE. WARNING: FIREARMS CAN BE DANGEROUS AND CAN POTENTIALLY CAUSE SERIOUS INJURY - Beretta SV10 Prevail III | Beretta SV10 Perennia/Preveil User Manual - Page 3
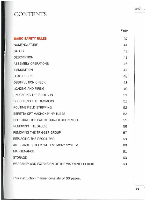
THE STOCK REMOVING THE TRIGGER GROUP REPLACING THE RECOIL PAD ADJUSTABLE STOCK WITH MEMORY SYSTEM MAINTENANCE STORAGE WARRANTY AND EXTENSION OF THE WARRANTY PERIOD This instruction manual consists of 66 pages. Page 37 41 42 43 46 47 48 48 49 51 51 52 53 55 56 57 59 60 61 63 - Beretta SV10 Prevail III | Beretta SV10 Perennia/Preveil User Manual - Page 4
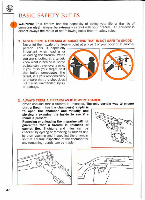
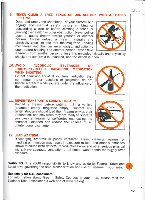
BASIC SAFETY RULES WARNING: This firearm has the capability of taking your life or the life of someone else! Always be extremely careful with your firearm. An accident is almost always the result of not following basic firearm safety rules. 1. NEVER POINT A FIREARM AT SOMETHING THAT IS NOT SAFE TO - Beretta SV10 Prevail III | Beretta SV10 Perennia/Preveil User Manual - Page 5
9. NEVER CLIMB A TREE, FENCE OR OBSTRUCTION WITH A LOADED FIREARM. Open and empty the chamber(s) of your firearm and engage the manual safety before climbing or descending a tree or before climbing a fence or jumping over a ditch or other obstruction. Never pull or push a loaded firearm toward - Beretta SV10 Prevail III | Beretta SV10 Perennia/Preveil User Manual - Page 6
. Store and carry your firearm so that dirt or lint does not accumulate in the working parts. Clean and oil your firearm, following the instructions provided in this manual, after each use to prevent corrosion, damage to the barrel or accumulation of impurities which can prevent use of the gun in an - Beretta SV10 Prevail III | Beretta SV10 Perennia/Preveil User Manual - Page 7
9. NEVER CLIMB A TREE. FENCE OR OBSTRUCTION WITH A LOADED FIREARM. Open and empty the chamber(s) of your firearm and engage the manual safety before climbing or descending a tree or before climbing a fence or jumping over a ditch or other obstruction. Never pull or push a loaded firearm toward - Beretta SV10 Prevail III | Beretta SV10 Perennia/Preveil User Manual - Page 8
handling, but accidents can best be prevented by following the safe handling procedures described in these safety rules and elsewhere in the product manual. To further familiarize yourself with the proper use of this or other firearms, take a Firearms Safety Course taught by an expert in firearms - Beretta SV10 Prevail III | Beretta SV10 Perennia/Preveil User Manual - Page 9
NOMENCLATURE A - KICK OFF DEVICE (on request) B - STOCK C - STOCK GRIP COVERPLATE D - TRIGGER E - RECEIVER F - HINGE PIN G - FORE-END CATCH LEVER H - FORE-END I - BARRELS L - MUZZLE M- FRONT SIGHT N - TOP RIB 0 - TOP LEVER P - MANUAL SAFETY P A B C D EF G H M N 0 P I H G E D C B 41 - Beretta SV10 Prevail III | Beretta SV10 Perennia/Preveil User Manual - Page 10
safety is located on the receiver tang, over the stock grip. According to the models the manual safety features an integral barrel selector. When the safety is fully retracted the letter S Is visible and the safety is engaged. When the safety is - Beretta SV10 Prevail III | Beretta SV10 Perennia/Preveil User Manual - Page 11
it 0 43 DESCRIPTION The receiver, while maintaining the traditional Beretta locking system with trapezoidal shoulders and double longitudinal locking lugs, is strongly characterized by the sideplates that stand out from the sides in an arrow-head shape. The locking shoulders of the monobloc and - Beretta SV10 Prevail III | Beretta SV10 Perennia/Preveil User Manual - Page 12
- for replacement, special work or access to the trigger mechanism - without having to remove the recoil pad. This new Q-Stock" design no longer requires the traditional internal through-bolt since it attaches directly to the receiver, increasing the solidity of the receiver-stock assembly. The - Beretta SV10 Prevail III | Beretta SV10 Perennia/Preveil User Manual - Page 13
The newly designed extractors are precisely guided along the entire length of the barrel monobloc to ensure receiver-iron fit. This system further contributes to improve the strength of the locking system and the service life of the gun. The new fore-end lever, with its elongated shape, ensures the - Beretta SV10 Prevail III | Beretta SV10 Perennia/Preveil User Manual - Page 14
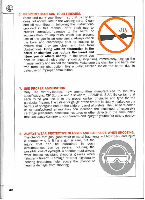
ASSEMBLY OPERATIONS trkilklmi WARNING: Beretta assumes no responsibility for any injury or property damage resulting from improper or careless handling, intentional or accidental discharge of the firearm. WARNING: During assembly, disassembly and maintenance procedures, never point the firearm at - Beretta SV10 Prevail III | Beretta SV10 Perennia/Preveil User Manual - Page 15
• Pivot the barrels in an upward motion smoothly and evenly. When the top lever snaps to its centered position. the barrels are locked into the receiver (Fig. 10). • Fit the fore-end to the barrels by placing the fore-end iron (the curved steel component at the rear of the fore-end) over the ends of - Beretta SV10 Prevail III | Beretta SV10 Perennia/Preveil User Manual - Page 16
associated with lead shot (i.e. "blown pattern"). (See also the paragraph: " BERETTA OPTIMACHOKE' HP TUBES"). LOAD CHECK At various parts in this manual, you are instructed to visually inspect the cartridge chambers of the Beretta Perennia over and under to make sure it is unloaded. This operation - Beretta SV10 Prevail III | Beretta SV10 Perennia/Preveil User Manual - Page 17
is unloaded. Refer to the instructions in the above section: barrel is detected, please contact the Beretta Customer Service or a Beretta authorized gunsmith to remove the obstruction the safety if it is not already engaged. WARNING: The manual safety is merely a mechanical device and is in no way - Beretta SV10 Prevail III | Beretta SV10 Perennia/Preveil User Manual - Page 18
does not fire on a live cartridge when the trigger is pulled, engage the safety, wait for one minute, then open the shotgun and manually extract the unfired cartridge. WARNING: The Manufacturer assumes no responsibility for any injury or property damage resulting from improper or careless handling - Beretta SV10 Prevail III | Beretta SV10 Perennia/Preveil User Manual - Page 19
unfired cartridge/s will be only pulled up. To unload the gun, manually remove the live cartridge/s and check to ensure that both chambers are the shotgun is unloaded (empty cartridge chambers). If not, unload it as instructed in the relevant section. WARNING: Never point the firearm at someone or - Beretta SV10 Prevail III | Beretta SV10 Perennia/Preveil User Manual - Page 20
and remount the fore-end. ROUTINE FIELD STRIPPING WARNING: Always check that the shotgun is unloaded (empty cartridge chambers). If not, unload it as instructed in the relevant section. WARNING: Never point the firearm at someone or at hard and flat surfaces. Always treat the shotgun as if it were - Beretta SV10 Prevail III | Beretta SV10 Perennia/Preveil User Manual - Page 21
BERETTA OPTIMACHOICE' HP TUBES Beretta Optimachokev HP tubes are made of high•resistance steel which Is a guarantee of long life and protection against corrosion and have been designed to withstand the rigors of nontoxic steel shot. Optimachoke HP tubes are fully interchangeable on all Beretta - Beretta SV10 Prevail III | Beretta SV10 Perennia/Preveil User Manual - Page 22
grade Gun Oil on the barrel thread and choke tubes. • Install the desired choke tubes after checking they are perfectly clean inside and outside. • Manually screw the choke tubes clockwise in the barrels. Use the Beretta spanner provided to tighten the choke tubes until they are fully bottomed into - Beretta SV10 Prevail III | Beretta SV10 Perennia/Preveil User Manual - Page 23
the shotgun is unloaded. Refer to the instructions given in the section: "LOAD CHECK". Thanks to the new Beretta patented system it is possible to select between the automatic ejection and the manual extraction of the spent shell casings. The manual extraction allows the shooter to easily retrieve - Beretta SV10 Prevail III | Beretta SV10 Perennia/Preveil User Manual - Page 24
unfired cartridge/s will be only pulled up. To unload the gun, manually remove the live cartridge/s and check to ensure that both chambers are shotgun is unloaded (empty cartridge • chambers). If not, unload it as instructed in the relevant section. WARNING: Never point the firearm at someone or at - Beretta SV10 Prevail III | Beretta SV10 Perennia/Preveil User Manual - Page 25
of the stock with the surfaces of the receiver. • Manually push with force the receiver towards the stock until it is service or by a Beretta authorized gunsmith. REMOVING THE TRIGGER GROUP WARNING: Always check that the shotgun is unloaded (empty cartridge chambers). If not. unload it as instructed - Beretta SV10 Prevail III | Beretta SV10 Perennia/Preveil User Manual - Page 26
from its seat. To remount the trigger group: NOTICE: Ensure that the manual safety is In its rearmost position and shows the letter S (safety engaged) have been accidentally decocked (the trigger has been pulled), cock them manually by retracting with force until they can remain engaged in the rear - Beretta SV10 Prevail III | Beretta SV10 Perennia/Preveil User Manual - Page 27
the manufacturer's warranty. REPLACING THE RECOIL PAD WARNING: Always check that the shotgun is unloaded (empty cartridge chambers). If not, unload it as instructed in the relevant section. WARNING: Never point the firearm at someone or at hard and flat surfaces. Always treat the shotgun as if it - Beretta SV10 Prevail III | Beretta SV10 Perennia/Preveil User Manual - Page 28
shotgun is unloaded (empty cartridge chambers). If not, unload it as instructed in the relevant section. WARNING: Never point the firearm at someone or . To reestablish the original assembly condition, it is sufficient to manually realign the internal locking stem of the screws and retightening them. - Beretta SV10 Prevail III | Beretta SV10 Perennia/Preveil User Manual - Page 29
the original assembly condition, it is sufficient to manually realign the internal locking stem of the screw and cartridge chambers). If not, unload it as instructed in the relevant section. WARNING: Never point the and a longer service life for the shotgun. CAUTION: To clean the - Beretta SV10 Prevail III | Beretta SV10 Perennia/Preveil User Manual - Page 30
malfunctioning of the shotgun. (The areas to lubricate are indicated by the arrows on Fig. 6). Always make sure that the lubricant is present as instructed. • Carefully clean the external surfaces of the shotgun to remove any trace of dirt, sweat and fingerprints. Apply a thin film of good grade Gun - Beretta SV10 Prevail III | Beretta SV10 Perennia/Preveil User Manual - Page 31
the warranty period is packed with your Beretta Perennia over and under. Please refer to the WARRANTY and the related instructions should a repair service be required under the warranty period. NOTICE: Wholesalers, dealers or gunsmiths (unless they are a Repair Station authorized by the Manufacturer - Beretta SV10 Prevail III | Beretta SV10 Perennia/Preveil User Manual - Page 32
-
 1
1 -
 2
2 -
 3
3 -
 4
4 -
 5
5 -
 6
6 -
 7
7 -
8
-
9
-
10
-
11
-
12
-
13
-
14
-
15
-
16
-
17
-
18
-
19
-
20
-
21
-
22
-
23
-
24
-
25
-
26
-
27
-
28
-
29
-
30
-
31
-
32
 |
 |

PERENNIA
-
-7--
T7.1
Manuale
di
Istruzione
Instruction
Manual