Bernina 009DCC Owners Manual - Page 10
Attaching Binding - manual for
 |
View all Bernina 009DCC manuals
Add to My Manuals
Save this manual to your list of manuals |
Page 10 highlights
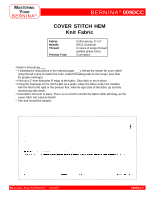
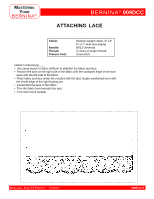
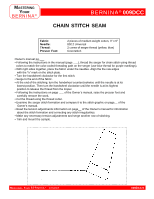
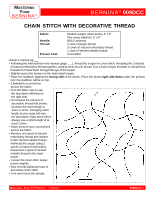
MASTERING YOUR BERNINA® BERNINA® 009DCC ATTACHING BINDING Fabric: Needle: Thread: Presser Foot: Pre-quilted fabric, 3" x 6" 20" of wide prefolded bias binding 80/12 Universal 2 or 3 cones of serger thread Coverstitch Cover Stitch Option: Owner's manual pg.___ • Following the instructions in the manual (page ___), thread the serger for cover stitch. • Wrap the bias binding around one 6" side of the quilted fabric; secure in place with 505 temporary spray adhesive. • Place the fabric under the needles with the unstitched edge of the binding even with the inside of the left floating toe, with the quilted fabric to the left. • Coverstitch the binding to the quilted fabric. Chain Stitch Option: Owner's manual pg.___ • Following the instructions in the manual (page ___), thread the serger for cover stitch. • Wrap the bias binding around one 6" side of the quilted fabric; secure in place with 505 temporary spray adhesive. • Place the fabric under the needles with the unstitched edge of the binding even with the inside of the right floating toe, with the quilted fabric to the right. • Coverstitch the binding to the quilted fabric. • Trim and mount the sample. MASTERING YOUR BERNINA® 1/04/02 009DCC/10
-
 1
1 -
2
-
3
-
4
-
 5
5 -
 6
6 -
 7
7 -
 8
8 -
 9
9 -
 10
10 -
 11
11 -
 12
12
 |
 |