Bernina Bernette 25 Instruction Manual - Page 17
Thread Cutter, Replacing the Needle
 |
View all Bernina Bernette 25 manuals
Add to My Manuals
Save this manual to your list of manuals |
Page 17 highlights
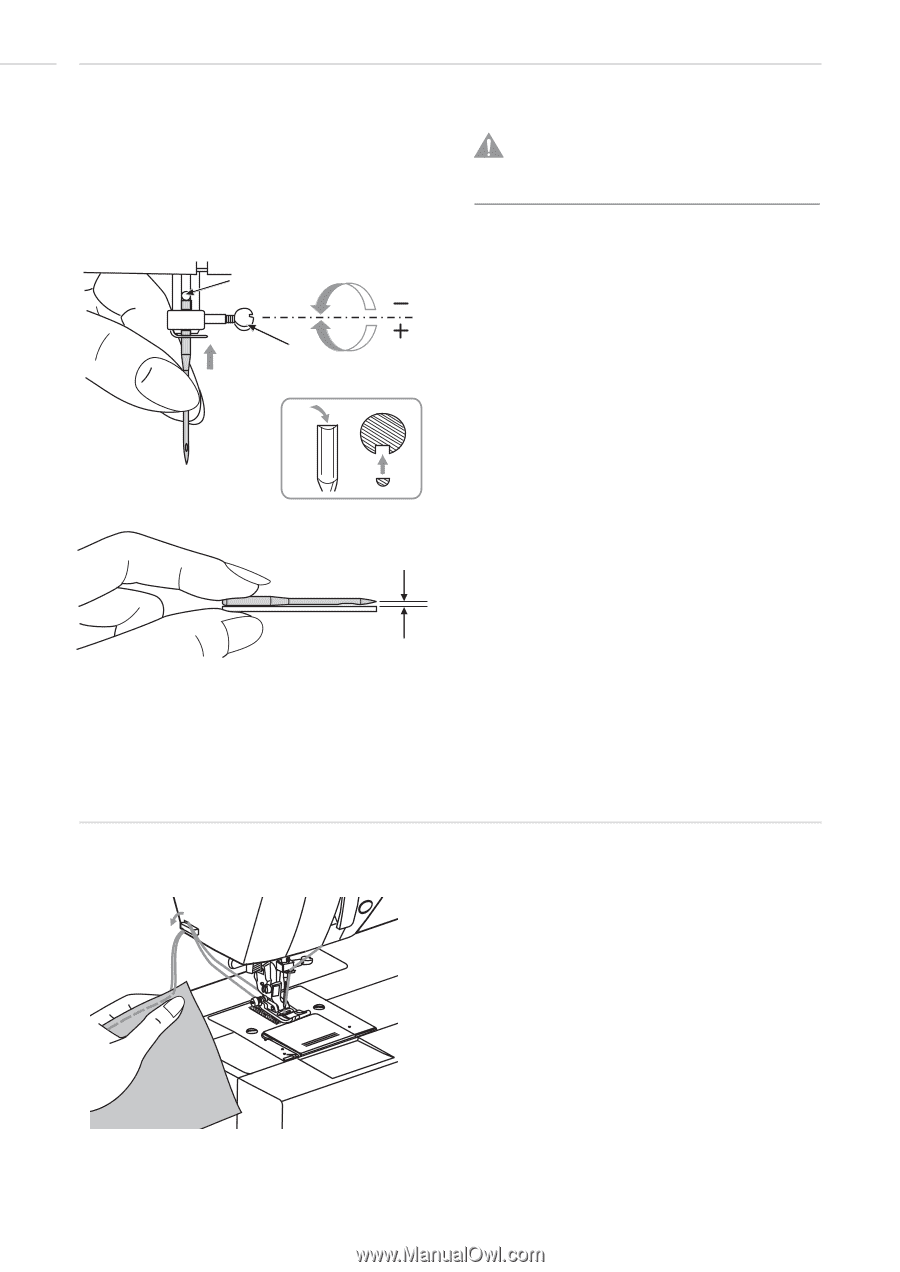
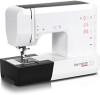
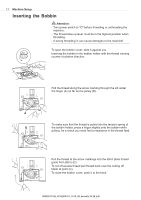
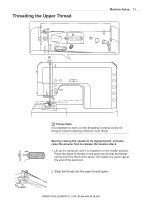
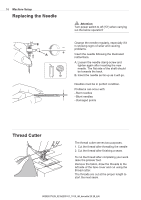
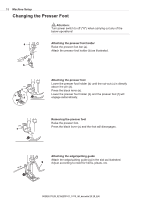
16 Machine Setup Replacing the Needle B A Attention: Turn power switch to off ("O") when carrying out the below operation! Change the needle regularly, especially if it is showing signs of wear and causing problems. Insert the needle following the illustrated instructions. A. Loosen the needle clamp screw and tighten again after inserting the new needle. The flat side of the shaft should be towards the back. B. Insert the needle as far up as it will go. Needles must be in perfect condition. Problems can occur with: - Bent needles - Blunt needles - Damaged points Thread Cutter The thread cutter serves two purposes. 1. Cut the thread after threading the needle 2. Cut the thread after finishing a seam. To cut the thread after completing your work raise the presser foot. Remove the fabric, draw the threads to the left side of the face cover and cut using the thread cutter. The threads are cut at the proper length to start the next seam. 502020.75.28_021H2D0101_1010_IM_bernette 20 25_EN
-
 1
1 -
2
-
3
-
4
-
5
-
6
-
7
-
8
-
9
-
10
-
11
-
 12
12 -
 13
13 -
 14
14 -
 15
15 -
 16
16 -
 17
17 -
 18
18 -
 19
19 -
 20
20 -
 21
21 -
 22
22 -
23
-
24
-
25
-
26
-
27
-
28
-
29
-
30
-
31
-
32
-
33
-
34
-
35
-
36
-
37
-
38
-
39
-
40
-
41
-
42
-
43
-
44
-
45
-
46
-
47
-
48
-
49
-
50
-
51
-
52
-
53
-
54
-
55
-
56
-
57
-
58
-
59
-
60
-
61
-
62
-
63
-
64
-
65
-
66
-
67
-
68
-
69
-
70
-
71
-
72
-
73
-
74
-
75
-
76
-
77
-
78
-
79
-
80
 |
 |