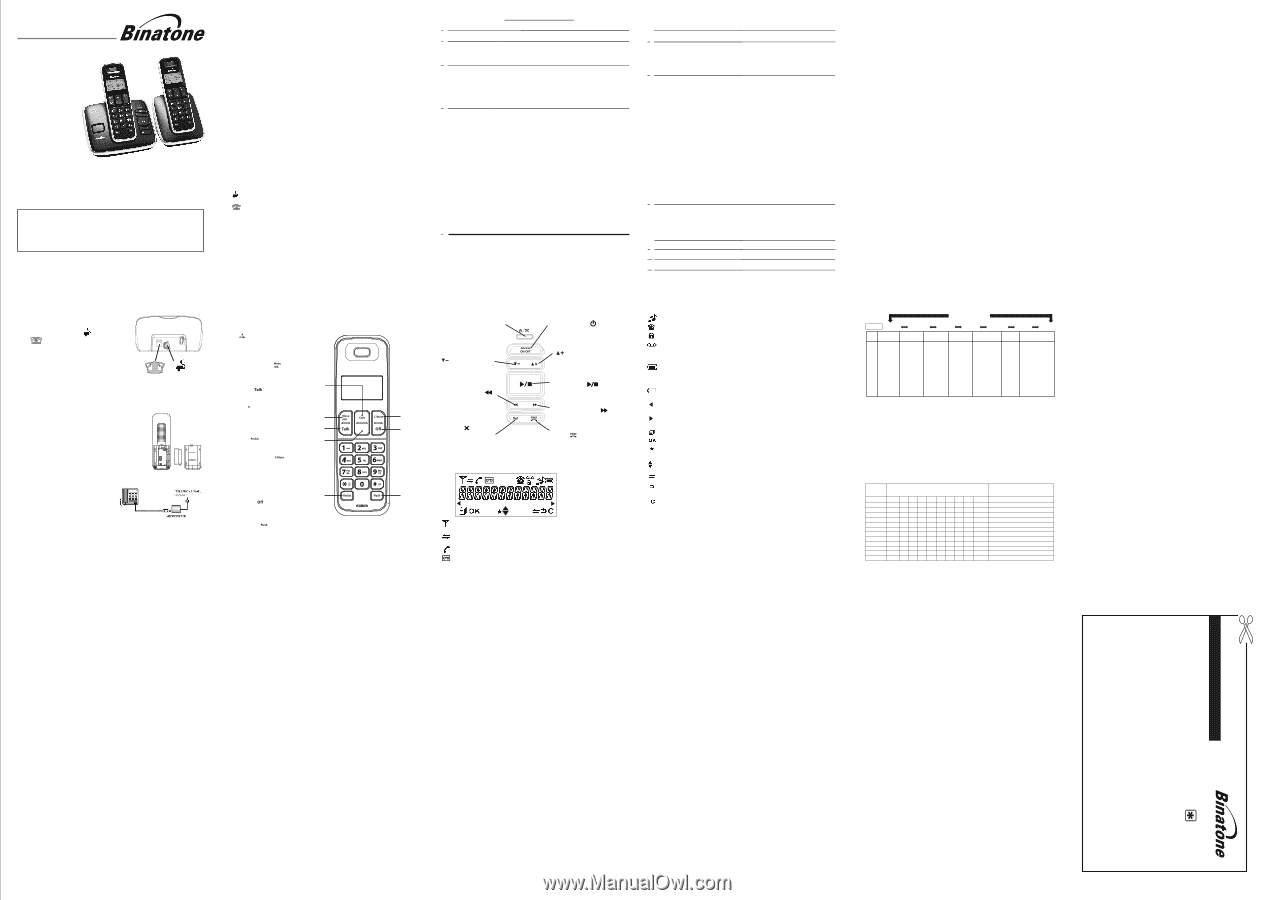
Binatone Solas 1520 User Guide - Page 1
Binatone Solas 1520 Manual
 |
View all Binatone Solas 1520 manuals
Add to My Manuals
Save this manual to your list of manuals |
Page 1 highlights
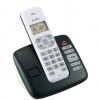
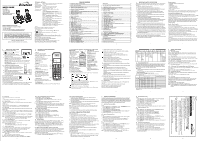
USER GUIDE Veva 1520 Veva 1520 Twin Veva 1520 Triple Veva 1520 Quad Digital Cordless Telephone with Answer Machine Binatone Helpline (for UK only) Monday to Friday from 9:00am to 5:00pm Tel: 0845 345 9677 **Please note that all calls are charged at local rate Or visit our website: www.binatonetelecom.com THIS EQUIPMENT IS NOT DESIGNED FOR MAKING EMERGENCY TELEPHONE CALLS WHEN THE POWER FAILS. ALTERNATIVE ARRANGEMENTS SHOULD BE MADE FOR ACCESS TO DIAL EMERGENCY SERVICES. Before operating this set, please read these instructions carefully. TECHNICAL DETAILS Standard Digital Enhanced Cordless Telecommunication (DECT) Frequency range 1.88 to 1.9 GHz (bandwidth = 20 MHz) Channel bandwidth 1.728 MHz Operating range Up to 300m outdoors; Up to 50m indoors Operating time Standby: 100 hours,Talking: 10 hours Battery charge time:15 hours Temperature range Operating 0 C to 40 C, Storage -20 C to 60 C Electrical power Charger unit: TenPao - S004LB0600030 / S004LV0600030 input 100-240VAC 50/60Hz 150mA, output 6VDC 300mA Salcomp - VT1001 / VT1000 . input 100-240VAC 50/60Hz 150mA, output 6VDC 300mA Base unit: TenPao - S004LB0600045 / S004LV0600045 input 100-240VAC 50/60Hz 150mA, output 6VDC 450mA Salcomp - VT0601 / VT0600 . input 100-240VAC 50/60Hz 150mA, output 6VDC 450mA Battery information as below: GPI - VTHC043C00, Type NiMH (Rechargeable battery) Voltage Rating 400mAh, 2 X 1.2V AAA Size BYD- H-AAA400A, Type NiMH (Rechargeable battery) Voltage Rating 400mAh , 2 X 1.2V AAA Size CORUN- NI-MHAAAJ400, Type NiMH (Rechargeable battery) Voltage Rating 400mAh ,2 X 1.2V AAA Size Caution Risk of explosion if battery is replaced by an incorrect type Dispose of used batteries according to the instructions. Port specification The port (connected to the mains power supply) is a SELV port with respect to EN41003. The port (connected to the telephoneline ) is a TNV port with respect to EN41003. CLEANING AND CARE Do not clean any part of your phone system with benzene, thinners or other solvent chemicals as this may cause permanent damage which is not covered by the Guarantee. When necessary, clean it with a damp cloth. Keep your phone system away from hot, humid conditions or strong sunlight, and don't let it get wet. Every effort has been made to ensure high standardsof reliability for your phone system. However, if something does go wrong, please do not try to repair it yourself consult your supplier or the Helpline. 2 INSTALLING YOUR PHONE 2.1 Connecting the base station 3 GETTING TO KNOW YOUR PHONE 3.1 Handset Overview 1) Plug the power supply and line cord into the base station. 1 UP ( ) From idle: access the Call List 2) Plug the power adapter into a 230Vac, In lists: move up the options 50Hz mains socket, and the line cord into your telephone line socket. 3) Always use the cables provided in the box Warning: Use only the provided adaptor, using other power supplies may cause a hazard. Warning: Install the base unit in a position where the mains adapter plug will reach an easily accessible mains socket. Never try to lengthen the mains power cable. During calls / ringing: increase the volume. 2 LEFT SOFT KEY( ) Use with icons on display above, to open menu and confirm options. 3 TALK ON( ) 1 Make or answer calls Note: The base unit needs mains power for normal operation, not just for charging the handset batteries. 4 DOWN( ) 2.2 Installing and charging the batteries In lists: move down the options 2 6 1) Place the 2 supplied batteries into the battery compartment with the polarity markings as shown. During calls / ringing: decrease the volume 3 7 Use only the NiMH rechargeable battery type provided. 2) Position the battery compartment cover over the batteries and slide up to click into place. 3) Put the handset on the base and charge for 5 REDIAL( ) 4 From idle: access the Redial List 6 RIGHT SOFT KEY( ) (CLEAR/BACK/MUTE/INTERCOM) 15 hours before using the handset for the first time. The handset will give a beep when it is properly placed on the base or charger. Use with icons on display above, to clear characters, go back to previous If you have a Broadband line menu, mute the microphone or make If you connect your telephone to a line with a broadband connection, you will need to insert a micro-filter between the telephone and the telephone line, otherwise you may get an intercom call. 5 8 7 TALK OFF( ) End a call or return to previous menu. interference between the telephone and the broadband, Press and hold to turn the handset on / off. which could cause problems. In a home with broadband, every telephone must have a micro-filter connected, not just the one at the telephone point that your modem is connected to. If you need more broadband micro-filters, contact your broadband supplier. 8 R - RECALL( ) also called Flash Sends a recall (R) signal, used for some PBX / Calling Features. 5 6 4.3 End a Call During a call press to end the call. OR Put the handset on the base station or charger to end the call. 4.4 Adjust Volume There are 5 levels (VOLUME 1 to VOLUME 5) to choose from for the earpiece volume . During a call: Press to select volume 1-5. The current setting is shown. When you end the call, the setting will remain at the last selected level. 4.5 Mute a Call You can talk to someone nearby without letting the caller hear you during a call. During a call: Press to mute the microphone and "MUTED" will display on the LCD. Your caller cannot hear you. Press again to unmute the microphone. 4.6 Turn off the Handset Ringer In idle, press and hold to turn off the handset ringer. The "RINGER OFF" icon is displayed on the LCD. Note: The display will still flash the Call icon and show CALL or the Caller Display number, when there is an incoming call, even if the ringer is turned off To turn the ringer back on, press and hold again. 4.7 Turn on the Keypad Lock In idle, press and hold to turn on the keypad lock, and the "KEY LOCK" icon is displayed on the LCD. Note: You can still use to answer a call when the handset is ringing. To turn the keypad lock off, press and hold again. 4.8 Redial the last number You can redial any of the 5 last numbers called. If you have stored a name in phonebook to go with the number, the name will be displayed instead. The most recent last number will display at the top of the redial list. 4.8.1 Redial a Number from the Redial List 1. Press to access the redial list. Note: If the redial list entry shows a name, press to view the number of this entry. 2. Press to browse the redial list. 3. Press to dial to the selected redial number. Note: If there are no numbers in the redial list, the display shows "EMPTY ". 11 4.8.2 Store a Redial Number into the Phonebook 1. Follow Steps 1 and 2 in section 4.8.1. 2. Press to show ADD TO PB. 3. Press and then enter the name you want to use in the phonebook. 4. Press and then modify the number, if necessary. 5. Press to show . 6. Press to browse the ringtone list. The respective ringtone will be played when browsing the ringtone list. (Note: the selected melody will only be played if you subscribe to Caller Display and the incoming number matches the stored number.) 7. Press to confirm, and the entry will be stored. 4.8.3 Delete a Redial Number 1. Follow Steps 1 and 2 in section 4.8.1. 2. Press and to select DELETE. 3. Press to confirm, and the entry will be deleted. 4.8.4 Delete all Redial List entries 1. Follow Steps 1 and 2 in section 4.8.1. 2. Press and to select DELETE ALL 3. Press to display . 4. Press to confirm. All entries will be deleted and the display will show . 4.9 Find the Handset You can locate the handset by pressing on the base station. All the handsets registered to the base will produce the paging tone and show "PAGING" on the display. You can stop the paging by pressing / / on any handset or on the base again. Note: If there is an incoming call during paging, the phone will ring with the incoming call instead of paging. 4.10 Make an Internal Call (Multi - handset versions only) This feature is only applicable when there are at least two registered handsets. It allows you to make internal calls, transfer external calls from one handset to another handset and make conference calls. If the called handset is not answered within 60 seconds, the called handset will stop ringing and the calling handset will return to standby mode. Note: If only one handset is registered to the base station, when is pressed, it will display "NOT POSSIBLE" 12 TABLE OF CONTENTS 1 IMPORTANT SAFETY INSTRUCTIONS 3 2 INSTALLING YOUR PHONE 5 2.1 CONNECTING THE BASE STATION 5 2.2 INSTALLING AND CHARGING THE BATTERIES 5 3 GETTING TO KNOW YOUR PHONE 6 3.1 HANDSET OVERVIEW 6 3.2 BASE STATION WITH TELEPHONE ANSWERING MACHINE (TAM) CONTROL ...... 7 3.3 DISPLAY ICONS AND SYMBOLS 7 3.4 MENU STRUCTURE ...8 3.5 TEXT AND DIGIT ENTRY TABLE 9 3.5.1 CHARACTER SET ...9 4 USING YOUR PHONE 10 4.1 MAKE A CALL ...10 4.1.1 PREPARATORY DIALLING 10 4.1.2 DIRECT DIALLING 10 4.1.3 CALL FROM THE PHONEBOOK 10 4.1.4 CALL FROM THE CALL LIST(ONLY AVAILABLE WITH CALLER DISPLAY) .........10 4.1.5 CALL FROM THE REDIAL LIST 10 4.1.6 CALL TIMER ...10 4.2 ANSWER A CALL ...10 4.3 END A CALL ...11 4.4 ADJUST EARPIECE VOLUME 11 4.5 MUTE A CALL ...11 4.6 TURN OFF HANDSET RINGER 11 4.7 TURN ON THE KEYPAD LOCK 11 4.8 REDIAL THE LAST NUMBER 11 4.8.1 REDIAL A NUMBER FROM THE REDIAL LIST 11 4.8.2 STORE A REDIAL NUMBER INTO THE PHONEBOOK 12 4.8.3 DELETE A REDIAL NUMBER 12 4.8.4 DELETE ALL REDIAL LIST ENTRIES 12 4.9 FIND THE HANDSET 12 4.10 MAKE AN INTERNAL CALL(FOR MULTI-HANDSET VERSIONS ONLY 12 4.10.1 INTERCOM ANOTHER HANDSET 13 4.10.2 CALL ALL HANDSETS 13 4.10.3 TRANSFER AN EXTERNAL CALL TO ANOTHER HANDSET 13 4.10.4 MAKE A 3-WAY CONFERENCE CALL 13 5 PRIVATE PHONEBOOK 14 5.1 ADD A NEW PHONEBOOK ENTRY 14 5.2 SEARCH A PHONEBOOK ENTRY 14 5.3 VIEW A PHONEBOOK ENTRY 14 5.4 EDIT A PHONEBOOK ENTRY 15 5.5 DELETE A PHONEBOOK ENTRY 15 5.6 DELETE ALL PHONEBOOK ENTRIES 15 5.7 CHECK THE PHONEBOOK USAGE 15 1 Remote Card 16 6 CALLER DISPLAY (NETWORK DEPENDENT 17 6.1 VIEW THE CALL LIST 17 6.2 STORE A CALL LIST NUMBER INTO THE PHONEBOOK 17 6.3 DELETE AN ENTRY IN THE CALL LIST 17 6.4 DELETE ALL CALL LIST ENTRIES 18 7 PHONE SETTINGS 18 7.1 DATE AND TIME SETTINGS 18 7.1.1 CHANGE THE DATE FORMAT 18 7.1.2 HANGE THE TIME FORMAT 18 7.1.3 SET THE TIME...18 7.1.4 SET THE DATE...19 7.2 ALARM SETTINGS ...19 7.2.1 TURN ON/OFF THE ALARM 19 7.2.2 SET THE ALARM TIME 19 7.3 HANDSET SETTINGS 20 7.3.1 SET THE RINGER MELODY FOR INTERNAL CALLS 20 7.3.2 SET THE RINGER MELODY FOR EXTERNAL CALLS 20 7.3.3 SET THE RINGER VOLUME 20 7.3.4 SET ALERT TONES 20 7.3.5 SET THE HANDSET LANGUAGE 21 7.3.6 RENAME THE HANDSET 21 7.3.7 CHOOSE THE INFORMATION TO BE DISPLAYED IN IDLE 21 7.3.8 SET THE AUTO ANSWER 21 7.4 BASE SETTINGS ...21 7.4.1 DE-REGISTER A HANDSET 21 7.4.2 CHANGE THE DIAL MODE 22 7.4.3 CHANGE THE FLASH (RECALL)TIME 22 7.4.4 CHANGE THE SYSTEM PIN CODE 22 7.5 REGISTRATION ...23 7.6 RESET YOUR PHONE 23 8 ANSWERING MACHINE 24 8.1 TURN ON/OFF THE ANSWERING MACHINE 24 8.2 LISTEN TO THE MESSAGES IN THE ANSWERING MACHINE 24 8.3 DELETE ALL MESSAGES IN THE ANSWERING MACHINE 25 8.4 RECORD MEMO ...26 8.5 ANSWERING MACHINE SETTINGS 26 Remote Card 29 9 TROUBLESHOOTING 32 10 DECLARATION OF CONFORMITY 33 11 GUARANTEE AND SERVICE 34 2 1 IMPORTANT SAFETY INSTRUCTIONS When using your telephone equipment, basic safety precautions should always be followed to reduce the risk of fire, electric shock and injury, including the following: 1) Read and understand all the instructions. 2) Follow all warnings and instructions marked on the product. 3) Unplug this product from the wall outlet before cleaning. Do not use liquid cleaners or aerosol cleaners. Use a damp cloth for cleaning. 4) Keep your phone away from hot, humid conditions or strong sunlight, and don't let it get wet or use this product near water (for example, near a bath tub, kitchen sink, swimming pool). 5) Do not overload wall outlets and extension cords as this can result in the risk of fire or electric shock. 6) Unplug this product from the wall outlet and refer servicing to our Repair Centre under the following conditions: • When the power supply cord or plug is damaged or frayed. • If the product does not operate normally by following the operating instructions. • If the product has been dropped and the cabinet has been damaged. • If the product exhibits a distinct change in performance. 7) NEVER use your phone outdoors during a thunderstorm-unplug the base from the telephone line and the mains socket when there are storms in your area. Damage caused by l ightning is not covered by the guarantee. 8) Do not use the telephone to report a gas leak in the vicinity of the leak. 9) Use only the supplied NiMH (Nickel Metal Hydride) batteries! The operation periods for the handsets are only applicable with the default battery capacities 10) The use of other battery types or non-rechargeable batteries/primary cells can be dangerous. These may cause interference and/or damage to the unit or surroundings. The manufacturer will not be held liable for damage arising from such non-compliance. 11) Do not use third party charging bays. Damage may be caused to the batteries. 12) Please ensure the batteries are inserted in the correct polarity. 13) Dispose of batteries safely. Do not immerse them in water, burn them, or put them where they could get punctured. 3 Package contents The package contains the following items: • 1 Handset • 1 Base station • 1 Mains power adapter • 1 Telephone line cord • 2 AAA rechargeable batteries • 1 User manual Note: If you have a Twin, Triple or Quad system, you will also have the requisite extra handset(s) and batteries, and a charger pod for each extra handset. Connection and conditions for use: You can connect your phone to a direct exchange line (DEL) on a local exchange with its own phone number; to an extension socket connected to a DEL; or to an extension on an approved compatible PBX. Do not connect as an extension to a payphone. The ringer equivalence numbers (REN) of all equipment (phones, fax machines, modems, etc.) connected to an exchange line must not add up to more than 4, otherwise one or more of them may not ring and/or answer calls correctly. The phone has a REN of 1, and most other telephones have a REN of 1 unless marked otherwise. Handset - Base Connection 1) When purchased, all handsets are already registered to the base unit and should link to it when they are all powered up. 2) To use your cordless handset and base unit together, you must be able to establish a radio link between them. The signal between the handset and the base is in accordance with the normal standards for a DECT phone: Maximum range up to 300 metres outdoors or 50 metres indoors. Be aware that: > Any large metal object, such as a refrigerator, mirror or filing cabinet, between the handset and the base unit may block the radio signal. > Other solid structures, like walls, may reduce the signal strength. > Other electrical equipment may cause interference and/or affect the range. 3) Do not place close to another telephone, a TV or audio equipment - it may cause interference. 4) Out of Range warning. If you hear a warning tone during a call, and/or the sound in the earpiece becomes faint or distorted, you may be going out of range of the base unit, so move nearer to the base unit within 20 seconds, otherwise the call may be cut off. 4 3.2 Base Station with Telephone Answering Machine (TAM) Control MESSAGE LED TAM ON/OFF Light On when TAM is ON Light Off when TAM is OFF Flashes when new messages received or incoming call. Press to turn on the answering machine. Press again to turn off the answering machine. Press to Press to decrease the playback Volume, or the base ringer volume during incoming increase the playback Volume, or the base ringer volume during incoming ringing. ringing. PLAY/STOP SKIP BACKWARD Press to repeat playing the current message from Press to play the message Press to stop the message playback the beginning. Press twice to skip back to the previous message. SKIP FORWARD Press to skip the current message and play the next DELETE message. Press once to delete the message during playback From idle: Press and hold to delete all the old messages. FIND Press to find your handset. It will ring for approximately 60 seconds 3.3 Display Icons and Symbols The LCD display gives you information on the current status of the telephone. Steady when the handset is in range of the base. Flashes when out of range of the base or not registered to the base. Steady when an intercom call is in progress. Flashes when there is an incoming internal call. Indicates a call is in progress on that handset. Indicates that your answering machine (TAM) is on and flashes when there is a new message. 7 Indicates that the handset ringer is switched off. Steady when an alarm is set. Flashes when the alarm is sounding. Indicates that the keypad is locked. Indicates when you have a new Voice Mail message. (This is a Caller Display service and is not usually available from UK network providers.) Indicates when the battery is fully charged. Whole icon flashes when the battery is charging. Internal block icon flashes when the battery is in final charging stage. Indicates when the battery needs charging. Flashes when low battery power level is detected. Indicates when there are more characters or numbers in front of those being displayed. Indicates when there are more characters or numbers after those being displayed. LEFT SOFT KEY function. Press to access the main menu. LEFT SOFT KEY function. Press to confirm the current selection. Indicates a new TAM message is playing or a new Call List entry is being displayed. Indicates you can scroll up / down the menu items / Phonebook list / Redial list / Call List (INT) RIGHT SOFT KEY function. Press to start an intercom call. RIGHT SOFT KEY function. Press to go back to the previous menu level (BACK) or cancel the current action. RIGHT SOFT KEY function. Press to clear a character, stop the alarm, or mute/unmute the microphone during a call. 3.4 Menu Structure In idle mode, press to go to CALL LIST, the first option in the menu list. Press or to go to other options in the menu list. Press to enter a sub-menu or function. Press to go back to the previous level. Refer to the following for the menu structure. 8 Key Press Main Menu CALL LIST PHONEBOOK BS SETTINGS HS SETTINGS REGISTRATION DEFAULT ANS. MACHINE Sub menu Shows EMPTY Shows EMPTY or the first Call or the first List Entry. Then phonebook Entry. for: Then for: ADD TO PB ADD DELETE PB STATUS DELETE ALL or DETAILS ADD VIEW EDIT DELETE DELETE ALL PB STATUS BS RINGER RING VOLUME DELETE HS DIAL MODE FLASH TIME CHANGE PIN ALARM PIN? - - - - RING SETUP TONE SETUP LANGUAGE RENAME HS HS DISPLAY AUTO ANSWER DATE & TIME PIN? - - - - MSG PLAYBACK DELETE ALL MEMO TAM ON/OFF TAM SETTINGS ANSWER MODE TAM LANGUAGE OGM SETTINGS ANSWER DELAY RECORD TIME REMOTE ACC COMPRESSION BS SCREENING CHANGE PIN 3.5 Text and Digit Entry Table The following table shows you where each letter and punctuation character can be found, by using repeated presses of the alphanumeric keypad. This will be helpful when storing a name in the phonebook and renaming your handset. In editing mode, a cursor is displayed to indicate the current text entry position. It is positioned at the right of the last character entered. Writing Tips: 1. Once a character is selected, the cursor will move to the next position after a short pause. 2. You can move the cursor within the text with the keys to amend the text entry. 3. Press to delete the last character. 4. Press and hold to delete the entire text string. 3.5.1 Character Set Alphanumeric Editing Number Editing (For phone (For phonebook name editing and renaming handset) number editing,date/time editing) Key Press 1st 2nd 3rd 4th 5th 6th 7th 8th 9th 10th 1 space - 1 2 A BC2 3 D EF3 4 G HI4 5 J KL5 6 M NO6 7 P QRS 7 8 T UV8 9 W XYZ 9 0 0 * # * o 1 2 3 4 5 6 7 8 9 0, or P (Pause) if press and hold * # Note: There are some different characters if the handset language is changed (7.3.5). 9 4 USING YOUR PHONE 4.1 Make a Call 4.1.1 Preparatory Dialling Enter the phone number and press to connect to the line and dial the number. When entering the number, if you make a mistake, press to delete digits. 4.1.2 Direct Dialling Press to connect to the line and then enter the phone number. (Note: if you enter a wrong digit you cannot correct it with the key.) 4.1.3 Call from the phonebook Press , and then again to access the phonebook and press to select the desired phonebook entry. Press to dial out the selected phonebook entry. Note: The alphanumeric keys provide a short-cut to find entries beginning with the corresponding letters. 4.1.4 Call from the Call List (only available with Caller Display) Press to access the Call List and press to select the desired Call List entry. Press to dial out the selected Call List entry. Note: You can also access the Call List by pressing twice. 4.1.5 Call from the redial list Press to access the redial list and press to select the desired redial number. Press to dial out the selected redial number. 4.1.6 Call timer Your handset automatically times the duration of every call. The call timer is displayed as soon as you answer a call or 15 seconds after dialling and remains on the screen for 5 seconds after the end of the call. It is shown in hours, minutes and seconds format (HH:MM:SS). 4.2 Answer a Call If the handset is not on the charging cradle: When the phone rings, press to answer a call. Note: If AUTO ANSWER is set to ON, then lifting the handset off the base or charger will answer the call automatically, and no buttons need to be pressed. 10 Veva 1520 system Remote operation 1 Using a tone-dialling phone, dial your home number 2 While your outgoing message is playing, press 3 Key in your remote security code The default code is 0000. For details of how to set a new code, see the User Guide 8.5.9.1 on page 30. Note: The key must be entered while the OGM is still playing, and the 4-digit PIN should follow without any delays. If the 4-digit Remote Access PIN is entered incorrectly three times consecutively, the line will be released automatically. 4 You can also use the codes on the other side of this card Note: If your answering machine is switched off, the phone will enter into the remote access mode after 14 rings. You can then enter the 4-digit remote access PIN (Default Remote Access PIN is 0000) to activate the remote access feature. 4.10.1 Intercom Another Handset 1. In idle mode, press and all the other registered handset numbers will display, along with a "9". 2. Enter the number of the handset that you want to call, or press the < 9 > key to call all handsets. 3. The called handset rings and must be pressed on that handset to establish the intercom call. Note: If only two handsets are registered to the base station, pressing will call the other handset immediately. Note: If there is an external call while you are on an intercom call, you'll hear warning beeps, and you have to end the intercom call, before you can answer the external call. 4.10.2 Call All Handsets 1. In idle mode, press and the registered handsets will display. 2. Press the < 9 > key to ring to all registered handsets 4.10.3 Transfer an External Call to another handset During an external call: 1. Press to show INTERCOM. 2. Press to show all the other registered handset numbers, plus "9". Enter the number for the handset you want to transfer the call to. 3. The external call is put on hold automatically and the called handset rings. 4. Press on the called handset to establish an internal call. 5. Press on the calling handset or put the calling handset on the charging cradle to end the current call with the external party. 6. The external call is transferred to the called handset. Note: If the other handset has not answered the intercom call, you can stop the intercom and return to the external call by pressing 4.10.4 Make a 3-way Conference Call The conference call feature allows one external call to be shared with two handsets (in intercom). The three parties can share the conversation and no additional network subscription is required. During an external call: 1. Follow Steps 1 to 4 in section 4.10.3. 2. Press and hold on the calling handset to establish the conference call. Either handset can exit the conference by pressing , leaving the other handset still connected to the external call. 5 PRIVATE PHONEBOOK Each handset can store up to 20 private phonebook entries with names and numbers. Each phonebook entry can have a maximum of 20 digits for the phone number and 12 characters for the name. You can also select different ringtones for your phonebook entries. (Note: the different ringtones only play if you subscribe to Caller Display and the incoming number matches the stored number.) Phonebook entries are stored alphabetically by name. 5.1 Add a New Phonebook Entry In idle: 1. Press and to select PHONEBOOK and then press to access the phonebook. 2. Press to show ADD. 3. Press and then enter the name. 4. Press and then enter the number. 5. Press and to select the desired ringtone for your phonebook entry. 6. Press to store the phonebook entry. 5.2 Search a Phonebook Entry In idle: 1. Press and to select PHONEBOOK and then press to access the phonebook. 2. Enter the first letter of the name using the alphanumeric keys(e.g. if it begins with C, press the 2 key three times), and then to scroll to the entry you want. 5.3 View a Phonebook Entry In idle: 1. Press and to select PHONEBOOK and then press to access the phonebook. 2. Press to select the desired phonebook entry. 3. Press and to select VIEW. 4. Press and to review the name, number and ringtone of the selected phonebook entry. Note: If the number is more than 12 digits, press or to view the remaining digits. 5.4 Edit a Phonebook Entry In idle: 1. Press and to select PHONEBOOK and then press to access the phonebook. 2. Press to select the desired phonebook entry. 3. Press and to select EDIT. 4. Press to display the current name. 5. Edit the name and press . 6. Edit the number and press . 7. Press to select the ringtone and press to confirm. 5.5 Delete a Phonebook Entry In idle: 1. Press and to select PHONEBOOK and then press to access the phonebook. 2. Press to select the desired phonebook entry. 3. Press and to select DELETE. 4. Press to confirm, and the entry will be deleted. 5.6 Delete all Phonebook entries 1. Press and to select PHONEBOOK and then press to access the phonebook. 2. Press and to select DELETE ALL. 3. Press to display . 4. Press to confirm. All entries will be deleted and the display will show . 5.7 Check the Phonebook Usage You can check how many phonebook entries are stored in your handset and how many phonebook entries are available for you to store in the phonebook. 1. Press and to select PHONEBOOK and then press to access the phonebook. 2. Press and to select PB STATUS. 3. Press to display how much of the phonebook is being used for example means 14 entries are stored out of the total 20 available spaces. 13 14 15 16
-
 1
1 -
 2
2
 |
 |