Bissell EasySweep® Cordless Rechargeable Sweeper 15D1-K EasySweep - Page 4
Warning
 |
View all Bissell EasySweep® Cordless Rechargeable Sweeper 15D1-K manuals
Add to My Manuals
Save this manual to your list of manuals |
Page 4 highlights
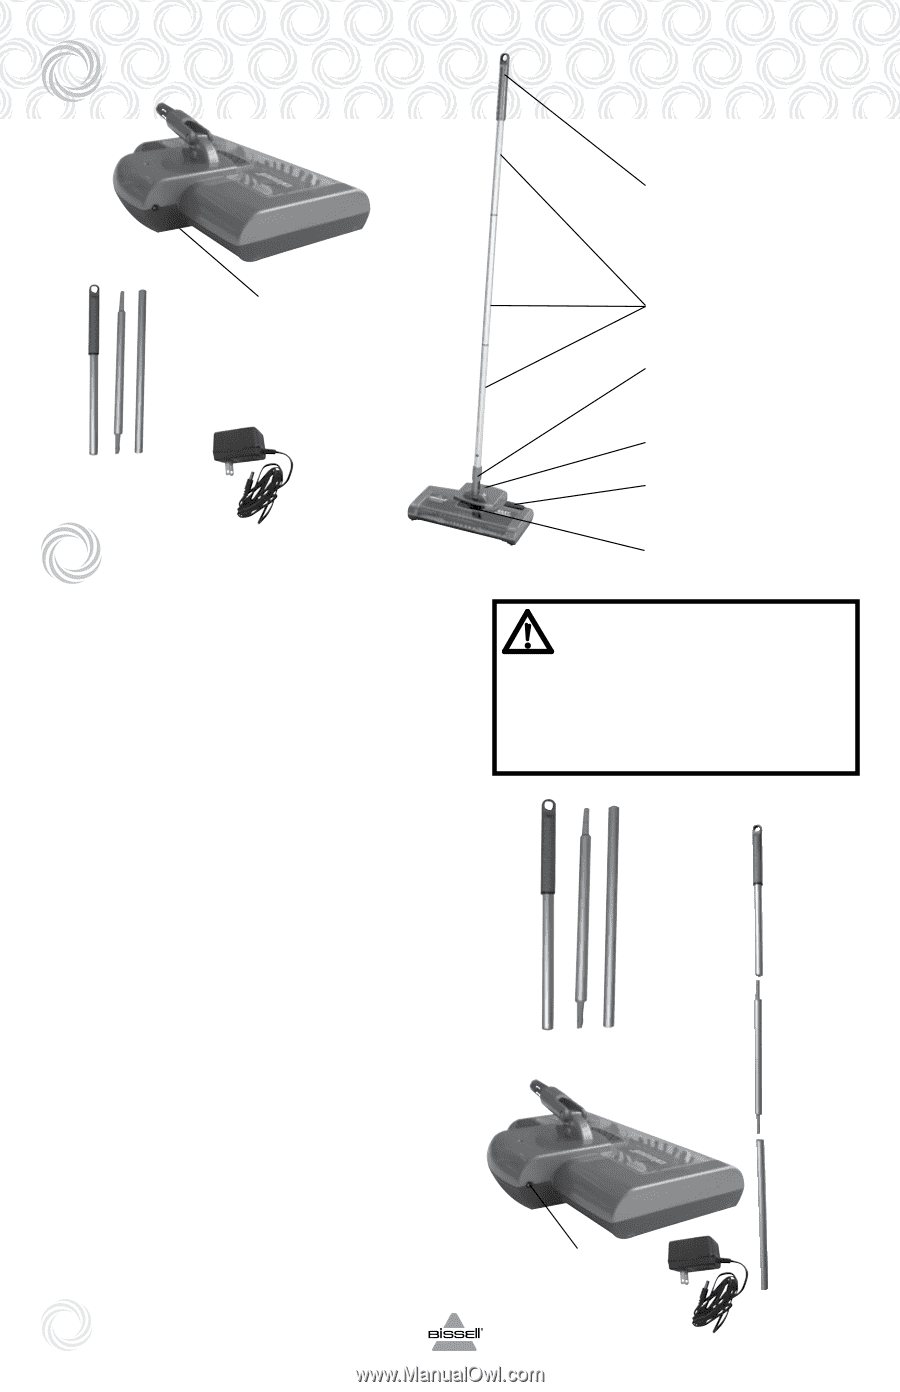
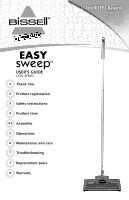
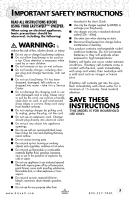
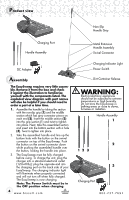
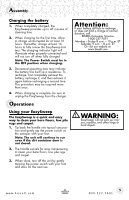
Product view Non-Slip Handle Grip Charging Port Handle Assembly Metal Extension Handle Assembly Swivel Connector DC Adapter Assembly The EasySweep requires very little assembly. Remove it from the box and check it against the illustration to familiarize yourself with the components listed. The exploded view diagram with part names will also be helpful if you should need to order a part at a later time. 1. Assemble the handle by taking the section with the non-slip grip (1) and the middle section which has grey connector pieces on each end (2). Insert the middle section (2) into the grip section (1) and twist to tighten into place. Next, take this assembled section and insert into the bottom section with a hole (3). Twist to tighten into place. 2. Take the assembled handle and line up the bottom hole with the button on the swivel connector on top of the EasySweep. Push the button on the swivel connector down while pushing the assembled handle over the button, locking the handle into place. 3. The EasySweep must be fully charged before using. To charge the unit, plug the charger into a standard electrical outlet (120v-60hz); plug the opposite end into the charging port on the back side of your EasySweep. The charging indicator light will illuminate when properly connected and will not turn off when fully charged. The EasySweep is now charging. Note: The Power Switch must be in the OFF position when charging. 4 www.bissell.com Charging Indicator Light Power Switch Dirt Container Release WARNING: Electric/electronic appliances should not be subjected to extreme temperatures or high humidity. Do not store the EasySweep in bathing areas or close to stoves, furnaces or radiators. Handle Assembly 1 2 12 3 3 Charging Port 800.237.7691
-
 1
1 -
 2
2 -
 3
3 -
 4
4 -
 5
5 -
 6
6 -
 7
7 -
 8
8
 |
 |