Bissell Momentum Vacuum User Guide - English
Bissell Momentum Vacuum Manual
 |
View all Bissell Momentum Vacuum manuals
Add to My Manuals
Save this manual to your list of manuals |
Bissell Momentum Vacuum manual content summary:
- Bissell Momentum Vacuum | User Guide - English - Page 1
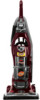
Momentum® BAGLESS VACUUM USER'S GUIDE 82G7 SERIES 3 Safety Instructions 4 Product View 5-6 Assembly 6-9 Operation 10-16 Maintenance and Care 17-18 Troubleshooting 18 Consumer Services 19 Replacement Parts 20 Warranty - Bissell Momentum Vacuum | User Guide - English - Page 2
, so, should you ever have a problem, you'll receive fast, considerate assistance. My great-grandfather invented the floor sweeper in 1876. Today, BISSELL is a global leader in the design, manufacture, and service of high quality homecare products like your BISSELL vacuum . Thanks again, from all of - Bissell Momentum Vacuum | User Guide - English - Page 3
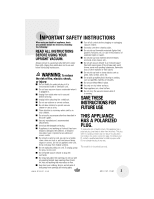
such as cigarettes, matches, or hot ashes. ■ Do not use without filters in place. ■ Use only on dry, indoor surfaces. ■ Keep appliance on a level surface. ■ Do not carry the vacuum cleaner while it is running. SAVE THESE INSTRUCTIONS FOR FUTURE USE THIS APPLIANCE HAS A POLARIZED PLUG. To reduce the - Bissell Momentum Vacuum | User Guide - English - Page 4
Foot Clean Filter Indicator (Select Models Only) Debris Barrier HEPA Media Post Motor Filter Lock 'n Seal® Lever Handle Release Pedal Height Adjustment Knob Scuff Resistant Bumper Quick Release™ Cord Wraps Twist 'n Snap™ Hose Curved Hose Wand Lower Hose Clip Hose Wand Base 4 www.bissell.com 800 - Bissell Momentum Vacuum | User Guide - English - Page 5
snapping it into place and twisting to the right. 6. CAUTION: Do not plug in your vacuum cleaner until you are familiar with all instructions and operating procedures. 3. 7. www.bissell.com Hose Clip WARNING: Plastic film can be dangerous. To avoid danger of suffocation, keep away from babies - Bissell Momentum Vacuum | User Guide - English - Page 6
clip. 6. Store TurboBrush on the front of the handle by lining up the TurboBrush base with the base of the holder then push back to snap into place. CAUTION: Before using your vacuum, make sure that the dirt container is in the locked position and that all filters (pre-motor and HEPA postmotor) are - Bissell Momentum Vacuum | User Guide - English - Page 7
the vacuum in normal or block the vacuum hose. cleaner 1. To move your cleaner from room to room, put the handle in the upright position, tilt the cleaner back on its rear wheels and push forward. 2. The cleaner can also be moved by using the carrying handle. 2b. wrong way to carry www.bissell - Bissell Momentum Vacuum | User Guide - English - Page 8
a versatile above floor vacuum cleaner when you select one of the special tools. 1. Raise the handle to the upright position. Curved Hose Wand 2. Grasp the curved hose wand handle to separate from hose wand base. 3. Attach tools by firmly pushing onto vacuum hose, curved hose wand or extension - Bissell Momentum Vacuum | User Guide - English - Page 9
small objects can block the vacuum hose or tools. Check them occasionally for obstructions. Power cord usage 1. To use your vacuum, remove the cord and the risk of injury from moving parts, always move the cleaner with the carrying handle. Always place vacuum cleaner on the floor with handle in - Bissell Momentum Vacuum | User Guide - English - Page 10
post-motor HEPA media filter every three to six months. Tip: To maximize cleaning performance, check and clean or replace all filters as suggested. NOTE: More frequent filter cleaning may be necessary if you are vacuuming new carpet, fine dust, or have allergy concerns. Follow the instructions on - Bissell Momentum Vacuum | User Guide - English - Page 11
door, remove the filter and replace. NOTE: The post-motor filter is a white, pleated HEPA media filter. This filter is not washable and must be replaced when it becomes dirty. WARNING: Do not operate cleaner with damp or wet filters or without all filters in place. www.bissell.com 800.237.7691 - Bissell Momentum Vacuum | User Guide - English - Page 12
cover. 1. Unplug the vacuum from electrical outlet. WARNING: To reduce the risk of injury from moving parts, turn vacuum cleaner off and disconnect power and other debris from the motor pulley and drive belt areas. Motor Pulley 7. Check the drive belt carefully for wear, cuts or stressed areas. 8. - Bissell Momentum Vacuum | User Guide - English - Page 13
. 2. With the rotating floor brush removed from the vacuum cleaner (Steps 1-4 of check rotating floor brush and drive belt), grasp the old drive belt and remove from the motor pulley. Discard the old drive belt. 3. 3. Place the new drive belt over the motor Motor Pulley pulley and loop other - Bissell Momentum Vacuum | User Guide - English - Page 14
regularly for clogs or debris wrapping around the brush. 2. 1. Unplug the vacuum from electrical outlet. 2. If a clog is present or debris is from the brush, remove the 4. brush from the drive belt and clean debris. 4. Reposition the drive belt on the brush. Place ends of brush in slots on - Bissell Momentum Vacuum | User Guide - English - Page 15
the vacuum cleaner. If you notice a change in the sound of the motor, check for clogs. 1. Unplug the vacuum from instructions for checking the rotating floor brush and drive belt on page 12 and inspect the air passageway for obstructions. 2. 5. Connecting Tube Hose Wand Base Bottom Port www.bissell - Bissell Momentum Vacuum | User Guide - English - Page 16
Maintenance and care Cleaning the upper tank 1. 1. Unplug the vacuum from electrical outlet. 2. Remove the dirt container as instructed in "Empty Dirt Container" on page 10. 3. Flip separator plate down. 4. Remove debris barrier by pulling straight down. Remove any dirt or debris on the - Bissell Momentum Vacuum | User Guide - English - Page 17
. Vacuum cleaner and tools won't pick up dirt Possible causes Remedies 1. Incorrect height adjustment 1. Adjust powerfoot to correct height 2. Hose not attached to suction opening 2. Firmly push curved hose wand into hose wand base 3. Twist 'n Snap hose not securely attached 3. Make sure - Bissell Momentum Vacuum | User Guide - English - Page 18
Troubleshooting Other maintenance or service not included in the manual should be performed by an authorized service representative. Thank you for selecting a BISSELL Consumer Services Or visit the BISSELL website - www.bissell.com When contacting BISSELL, have model number of cleaner available. - Bissell Momentum Vacuum | User Guide - English - Page 19
BISSELL Consumer Services or by visiting our website. Below is a list of common replacement parts. While not all of these parts may have come with your specific model, they are available for purchase if desired. Please note, all attachments may not store on board your vacuum. Item Part No. Part - Bissell Momentum Vacuum | User Guide - English - Page 20
® Cyclonic and Momentum® Vacuums This warranty gives you specific legal rights, and you may also have other rights which may vary from state to state. If you need additional instruction regarding this warranty or have questions regarding what it may cover, please contact BISSELL Consumer Services
-
 1
1 -
 2
2 -
 3
3 -
 4
4 -
 5
5 -
 6
6 -
 7
7 -
8
-
9
-
10
-
11
-
12
-
13
-
14
-
15
-
16
-
17
-
18
-
19
-
20
 |
 |
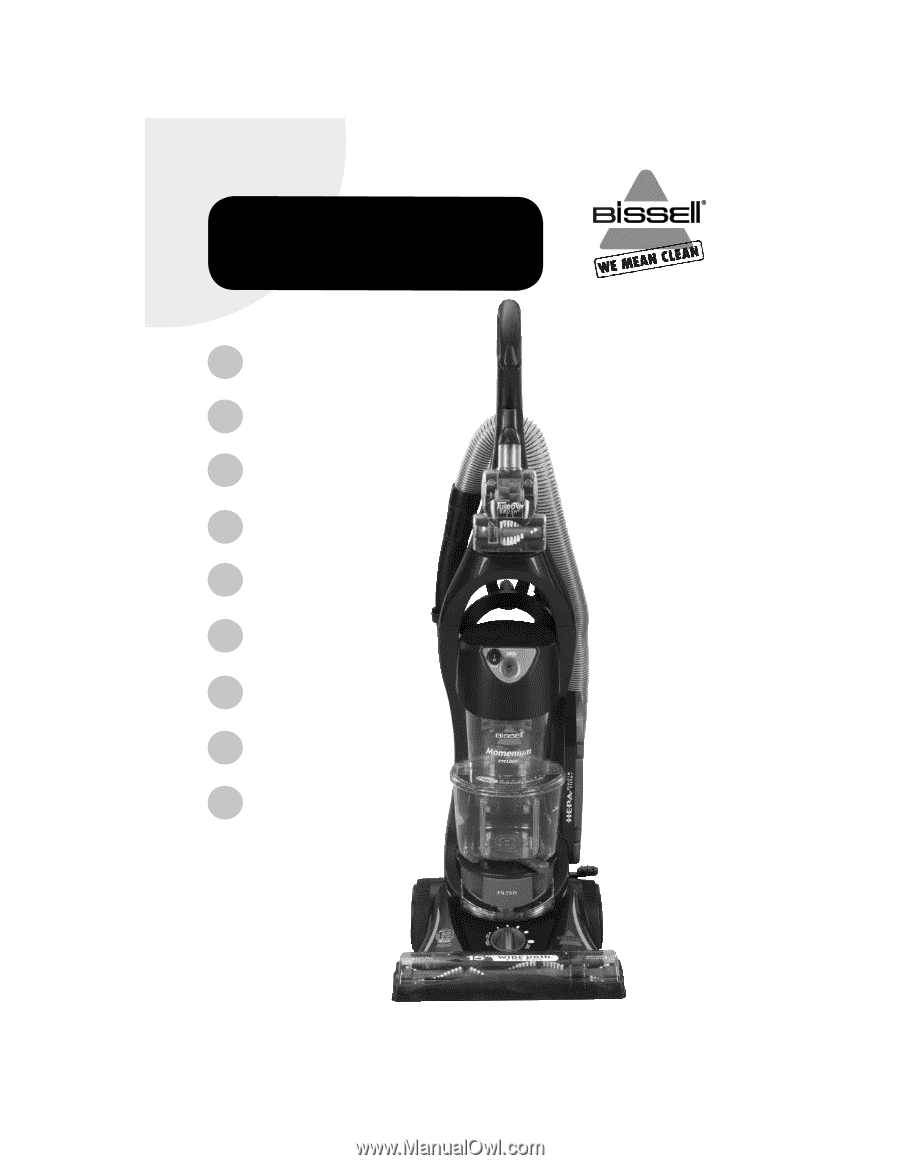
USER’S GUIDE
82G7 SERIES
3
Safety Instructions
Product View
Assembly
Operation
Maintenance and Care
Troubleshooting
Consumer Services
Replacement Parts
4
5-6
6-9
10-16
17-18
18
19
Warranty
20
Momentum
®
BAGLESS VACUUM