Bosch HDI7132U Installation Instructions - Page 6
Installation - tools
 |
View all Bosch HDI7132U manuals
Add to My Manuals
Save this manual to your list of manuals |
Page 6 highlights
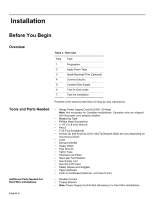
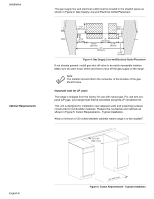
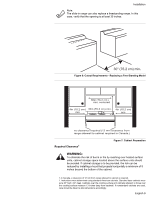
Installation Before You Begin Overview Table 1: Overview Step Task 1. Preparation 2. Apply Foam Tape 3. Install Backwall Trim (Optional) 4. Connect Electric 5. Connect Gas Supply 6. Test for Gas Leaks 7. Test the Installation Proceed to the sections that follow for step-by-step instructions. Tools and Parts Needed Additional Parts Needed For Hard Wire Installations • Range Power Supply Cord Kit (240V -30 Amp) Note: Not necessary for Canadian installations; Canadian units are shipped with the power cord already installed. • Measuring Tape • Phillips Head Screwdriver • 1-1/4" (31.8 mm) Wrench • Pencil • T-20 Torx Screwdriver • Screws (2) and Anchors (2) for Anti-Tip Bracket (Style will vary depending on mounting surface) • Level • Drill and Drill Bit • Soapy Water • Pipe Wrench • Teflon Tape • Channel Lock Pliers • Gas Leak Test Solution • Gas Supply Line • Gas Shut Off Valve • Safety Gloves and Goggles • Tape (Optional) • Cloth or Cardboard (Optional - to Protect Floor) • Flexible Conduit • Torque Wrench • Note: Power Supply Cord Kit Not Necessary For Hard Wire Installations English 4
-
 1
1 -
 2
2 -
 3
3 -
 4
4 -
 5
5 -
 6
6 -
 7
7 -
 8
8 -
 9
9 -
 10
10 -
 11
11 -
 12
12 -
13
-
14
-
15
-
16
-
17
-
18
-
19
-
20
-
21
-
22
-
23
-
24
-
25
-
26
-
27
-
28
-
29
-
30
-
31
-
32
-
33
-
34
-
35
-
36
-
37
-
38
-
39
-
40
-
41
-
42
-
43
-
44
-
45
-
46
-
47
-
48
-
49
-
50
-
51
-
52
-
53
-
54
-
55
-
56
-
57
-
58
-
59
-
60
-
61
-
62
-
63
-
64
-
65
-
66
-
67
-
68
-
69
-
70
-
71
-
72
-
73
-
74
-
75
-
76
-
77
-
78
-
79
-
80
 |
 |
