Bose 301 Series III Owner's guide - Page 3
Connecting, speaker, wires
 |
View all Bose 301 Series III manuals
Add to My Manuals
Save this manual to your list of manuals |
Page 3 highlights
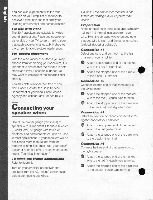
m co You can also experiment with the tone cfi controls on your amplifier or receiver to achieve a tonal balance that suits your listening environment and personal tastes. For use with video The 301 speakers are suitable for video sound applications. Place one speaker on either side of your TV screen, making sure that each speaker is at least 24 inches from the screen to avoid picture interference. For secure placement With the wide variety of surfaces you may choose from for placing your speakers, it is important to ensure that the surface is both stable and level. For some surfaces, you may want to use rubber feet for additional stability. You may obtain rubber feet, free of cost, from Bose". Contact the Bose Service Department or your local Bose Service Agency and ask for Part Number 103593. Connecting your speaker wires Use of the proper gauge (thickness) of speaker wire is important. Standard zip cord (2-conductor, 18-gauge wire found at electrical and hardware stores) can be used in most applications. If your speakers will be positioned more than 30 feet from the receiver or amplifier, check with your Bose' dealer or refer to the Wire recommendations under 'Technical information' To make the proper connections Refer to figure 2. Turn off your amplifier or receiver and unplug it from the AC (mains) power outlet before connecting any wires. Caution: If the amplifier or receiver is not turned off, damage to your system may occur. Preparation At the ends of each cord, strip approximately 1/2 inch (12 mm) of insulation from each wire. Twist the stripped wire ends and note that one wire is plain and the other is marked (striped, ribbed or collared). Connection #1 Select one cord and connect it to the left Channel of your amplifier. Attach one stripped end of the marked wire to the red (+) terminal. Attach the stripped end of the plain wire to the black (-) terminal. Connection #2 Connect the free end of that same cord to the left speaker. Attach the stripped end of the marked wire to the red (+) push-type terminal. Attach the stripped end of the plain wire to the black (-) push-type terminal. Connection #3 Select the second cord and connect it to the right channel of your amplifier. es Attach one stripped end of the marked wire to the red (+) terminal. Attach the stripped end of the plain wire to the black (-) terminal. Connection #4 Connect the free end of that same cord to the right speaker. Attach the stripped end of the marked wire to the red (+) push-type terminal. Attach the stripped end of the plain wire to the black (-) push-type terminal. 2
-
 1
1 -
 2
2 -
 3
3 -
 4
4 -
 5
5 -
 6
6 -
 7
7 -
 8
8 -
 9
9
 |
 |
