Brother International 1940CN User Guide - Page 41
Setting the Phone Line Type, PABX and TRANSFER, For FAX-1840CN, press
 |
UPC - 012502610908
View all Brother International 1940CN manuals
Add to My Manuals
Save this manual to your list of manuals |
Page 41 highlights
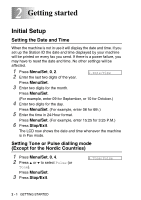
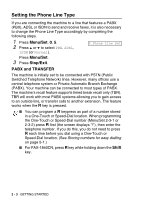
Setting the Phone Line Type If you are connecting the machine to a line that features a PABX (PBX), ADSL or ISDN to send and receive faxes, it is also necessary to change the Phone Line Type accordingly by completing the following steps. 1 Press Menu/Set, 0, 5. 2 Press ▲ or ▼ to select PBX, ADSL, ISDN (or Normal). 5.Phone Line Set Press Menu/Set. 3 Press Stop/Exit. PABX and TRANSFER The machine is initially set to be connected with PSTN (Public Switched Telephone Network) lines. However, many offices use a central telephone system or Private Automatic Branch Exchange (PABX). Your machine can be connected to most types of PABX. The machine's recall feature supports timed break recall only (TBR). TBR will work with most PABX systems allowing you to gain access to an outside line, or transfer calls to another extension. The feature works when the R key is pressed. ■ You can program a R keypress as part of a number stored in a One-Touch or Speed-Dial location. When programming the One-Touch or Speed-Dial number (Menu/Set 2-3-1 or 2-3-2) press R first (the screen displays "!"), then enter the telephone number. If you do this, you do not need to press R each time before you dial using a One-Touch or Speed-Dial location. (See Storing numbers for easy dialling on page 5-1.) ■ For FAX-1840CN, press R key while holding down the Shift key. 2 - 3 GETTING STARTED
-
 1
1 -
2
-
3
-
4
-
5
-
6
-
7
-
8
-
9
-
10
-
11
-
12
-
13
-
14
-
15
-
16
-
17
-
18
-
19
-
20
-
21
-
22
-
23
-
24
-
25
-
26
-
27
-
28
-
29
-
30
-
31
-
32
-
33
-
34
-
35
-
 36
36 -
 37
37 -
 38
38 -
 39
39 -
 40
40 -
 41
41 -
 42
42 -
 43
43 -
 44
44 -
 45
45 -
 46
46 -
47
-
48
-
49
-
50
-
51
-
52
-
53
-
54
-
55
-
56
-
57
-
58
-
59
-
60
-
61
-
62
-
63
-
64
-
65
-
66
-
67
-
68
-
69
-
70
-
71
-
72
-
73
-
74
-
75
-
76
-
77
-
78
-
79
-
80
-
81
-
82
-
83
-
84
-
85
-
86
-
87
-
88
-
89
-
90
-
91
-
92
-
93
-
94
-
95
-
96
-
97
-
98
-
99
-
100
-
101
-
102
-
103
-
104
-
105
-
106
-
107
-
108
-
109
-
110
-
111
-
112
-
113
-
114
-
115
-
116
-
117
-
118
-
119
-
120
-
121
-
122
-
123
-
124
-
125
-
126
-
127
-
128
-
129
-
130
-
131
-
132
-
133
-
134
-
135
-
136
-
137
-
138
-
139
-
140
-
141
-
142
-
143
-
144
-
145
-
146
-
147
-
148
-
149
-
150
-
151
-
152
-
153
-
154
-
155
-
156
-
157
-
158
-
159
-
160
-
161
-
162
-
163
-
164
-
165
-
166
-
167
-
168
-
169
-
170
-
171
-
172
-
173
-
174
-
175
-
176
-
177
-
178
-
179
-
180
-
181
-
182
-
183
-
184
-
185
-
186
-
187
-
188
-
189
-
190
-
191
-
192
-
193
-
194
-
195
-
196
-
197
-
198
-
199
-
200
-
201
-
202
-
203
-
204
-
205
-
206
-
207
-
208
-
209
-
210
-
211
-
212
-
213
-
214
-
215
-
216
-
217
-
218
-
219
-
220
 |
 |