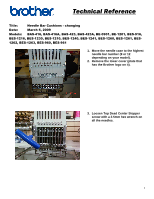
Brother International BE-1201B-AC Changing Needle Bar Cushions - English - Page 2
Push down on the Top Dead Center - manual
 |
View all Brother International BE-1201B-AC manuals
Add to My Manuals
Save this manual to your list of manuals |
Page 2 highlights
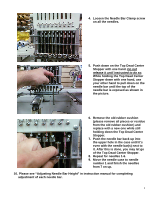
4. Loosen the Needle Bar Clamp screw on all the needles. 5. Push down on the Top Dead Center Stopper with one hand. Do not release it until instructed to do so. While holding the Top Dead Center Stopper down with one hand, use your other hand to pull down on the needle bar until the top of the needle bar is exposed as shown in the picture. 6. Remove the old rubber cushion (please remove all pieces or residue from the old rubber cushion) and replace with a new one while still holding down the Top Dead Center Stopper. 7. Push the needle bar back up into the upper hole in the case until it's even with the needle bar(s) next to it. After this is done, you may let go of the Top Dead Center Stopper. 8. Repeat for needles 1-6. 9. Move the needle case to needle number 1 and finish the needles from 7 on up. 10. Please see "Adjusting Needle Bar Height" in instruction manual for completing adjustment of each needle bar. 2
-
 1
1 -
 2
2
 |
 |
