Brother International BE-1204C Cap Frame Device Instruction Manual - English - Page 10
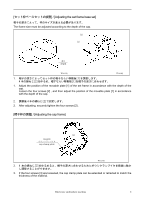
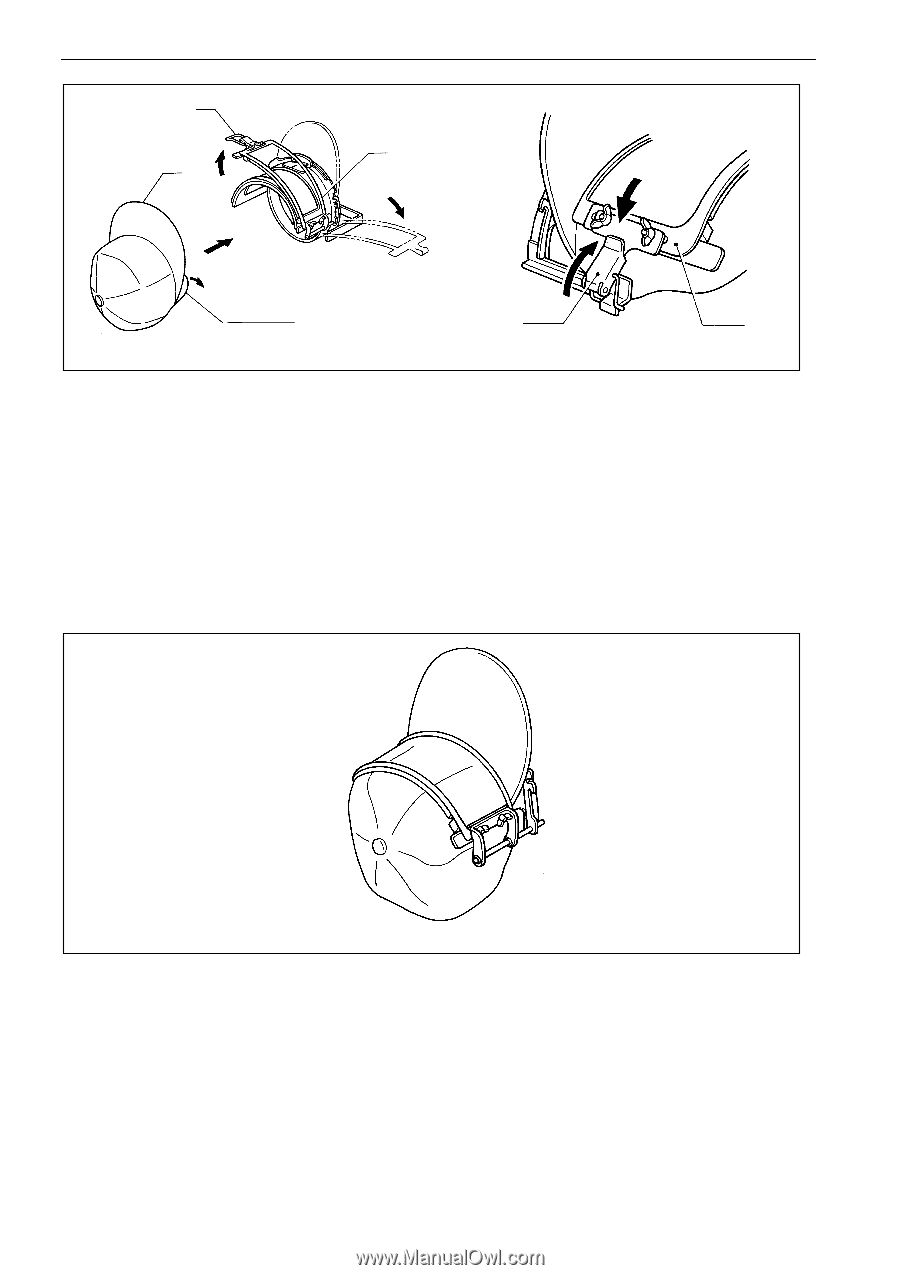
Release the snap lock [8] on the cap frame[7] to set the cap [9].
 |
View all Brother International BE-1204C manuals
Add to My Manuals
Save this manual to your list of manuals |
Page 10 highlights
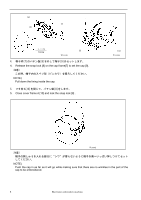
[8] [7] [9] lining [8] W1444Q 4. 帽子枠[7 8 9 4. Release the snap lock [8] on the cap frame[7] to set the cap [9]. NOTE) Pull down the lining inside the cap. 5. フタ枠 A[10 8 5. Close cover frame A [10] and lock the snap lock [8] . [10] W1445Q W1446Q NOTE) Push the cap in as far as it will go while making sure that there are no wrinkles in the part of the cap to be embroidered. 8 Electronic embroidery machine
-
 1
1 -
2
-
3
-
4
-
 5
5 -
 6
6 -
 7
7 -
 8
8 -
 9
9 -
 10
10 -
 11
11 -
 12
12 -
 13
13 -
 14
14 -
 15
15 -
16
-
17
-
18
-
19
-
20
-
21
-
22
-
23
-
24
-
25
-
26
-
27
-
28
 |
 |
8
Electronic embroidery machine
W1444Q
W1445Q
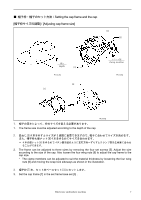
4.
帽子枠
[7]
のパチン錠
[8]
を外して帽子
[9]
をセットします。
4.
Release the snap lock [8] on the cap frame[7] to set the cap [9].
注意
)
この時、帽子内のスベリ部(ビンカワ)を降ろしてください。
NOTE)
Pull down the lining inside the cap.
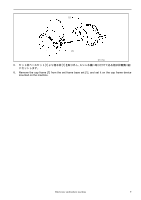
5.
フタ枠
A[10]
を閉じて、パチン錠
[8]
をします。
5.
Close cover frame A [10] and lock the snap lock [8] .
W1446Q
注意
)
帽子の刺しゅうを入れる部分に
“
シワ
”
が
寄
らないように帽子を奥へいっ
ぱ
い押しつけてセット
してください。
NOTE)
Push the cap in as far as it will go while making sure that there are no wrinkles in the part of the
cap to be embroidered.
[9]
[8]
[7]
[8]
[10]
スベリ部
lining