Brother International DCP120C Quick Setup Guide - English - Page 7
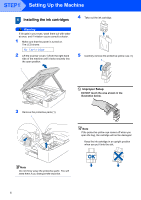
Setting Up the Machine - ink cartridges
 |
UPC - 012502614043
View all Brother International DCP120C manuals
Add to My Manuals
Save this manual to your list of manuals |
Page 7 highlights
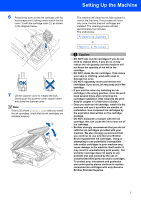
Setting Up the Machine 4 Fan the stack of paper well to avoid paper jams and misfeeds. 3 Installing the power cord 1 Connect the power cord. 5 Gently put the paper into the paper tray print side down and top edge first. Check that the paper is flat in the tray and below the maximum paper mark (1). 1 Improper Setup DO NOT connect the USB cable yet. Note The control panel warning LED will stay on until you have installed the ink cartridges. Note • Make sure the paper side guides touch the sides of the paper. • Be careful that you do not push the paper in too far; it may lift at the back of the tray and cause paper feed problems. 6 Put the output paper tray back on and push the paper tray firmly back into the machine. 5
-
 1
1 -
 2
2 -
 3
3 -
 4
4 -
 5
5 -
 6
6 -
 7
7 -
 8
8 -
 9
9 -
 10
10 -
 11
11 -
 12
12 -
13
-
14
-
15
-
16
-
17
-
18
-
19
-
20
-
21
-
22
-
23
-
24
 |
 |
Setting Up the Machine
5
4
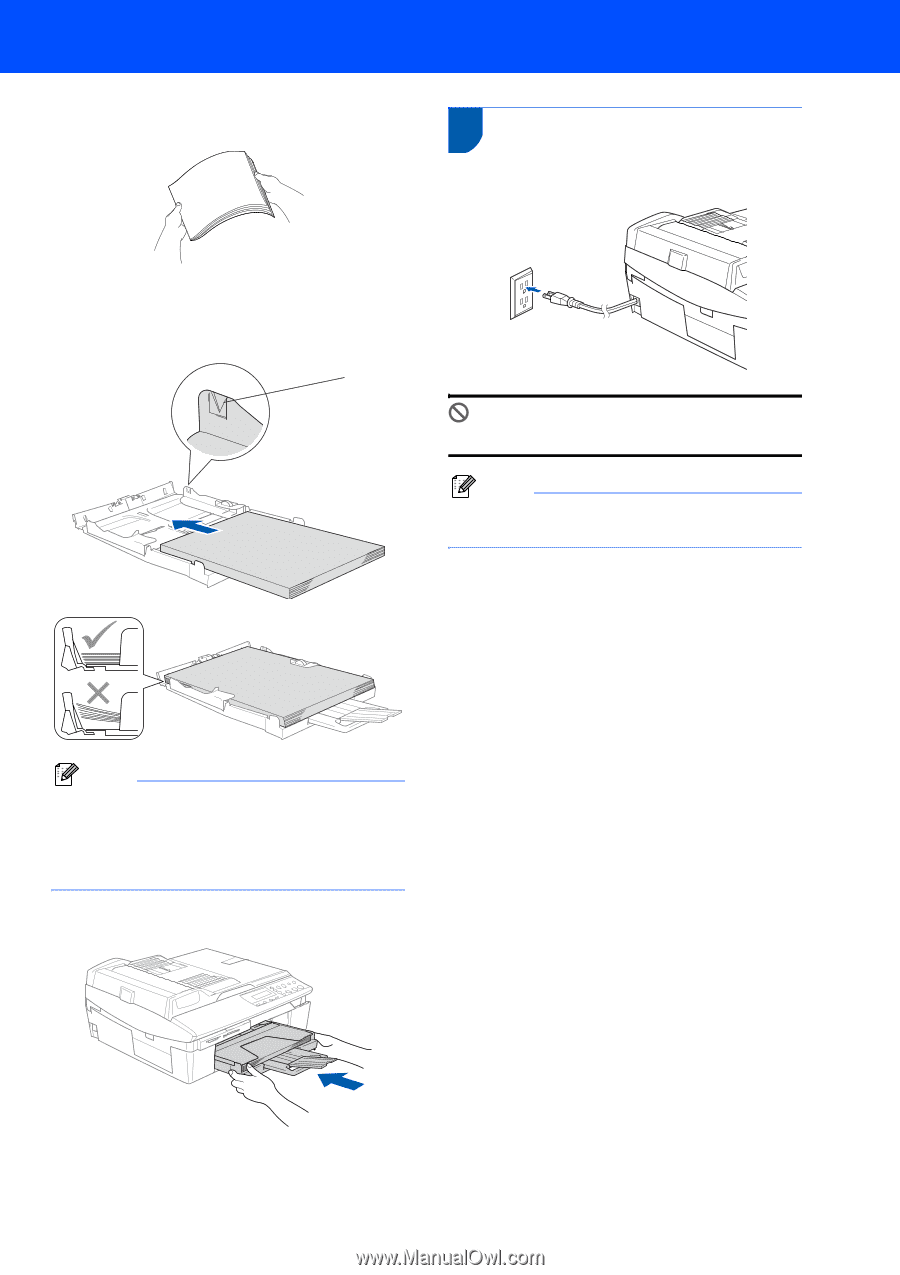
Fan the stack of paper well to avoid paper jams
and misfeeds.
5
Gently put the paper into the paper tray print
side down and top edge first.
Check that the paper is flat in the tray and
below the maximum paper mark (1).
Note
•
Make sure the paper side guides touch the sides
of the paper.
•
Be careful that you do not push the paper in too
far; it may lift at the back of the tray and cause
paper feed problems.
6
Put the output paper tray back on and push the
paper tray firmly back into the machine.
3
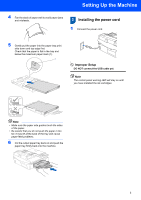
Installing the power cord
1
Connect the power cord.
Improper Setup
DO NOT connect the USB cable yet.
Note
The control panel warning LED will stay on until
you have installed the ink cartridges.
1