Brother International Entrepreneur Pro PR1000e Kit 1 Instruction Manual - Engl - Page 32
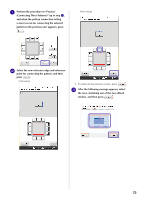
Sliding the Position of the Pattern to be Connected, Connecting Three Patterns to finish
 |
View all Brother International Entrepreneur Pro PR1000e manuals
Add to My Manuals
Save this manual to your list of manuals |
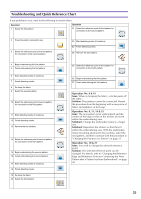
Page 32 highlights
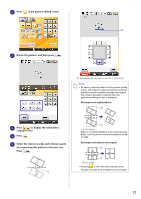
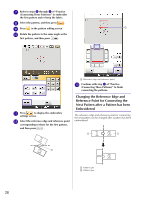
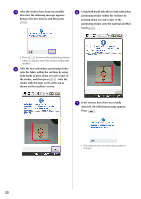
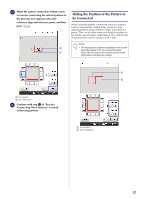
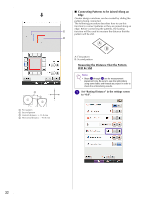
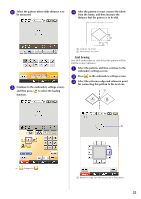
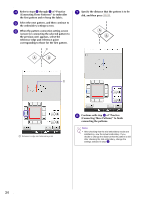
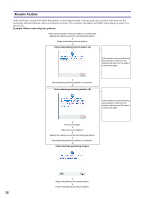
h When the pattern connection setting screen (screen for connecting the selected pattern to the previous one) appears, select the reference edge and reference point, and then press . b a Sliding the Position of the Pattern to be Connected When using the pattern connecting function, patterns can be connected by sliding them, instead of only aligning patterns along reference edges and reference points. This can be done when you want the pattern to be equally spaced when embroidered. The vertical and horizontal shifts can be set up to ±99.9 mm. Note • The arrangement of patterns displayed in the screen may differ slightly from the actual embroidery. Use a ruler to measure the vertical and horizontal shifts before changing the settings. a b a First pattern b Second pattern i Continue with step n of "Practice (Connecting Three Patterns)" to finish connecting patterns. a First pattern b Second pattern 31
-
 1
1 -
2
-
3
-
4
-
5
-
6
-
7
-
8
-
9
-
10
-
11
-
12
-
13
-
14
-
15
-
16
-
17
-
18
-
19
-
20
-
21
-
22
-
23
-
24
-
25
-
26
-
 27
27 -
 28
28 -
 29
29 -
 30
30 -
 31
31 -
 32
32 -
 33
33 -
 34
34 -
 35
35 -
 36
36 -
 37
37 -
38
-
39
-
40
-
41
-
42
 |
 |
