Brother International Innov-is NQ1400E Operation Manual
Brother International Innov-is NQ1400E Manual
 |
View all Brother International Innov-is NQ1400E manuals
Add to My Manuals
Save this manual to your list of manuals |
Brother International Innov-is NQ1400E manual content summary:
- Brother International Innov-is NQ1400E | Operation Manual - Page 1
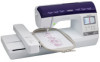
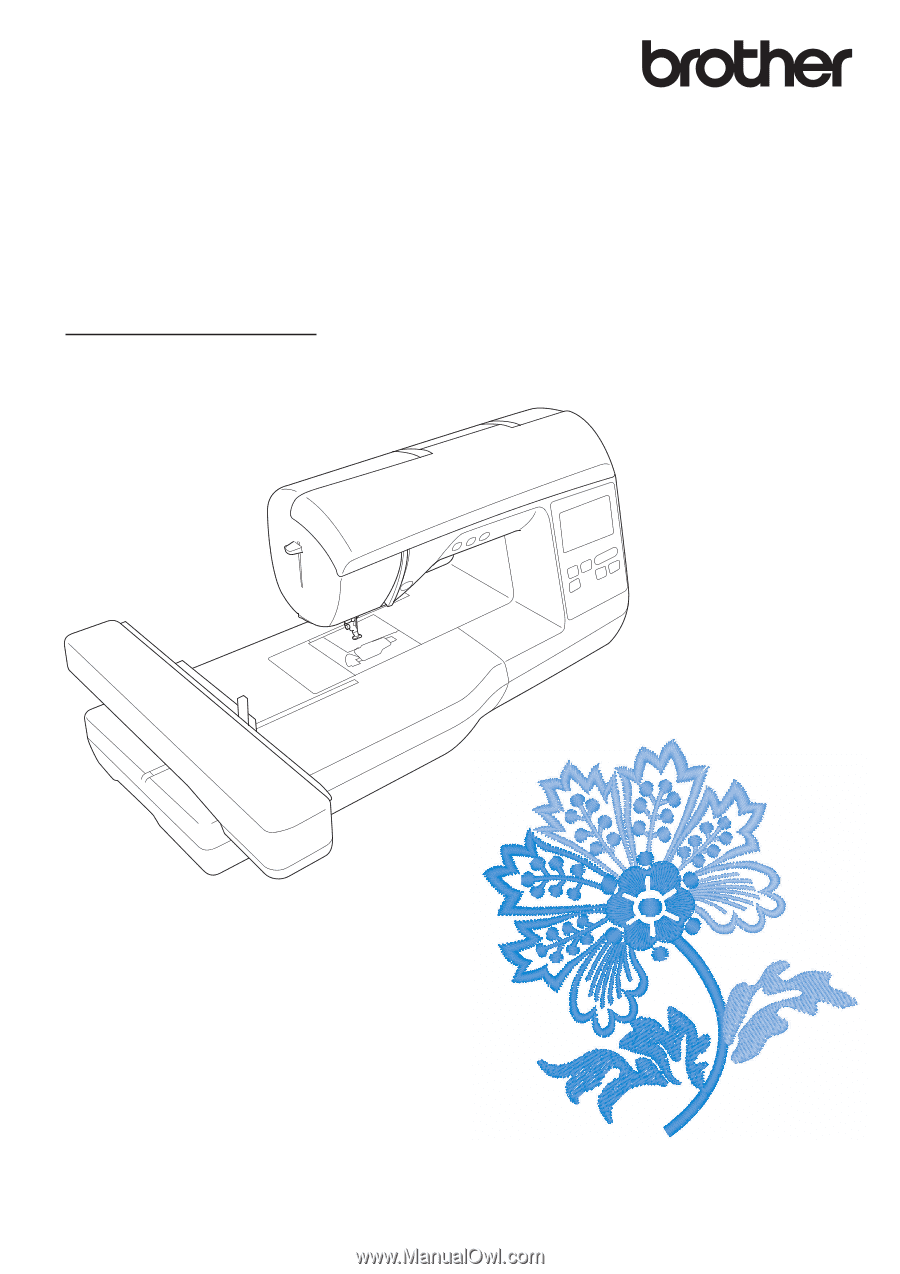
Operation Manual Embroidery Machine Product Code: 888-G80/G82 Be sure to read this document before using the machine. We recommend that you keep this document nearby for future reference. - Brother International Innov-is NQ1400E | Operation Manual - Page 2
- Brother International Innov-is NQ1400E | Operation Manual - Page 3
instructions before attempting to use the machine. DANGER - To reduce the risk of electrical shock 1 Always unplug the machine from the electrical outlet immediately after using, when cleaning, making any user servicing adjustments mentioned in this manual the nearest authorized Brother dealer for - Brother International Innov-is NQ1400E | Operation Manual - Page 4
INSTRUCTIONS suffocation. • Do not use outdoors. 8 For a longer service life: • When storing this machine, avoid direct sunlight troubleshooting table in the back of the Operation Manual to inspect and adjust the machine yourself. If the problem persists, please consult your local authorized Brother - Brother International Innov-is NQ1400E | Operation Manual - Page 5
mental capabilities or lack of experience and knowledge if they have been given supervision or instruction concerning use of the appliance in a safe way and understand the hazards involved. with this equipment, you should contact your authorized Brother dealer to obtain the correct lead. iii - Brother International Innov-is NQ1400E | Operation Manual - Page 6
liable for any direct, indirect, incidental, special, exemplary, or consequential damages (including, but not limited to, procurement of substitute goods or services; loss of use, data, or profits; or business interruption) however caused and on any theory of liability, whether in contract, strict - Brother International Innov-is NQ1400E | Operation Manual - Page 7
and basic embroidering operations E Embroidering This section provides instruction on editing embroidery patterns and recalling stored embroidery patterns. this machine. Chapter 1 MAINTENANCE AND TROUBLESHOOTING The various maintenance and troubleshooting procedures are described. Page A-2 v - Brother International Innov-is NQ1400E | Operation Manual - Page 8
i IMPORTANT SAFETY INSTRUCTIONS i TRADEMARKS iv WHAT Threading the needle 21 Threading the needle manually (without using the needle threader 22 backing) to the fabric 29 Hooping the fabric in the embroidery frame 2 Selecting embroidery patterns/Brother "Exclusives"/floral alphabet patterns - Brother International Innov-is NQ1400E | Operation Manual - Page 9
surface 2 Cleaning the race 2 About the maintenance message 4 Touch panel is malfunctioning 4 Operation beep 4 Replacing the embroidery foot 5 Troubleshooting 6 List of symptoms 6 Error messages 10 Specifications 12 Upgrading your machine's software using USB flash drive 13 Index 14 - Brother International Innov-is NQ1400E | Operation Manual - Page 10
CONTENTS viii - Brother International Innov-is NQ1400E | Operation Manual - Page 11
Basic operations This section provides details on the initial setup procedures as well as descriptions of this machine's more useful functions. Page number starts with "B" in this section. Chapter1 GETTING READY B-2 Chapter2 STARTING TO EMBROIDER B-25 - Brother International Innov-is NQ1400E | Operation Manual - Page 12
to place the spool of thread on the spool pin. 2 Thread guide plate Pass the thread around the thread guide plate when threading the upper thread. 3 Bobbin winding thread guide and pretension disk Pass the thread under this thread guide and around the pretension disk when winding the bobbin thread - Brother International Innov-is NQ1400E | Operation Manual - Page 13
and presser foot section f Names of Machine Parts and Their Functions Embroidery Unit b a a c b e c d 1 Needle bar thread guide Pass the upper thread through the needle bar thread guide. 2 Needle plate 3 Needle plate cover Remove the needle plate cover to clean the bobbin case and race - Brother International Innov-is NQ1400E | Operation Manual - Page 14
Names of Machine Parts and Their Functions Operation buttons bcd Operation panel and operation keys a a 1 "Start/Stop" button Press the "Start/Stop" button to start or stop embroidering. The button changes color according to the machine's operation mode. Green: The machine is ready to - Brother International Innov-is NQ1400E | Operation Manual - Page 15
included accessories and their part codes of your machine, refer to the Quick Reference Guide. 1. 2. 3. 4. 5. 6. U Embroidery foot "U" 7. Needle set 75/ 90 weight bobbin thread Accessory bag Dust cover Operation Manual Quick Reference Guide Embroidery Design Guide Basic operations B-5 - Brother International Innov-is NQ1400E | Operation Manual - Page 16
purchased separately. For more optional accessories and their part codes, refer to the Quick Reference Guide. 1. 2. 3. Embroidery frame set (large) 18 cm (H) × 13 cm (W) To obtain optional accessories or parts, contact your authorized Brother dealer. • All specifications are correct at the time - Brother International Innov-is NQ1400E | Operation Manual - Page 17
If the cord or plug is damaged, take the machine to your authorized Brother dealer for repairs before continuing use. • Unplug the power cord if the machine or the plug must be removed from the electrical outlet. • When servicing the machine or when removing covers, the machine must be unplugged. • - Brother International Innov-is NQ1400E | Operation Manual - Page 18
Turning the Machine On/Off Turning on the machine Make sure that the machine is turned off (the main a power switch is set to " "), and then plug the power cord into the power supply jack on the right side of the machine. Insert the plug of the power cord into a household b electrical outlet. - Brother International Innov-is NQ1400E | Operation Manual - Page 19
The screen below appears after the embroidery carriage moves to its initial position. a b B c e f h d g GETTING READY 1 Embroidery patterns 2 Brother "Exclusives" 3 Floral alphabet patterns 4 Character patterns 5 Frame patterns 6 Press this key to position the embroidery unit for storage - Brother International Innov-is NQ1400E | Operation Manual - Page 20
you changed necessary settings. ■ Embroidery settings Page 1 Page 2 Page 3 3 4 15 6 7 8 2 9 1 Select the embroidery frame to be used and displayed as a guide. For details, refer to "Changing the "Embroidery Frame Display"" in the "Embroidering" section. 2 When set to "ON", the embroidery - Brother International Innov-is NQ1400E | Operation Manual - Page 21
B-12) H Display the service count which is a reminder to take your machine in for regular servicing. (Contact your authorized Brother dealer for details.) I in your machine. Check with your local authorized Brother dealer or at " http://support.brother.com/ " for available updates. For details, - Brother International Innov-is NQ1400E | Operation Manual - Page 22
LCD Operation ■ Choosing the display language Press . a Display page 5. b Use and to choose the display language. c Adjust the "Input Sensitivity" by pressing / . d • The higher the setting, the more sensitive the keys will be. The default setting is "3". Note • We recommend selecting the highest - Brother International Innov-is NQ1400E | Operation Manual - Page 23
Saving a settings screen image to USB flash drive An image of the settings screen can be saved as a BMP file. Insert the USB flash drive into the USB port on the a right side of the machine. LCD Operation Press the item to be displayed. d 1 23 4 1 USB port 2 USB flash drive Press . b → The - Brother International Innov-is NQ1400E | Operation Manual - Page 24
Winding/Installing the Bobbin Winding/Installing the Bobbin CAUTION • Only use the Bobbin (part code: SA156, SFB: XA5539-151) designed specifically for this machine. Use of any other bobbin may result in injuries or damage to the machine. • The included bobbin was designed specifically for this - Brother International Innov-is NQ1400E | Operation Manual - Page 25
Place the spool of thread for the bobbin onto the spool e pin. Slide the spool onto the pin so that the spool is horizontal and the thread unwinds to the front at the bottom. • If the spool is not positioned so that the thread unwinds correctly, the thread may become tangled around the spool pin. - Brother International Innov-is NQ1400E | Operation Manual - Page 26
with your left hand, and then pass the thread behind the thread guide cover and to the front. While holding the thread with your left hand Press the "Start/Stop" button once to start winding the m bobbin. 3 1 Thread guide 2 Pretension disk 3 Pull it in as far as possible Note • Make sure that the - Brother International Innov-is NQ1400E | Operation Manual - Page 27
wound with thread. You can begin embroidering immediately without pulling up the bobbin thread by simply inserting the bobbin in the bobbin case and guiding the thread through the slit in the needle plate cover. 1 Bobbin cover 2 Latch Remove the bobbin cover. e Hold the bobbin with your right hand - Brother International Innov-is NQ1400E | Operation Manual - Page 28
-left corner of the bobbin cover, and then lightly press down on the right side. 2 While lightly holding down the bobbin with your right h hand (1), guide the thread through the slit in the needle plate cover (2) and lightly pull it with your left hand (3). • The thread enters the tension spring of - Brother International Innov-is NQ1400E | Operation Manual - Page 29
. For more information regarding the choice of spool caps for your thread choice, see page B-15. • When threading the upper thread, carefully follow the instructions. If the upper threading is not correct, the thread may become tangled or the needle may bend or break. • Never use a thread weight of - Brother International Innov-is NQ1400E | Operation Manual - Page 30
left. While holding the thread lightly with your right hand, g pull the thread with your left hand, and then pass the thread behind the thread guide cover and to the front. 1 Note • If the presser foot has been lowered and the shutter is closed, the machine cannot be threaded. Be sure - Brother International Innov-is NQ1400E | Operation Manual - Page 31
needle threader cannot be used, refer to "Threading the needle manually (without using the needle threader)" on page B-22. Pull the end of foot. c GETTING READY 21 2 1 1 Notch of the threader thread guide 2 Threader thread guide disk Cut the thread with the cutter on the left side of the b - Brother International Innov-is NQ1400E | Operation Manual - Page 32
inches) Press g to unlock all keys and buttons. Threading the needle manually (without using the needle threader) Some needles cannot be threaded with the the needle as described below. Thread the machine to the needle bar thread guide. a • For details, refer to "Upper Threading" on page B-19. - Brother International Innov-is NQ1400E | Operation Manual - Page 33
Needle type marking 1 1 Flat surface Replacing the needle Use the screwdriver and a needle that has been determined to be straight according to the instructions in "Checking the needle". Press (Needle position button) once or twice to a raise the needle. Place fabric or paper under the presser foot - Brother International Innov-is NQ1400E | Operation Manual - Page 34
Replacing the Needle Hold the needle with your left hand, and then use a d screwdriver to turn the needle clamp screw toward you (counterclockwise) to remove the needle. • The needle clamp screw can also be loosened or tightened with the L-shaped (or disc-shaped) screwdriver. 2 1 1 Screwdriver 2 - Brother International Innov-is NQ1400E | Operation Manual - Page 35
. * Attach the embroidery unit. For the bobbin thread, wind embroidery bobbin thread and set it in place. Attach a stabilizer material to the fabric, and hoop it in the embroidery frame. Attach the embroidery frame to the embroidery unit. Turn the main power to on, and select an embroidery pattern - Brother International Innov-is NQ1400E | Operation Manual - Page 36
Attaching the Embroidery Unit Attaching the Embroidery Unit CAUTION • Do not move the machine with the embroidery unit in place. The embroidery unit may be dropped and cause injury. • Keep your hands and other objects away from the embroidery carriage and frame. Otherwise injury may result. Slide - Brother International Innov-is NQ1400E | Operation Manual - Page 37
refer to "Viewing the LCD" on page B-9. ■ Removing the embroidery unit Make sure that the machine is completely stopped and follow the instructions below. Remove the embroidery frame. a • For details on removing the embroidery frame, refer to "Attaching the Embroidery Frame" on page B-33. 1 Release - Brother International Innov-is NQ1400E | Operation Manual - Page 38
Finishes Embroidery Attractive Finishes There are many factors that go into beautiful embroidery. Using the appropriate stabilizer (see page B-29) and hooping the fabric in the frame (see page B-30) are two important factors mentioned earlier. Another important point is the appropriateness of - Brother International Innov-is NQ1400E | Operation Manual - Page 39
projects, always use stabilizer material for embroidery. Follow the package instructions for the stabilizer being used. When using fabrics that cannot be and stabilizer in the embroidery frame, or check with your authorized Brother dealer for the correct stabilizer to use. 1 Fusible side of - Brother International Innov-is NQ1400E | Operation Manual - Page 40
Preparing the Fabric Hooping the fabric in the embroidery frame ■ Types of embroidery to check the design size of the embroidery field of the optional frame. Check with your authorized Brother dealer for frame compatibility. Select a frame that is slightly larger than the pattern size. Included frame - Brother International Innov-is NQ1400E | Operation Manual - Page 41
Lay the fabric right side up on top of the outer frame. b Re-insert the inner frame making sure to align the inner frame's with the outer frame's . Preparing the Fabric Memo • After stretching the fabric, lightly tapping it should produce a drum-like sound. • Stretch the fabric from all four - Brother International Innov-is NQ1400E | Operation Manual - Page 42
the embroidery sheet on the inner frame. Align b the guide lines on the embroidery sheet with the mark you made on the fabric. Embroidering small fabrics or fabric edges Use an embroidery stabilizer to provide extra support. After embroidering, remove the stabilizer carefully. Attach the stabilizer - Brother International Innov-is NQ1400E | Operation Manual - Page 43
level with the e frame to secure the embroidery frame in the embroidery frame holder. B 1 Frame-securing lever 2 Carriage Align the embroidery frame guide with the right edge c of the embroidery frame holder. CAUTION • If the frame-securing lever is not lowered, the following message appears. You - Brother International Innov-is NQ1400E | Operation Manual - Page 44
, and then . c Embroidery pattern types There are many character and decorative embroidery patterns stored in the machine's memory (see the "Embroidery Design Guide" for a full summary of patterns in the machine's memory). You can also use patterns from USB flash drive (sold separately). • For - Brother International Innov-is NQ1400E | Operation Manual - Page 45
Confirming the Pattern Position Confirming the Pattern Position The pattern is normally positioned in the center of the embroidery frame. If the pattern needs to be repositioned for better placement on the garment, you can check the layout before starting embroidery. Checking the pattern position - Brother International Innov-is NQ1400E | Operation Manual - Page 46
Embroidering Embroidering After the preparations are done, you can try embroidering. This section describes the steps for embroidering and appliquéing. Embroidering a pattern Embroidery patterns are embroidered with a change of thread after each color. Prepare embroidery thread of the color shown - Brother International Innov-is NQ1400E | Operation Manual - Page 47
Repeat the same steps for embroidering the remaining h colors. Thread color name Embroidering → When the last color is sewn, the message informing that the embroidering is finished will appear on the display. Press initial screen. , and the display will return to the Memo • For the automatic - Brother International Innov-is NQ1400E | Operation Manual - Page 48
Embroidering B-38 - Brother International Innov-is NQ1400E | Operation Manual - Page 49
Embroidering This section provides instruction to embroider designs with this machine. Page number starts with "E" in this section. The screen display and machine illustration may vary slightly, depending on the countries or regions. Chapter1 EMBROIDERY E-2 - Brother International Innov-is NQ1400E | Operation Manual - Page 50
EMBROIDERY Selecting Patterns Prepare the machine for embroidery according to the instructions on "STARTING TO EMBROIDER" of "Basic operations". ab c Press . c e f d gh 1 Embroidery patterns 2 Brother "Exclusives" 3 Floral alphabet patterns 4 Character patterns 5 Frame patterns 6 Press this - Brother International Innov-is NQ1400E | Operation Manual - Page 51
d Press "e". to display "e" on the screen, and then enter Selecting Patterns f Press , and then enter "F". • After selecting a character if you would like to change the character size press . The size changes each time you press the key, from large to medium to small. • If you make a mistake, - Brother International Innov-is NQ1400E | Operation Manual - Page 52
Selecting Patterns ■ Entering a line feed Using the line feed key, multiple lines of text can be entered. Each line becomes a group, each of which can be edited one at a time. … Example: Entering "High" in the second line of the following screen Selecting frame patterns a Press . b Press the key - Brother International Innov-is NQ1400E | Operation Manual - Page 53
Editing Patterns Editing Patterns When a pattern is selected in the pattern selection screen and is pressed, the pattern editing screen appears. To finish editing, press to continue to the embroidery settings screen. ■ Pattern editing screen 12 3 4 F 5 E 6 D 7 8 CB A 0 9 Memo • If a - Brother International Innov-is NQ1400E | Operation Manual - Page 54
Editing Patterns Moving the pattern a Press . b Use to move the pattern in the direction shown by the arrow. • Press to center the pattern. 1 1 Distance from the center Memo • The pattern can also be moved by dragging it. • Patterns cannot be moved in screens where does not appear. c Press - Brother International Innov-is NQ1400E | Operation Manual - Page 55
Editing Patterns Changing the thread color You can change the thread color by choosing a new color from the thread colors in the machine. a In the pattern editing screen, press . → The thread color palette screen displays. b Press or to select the color you want to change. Changing the density ( - Brother International Innov-is NQ1400E | Operation Manual - Page 56
Editing Patterns Displaying patterns in the screen magnification a Press . → Magnification select screen is displayed. b Press desired magnification to enlarge the pattern. • Press to return to the normal size. c Press to return to the original screen. After editing a Press . • To combine the - Brother International Innov-is NQ1400E | Operation Manual - Page 57
Editing Character Patterns Editing Character Patterns Font editing screen appears by pressing editing screen. on the pattern ■ Font editing screen 123 4 5 Changing the colors of alphabet character patterns Combined alphabet character patterns can be sewn with each letter in a different color - Brother International Innov-is NQ1400E | Operation Manual - Page 58
Note • It is not recommended to edit data and transfer to other or older version machines. Same features do not apply in other machines, so problems may occur. • Character spacing can be reduced only when characters are arranged normally on a straight line. → The text appears in the screen with the - Brother International Innov-is NQ1400E | Operation Manual - Page 59
c Press to return to the font editing screen. Editing Character Patterns ■ Changing the font a Press . b Press , and then select the character whose font is to be changed. • To select the character, press or . → The selected character is surrounded with a red box. Editing single characters Press - Brother International Innov-is NQ1400E | Operation Manual - Page 60
Editing Character Patterns Changing the configuration of character patterns a Press . b Press the key of the layout you want to embroider. • When selecting an arc, use and the degree of the arc. : Make the arc flatter. : Make the arc rounder. to change Memo • When selecting , and change to and . - Brother International Innov-is NQ1400E | Operation Manual - Page 61
Combining Patterns Editing combined patterns … Example: Combining alphabet characters with an embroidery pattern and editing g Press . Combining Patterns a Press to select an embroidery pattern. b Select the following pattern and then press . c Press . h Press to move the characters. • - Brother International Innov-is NQ1400E | Operation Manual - Page 62
Combining Patterns m When all editing is finished, press and then . → Embroidering screen appears. b Embroider characters. ■ Selecting combined embroidery patterns If multiple patterns have been combined, use to select the pattern to be edited. In addition, patterns can be selected by directly - Brother International Innov-is NQ1400E | Operation Manual - Page 63
Editing All Patterns Editing All Patterns When is pressed in the editing screen, the embroidery settings screen appears. After editing the pattern, press to continue to the embroidering screen. ■ Embroidery settings screen 1 Aligning the pattern and the needle … Example: Aligning the lower left - Brother International Innov-is NQ1400E | Operation Manual - Page 64
Editing All Patterns e Use to align the needle and the mark on the fabric, and begin embroidering the pattern. Note • To cancel the starting point setting and return the starting point to the center of the pattern, press . • Use to select a different starting point for embroidering. d Press - Brother International Innov-is NQ1400E | Operation Manual - Page 65
i As in step a, select the character patterns for "DEF". j Press . k Press , and then press . → The needle is positioned in the lower-left corner of the pattern. The embroidery frame moves so that the needle is positioned correctly. l Use to align the needle with the end of the embroidering - Brother International Innov-is NQ1400E | Operation Manual - Page 66
the appliqué pattern, embroidering screen. and then continue to the b Attach stabilizer appliqué fabric. material to the wrong side of the Hoop the fabric in the embroidery frame, and then attach the embroidery frame to the embroidery unit. 1 Applique material (cotton, felt, etc - Brother International Innov-is NQ1400E | Operation Manual - Page 67
■ 2. Sewing the appliqué position on the base fabric a Attach stabilizer material to fabric for the appliqué base. the wrong side of the Hoop the fabric in the embroidery frame, and then attach the embroidery frame to the embroidery unit. b Thread the the presser machine with the - Brother International Innov-is NQ1400E | Operation Manual - Page 68
Embroidery Applications ■ 4. Embroidering the remainder of the pattern a Change the embroidery thread according to the thread color sewing order, and then finish embroidering the remainder of the pattern. b Embroider the base fabric. same pattern from step a onto the c Apply a thin - Brother International Innov-is NQ1400E | Operation Manual - Page 69
Embroidery Applications Using a frame pattern to make an appliqué (2) This is a second method to make appliqué using embroidery patterns. You do not have to change the fabric in the embroidery frame using this method. Embroider one pattern with a straight stitch and one pattern with a satin stitch - Brother International Innov-is NQ1400E | Operation Manual - Page 70
designs larger than the embroidery hoop are divided into multiple sections, which combine to create a single pattern after each section is sewn. For details on creating split embroidery patterns and for more detailed sewing instructions, refer to the Instruction manual included with PE-DESIGN Ver - Brother International Innov-is NQ1400E | Operation Manual - Page 71
Adjustments During the Embroidery Process Adjustments During the Embroidery Process Note • Be careful not to bump the embroidery unit carriage or the presser foot when removing or attaching the embroidery frame. Otherwise, the pattern will not embroider correctly. c Insert a wound bobbin into - Brother International Innov-is NQ1400E | Operation Manual - Page 72
stopped Note • Do not remove the embroidery unit or the memory will no longer remember your design. a Turn the main power to ON. b Follow the instructions shown on remove the embroidery frame. the screen and → The following message will appear. a Press . E-24 - Brother International Innov-is NQ1400E | Operation Manual - Page 73
c Attach the embroidery frame and press . Adjustments During the Embroidery Process → The previous embroidery screen displayed before the machine was turned off appears. Memo • If you want to start a new embroidery pattern, press so the pattern selection screen appears. d Continue - Brother International Innov-is NQ1400E | Operation Manual - Page 74
Making Embroidery Adjustments Making Embroidery Adjustments Adjusting thread tension When embroidering, the thread tension should be set so that the upper thread can slightly be seen on the wrong side of the fabric. ■ Correct thread tension The pattern can be seen from the wrong side of the fabric - Brother International Innov-is NQ1400E | Operation Manual - Page 75
c Press . Note • With "Embroidery Tension" on the setting screen, the tension of the upper thread can be adjusted for embroidering. The selected setting will be applied to all patterns. When embroidering, if the overall tension of the upper thread is too tight or too loose, adjust it from the - Brother International Innov-is NQ1400E | Operation Manual - Page 76
Making Embroidery Adjustments Using the automatic thread cutting function (END COLOR TRIM) The automatic thread cutting function will cut the thread at the end of sewing each color. This function is initially turned on. To turn this function off, press key and then . This function can be turned on - Brother International Innov-is NQ1400E | Operation Manual - Page 77
Making Embroidery Adjustments Selecting/displaying patterns according to the embroidery frame size If "Embroidery Frame Identification View" in the settings screen is set to "ON", the pattern can be edited in the screen as if that embroidery frame is attached. * Sold separately with some models. 1 - Brother International Innov-is NQ1400E | Operation Manual - Page 78
Making Embroidery Adjustments Changing the background colors of the embroidery patterns In the settings screen, the background colors can be changed for the embroidery pattern and pattern thumbnails. Depending on the pattern color, select the desired background color from the 66 settings available - Brother International Innov-is NQ1400E | Operation Manual - Page 79
5 to 6 seconds to recognize the drive. (Time will differ depending on the USB flash drive). • For additional information, refer to the instruction manual included with the USB flash drive that you have purchased. Memo • To create file folders, use a computer. ■ Precautions on using the computer - Brother International Innov-is NQ1400E | Operation Manual - Page 80
Using the Memory Function Saving embroidery patterns in the machine's memory You can save embroidery patterns that you have customized and will use often; for example, your name, patterns that have been rotated or had the size changed, patterns that have had the sewing position changed, etc. A total - Brother International Innov-is NQ1400E | Operation Manual - Page 81
Using the Memory Function Memo • If there is enough memory available after deleting the pattern, the pattern you want to save will be saved automatically. If there is not enough memory available after deleting the pattern, repeat the steps above to delete another pattern from the machine's memory. - Brother International Innov-is NQ1400E | Operation Manual - Page 82
Using the Memory Function Memo • The selected pattern can be saved to USB flash drive directly by pressing . c Select the pattern. If the stitch pattern to be retrieved is in a folder, press the key for that folder. • Press / to move to the previous/next page. • Press to return to the original - Brother International Innov-is NQ1400E | Operation Manual - Page 83
f If necessary, edit the pattern, and press . → Embroidery settings screen is displayed. g Press . → The embroidery screen is displayed. Using the Memory Function E EMBROIDERY Embroidering E-35 - Brother International Innov-is NQ1400E | Operation Manual - Page 84
Using the Memory Function E-36 - Brother International Innov-is NQ1400E | Operation Manual - Page 85
This section provides important information for operating this machine. Please read this section to find troubleshooting tips and pointers as well as how to keep your machine in the best working order. Page number starts with "A" in this section. Chapter1 MAINTENANCE AND TROUBLESHOOTING......A-2 - Brother International Innov-is NQ1400E | Operation Manual - Page 86
operation, making periodic oiling unnecessary. If problems occur, such as difficulty turning the handwheel or an unusual noise, immediately stop using the machine, and contact your authorized Brother dealer or the nearest Brother authorized service center. Precautions on storing the machine Do - Brother International Innov-is NQ1400E | Operation Manual - Page 87
a 1 Needle plate cover Remove the bobbin case. g Grasp the bobbin case, and then pull it out. • Align the S and z marks. MAINTENANCE AND TROUBLESHOOTING 1 1 Bobbin case 1 S mark 2 z mark 3 Bobbin case • Make sure that the indicated points are aligned before installing the bobbin case. Appendix - Brother International Innov-is NQ1400E | Operation Manual - Page 88
the upper thread may become tangled, the needle may break or sewing performance may suffer. For a new bobbin case, contact your nearest Brother authorized service center. • Be sure that the bobbin case is correctly installed, otherwise the needle may break. About the maintenance message Touch panel - Brother International Innov-is NQ1400E | Operation Manual - Page 89
foot lever. f Raise the presser foot lever to check that the g embroidery foot is securely attached. Press h to unlock all keys and buttons. A MAINTENANCE AND TROUBLESHOOTING Raise the presser foot lever. c Appendix A-5 - Brother International Innov-is NQ1400E | Operation Manual - Page 90
Brother Solutions Center offers the latest FAQs and troubleshooting tips. Visit us at " http://support.brother.com/ ". If the problem persists, contact your Brother dealer or the nearest Brother authorized service thread is not properly inserted into the guides. After removing the thread wound below - Brother International Innov-is NQ1400E | Operation Manual - Page 91
Troubleshooting Symptom Probable Cause Remedy The sewing light The sewing light is damaged. does not come on. "Light" is set to "OFF" in the settings screen. Contact your authorized dealer or the nearest Brother authorized service center. Change the setting to "ON". Embroidery unit does not - Brother International Innov-is NQ1400E | Operation Manual - Page 92
Troubleshooting Symptom Probable Cause Remedy Reference Upper thread breaks. Machine is not the hole in the embroidery foot. Replace the embroidery foot, or consult your A-5 authorized Brother dealer. There are scratches on the bobbin case. Replace the bobbin case, or consult your - Brother International Innov-is NQ1400E | Operation Manual - Page 93
Replace the bobbin case, or consult your A-2 the bobbin case. authorized Brother dealer. The needle clamp screw is loose. Firmly tighten the needle clamp B-23 A-2 ■ After embroidering A MAINTENANCE AND TROUBLESHOOTING Symptom Probable Cause Remedy Reference Thread tension is incorrect. - Brother International Innov-is NQ1400E | Operation Manual - Page 94
Troubleshooting Symptom Probable Cause Remedy Reference Embroidery pattern Fabric outside appear, the machine may be malfunctioning. Please contact your authorized Brother dealer or the nearest Brother authorized service center. 2 Cannot change the configuration of the characters. This - Brother International Innov-is NQ1400E | Operation Manual - Page 95
Troubleshooting Error messages Cause/solution 9 Not enough available memory to save the pattern. Delete another is being used, the machine may be malfunctioning. Contact your authorized dealer or the nearest Brother authorized service center. MAINTENANCE AND TROUBLESHOOTING A Appendix A-11 - Brother International Innov-is NQ1400E | Operation Manual - Page 96
Specifications Specifications ■ Embroidery machine Item Dimensions of machine Weight of machine Embroidering speed Needles Specification Approx. 480 mm (W) × 300 mm (H) × 249.4 mm (D) (Approx. 18-7/8 inches (W) × 11-7/8 inches (H) × 9-7/8 inches (D)) Approx. 8.6 kg (Approx. 18.9 lb) 70 to 850 - Brother International Innov-is NQ1400E | Operation Manual - Page 97
on our website at " http://support.brother.com/ ", please download the file(s) following the instructions on the website and steps listed following screen appears, upgrading is d completed. A MAINTENANCE AND TROUBLESHOOTING → The following screen appears. Remove the USB flash drive after - Brother International Innov-is NQ1400E | Operation Manual - Page 98
installation B-17 Bobbin winder B-2 Bobbin winding B-14 , Bobbin winding thread guide B-2 B-14 "bPocket" folder E-33 Buzzer A-4 C Care A-2 A-2 M Machine surface cleaning A-2 Main power switch B-2 Maintenance A-2 Manual needle threading B-22 Mirror image key E-7 Multi color key E-9 N - Brother International Innov-is NQ1400E | Operation Manual - Page 99
B-4 Size key E-6 Solving operation problems A-6 Spool net B-15 Stabilizer B- guide plate B-2 Thread palette key E-7 Thread tension E-26 Threading B-19 Threading needle B-21 Threading needle manually B-22 Top cover B-2 Touch panel B-4 , Touch pen B-4 B-12 Trial key B-35 Troubleshooting - Brother International Innov-is NQ1400E | Operation Manual - Page 100
Please visit us at http://support.brother.com/ where you can get product support and answers to frequently asked questions (FAQs). English 888-G80/G82 Printed in Vietnam XG0252-0011
-
 1
1 -
 2
2 -
 3
3 -
 4
4 -
 5
5 -
 6
6 -
 7
7 -
8
-
9
-
10
-
11
-
12
-
13
-
14
-
15
-
16
-
17
-
18
-
19
-
20
-
21
-
22
-
23
-
24
-
25
-
26
-
27
-
28
-
29
-
30
-
31
-
32
-
33
-
34
-
35
-
36
-
37
-
38
-
39
-
40
-
41
-
42
-
43
-
44
-
45
-
46
-
47
-
48
-
49
-
50
-
51
-
52
-
53
-
54
-
55
-
56
-
57
-
58
-
59
-
60
-
61
-
62
-
63
-
64
-
65
-
66
-
67
-
68
-
69
-
70
-
71
-
72
-
73
-
74
-
75
-
76
-
77
-
78
-
79
-
80
-
81
-
82
-
83
-
84
-
85
-
86
-
87
-
88
-
89
-
90
-
91
-
92
-
93
-
94
-
95
-
96
-
97
-
98
-
99
-
100
 |
 |
Operation Manual
Embroidery Machine
Product Code: 888-G80/G82
Be sure to read this document before using the machine.
We recommend that you keep this document nearby for future reference.