Brother International MFC 9120CN Quick Setup Guide - English
Brother International MFC 9120CN - Color LED - All-in-One Manual
 |
UPC - 012502622390
View all Brother International MFC 9120CN manuals
Add to My Manuals
Save this manual to your list of manuals |
Brother International MFC 9120CN manual content summary:
- Brother International MFC 9120CN | Quick Setup Guide - English - Page 1
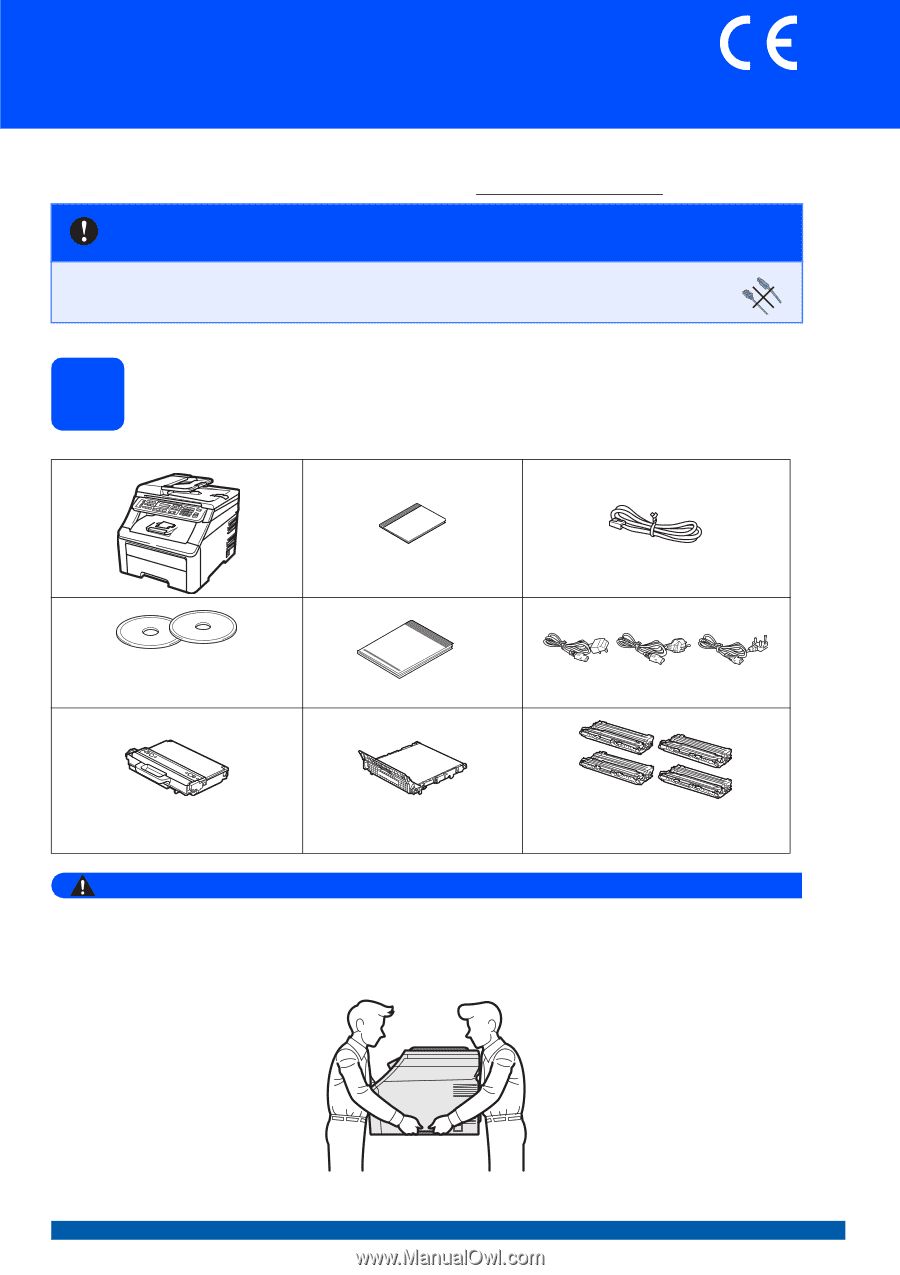
and check the components CD-ROM (Windows®) (Macintosh) User's Guide Telephone Line Cord Quick Setup Guide AC Power Cord Waste Toner Box (pre-installed) Belt Unit (pre-installed) Drum Unit and Stater Toner Cartridge Assemblies (Black, Cyan, Magenta and Yellow) WARNING • Plastic bags are used - Brother International MFC 9120CN | Quick Setup Guide - English - Page 2
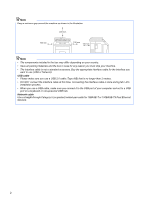
Note Keep a minimum gap around the machine as shown in the illustration. 400 mm 100 mm 100 mm 120 mm Note • The components included in the box may differ depending on your country. • Save all packing materials and the box in case for any reason you must ship your machine. • The interface cable is - Brother International MFC 9120CN | Quick Setup Guide - English - Page 3
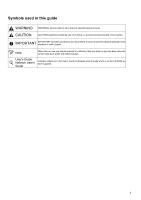
Symbols used in this guide WARNING CAUTION WARNINGs tell you what to do to prevent tips about how the current operation works with other features. User's Guide Network User's Guide Indicates reference to the User's Guide or Network User's Guide which is on the CD-ROM we have supplied. 3 - Brother International MFC 9120CN | Quick Setup Guide - English - Page 4
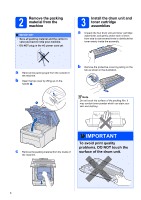
the drum unit and toner cartridge assemblies a Unpack the four drum unit and toner cartridge toner powder which can stain your skin and clothing. c Remove the packing material from the inside of the machine. IMPORTANT To avoid print quality problems, DO NOT touch the surface of the drum unit - Brother International MFC 9120CN | Quick Setup Guide - English - Page 5
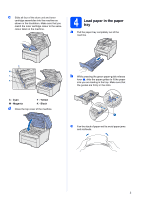
c Slide all four of the drum unit and toner cartridge assemblies into the machine as shown in the illustration. Make sure that you match the toner cartridge colour to the same colour label on the machine. 4 Load paper in the paper tray a Pull the paper tray completely out of the machine. C M Y K - Brother International MFC 9120CN | Quick Setup Guide - English - Page 6
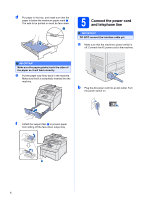
switch is off. Connect the AC power cord to the machine. IMPORTANT Make sure the paper guides touch the sides of the paper so it will feed correctly. e Put the paper tray firmly Turn the power switch on. f Unfold the support flap a to prevent paper from sliding off the face-down output tray. 1 6 - Brother International MFC 9120CN | Quick Setup Guide - English - Page 7
on the machine marked LINE and the other end to a telephone wall socket. Note If you are sharing one telephone line with an external telephone, connect it as shown below. Before you connect the external telephone, remove details, see Connecting an external TAD in Chapter 7 of the User's Guide. 7 - Brother International MFC 9120CN | Quick Setup Guide - English - Page 8
phone will ring for you to pick up the call. No Manual You control the phone line and must answer every call yourself. Press Stop/Exit. For more details, see Receiving a fax in Chapter 6 of the User's Guide. 7 Set the LCD contrast (if needed) If you are having difficulty reading the LCD, - Brother International MFC 9120CN | Quick Setup Guide - English - Page 9
two digits of the year on the to the incorrect character, press Clear/Back. Press key 2 3 4 5 6 7 8 9 One time A D G J M P T W Two times B E H K N Q U D G J M 7 T 9 For more details, see Entering text in the User's Guide. e Press Stop/Exit. Note If you make a mistake and want to start again, - Brother International MFC 9120CN | Quick Setup Guide - English - Page 10
10 Fax Transmission Report Your Brother machine is equipped with a Transmission Verification Report that 11 Printing reports in the User's Guide. 11 Set tone or pulse dialling mode Your machine comes set for Tone dialling service. If you have Pulse dialling service (rotary), you need to change the - Brother International MFC 9120CN | Quick Setup Guide - English - Page 11
PBX, ISDN or Normal. Press OK. Do one of the following: „ If you choose ISDN or Normal, go to The default setting is "!". When you press Tel/R, "!" will be displayed on the LCD. d Enter the Prefix number (up to 5 digits) (PBX). The machine's recall feature supports timed break recall only (TBR). TBR - Brother International MFC 9120CN | Quick Setup Guide - English - Page 12
13 Automatic Daylight Savings Time You can set the machine to change automatically for daylight savings time. It will reset itself forward one hour in the Spring and backward one hour in the Autumn. a Press Menu, 1, 4. General Setup 4.Auto Daylight b Press a or b to choose On (or Off). Press OK. c - Brother International MFC 9120CN | Quick Setup Guide - English - Page 13
page 18 For Wired Network Windows®, go to page 20 Macintosh, go to page 25 Note For Windows Server® 2003/ 2008, see the Network User's Guide on the CD-ROM. 13 - Brother International MFC 9120CN | Quick Setup Guide - English - Page 14
includes ScanSoft™ PaperPort™ 11SE. This software supports Windows® 2000 (SP4 or greater), XP Vista®. Update to the latest Windows® Service Pack before installing MFL-Pro Suite. b screen appears, choose your language. Note If the Brother screen does not appear automatically, go to My Computer - Brother International MFC 9120CN | Quick Setup Guide - English - Page 15
. Note If you want to install the PS driver (Brother's BR-Script Driver), choose Custom Install and then follow the on-screen instructions. When the Select Features screen appears, check PS Printer Driver, and then continue following the on-screen instructions. h If you do not want to monitor the - Brother International MFC 9120CN | Quick Setup Guide - English - Page 16
. Turn the power switch on. The installation will continue automatically. The installation screens appear one after another. IMPORTANT DO NOT cancel any of the is displayed, make your selection and follow the on-screen instructions. Once you have completed the registration process, close your web - Brother International MFC 9120CN | Quick Setup Guide - English - Page 17
Programs/Brother/ MFC-XXXX (where MFC-XXXX is your model name). b If this screen appears, choose the firmware update setting and click OK. Windows® Note Internet access is required for the firmware upgrade. Finish The installation is now complete. Note XML Paper Specification Printer Driver The - Brother International MFC 9120CN | Quick Setup Guide - English - Page 18
into your CD-ROM drive. b Double-click Start Here OSX to install. Note Please see the Software User's Guide on the CD-ROM if you want to install the PS driver. (Brother's BR-Script Driver) c Please wait, it will take a few seconds for the software to install. After the installation, click Restart - Brother International MFC 9120CN | Quick Setup Guide - English - Page 19
Presto! PageManager is installed OCR capability is added to Brother ControlCenter2. You can easily scan, share and organize photos and documents using Presto! PageManager. a Double-click Presto! PageManager and follow the on-screen instructions. The installation of MFL-Pro Suite is now complete - Brother International MFC 9120CN | Quick Setup Guide - English - Page 20
. • The supplied CD-ROM includes ScanSoft™ PaperPort™ 11SE. This software supports Windows® 2000 (SP4 or greater), XP (SP2 or greater), XP Professional x64 Edition and Windows Vista®. Update to the latest Windows® Service Pack before installing MFL-Pro Suite. IMPORTANT Disable all personal firewall - Brother International MFC 9120CN | Quick Setup Guide - English - Page 21
CD-ROM or double-click the Start.exe program from the root folder, and continue from step c to install MFL-Pro Suite. • For Windows Vista®, when the User Account Control screen appears, click Allow. Note If the Brother screen does not appear automatically, go to My Computer (Computer), double-click - Brother International MFC 9120CN | Quick Setup Guide - English - Page 22
. Note If you want to install the PS driver (Brother's BR-Script Driver), choose Custom Install and then follow the on-screen instructions. When the Select Features screen appears, check PS Printer Driver, and then continue following the on-screen instructions. h For Windows® XP SP2 or greater/XP - Brother International MFC 9120CN | Quick Setup Guide - English - Page 23
instructions. Once you have completed the registration process, close your web browser to return to this window. Then click Next. Note If an error message appears during the software installation, run the Installation Diagnostics located in Start/All Programs/Brother/ MFC-XXXX LAN (where MFC - Brother International MFC 9120CN | Quick Setup Guide - English - Page 24
Brother customer service. Finish The installation is now complete. Note XML Paper Specification Printer Driver The XML Paper Specification Printer Driver is the most suitable driver when printing from the applications that use the XML Paper Specification documents. Please download the latest driver - Brother International MFC 9120CN | Quick Setup Guide - English - Page 25
free port on your hub. b Double-click Start Here OSX to install. Note Please see the Network User's Guide on the CD-ROM if you want to install the PS driver. (Brother's BR-Script Driver) c Please wait, it will take a few seconds for the software to install. After the installation, click Restart to - Brother International MFC 9120CN | Quick Setup Guide - English - Page 26
Brother ControlCenter2. You can easily scan, share and organize photos and documents using Presto! PageManager. a Double-click Presto! PageManager and follow the on-screen instructions press and choose a scan option. (For more information, see Network Scanning in the Software User's Guide on the CD- - Brother International MFC 9120CN | Quick Setup Guide - English - Page 27
brother.com/. Note If you require more advanced printer management, use the latest Brother BRAdmin Professional utility version that is available as a download from http://solutions.brother the on-screen instructions. b Double-click the unconfigured device. Note The default password for the machine - Brother International MFC 9120CN | Quick Setup Guide - English - Page 28
is installed on your computer. • The default password for the machine is 'access'. You can use BRAdmin Light to change this password. d Double-click the unconfigured device. a Double-click Macintosh HD on your desktop. b Choose Library, Printers, Brother and then Utilities. e Choose STATIC for - Brother International MFC 9120CN | Quick Setup Guide - English - Page 29
Web Based Management (web browser) The Brother print server is equipped with a web server that allows you to monitor its status or change some of its configuration settings, using HTTP (Hyper Text Transfer Protocol). Note • The User Name is 'admin' and the default password is 'access'. You can use - Brother International MFC 9120CN | Quick Setup Guide - English - Page 30
us at http://solutions.brother.com/ or contact your local Brother reseller. Toner cartridges TN-240C/TN-240M/TN-240Y/TN-240BK Drum units DR-240CL 1 Belt Unit (BU-200CL) Waste Toner Box (WT-200CL) 1 Contains a set of three colour drums and one black drum. All four drums are replaced at the same - Brother International MFC 9120CN | Quick Setup Guide - English - Page 31
Macintosh, Safari and TrueType are trademarks of Apple Inc., registered in the United States and other countries. Nuance, the Nuance logo, PaperPort and ScanSoft are The contents of this manual and the specifications of this product are subject to change without notice. Brother reserves the right to
-
 1
1 -
 2
2 -
 3
3 -
 4
4 -
 5
5 -
 6
6 -
 7
7 -
8
-
9
-
10
-
11
-
12
-
13
-
14
-
15
-
16
-
17
-
18
-
19
-
20
-
21
-
22
-
23
-
24
-
25
-
26
-
27
-
28
-
29
-
30
-
31
 |
 |
1
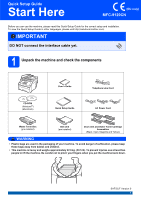
Start Here
MFC-9120CN
Quick Setup Guide
SAF/GLF Version 0
(EU only)
Before you can use the machine, please read this Quick Setup Guide for the correct setup and installation.
To view the Quick Setup Guide in other languages, please visit http://solutions.brother.com/
.
1
Unpack the machine and check the components
WARNING
•
Plastic bags are used in the packaging of your machine. To avoid danger of suffocation, please keep
these bags away from babies and children.
•
This machine is heavy and weighs approximately 22.9 kg. (50.5 lb). To prevent injuries use at least two
people to lift the machine. Be careful not to pinch your fingers when you put the machine back down.
IMPORTANT
DO NOT connect the interface cable yet.
User’s Guide
Telephone Line Cord
CD-ROM
(Windows
®
)
(Macintosh)
Quick Setup Guide
AC Power Cord
Waste Toner Box
(pre-installed)
Belt Unit
(pre-installed)
Drum Unit and Stater Toner Cartridge
Assemblies
(Black, Cyan, Magenta and Yellow)