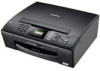
Brother International MFC-J220 Basic Users Manual - English - Page 38
Transmission Verification Report, On+Image
 |
UPC - 012502625049
View all Brother International MFC-J220 manuals
Add to My Manuals
Save this manual to your list of manuals |
Page 38 highlights
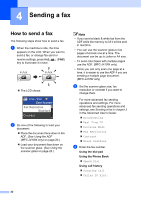
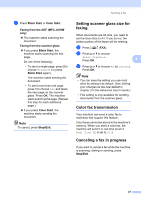
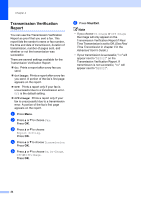
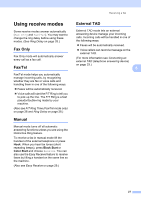
Chapter 4 Transmission Verification Report 4 You can use the Transmission Verification Report as proof that you sent a fax. This report lists the sender's name or fax number, the time and date of transmission, duration of transmission, number of pages sent, and whether or not the transmission was successful. There are several settings available for the Transmission Verification Report: On: Prints a report after every fax you send. On+Image: Prints a report after every fax you send. A portion of the fax's first page appears on the report. Off: Prints a report only if your fax is unsuccessful due to a transmission error. Off is the default setting. Off+Image: Prints a report only if your fax is unsuccessful due to a transmission error. A portion of the fax's first page appears on the report. a Press Menu. b Press a or b to choose Fax. Press OK. c Press a or b to choose Report Setting. Press OK. d Press a or b to choose Transmission. Press OK. e Press a or b to choose On, On+Image, Off or Off+Image. Press OK. f Press Stop/Exit. Note • If you choose On+Image or Off+Image the image will only appear on the Transmission Verification Report if Real Time Transmission is set to Off. (See Real Time Transmission in chapter 3 in the Advanced User's Guide.) • If your transmission is successful, "OK" will appear next to "RESULT" on the Transmission Verification Report. If transmission is not successful, "NG" will appear next to "RESULT". 24
-
 1
1 -
2
-
3
-
4
-
5
-
6
-
7
-
8
-
9
-
10
-
11
-
12
-
13
-
14
-
15
-
16
-
17
-
18
-
19
-
20
-
21
-
22
-
23
-
24
-
25
-
26
-
27
-
28
-
29
-
30
-
31
-
32
-
 33
33 -
 34
34 -
 35
35 -
 36
36 -
 37
37 -
 38
38 -
 39
39 -
 40
40 -
 41
41 -
 42
42 -
 43
43 -
44
-
45
-
46
-
47
-
48
-
49
-
50
-
51
-
52
-
53
-
54
-
55
-
56
-
57
-
58
-
59
-
60
-
61
-
62
-
63
-
64
-
65
-
66
-
67
-
68
-
69
-
70
-
71
-
72
-
73
-
74
-
75
-
76
-
77
-
78
-
79
-
80
-
81
-
82
-
83
-
84
-
85
-
86
-
87
-
88
-
89
-
90
-
91
-
92
-
93
-
94
-
95
-
96
-
97
-
98
-
99
-
100
-
101
-
102
-
103
-
104
-
105
-
106
-
107
-
108
-
109
-
110
-
111
-
112
-
113
-
114
-
115
-
116
-
117
-
118
-
119
-
120
-
121
-
122
 |
 |