Brother International NX-650 Users Manual - English - Page 128
Changing the pattern length
 |
View all Brother International NX-650 manuals
Add to My Manuals
Save this manual to your list of manuals |
Page 128 highlights
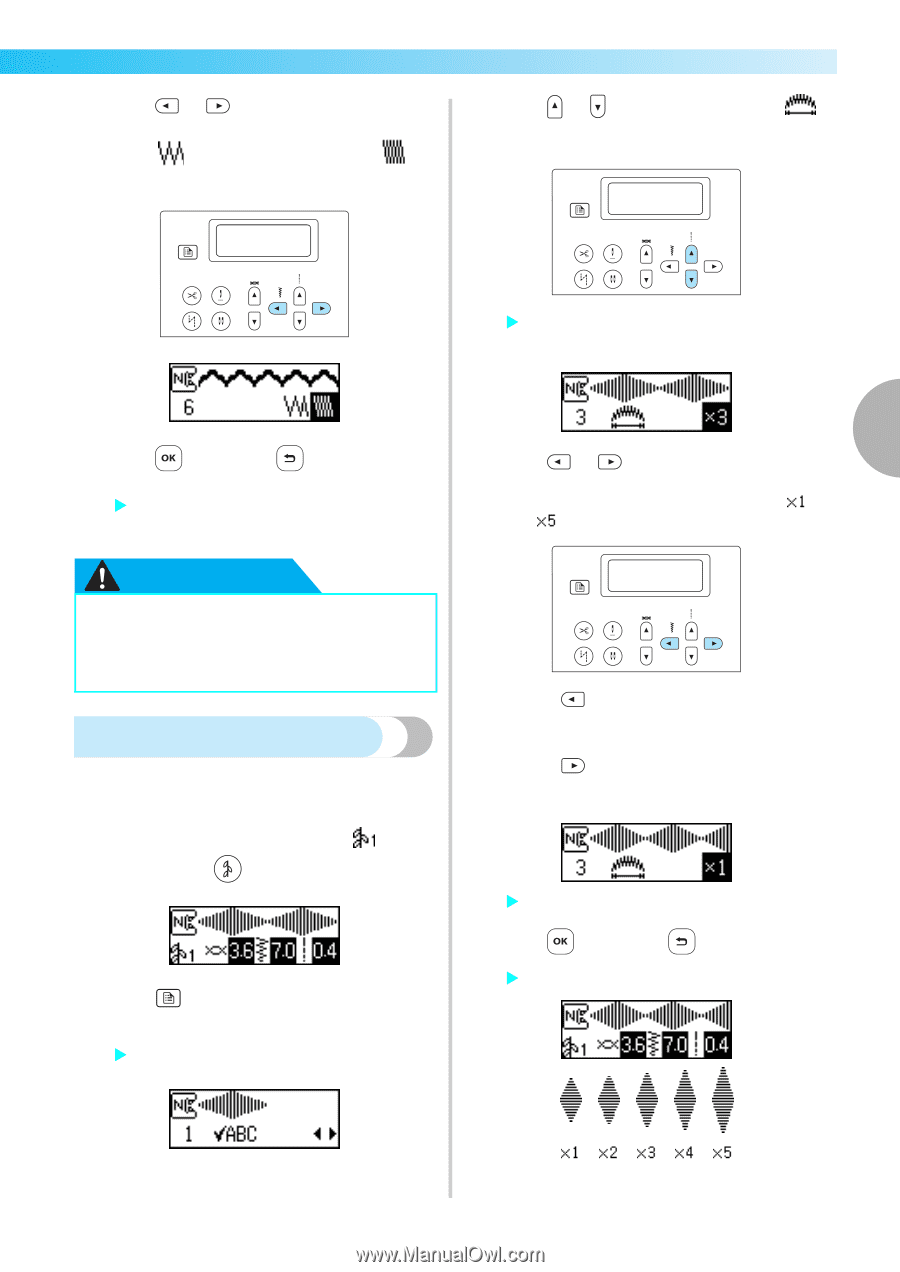
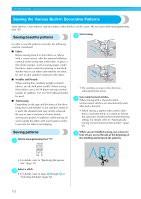
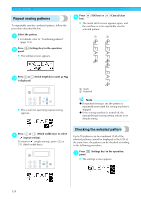
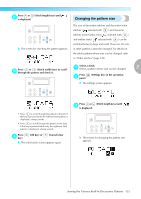
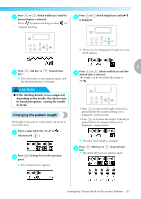
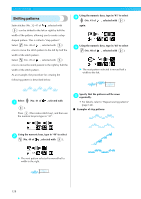
Press or (Stitch width keys) until the d desired density is selected. Select for sparse stitching or select for compact stitching. Press or (Stitch length keys) until c is displayed. X The screen for changing the length of a satin stitch appears. 3 Press e key). (OK key) or (Cancel/clear X The initial stitch screen appears again, and the stitching density is changed. Press or (Stitch width keys) until the d desired ratio is selected. The length can be set within the range of and . CAUTION ● If the stitching density is too compacted, depending on the needle, the stitches may be bunched together, causing the needle to break. Changing the pattern length The length of one part of a satin stitch can be set to one of five sizes. Select a satin stitch (No. 32-47 of , a selected with ). Press b panel. (Settings key) in the operation X The settings screen appears. • Press to reduce the length. If the key is pressed while the smallest setting (×1) is displayed, a beep sounds. • Press to increase the length. If the key is pressed while the largest setting (×5) is displayed, a beep sounds. X The satin stitch length is changed. Press (OK key) or (Cancel/clear e key). X The initial stitch screen appears again. Sewing the Various Built-In Decorative Patterns 127
-
 1
1 -
2
-
3
-
4
-
5
-
6
-
7
-
8
-
9
-
10
-
11
-
12
-
13
-
14
-
15
-
16
-
17
-
18
-
19
-
20
-
21
-
22
-
23
-
24
-
25
-
26
-
27
-
28
-
29
-
30
-
31
-
32
-
33
-
34
-
35
-
36
-
37
-
38
-
39
-
40
-
41
-
42
-
43
-
44
-
45
-
46
-
47
-
48
-
49
-
50
-
51
-
52
-
53
-
54
-
55
-
56
-
57
-
58
-
59
-
60
-
61
-
62
-
63
-
64
-
65
-
66
-
67
-
68
-
69
-
70
-
71
-
72
-
73
-
74
-
75
-
76
-
77
-
78
-
79
-
80
-
81
-
82
-
83
-
84
-
85
-
86
-
87
-
88
-
89
-
90
-
91
-
92
-
93
-
94
-
95
-
96
-
97
-
98
-
99
-
100
-
101
-
102
-
103
-
104
-
105
-
106
-
107
-
108
-
109
-
110
-
111
-
112
-
113
-
114
-
115
-
116
-
117
-
118
-
119
-
120
-
121
-
122
-
 123
123 -
 124
124 -
 125
125 -
 126
126 -
 127
127 -
 128
128 -
 129
129 -
 130
130 -
 131
131 -
 132
132 -
 133
133 -
134
-
135
-
136
-
137
-
138
-
139
-
140
-
141
-
142
-
143
-
144
-
145
-
146
-
147
-
148
-
149
-
150
-
151
-
152
-
153
-
154
-
155
-
156
-
157
-
158
-
159
-
160
-
161
-
162
 |
 |