Brother International PS-2250 User Manual - French - Page 70
Scallop Stitching, Ondas decorativas
 |
View all Brother International PS-2250 manuals
Add to My Manuals
Save this manual to your list of manuals |
Page 70 highlights
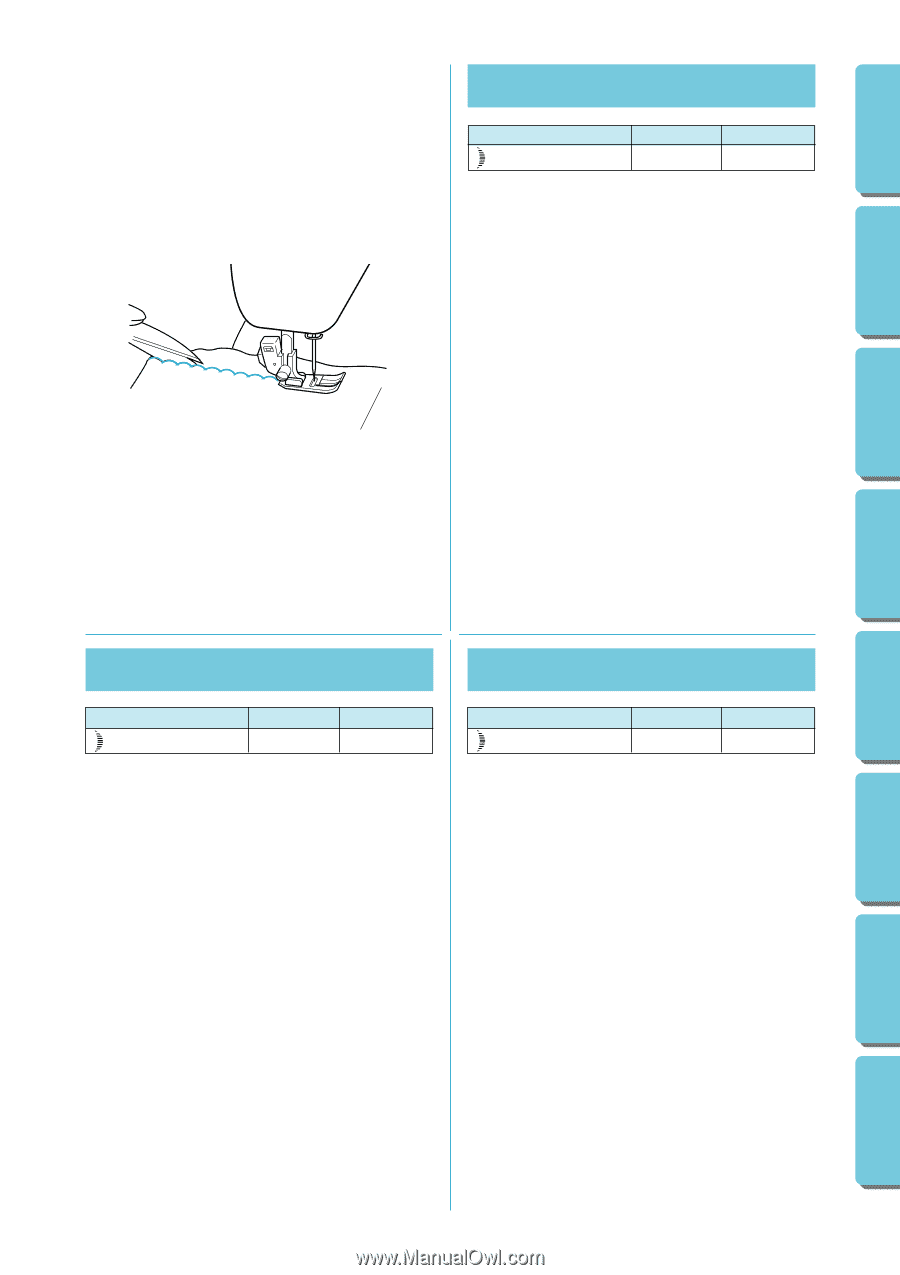
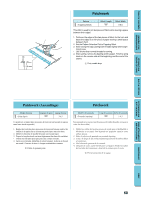
TABLE OF CONTENTS Scallop Stitching Pattern (Scallop Stitch) Stitch Length F-1.5 Stitch Width 3-6.5 This machine automatically produces a Scallop Stitch which may be used as a decorative edging. 1. Set the Pattern Selection Dial to Scallop Stitch. 2. Sew the Scallop Stitch along the edge of the material. 3. If desired, trim around the scallop with scissors to create a scalloped edge. Be careful not to cut the thread. * If you use the Satin Stitch Foot, it is easy to see the fabric and to produce more beautiful stitches. KNOWING YOUR SEWING MACHINE STRAIGHT AND ZIGZAG STITCHING BUILT-IN STITCHES BUTTONHOLE AND BUTTON SEWING USING ATTACHMENTS AND APPLICATIONS MAINTENANCE Feston Ondas decorativas Modèle de point (Feston) Longueur de point Largeur de point F-1,5 3-6,5 Cette machine crée automatiquement un point de feston qui peut servir à réaliser des lisières décoratives (à picots). 1. Mettre le sélecteur de modèle de point sur le point de feston. 2. Effectuer le point de feston le long de la lisière du tissu. 3. Si on le souhaite, découper autour des coquilles à l'aide d'une paire de ciseaux pour festonner le tissu. Faire attention cependant de ne pas couper le fil. * Avec le pied pour point de bourdon, on peut mieux voir le tissu et faire de plus beaux points. Modelo de puntada (Puntada festón) Largo de puntada Ancho de puntada F-1,5 3-6,5 Esta máquina puede realizar automáticamente unas ondas decorativas que pueden servir para decorar los bordes de la tela. 1. Coloque el selector de puntadas en la puntada festón. 2. Cosa las ondas decorativas a lo largo del borde del material. 3. Si lo desea, corte el borde con tijeras, siguiendo las ondas para crear un borde festonado. Sin embargo, tenga sumo cuidado en no cortar el hilo. * Si utiliza el prénsatela para puntada de realce, le resultará fácil ver el tejido y conseguir puntadas aun más bellas. 58 INDEX
-
 1
1 -
2
-
3
-
4
-
5
-
6
-
7
-
8
-
9
-
10
-
11
-
12
-
13
-
14
-
15
-
16
-
17
-
18
-
19
-
20
-
21
-
22
-
23
-
24
-
25
-
26
-
27
-
28
-
29
-
30
-
31
-
32
-
33
-
34
-
35
-
36
-
37
-
38
-
39
-
40
-
41
-
42
-
43
-
44
-
45
-
46
-
47
-
48
-
49
-
50
-
51
-
52
-
53
-
54
-
55
-
56
-
57
-
58
-
59
-
60
-
61
-
62
-
63
-
64
-
 65
65 -
 66
66 -
 67
67 -
 68
68 -
 69
69 -
 70
70 -
 71
71 -
 72
72 -
 73
73 -
 74
74 -
 75
75 -
76
-
77
-
78
-
79
-
80
-
81
-
82
-
83
-
84
-
85
-
86
-
87
-
88
-
89
-
90
-
91
-
92
-
93
-
94
-
95
-
96
-
97
-
98
-
99
-
100
-
101
-
102
-
103
-
104
-
105
-
106
-
107
-
108
-
109
-
110
-
111
 |
 |