Brother International Pacesetter PS-3700 Users Manual - Multi - Page 56
Brother International Pacesetter PS-3700 Manual
 |
View all Brother International Pacesetter PS-3700 manuals
Add to My Manuals
Save this manual to your list of manuals |
Page 56 highlights
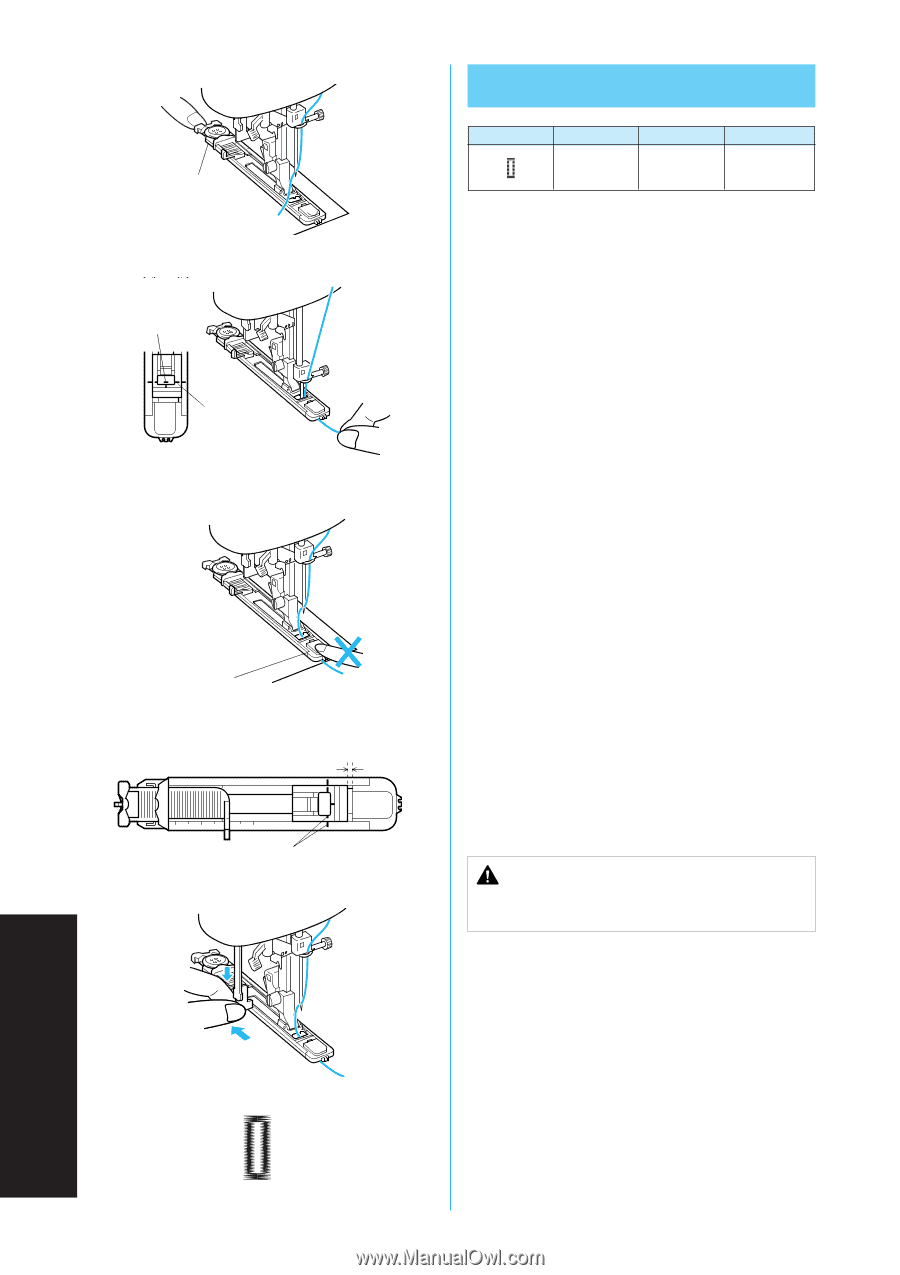
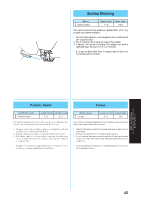
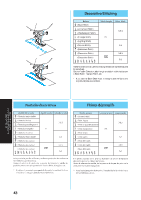
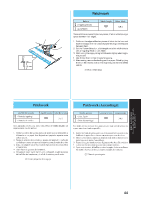
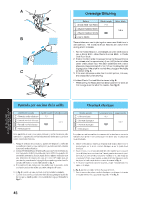
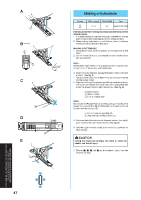
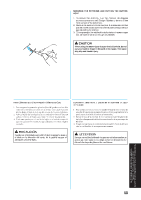
A Pattern Making a Buttonhole Stitch Length F-1.5 Stitch Width 4-7 Foot Buttonhole Foot 1 One-step buttonhole-making is a simple process that provides reliable results. 1. It is recommended to practice making a buttonhole on a scrap piece of fabric before attempting it on the actual garment. 2. When making buttonholes on soft fabrics, place a stabilizer material on the underside of the fabric. MAKING A BUTTONHOLE 1. Using tailor's chalk, mark the position of the buttonhole on the fabric. 2. Set the Pattern Selection, stitch length and stitch width dials to sew a buttonhole. B 2 3 NOTE: Set the Stitch Width Dial to "7" for a buttonhole with an actual width of 5 mm or to "4" for a 3-mm-width buttonhole. 3. Attach the buttonhole foot, pull open the button holder and insert a button. (See fig. A) * The size of the buttonhole is determined by the button inserted into the button holder. 4. Align the red line on the presser foot with the mark on the fabric, then lower the Presser Foot Lever. Be sure to pass the thread under the presser foot and pull it toward you. (See fig. B) 1 Button holder 2 Mark on fabric 3 Line on presser foot NOTE: Do not lower the Presser Foot Lever while pushing in the area of the presser foot marked a in fig. C. Otherwise the buttonhole will not be sewn with the correct size. 4 Do not close this gap.(Fig. D) 5 Align the lines on the presser foot. C a D 4 5. Pull down the buttonhole lever to its lowest position, then lightly push it toward the back of the machine. (See fig. E) A 6. Hold the upper thread and step down on the foot controller to begin sewing. 5 E BUTTONHOLE AND BUTTON SEWING OJALES Y COSTURA DE BOTONES COUTURE DE BOUTONNIERES ET DE BOUTONS CAUTION Pulling the thread too strongly may bend or break the needle, and lead to injury. 7. Stitches 1, 2, 3 and 4 are automatically sewn, then the machine will stop. 3 2 1 4 47
-
 1
1 -
2
-
3
-
4
-
5
-
6
-
7
-
8
-
9
-
10
-
11
-
12
-
13
-
14
-
15
-
16
-
17
-
18
-
19
-
20
-
21
-
22
-
23
-
24
-
25
-
26
-
27
-
28
-
29
-
30
-
31
-
32
-
33
-
34
-
35
-
36
-
37
-
38
-
39
-
40
-
41
-
42
-
43
-
44
-
45
-
46
-
47
-
48
-
49
-
50
-
 51
51 -
 52
52 -
 53
53 -
 54
54 -
 55
55 -
 56
56 -
 57
57 -
 58
58 -
 59
59 -
 60
60 -
 61
61 -
62
-
63
-
64
-
65
-
66
-
67
-
68
-
69
-
70
-
71
-
72
-
73
-
74
-
75
-
76
-
77
-
78
-
79
-
80
-
81
-
82
-
83
-
84
-
85
-
86
-
87
-
88
-
89
-
90
 |
 |