Brother International XL-3027 Users Manual - English
Brother International XL-3027 Manual
 |
View all Brother International XL-3027 manuals
Add to My Manuals
Save this manual to your list of manuals |
Brother International XL-3027 manual content summary:
- Brother International XL-3027 | Users Manual - English - Page 1
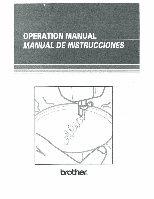
OPERATION MANUAL MANUAL DE 1NSTRUCCIONES k )r brother® - Brother International XL-3027 | Users Manual - English - Page 2
the needle, threading the bobbin, or changing the presser foot. 15. Always unplug the sewing machine from the electrical outlet when removing covers, lubricating, or when making any other user service adjustments mentioned in this instruction manual. "SAVE THESE INSTRUCTIONS" "This sewing machine is - Brother International XL-3027 | Users Manual - English - Page 3
USERS IN THE UK, EIRE, MALTA AND CYPRUS ONLY. If your sewing machine destroyed as a plug with bared flexible cords is hazardous it engaged in a live power and sewlight. O Turn on O Turn off When servicing the sewing machine, or when removing covers or changing lamps, the machine or the electrical set - Brother International XL-3027 | Users Manual - English - Page 4
23 Using needle threader (when the machine is equipped with a needle threader) 24 Drawing Up Lower Thread 25 Twin Needle Sewing 26 Thread Tension 27 RELATIVE CHART OF SEWING FABRICS, NEEDLES AND "THREADS 28 USING ATTACHMENTS AND APPLICATIONS Zipper Insertion 48 Gathering 49 Darning - Brother International XL-3027 | Users Manual - English - Page 5
Pulsador de retroceso 19 Enhebrado de la maquina 20 Bobinado de la canilla 20 Enhebrado inferior 22 Enhebrado superior 23 Use del enhebrador (Cuando la maquina esta provista tie un en hebrador de aguja)24 Para sacar el hilo de la canilla 25 Costura con aguja doble 26 TensiOn de los - Brother International XL-3027 | Users Manual - English - Page 6
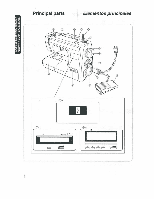
Principal parts Elementos principales 2 3 0 8 0 -a (1}b CC 8M= A 0 4. I C 1 - Brother International XL-3027 | Users Manual - English - Page 7
ASSEMBLY Winds the thread onto the bobbin to be used far the lower thread. 0) SPOOL HOLDER Holds the sewing thread. ® STITCH LENGTH DIAL Controls the length of the stitches. ® PRESSER FOOT LEVER Raises and lowers the presser foot. ® UPPER TENSION CONTROL DIAL Controls the tension of the upper - Brother International XL-3027 | Users Manual - English - Page 8
(I) Buttonhole Foot (1 pc.) * Zipper Foot (1 pc.) (3) Button Sewing Foot (1 pc.) (4) Needle Pack (Regular Single Needle No. 14) (3 Pm) (6) Twin Needle (1 pc.) (6) Bobbin (3 pcs.) 0) Darning Plate (1 pc.) (a) Screw Drivers (Large & Small) (2 pcs.) (i) Extra Spool Pin (1 pc.) (i0i Spool Holder (Large - Brother International XL-3027 | Users Manual - English - Page 9
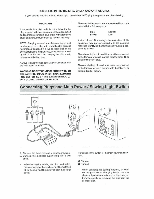
KNOWING YOUR SEWING MACHINE CONOZCA SU MAQUINA DE COSER OPERATING YOUR SEWING MACHINE Connecting Plugs 1. Connect the three-prong plug into the machine. It is located between the loot controller and the power supply plug on the cord. 2. Connect the power supply plug into a wall outlet. CAUTION 1. - Brother International XL-3027 | Users Manual - English - Page 10
. (i) Foot controller: Model N Note (For U.S.A. only): This toot controller can be used for sewing machine models X13025, XL3027 and XL3030. Pedal Al presionar ligerarnenle el pedal, la maquina funcionani a baja velocidad. Alaumentaria presion, se incrementa ramblen la velocidad de la maquina. Al - Brother International XL-3027 | Users Manual - English - Page 11
KNOWING YOUR SEWING MACHINE CONOZCA SU MAOUINA DE COSER Replacing the Needle 1. Remove the no....ry supuly plug Irani the outlet 2. Raise the needle bar to its highest position. 3. Lower the presser foot. 4. Remove the needle by loosening the needle clamp with a coin. 5. Insert a different needle - Brother International XL-3027 | Users Manual - English - Page 12
delprensatelasyNeelprensatolas enelsoporte. Sielprensatelasestabienoolocado. la berm debe engancharse de golpe. Converting to Free-arm Style Free-arm sewing is convenient for sewing tubular and hard-to-reach areas on a garment. To change your machine to the free-arm style, simply lift out - Brother International XL-3027 | Users Manual - English - Page 13
right side of the machine. The stitch selection dial may be turned in either direction. All stitches are preset in width, therefore, the stitch length is the only Estediscosepuedegiraren cualquier direction y todos los tipos de puntadas Zt.. tienenelanchopreseleccionado;potlolento satose debera - Brother International XL-3027 | Users Manual - English - Page 14
OVERLOCK STITCH TRIPLE ZIGZAG STRETCH STITCH TRIPLE STRETCH STITCH 5 (13/64) 0 0 1.5 (1/16) 3.5 (9/64) 5 (13/64) 3 (1/8) 5 (13/64) 5 (13/64) 3 (1/8) 5 (13/64) 5 (13/64) 5 (13/64) 5 (13/64) 5 (13/64) 5 (13/64) 5 (13/64) 5 (13/64) 5 (13/64) 5 (13/64) 0 RECOMMENDED PAGE IN LENGTH INSTRUCTIONS [mm - Brother International XL-3027 | Users Manual - English - Page 15
SEWING M • CHINE CONOZCA SUMAMMA DECOSER Largo recomendado para cada puntada PUNTA DA 2 3 4 5 6 7 8 9 10 11 12 13 14 15 16 17 18 19 20 21 NOMBRE ANCHO LARGO PRE-PROGRAMADO RECOMENDADO (MM) (MM) OJAL AUTOMATICO DE 32) Fija 2.5 (3/32) PAGINA DEL MANUAL 43 30 30 33 33 33 34 35 36 34 37 37 38 - Brother International XL-3027 | Users Manual - English - Page 16
de contrasts de la pantalla. (0 Selector de idioms. if Uutu ..4 ) When the machine is not properly set and a correction is required, a warning message appears on the display to give you instructions about how to make the correction. 1. When you slide the bobbin winder pin to the right for bobbin - Brother International XL-3027 | Users Manual - English - Page 17
about thenext key tobepressed @are shownonthe display. (1) Stitch number and description (1) Recommended presser foot for the stitch ® Recommended stitch length ® Instruction for more LCD information on this stitch Pantalla electronica (Pantalla de cuatro lineas) Al seleccionar una puntada con el - Brother International XL-3027 | Users Manual - English - Page 18
of the following major categories based on the sewing information you need: Al) SEWING PATTERN A2) USING MACHINE A3) TROUBLE SHOOTING A4) FABRIC•THREAD•NEEDLE r , A4 )I'MAIL • TietrAS NEEDLE 1- * A3)TROUBLE SHOOTING F' AfltISING MACHINE AI/SEWING PATTERN (SELECT WITH A KEY AND PRESS 1 KEY) 3. When - Brother International XL-3027 | Users Manual - English - Page 19
SEWING MACHINE CO,VOZCA SU MAOUINA DE COSEI? Uso de las teclas de instrucciones. (Ejemplo) Pantalla A E•1.5 I 1:OJAL O ± CAPREIAR IECIA 41 4 1. Presione !a lads A 2. Preston L4 tecla pars elegir una de las calegorlas principales que ilustra las inlormaciones necesitadas. Al) Molly° de - Brother International XL-3027 | Users Manual - English - Page 20
HACHDIP DI/WINDING BOBBIN rrnoume GHOSTING BlINELTLE BREAKS h4/FAIIMIC•THTIEND NEEDLE K) /NORMAL EMIG I /ATM/ BUTEN:MOLE POOPIA) A21USING MACHINE B2)REPLACING BOHRI N Al) TROUBLE SIER711NG R21UPPER TIIRPAD BREAKS AA1FABII C • THREAD• ugEr); 02I LIMIT FABRIC 2 }PULL OUT BACK OF FOOT.LET WPM IN - Brother International XL-3027 | Users Manual - English - Page 21
KNOWING YOUR SEWING MACHINE CONOZCA SU MAOUINA DE COSER Plangeneraldeinformacionenlapantalla decuatrolimas A 1:COAL P-I.5 IAPRETAR TECLA 11 A A MIRINTADA, El/TEIIE0 MIRMAL (Ak AoTertop-Htto-Acum 11.2)TEJIDO FIND 21PETIRAR LA PARTS ATMS DEL PIONSAISLAS CULOCAR RI. 1 0v0N4 Y VIJAY( A.2) INA Di - Brother International XL-3027 | Users Manual - English - Page 22
to give you instructions about how to make the correction. 1. When you slide the bobbin winder pin to the right for bobbin winding, the machine will only allow you to wind the bobbin and the message "BOBBIN WINDING SELECTED" will appear on the display. 2. When you set the machine to sew a buttonhole - Brother International XL-3027 | Users Manual - English - Page 23
thread being used. To determine the exact dial position, you should first test the stitch and length settings on a scrap of fabric to observe the feeding of the material. (9 STITCH LENGTH (2) Shorter (3i Longer (4)Cuando haya seleccionado elidioma, apague el interruptor principal. (5)Al encender de - Brother International XL-3027 | Users Manual - English - Page 24
while pressing rightly on the fool pedal. To sew forward, release the Reverse Sewing Button. The machine will then sew forward. Reverse sewing is used for backtacking and reinforcing seams. 0) Reverse sewing button Pulsador de retroceso Para coser hacia arras, apriete a tondo el pulsador deretraces - Brother International XL-3027 | Users Manual - English - Page 25
that the spool of thread will not turn. Pass the thread through the thread guide as shown following the dolled line on the machine. 3. Pass theendof thethread through thehole on the bobbin from the inside. (p Clutch release switch () Bobbin winding Enhebrado de la rnthquina Bobinado de la canilla - Brother International XL-3027 | Users Manual - English - Page 26
the foot controller. NOTE: The machine stops automatically when thebobbinis full. 7. Cut the thread, push the shalt to the left and remove the full bobbin from the shaft. 8. Return the Clutch Release Switch back to the needle mark. ® Spring (0 Slit 4. Coloque la canilla en el eje de bobinado - Brother International XL-3027 | Users Manual - English - Page 27
machine, it will fall out from the shuttle immediately atter staffing to sew. (I) Bobbin case laid' 0) Bobbin case finger 0) Tension spring (4) Metal linger (5) Notch B-1 1. Levante la aguja a suposition eras alta, girando la ruedecilla hacia usted (en el sentido contrario al de las mantillas de - Brother International XL-3027 | Users Manual - English - Page 28
the presser foot using the Presser Foot Lever as shown in fig. A below. 2. Raise the needle to its highest position by turning the balance wheel towardyou(counterclockwise). 3. Place a spoolof threadon the horizontalspoolpin andpressa spoof holder ontothe spoolpintohold the thread spool firmly in - Brother International XL-3027 | Users Manual - English - Page 29
. Lower thethreader slightlyandpositionthe thread under the guide. Oi Needle threader C) Guide 2. Move the threader to ils lowest position and guide the thread under the hook which passes through the eye of the needle. (a) Hook Uso del enhebrador (Cuando la maquina esta provista de un en hebrador - Brother International XL-3027 | Users Manual - English - Page 30
to the right toward the back of the machine and pull toward the back of the machine straight behind the presser fool. (t) Upper thread (2) Lower thread loop (at Lower thread Para sacar el hilo de la canilla 1. LeventeelprensetelaSyleagujeaSusposiciones mas &evades. 2. Conla manoizquierda, sujete - Brother International XL-3027 | Users Manual - English - Page 31
. Place the second spool of thread onto the vertical spool pin as shown in fig. A. TWIN NEEDLE THREADING Each needle should be threaded separately. 1. Threading the Right Needle Follow the same instructions for single needle threading using the thread from the spool on the extra spool pin. See page - Brother International XL-3027 | Users Manual - English - Page 32
. Reverse (2.) Sudace 0) Bobbin A A-1 Tensi6n de los hilos La tension de los hilos afeetara la calidad de las puntadas: puede rogue& cierto ajuste cuando cambia de tefido o hilo. NOTA: Le recomendamos hacer una prueba en gm pedazo de tea antes de empezar a coser en el tejido de trabajo. Alustes - Brother International XL-3027 | Users Manual - English - Page 33
KNOWING YOUR SEWING MACHINE CONOZCA SU MAOUINA DE COSER C Correct tension Correct tension is important since too much or too little tension will weaken your seams or cause puckers on your fabric. C Tension corrects Es ecesario teneruna tensioncorrecta dadoque una tensioninsuliciente o demasiado! - Brother International XL-3027 | Users Manual - English - Page 34
con su maquina) Algooqn: 60-80 Sada: :4" Sentence Merceria 50. Algoden; 50-60 &SoMdaelsiar) Mercerized 50-60 Tejano, Gabardine, Tweed, Pana, To!do, Dfil 16 Algoden: 40-50 Hilo Merceria gruesa. Prendas de punto Prendas de punto simple, Prendas de punto doble, Jersey, Tricot de bola 14 - Brother International XL-3027 | Users Manual - English - Page 35
Sewing 1. Turn the Pattorn Selection Dial to show your desired stitch on the Pattern Indication Window. Set the Pattern Selection Dial to 2, 3 or 21 for the type of Straight Stitch required. 2. Raise the needle to its highest positionandlift the presser foot lever. 3. Pull up the lower thread - Brother International XL-3027 | Users Manual - English - Page 36
the threads at the endof the seamor wherever reinforcement is needed. 1. Stitch to the end of the seam and stop. 2. Push the Reverse Sowing Button and lightly touch the foot controller to stitch backwards for 1 cm (3/81 from the end of the fabric. Para terminar las costuras La punlada de retroceso - Brother International XL-3027 | Users Manual - English - Page 37
on the back of the presser foot bar. 5. To prepare the machine for the next seam, pull about 10 cm (4') of thread through the toes of the presser foot toward the back of the machine. g.; Thread cutter Para retirar el tejldo de la maqulna 1. Pare la maquina. 2. Levante la aguja a su position mat - Brother International XL-3027 | Users Manual - English - Page 38
Puntadas zigzag Con el selector de puntadas, 0=0 ef nomero de puntada deacuerdoconelanchodezigzagdeseado. Luego, selection el largo de la puntada. Se recomienda coser conpuntada recta alprincipio y al final do ones puntadas zigzag. SATIN STITCH When the Zigzag Stitch length is set in the "Fa range - Brother International XL-3027 | Users Manual - English - Page 39
as infig.B. Leave a 6 mm (1/41overlap at the edge. 3. Set the Pattern Selection Dial to either 7 or 10. 4. Sew on the fold as in fig. C. 5. When the fabric is unfolded you will have a Blind Stitch hem as shown in fig. D. NOTE: The Stretch Blind Stitch is useful for stretch fabrics. 1. Ambos biles - Brother International XL-3027 | Users Manual - English - Page 40
are sewn slightly over the folded edge. 3. This stitch requires a tighter thread tension than normal. 4. Sew at a slow speed. Puntada Ondas Namara depuntada 8 (Puntada Ondas) Largo de puntada F-3 La puntada ondas puede usarse pare coser una Amelia (corn encaje) en un tejido 1. Ponga elselector - Brother International XL-3027 | Users Manual - English - Page 41
nylon thread is used, the stitch will not be visible. 1. Place theedge of thetwopiecesof fabric together and center them under the presser fool. 2. Sew them together using the Elastic Stitch taking care to keep the two fabric edges close together as shown in fig. C. Puntada elastica Nornero de - Brother International XL-3027 | Users Manual - English - Page 42
. Ponga el selector de puntadas en 11. nn L • Scallop Stitching P.attein 12 (Scallop Stitch) Stitch Length F-1.5 This machine automatically produces a Scallop Stitch which may be used as a decorative edging. 1. Set the Pattern Selection Dial to 12. 2. Sew the Scallop Stitch along the edge of - Brother International XL-3027 | Users Manual - English - Page 43
for making decora live top stitching and for smocking Set the Pattern Selection Dial to 13 or 14. Puntadas decorativas 114/10merode punmda 13 (Pentode EscaJere) 14 (Puntada &Won Doble) Largo demoted:, F-1 Estes dos puntadas pueden servir pare puntadas decoralivas de "arta castors" y pare hater - Brother International XL-3027 | Users Manual - English - Page 44
Set the Pattern Selection Dial to 15. 3. Stitchalong theedge, pullingboth threadsslightly when beginning to sew. • Use thicker than normal threads for sewing. 4. After sewing, juntar dospiezas de lejido, dejando un espacio entre las dos orillas. 1. Doble las minas de las dospiezas de tejidopars - Brother International XL-3027 | Users Manual - English - Page 45
the edge of a blanket, while the Elastic Overlock and Slant Overlock Stitches are useful when sewing stretch materials. 1. Set the Pattern Selection Dial to 16, 18 or 19. 2. Position the fabric under the presser foot so that the seamline (or arrowhead point) is approximately 3 mm (1/8') to the - Brother International XL-3027 | Users Manual - English - Page 46
when embroidering. 1. Set the Pattern Selection Dial to 17. 2. Place the fabric right side up and seir1cm OM from the edge of the fabric. 3. Trim close to the stitching. The stitch will prevent the fabric from unravelling. Puntada pluma r Ndrncto depuntada 17(Puntada Plums) Largo de punlads F7ja - Brother International XL-3027 | Users Manual - English - Page 47
Patient 20 (Tripe Zigzag Stretch Stitch) Stitch Length Fixed 2.5 This stitch can be used to sew heavyweight stretch fabrics wherever a Zigzag Stitch could be used. The Triple Zigzag Stretch Stitch can also be used as a decorative top stitch. Set the Pattern Selection Dial to 20. Triple puntada - Brother International XL-3027 | Users Manual - English - Page 48
thread, start the machine. 8. Buttonhole stitching is done in order, 1-4, as shown in fig. D. 9. Stop the machine when the bar tacks are sewn. Para coser ojales 1 Mimero do Punktda Largo do puntada Prensatelas F-1,5 Prensakdaspara galas NOTA: 1. Le recomendamos hater una prueba de costura de - Brother International XL-3027 | Users Manual - English - Page 49
(1) Align the marks on the foot and on the fabric. O Starting mark on the fabric (0 Marks on the loot O Bolton plate QQ Mincelasmarcas delprenselelasconlas del WOO. O Marco do Thick) en ellefido ® - Brother International XL-3027 | Users Manual - English - Page 50
any stitches. Para completer las punfades y costar elo'er 1. Pam asegurar las puntadas, give el tejido a 90 grados enelsentidocontrarioaldelasmanecillas de un reloj y cosa unas Puntadas Reties (No 3) hasta el final de la linen del 'ornate de la pane delantera. 2. Retire el tejido de la maquina. Se - Brother International XL-3027 | Users Manual - English - Page 51
Stitch length dial (7) Buttonhole line adjusting Strew Oh Right row 00 In case 3. Cuando se logre una alimentation correcta para la pale izquierda, cosy la pale derecha del ojal y mire de (1) Dialde WOO depomade (7) Tomillo do ajuste lino de gal Qe Lado derecho En woo quo • II T GD - Brother International XL-3027 | Users Manual - English - Page 52
mm (9/64') 5 5 mm (13/645 6 2. Change the foot to the button sewing foot. 3. Place the darning plate on the needle plate. 4. Placea sew approximately 10 stitches. 6. Remove the material from the machine. Cut the upper and lower threads and tie both threads at the back of the material. Costura de - Brother International XL-3027 | Users Manual - English - Page 53
the shank to the left pin of the zipper foot. When sewing the left sideof the zipper,attach the shank to the right pin of the zipper foot. See fig. A. 1. Set the Pattern Selection Dial to 3. Set the Stitch Length between 2 and 3. 2. Lower the presser foot lever and fix either the left or right - Brother International XL-3027 | Users Manual - English - Page 54
1. Set the Pattern Selection Dial to 3. 2. Loosen the tension of he upper thread (to about 2) so that the lower thread lies on the underside of the material. 3. Sew a single row or multiple rows of Straight Stitches. 4. Pull the lower thread(s) to gather the material. Fruncido Malteds 3 Largo de - Brother International XL-3027 | Users Manual - English - Page 55
° creando unas cuantas knees de puntadas paralelas. trease fig. B. B Appliques Pattern 4, 5 or 6 Stitch Length F-2 An applique is sew around the edge of the cutout design with a Zigzag Stitch (patterns 4, 5 or 6) in the fine stitch length. 3. Cul away the surplus fabric outside of the stitching - Brother International XL-3027 | Users Manual - English - Page 56
hoop. 5. Place the work under the needle and lower the presser bar with the foot removed. 6. Pull the lower thread up through the work at the startingposition by turning thebalance wheeland make a few holding stitches. 7. Grip the hoop with the thumb and forefingers of both hands while pressing the - Brother International XL-3027 | Users Manual - English - Page 57
USING ATTACHMENTS AND APPLICATIONS USO DE ACCESORIOS Y APLICACIONES MONOGRAMMING 1. Sew moving the hoop slowly along the lettering at a constant speed. 2. Secure with a few straight stitches at the end of the last letter. Monogramas 1. Cosa moviendo el bastidor lentamente pot las tetras, a una - Brother International XL-3027 | Users Manual - English - Page 58
from the machine as Illustrated in fig. B. Cambio de la bombilla 1. Desenchule la maquina. 2. Alloje el tornillo de la cubierta de la maquina tal como se indica en la fig. A. 3. Retire la cubierta de la maquina tat como se indica en Pa lig. B. reA- too l B fl 4. Replace the sewing light bulb - Brother International XL-3027 | Users Manual - English - Page 59
a week if it is used more than one hour a day. If the machine is used more often, oil every day. Sewing machine oil is available from your local sewing machine dealer or service center. Engrasado I. lksonchule magunia. 2. Ponga 2 ci 3 gotas de aceite en cada uno de los puntos sehalados en la fig - Brother International XL-3027 | Users Manual - English - Page 60
thread from the retainingring,hook, driverandrace body with a brush. 2. A cloth dampened with machine oil should be used to wipe the shuttle race clean of lint. 3. Clean the shuttle hook in the same manner de polvo de la lanzadera con un trapo impregnado de aceite de maquina. 3. Limpie el gadio de la - Brother International XL-3027 | Users Manual - English - Page 61
using the machine. If the problem continues, the following check list may help you to improve the operation. It you still have difficulties, contact your nearest service center. Listado de posibles incidencias Cada vezqueencuentredilicultadesalcoser, vuelva a consultor la paste de este manual de - Brother International XL-3027 | Users Manual - English - Page 62
BREAKS SKIPPED STITCHES LOOP IN SEAM FABRIC PUCKERS r:Harff:I:NKIRM E C tlpper.thread is not correctly installed. Page 23 Upper thread is tangled. Lower thread is tangled. 4 Page 25 Bobbin is not threaded properly in the shuttle hook. Needle is incorrectly inserted. I h read tension is - Brother International XL-3027 | Users Manual - English - Page 63
Men enhebrado Clhit° inferior este enredadO • Pagina 23 No Regina 25 No La aguja cstd mal colocada La tension de los hilos no es coned!) iNo • Pagina 6 Peigina 27 No La tension de los hilos es demasiada (vette Pagano 27 I No Elhilo superior este enredado La canine no este bien enhebrada - Brother International XL-3027 | Users Manual - English - Page 64
power switch is turned off. Page 5.4 Page 5 No V Foot controller is not used correctly. Page 6 No Page 28 No Fabric is pulled excessively. Let the Thread is tangled. feed dogs move the fabric. Do not pull No Page 22-25 the fabric. No Page 5 No Clutch Release Switch is set at bobbin - Brother International XL-3027 | Users Manual - English - Page 65
Algina 29 No Se este usando una aguja inferior RIgina 6 Pagina 55-561No Se este usando une aguja inferior Fella de aceite Pagina 6 INO La combinacian lama& de aguja/ grueso de hilo/ tejido no es correcta Pagina 54 Psigina 4 No El interruplor principal este apegado Pagina 5 N No So use bien el - Brother International XL-3027 | Users Manual - English - Page 66
for future use. It may become necessary to reship the sewing machine. Improper packing or improper packing material could result in damage during shipping. Instructions forrepacking themachine areillustrated below. Embalaje de la maquina Guarde la cap de carton y el embalaje por si aca so nocesita - Brother International XL-3027 | Users Manual - English - Page 67
Button Sewing C Cleaning Connecting Plugs Darning Double Action Stitch Drawing Up Lower Thread E Elastic Stitch Elastic Overlock Stitch Embroidering F Fagoting Stitch Feather Stitch Feed Dog Cleaning Foot Controller Free-arm Style G Gathering Lightning Stitch Lower Threading M Main Power Switch - Brother International XL-3027 | Users Manual - English - Page 68
Stitch 40 Stitch Length Dial 18 Straight Stitch 30 Stretch Blind Stitch 34 a rri m T Thread Tension Triple Stretch Stitch Triple Zigzag Stretch Stitch Troubleshooting Twin Needle Sewing 27 30 42 57, 59 26 U Upper Tension Control Dial 27 Upper Threading 23 va Winding the Bobbin - Brother International XL-3027 | Users Manual - English - Page 69
NOTE - Brother International XL-3027 | Users Manual - English - Page 70
NOTA - Brother International XL-3027 | Users Manual - English - Page 71
•l a - Brother International XL-3027 | Users Manual - English - Page 72
English Spanish 194252.111 Printed in Taiwan
-
 1
1 -
 2
2 -
 3
3 -
 4
4 -
 5
5 -
 6
6 -
 7
7 -
8
-
9
-
10
-
11
-
12
-
13
-
14
-
15
-
16
-
17
-
18
-
19
-
20
-
21
-
22
-
23
-
24
-
25
-
26
-
27
-
28
-
29
-
30
-
31
-
32
-
33
-
34
-
35
-
36
-
37
-
38
-
39
-
40
-
41
-
42
-
43
-
44
-
45
-
46
-
47
-
48
-
49
-
50
-
51
-
52
-
53
-
54
-
55
-
56
-
57
-
58
-
59
-
60
-
61
-
62
-
63
-
64
-
65
-
66
-
67
-
68
-
69
-
70
-
71
-
72
 |
 |
OPERATION
MANUAL
MANUAL
DE
1NSTRUCCIONES
k
)r
brother®