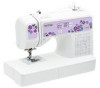
Brother International XS2070 Operation Manual
Brother International XS2070 Manual
 |
View all Brother International XS2070 manuals
Add to My Manuals
Save this manual to your list of manuals |
Brother International XS2070 manual content summary:
- Brother International XS2070 | Operation Manual - Page 1
Operation Manual Sewing Machine Product Code: 888-E44/E45/E46 KNOWING YOUR SEWING MACHINE SEWING BASICS UTILITY STITCHES APPENDIX Be sure to read this document before using the machine. We recommend that you keep this document nearby for future reference. - Brother International XS2070 | Operation Manual - Page 2
- Brother International XS2070 | Operation Manual - Page 3
Please read these safety instructions before attempting to use the machine. DANGER - To reduce the risk of electric shock: 1 Always unplug the machine from the electrical outlet immediately after using, when cleaning, when making any user servicing adjustments mentioned in this manual, or if you are - Brother International XS2070 | Operation Manual - Page 4
when sewing, and follow careful instruction when freehand stitching so that . 8 For a longer service life: • When storing troubleshooting table in the back of the operation manual to inspect and adjust the machine yourself. If the problem persists, please consult your local authorized Brother - Brother International XS2070 | Operation Manual - Page 5
by the manufacturer as contained in this manual. The contents of this manual and specifications of this product are subject to change without notice. For additional product information, visit our web site at www.brother.com SAVE THESE INSTRUCTIONS This machine is intended for household use - Brother International XS2070 | Operation Manual - Page 6
CONTENTS IMPORTANT SAFETY INSTRUCTIONS 1 1. KNOWING YOUR SEWING MACHINE 6 ACCESSORIES ...6 Included accessories ...6 Optional accessories ...7 Accessory compartment ...7 NAMES OF MACHINE PARTS AND THEIR FUNCTIONS 8 The main parts ...8 Needle and presser foot - Brother International XS2070 | Operation Manual - Page 7
82 Restrictions on oiling ...82 Precautions on storing the machine ...82 Cleaning the machine surface ...82 Cleaning the race ...82 TROUBLESHOOTING ...85 Frequent troubleshooting topics ...85 Upper thread tightened up ...85 Tangled thread on wrong side of fabric ...86 Incorrect thread tension ...89 - Brother International XS2070 | Operation Manual - Page 8
KNOWING YOUR SEWING MACHINE 1 KNOWING YOUR SEWING MACHINE ACCESSORIES Included accessories After opening the box, check that the following accessories are included. If any item is missing or damaged, contact your dealer. Note (For U.S.A. only) ● Foot controller: Model T This foot controller - Brother International XS2070 | Operation Manual - Page 9
foot Part Code Americas Others SA140 F033N: XG6623-001 SA129 F005N: XC1948-052 SA125 F001N: XC1944-052 No. Part Name 4 Quilting guide 5 Eyelet punch Part Code Americas Others SA132 F016N: XC2215-052 XZ5051-001 Accessory compartment The accessories are stored in a compartment inside - Brother International XS2070 | Operation Manual - Page 10
25) This holds the spool of thread. j Handwheel This is used to manually raise and lower the needle. k Air vent This vent allows the air surrounding then threading the machine. s Thread guide cover (page 18 and 27) Pass the thread under this thread guide when winding the bobbin thread and threading - Brother International XS2070 | Operation Manual - Page 11
to hold the presser foot holder in place. k Needle plate The needle plate is marked with guides for sewing straight seams. l Needle bar thread guide Pass the upper thread through the needle bar thread guide. m Presser foot lever Raise and lower the presser foot lever to raise and lower the presser - Brother International XS2070 | Operation Manual - Page 12
KNOWING YOUR SEWING MACHINE Operation panel The operation panel, located on the front of the sewing machine, allows you to select a stitch and specify how the stitch will be sewn. The operation panel differs depending on the sewing machine model. Spool pin As shown, press down on the spool pin - Brother International XS2070 | Operation Manual - Page 13
■ Storing the spool pin ■ Installing the spool pin When placing the cover on the sewing machine before storing or if the spool pin will not be used, If the spool pin has been removed from the return the spool pin to its storage position. a machine, insert the tab on the spool pin into - Brother International XS2070 | Operation Manual - Page 14
KNOWING YOUR SEWING MACHINE Flip chart Hold the notch with your finger to flip the chart. For models equipped with a flip chart on the top panel 1 For models equipped with a flip chart on the front panel 1 a Notch 12 - Brother International XS2070 | Operation Manual - Page 15
USING YOUR SEWING MACHINE Power supply precautions 1 Be sure to observe the following precautions concerning the power supply. WARNING ● Use only regular household electricity for the power source. Using other power sources may result in fire, electric shock, or damage to the machine. ● Make - Brother International XS2070 | Operation Manual - Page 16
KNOWING YOUR SEWING MACHINE Power supply Insert the plug into a wall outlet. a Foot controller Insert the foot controller plug into its jack/socket on the rear side of the sewing machine. 12 a Main power switch b Jack/socket connector Set the main power switch to "I". b The sewing light comes - Brother International XS2070 | Operation Manual - Page 17
Sewing speed controller Changing the initial needle (for models equipped with position the start/stop button) Slide the sewing speed controller to the left or a right to select the desired sewing speed. Slide the sewing speed controller to the left to sew at a slower speed, or slide the - Brother International XS2070 | Operation Manual - Page 18
KNOWING YOUR SEWING MACHINE Cancelling the operation beep When the sewing machine is purchased, it is set to beep each time a key is pressed. This setting can be changed so that the machine does not beep. Turn off the sewing machine. a Hold down the "-" side of (stitch width b adjustment key) - Brother International XS2070 | Operation Manual - Page 19
This section describes how to wind the thread onto the bobbin. • For details on the fast bobbin winding, see page 20. 1 a Bobbin-winding thread guide b Bobbin winder shaft c Bobbin CAUTION ● Only use bobbins (part code: SA156, SFB: XA5539-151) that have been designed for this sewing machine. Using - Brother International XS2070 | Operation Manual - Page 20
a a Spool cap (small) b Spool (cross-wound thread) c Space While holding the spool with your right hand, e and then pass the thread under the thread guide. CAUTION ● If the spool or the spool cap is not positioned correctly, the thread may become tangled around the spool pin or the machine may - Brother International XS2070 | Operation Manual - Page 21
when the thread is wound around the bobbin. a Bobbin-winding thread guide Make sure that the thread passes under the pre-tension disk. b Hook bobbin. 1 a 1 cm (3/8 inch) CAUTION ● Make sure you follow the instructions carefully. If you do not cut the thread completely, and the bobbin is wound, - Brother International XS2070 | Operation Manual - Page 22
KNOWING YOUR SEWING MACHINE Slide the sewing speed controller to the right l (to set the speed to fast). (For models equipped with the sewing speed controller.) CAUTION ● Not winding the bobbin properly may cause the thread tension to loosen, and may break the needle. a Sewing speed controller - Brother International XS2070 | Operation Manual - Page 23
Pull the thread to the right and pass it through e the slit in the bobbin winder seat. Cut the thread, slide the bobbin winder shaft j to the left, and then remove the bobbin from the shaft. 1 a Slit in bobbin winder seat (with built-in cutter) The thread is cut to a suitable length. - Brother International XS2070 | Operation Manual - Page 24
KNOWING YOUR SEWING MACHINE Lower threading Install the bobbin wound with thread. • For more details on quick-set bobbin, see page 23. CAUTION ● Winding the bobbin improperly may cause the thread tension to loosen, breaking the needle and resulting in injury. Raise the needle to its highest - Brother International XS2070 | Operation Manual - Page 25
is on the left, and then, after pulling the thread firmly around the tab with your left hand as shown, lightly pull the thread to guide it through the slit. • Replace the cover so that the end of the thread comes out from the left side of the cover (as shown - Brother International XS2070 | Operation Manual - Page 26
KNOWING YOUR SEWING MACHINE While lightly holding down the bobbin with e your right hand as shown, guide the thread through the slit (a and b). • At this time, check that the bobbin easily rotates counterclockwise. Then, pull the thread toward you to cut it - Brother International XS2070 | Operation Manual - Page 27
For details on the needle threader, see page 28. 1 a Spool pin b Mark on the handwheel CAUTION ● When threading the upper thread, carefully follow the instructions. If the upper threading is not correct, the thread may become tangled or the needle may bend or break. ● Never use a thread weight of - Brother International XS2070 | Operation Manual - Page 28
KNOWING YOUR SEWING MACHINE As shown, press down on the spool pin lever d with your finger. The spool pin swings up. Fully insert the spool for the upper thread f onto the spool pin. Slide the spool onto the pin so that the spool is horizontal and the thread unwinds to the front at the bottom. - Brother International XS2070 | Operation Manual - Page 29
with your right hand so that there is no slack in the thread that is pulled out, and then pass the thread under the thread guide cover with your left hand. a Thread take-up lever Memo ● If the needle is not raised, the thread takeup lever cannot be threaded. Be sure - Brother International XS2070 | Operation Manual - Page 30
before you feed the upper thread. ● If you incorrectly feed the thread you may cause sewing problems. ■ Using the needle threader (for models equipped with the needle threader) a Needle bar thread guide Turn off the sewing machine. m CAUTION ● Make sure you turn the power off while threading the - Brother International XS2070 | Operation Manual - Page 31
out about 5 cm (2 inches) of thread toward the rear of the machine. a 5 cm (2 inches) Note ● If you incorrectly feed the thread you may cause sewing problems. 29 - Brother International XS2070 | Operation Manual - Page 32
KNOWING YOUR SEWING MACHINE Drawing up the lower thread Lightly hold the end of the upper thread. a Pull out about 10 cm (4 inches) of both d threads and pull them toward the back of the machine under the presser foot. a Upper thread While holding the end of the upper thread, b raise the needle - Brother International XS2070 | Operation Manual - Page 33
precautions concerning the handling of the needle. Failure to observe these precautions is extremely dangerous. Be sure to read and carefully follow the instructions below. CAUTION ● Only use home sewing machine needles. Use of any other needle may bend the needle or damage the machine. ● Never - Brother International XS2070 | Operation Manual - Page 34
needle Replace the needle as described below. Use the disc-shaped screwdriver and a needle that has been determined to be straight according to the instructions in "Checking the needle". Raise the needle by turning the handwheel a toward you (counterclockwise) so that the mark on the wheel points up - Brother International XS2070 | Operation Manual - Page 35
Lower the presser foot lever. c With the flat side of the needle toward the e rear of the machine, insert the needle until it touches the needle stopper. 1 a Presser foot lever CAUTION ● Before replacing the needle, place fabric or paper under the presser foot to prevent the needle from - Brother International XS2070 | Operation Manual - Page 36
to "Replacing the needle" (page 32). Thread the upper thread for the left needle. b • For details, refer to steps a through l of "Upper threading" (page 25). Manually thread the left needle with the c upper thread. Pass the thread through the eye of the needle from the front to the back. Insert the - Brother International XS2070 | Operation Manual - Page 37
cover • For details, refer to step h through k of "Upper threading" (page 25). Without passing the thread through the g needle bar thread guide, manually thread the right needle. Pass the thread through the eye of the needle from the front to the back. CAUTION ● After adjusting the stitch width - Brother International XS2070 | Operation Manual - Page 38
KNOWING YOUR SEWING MACHINE REPLACING THE PRESSER FOOT CAUTION ● Always turn off the power before you change the presser foot. If you leave the power on and step on the controller, the machine will start and you may be injured. ● Always use the correct presser foot for the stitch pattern you - Brother International XS2070 | Operation Manual - Page 39
Slowly lower the presser foot lever so that the f presser foot pin snaps into the shank in the presser foot holder. Use the disc-shaped screwdriver to loosen the b presser foot holder screw. 1 a Disc-shaped screwdriver b Presser foot holder c Presser foot holder screw ■ Attaching the presser - Brother International XS2070 | Operation Manual - Page 40
SEWING BASICS 2 SEWING BASICS SEWING Basic sewing operations are described below. Before operating the sewing machine, read the following precautions. CAUTION ● While the machine is in operation, pay special attention to the needle location. In addition, keep your hands away from all moving - Brother International XS2070 | Operation Manual - Page 41
Selecting a stitch Using the stitch selection keys, select the desired stitch. When the sewing machine is turned on, the straight stitch ( left needle position) is selected. Attach the presser foot indicated in the LCD. c Turn on the sewing machine. a a Presser foot type • For details, refer - Brother International XS2070 | Operation Manual - Page 42
SEWING BASICS Adjusting the stitch length and width Press the "+" or "-" side of (stitch width c adjustment key) to increase or reduce the stitch width. ■ [Example] Selecting stitch . Press the stitch selection keys to select stitch 04. a With on the right, select "4", and with on the left, - Brother International XS2070 | Operation Manual - Page 43
Starting to sew Raise the needle by turning the handwheel a toward you (counterclockwise) so that the mark on the wheel points up. (With models equipped with (needle position button), raise the needle by pressing once or twice.) While holding the end of the thread and the d fabric with your - Brother International XS2070 | Operation Manual - Page 44
SEWING BASICS Take your foot off the foot controller, or press h (start/stop button) once (if the machine was started by pressing (start/stop button)) (for models equipped with the start/stop button). The machine stops sewing. Raise the needle by turning the handwheel i toward you ( - Brother International XS2070 | Operation Manual - Page 45
Thread tension The thread tension will affect the quality of your stitches. You may need to adjust it when you change fabric or thread. Memo ● We recommend that you do a test sample on scrap of a fabric before you start to sew. ■ Correct tension Correct tension is important as too much or too - Brother International XS2070 | Operation Manual - Page 46
SEWING BASICS USEFUL SEWING TIPS Various ways to achieve better results for your sewing projects are described below. Refer to these tips when sewing your project. Trial sewing Lower the presser foot lever and continue c sewing. After you select a stitch, the machine automatically sets the - Brother International XS2070 | Operation Manual - Page 47
■ If thick seams are being sewn and the fabric does not feed at the beginning of stitching The fabric may not feed when thick seams are being sewn and the presser foot is not level, as shown below. In this case, use the presser foot locking pin (black button on the left side of zigzag foot "J") - Brother International XS2070 | Operation Manual - Page 48
SEWING BASICS Sewing thin fabrics When sewing thin fabrics, the stitching may become misaligned or the fabric may not feed correctly. If this occurs, place thin paper or stabilizer material under the fabric and sew it together with the fabric. When you have finished sewing, tear off any excess - Brother International XS2070 | Operation Manual - Page 49
(Rfc.) Stitching Pattern No. Stitch Width Stitch Length [mm (inch.)] [mm (inch.)] Stitch Name Application Auto Auto Manual Manual Zigzag stitch J 04 04 04 04 04 04 04 Overcasting and attaching appliqués 3.5 (1/8) 0.0-7.0 (0-1/4) 1.4 (1/16) 0.0-4.0 (0-3/16) ** Yes ( J ) * Yes - Brother International XS2070 | Operation Manual - Page 50
(counterclockwise) and check that the needle does not touch the presser foot. Sew with the edge of the fabric against the e presser foot guide. 1 a Needle drop point CAUTION ● After adjusting the stitch width, slowly turn the handwheel toward you (counterclockwise) and check that the needle does not - Brother International XS2070 | Operation Manual - Page 51
Rev.)/ Reinforcement (Rfc.) Stitching Stitch Name Pattern No. Application Stitch Width Stitch Length [mm (inch.)] [mm (inch.)] Auto Manual Auto Manual Left J 00 00 00 00 00 00 00 Basic stitching, sewing gathers or pintucks, etc. 0.0 (0) 0.0-7.0 (0-1/4) 2.5 (3/32) 0.2-5.0 (1/64-3/16 - Brother International XS2070 | Operation Manual - Page 52
hem of a pair of trousers, without the stitch showing. Pattern No. Stitch Width Stitch Length [mm (inch.)] [mm (inch.)] Stitch Name Application Auto Manual Auto Manual Blind hem stitch R 10 10 10 09 09 09 09 Blind hem stitching on medium weight fabrics R 11 11 11 10 10 10 10 - Brother International XS2070 | Operation Manual - Page 53
Fold back the fabric inside along the basting. d Position the fabric with the edge of the folded j hem against the guide of the presser foot, and then lower the presser foot lever. 3 a Wrong side of fabric 3 5 b Right side of fabric c Edge of fabric 4 6 d Desired edge - Brother International XS2070 | Operation Manual - Page 54
fabric • For details on changing the stitch width, refer to "Selecting a stitch" (page 39). Sew with the fold of the hem against the l presser foot guide. Remove the basting stitching and turn the m fabric right side up. 1 2 a Wrong side of fabric b Right side of fabric 52 - Brother International XS2070 | Operation Manual - Page 55
sewn and buttons can be sewn on. Pattern No. Stitch Name Application Stitch Width Stitch Length [mm (inch.)] [mm (inch.)] Auto Manual Auto Manual Horizontal buttonholes 5.0 (3/16) 0.5 (1/32) * A 34 34 34 29 29 29 25 on thin and medium 3.0-5.0 0.2-1.0 No No Auto weight fabrics (1/8-3/16 - Brother International XS2070 | Operation Manual - Page 56
+ thickness of button) c 5 mm (3/16 inch) Example: For a button with a diameter of 15 mm (9/16 inch) and a thickness of 10 mm (3/8 inch), the button guide plate should be set to 25 mm (1 inch) on the scale. 1 2 a 10 mm (3/8 inch) b 15 mm (9/16 inch) Attach buttonhole foot "A". c Select a stitch - Brother International XS2070 | Operation Manual - Page 57
Position the fabric with the front end of the f buttonhole mark aligned with the red marks on the sides of the buttonhole foot, and then lower the presser foot lever. 1 Gently hold the end of the upper thread in h your left hand, and then start sewing. 2 A 2 a Mark on fabric b Red marks on - Brother International XS2070 | Operation Manual - Page 58
UTILITY STITCHES Insert a pin at the end of the buttonhole k stitching to prevent the stitching from being cut, and then use a seam ripper to cut towards the pin and open the buttonhole. 2 ■ Sewing buttonholes on stretch fabrics When sewing buttonholes on stretch fabrics, use a gimp thread. Hook - Brother International XS2070 | Operation Manual - Page 59
Button sewing Buttons can be sewn on with the sewing machine. Buttons with 2 or with 4 holes can be attached. Measure the distance between the holes in the a button to be attached. Place a button between the presser foot and d the fabric. Raise the presser foot lever, and then slide the b feed - Brother International XS2070 | Operation Manual - Page 60
UTILITY STITCHES Turn the handwheel toward you h (counterclockwise) to check that the needle correctly goes into the two holes of the button. Adjust the stitch width to the distance between the button holes. CAUTION ● When sewing, be sure that the needle does not touch the button, otherwise the - Brother International XS2070 | Operation Manual - Page 61
position it to the right or left side of the needle. Stitch Name Pattern No. Application Stitch Width Stitch Length [mm (inch.)] [mm (inch.)] Auto Manual Auto Manual Straight stitch (center) I Attaching zippers, basic 01 01 01 01 01 01 01 stitching, and sewing gathers or pintucks, etc - Brother International XS2070 | Operation Manual - Page 62
UTILITY STITCHES Attach the presser foot holder to the right side e of the pin on zipper foot "I". I CAUTION ● Make sure the needle does not hit the zipper during sewing. If the needle hits the zipper, the needle may break and you may be injured. a Pin on the right side b Needle drop point - Brother International XS2070 | Operation Manual - Page 63
sewn and elastic tape can be attached. Pattern No. Stitch Name Application Stitch Width Stitch Length [mm (inch.)] [mm (inch.)] Auto Manual Auto Manual Stretch stitch J 03 03 03 03 03 03 03 Sewing stretch fabrics and decorative stitching 1.0 (1/16) 2.5 (3/32) 1.0-3.0 1.0-4.0 (1/16 - Brother International XS2070 | Operation Manual - Page 64
UTILITY STITCHES Sew the elastic tape to the fabric while d stretching the tape so that it is the same length as the fabric. While pulling the fabric behind the presser foot with your left hand, pull the fabric at the pin nearest the front of the presser foot with your right hand. CAUTION ● When - Brother International XS2070 | Operation Manual - Page 65
are described below. Pattern No. Stitch Width Stitch Length [mm (inch.)] [mm (inch.)] Stitch Name Application Auto Manual Auto Manual Zigzag stitch J 04 04 04 04 04 04 04 Overcasting and attaching appliqués 3.5 (1/8) 0.0-7.0 (0-1/4) 1.4 (1/16) 0.0-4.0 (0-3/16) ** Yes ( J ) * Yes - Brother International XS2070 | Operation Manual - Page 66
UTILITY STITCHES Appliqués You can create an appliqué by cutting a different piece of fabric into a shape and using it as a decoration. Baste the cut design to the fabric. a CAUTION ● If glue is used to hold the cut design in place on the fabric, do not apply glue to areas that will be sewn with - Brother International XS2070 | Operation Manual - Page 67
can easily be sewn using the optional walking foot and the optional quilting guide. Note ● Only use the walking foot with straight or zigzag stitches. walking foot. Models equipped with a needle threader ● Thread the needle manually when using the walking foot, or only attach the walking foot after - Brother International XS2070 | Operation Manual - Page 68
holder Note Models equipped with a needle threader ● Thread the needle manually when using the quilting foot, or only attach the quilting foot after using the needle threader. Adjust the stem of the quilting guide so that b the guide aligns with the seam that has already been sewn. Remove the - Brother International XS2070 | Operation Manual - Page 69
Hold the quilting foot in place with your right c hand, and then tighten the presser foot holder screw using the disc-shaped screwdriver in your left hand. Use both hands to hold the fabric taut, then f move the fabric to follow the pattern. Reinforcement stitches are sewn at the beginning and - Brother International XS2070 | Operation Manual - Page 70
Stitch Width Stitch Length [mm (inch.)] [mm (inch.)] Auto Manual Auto Manual Triple stretch stitch J Attaching sleeves, sew- 02 02 02 inseams. Determine the desired length of the bar tack. a Set the button guide plate on buttonhole foot "A" to the desired length. (The distance between the - Brother International XS2070 | Operation Manual - Page 71
Position the fabric so that the opening of the d pocket faces toward you, and then lower the presser foot lever so that the needle drops 2 mm (1/16 inch) in front of the pocket opening. Pull down the buttonhole lever as far as e possible. a Buttonhole lever 1 The buttonhole lever is - Brother International XS2070 | Operation Manual - Page 72
with this sewing machine. Pattern No. Stitch Name Application Stitch Width Stitch Length [mm (inch.)] [mm (inch.)] Auto Manual Auto Manual Fagoting stitch J 19 19 19 17 17 17 17 Fagoting, smocking and decorative stitching 5.0 (3/16) 2.5 (3/32) 0.0-7.0 1.0-4.0 (0-1/4) (1/16-3/16 - Brother International XS2070 | Operation Manual - Page 73
Reverse (Rev.)/ Reinforcement (Rfc.) Stitching Stitch Name Pattern No. Application Stitch Width Stitch Length [mm (inch.)] [mm (inch.)] Auto Manual Auto Manual Decorative stitch N 31 31 31 28 28 28 - Decorative hemming on thin, medium weight and plain weave fabrics, heirloom stitching - Brother International XS2070 | Operation Manual - Page 74
UTILITY STITCHES Scallop stitching The wave-shaped repeating pattern that looks like shells is called "scalloping". It is used on the collars of blouses and to decorate the edges of handkerchiefs. Attach monogramming foot "N". a Select stitch . b Stitch along the edge of the fabric, making c sure - Brother International XS2070 | Operation Manual - Page 75
Shell tuck stitching The gathers that look like shells are called "shell tucks". They are used to decorate trims, the front of blouses or cuffs made of thin fabrics. Fold the fabric along the bias. a Attach zigzag foot "J". b Select stitch , and then increase the thread c tension. • For details, - Brother International XS2070 | Operation Manual - Page 76
fabrics in addition to plain weave fabrics. CAUTION ● The needle threader cannot be used with the wing needle, otherwise the sewing machine may be damaged. Manually pass the thread through the eye of the needle from the front to the back. For details, refer to "Upper threading" (page 25). Insert the - Brother International XS2070 | Operation Manual - Page 77
(Rfc.) Stitching Utility stitches Pattern No. 4 Stitch Width Stitch Length [mm (inch.)] [mm (inch.)] Stitch Name Application Auto Manual Auto Manual Left J 00 00 00 00 00 00 00 Basic stitching, sewing gathers or pintucks, etc. 0.0 (0) 0.0-7.0 (0-1/4) 2.5 (3/32) 0.2-5.0 (1/64-3/16 - Brother International XS2070 | Operation Manual - Page 78
Reverse (Rev.)/ Reinforcement (Rfc.) Stitching Stitch Name Pattern No. Application Stitch Width Stitch Length [mm (inch.)] [mm (inch.)] Auto Manual Auto Manual Blind hem stitch R 10 10 10 09 09 09 09 Blind hem stitching on medium weight fabrics 0 (0) -3 3 2.0 (1/16) 1.0-3.5 No - Brother International XS2070 | Operation Manual - Page 79
Foot Reverse (Rev.)/ Reinforcement (Rfc.) Stitching Stitch Name Pattern No. Application Stitch Width Stitch Length [mm (inch.)] [mm (inch.)] Auto Manual Auto Manual Decorative stitch Decorative hemming on thin, medium weight 5.0 (3/16) 3.5 (1/8) N 28 28 28 25 25 25 - and plain weave fab - Brother International XS2070 | Operation Manual - Page 80
Appliqué stitch (for quilting) Quilting stippling Decorative stitch Pattern No. Application Stitch Width Stitch Length [mm (inch.)] [mm (inch.)] Auto Manual Auto Manual J 45 45 45 39 39 35 31 Straight stitch quilting that looks hand-sewn 0.0 (0) 2.5 (3/32) 0.0-7.0 1.0-4.0 No No Rfc - Brother International XS2070 | Operation Manual - Page 81
Reinforcement (Rfc.) Stitching Stitch Name Pattern No. Application Stitch Width Stitch Length [mm (inch.)] [mm (inch.)] Auto Manual Auto Manual N 63 59 55 47 - - - For decoration, etc. 7.0 (1/4) 2.5 (3/32) 0.0-7.0 0.2-4.0 No No Rfc. (0-1/4) (1/64-3/16) N 64 60 - - - - - For decoration - Brother International XS2070 | Operation Manual - Page 82
of 5.0 mm (3/16 inch) or less. Stitch Width Stitch Length [mm (inch.)] [mm (inch.)] Auto Manual Auto Manual 7.0 (1/4) 0.4 (1/64) ** 0.0-7.0 0.1-1.0 Yes No Rfc. (0-1/4) (1/64-1/16) ( J ) 7.0 (1/4) 0.4 (1/64) ** 0.0-7.0 (0-1/4) 0.1-1.0 (1/64-1/16) Yes ( J ) No Rfc. 7.0 (1/4) 0.4 (1/64 - Brother International XS2070 | Operation Manual - Page 83
(Rev.)/ Reinforcement (Rfc.) Stitching Stitch Name Pattern No. Application Stitch Width Stitch Length [mm (inch.)] [mm (inch.)] Auto Manual Auto Manual N 93 83 - - - - - For decoration, etc. 6.0 (15/64) 1.4 (1/16) 0.0-7.0 0.2-4.0 No No Rfc. (0-1/4) (1/64-3/16) N 94 84 75 65 - - - For - Brother International XS2070 | Operation Manual - Page 84
applied to ensure correct operation, making periodic oiling unnecessary. If problems occur, such as difficulty turning the handwheel or an unusual noise the machine, and contact your authorized dealer or the nearest authorized service center. Precautions on storing the machine Do not store the - Brother International XS2070 | Operation Manual - Page 85
thread may become tangled, the needle may break or sewing performance may suffer. For a new bobbin case (part code: XE7560-001), contact your nearest authorized service center. ● Make sure that you fit the bobbin case properly, otherwise the needle may break. 83 - Brother International XS2070 | Operation Manual - Page 86
APPENDIX As shown, insert the tab on the needle plate h cover into the hole in the needle plate, and then correctly position of the needle plate cover. From the front, slide the needle plate cover i back into position. a Needle plate cover b Tab c Hole • Check that the needle plate cover is - Brother International XS2070 | Operation Manual - Page 87
you need additional help, the Brother Solutions Center offers the latest FAQs and troubleshooting tips. Visit us at " http://support.brother.com/ " . If the problem persists, contact your dealer or the nearest authorized service center. Frequent troubleshooting topics Detailed causes and remedies - Brother International XS2070 | Operation Manual - Page 88
APPENDIX While holding the bobbin in place with your d finger, pass the thread through the slit in the needle plate. • Hold down the bobbin with your right hand, and then pull the end of the thread around the tab with your left hand. Tangled thread on wrong side of fabric ■ Symptom • The thread - Brother International XS2070 | Operation Manual - Page 89
the thread that is pulled out, and then pass the thread under the thread guide cover with your left hand. a Presser foot lever • If the presser foot turning the handwheel e toward you (counterclockwise) so that the a Thread guide cover mark on the wheel points up, or press (needle position button) - Brother International XS2070 | Operation Manual - Page 90
behind the needle bar thread j guide above the needle. The thread can easily be passed behind the needle bar thread guide by holding the thread in your left then feeding the thread with your right hand. 1 a Needle bar thread guide Thread the needle according to steps m and k n in "Upper threading" - Brother International XS2070 | Operation Manual - Page 91
Incorrect thread tension ■ Symptoms • Symptom 1: The lower thread is visible from the upper side of the fabric. • Symptom 2: The upper thread appears as a straight line on the upper side of the fabric. • Symptom 3: The upper thread is visible from the lower side of the fabric. • Symptom 4: The - Brother International XS2070 | Operation Manual - Page 92
. If the operation could not be completed according to the procedure, instead of attempting to complete it forcefully, contact your nearest authorized service center. ■ Removing the fabric from the machine Immediately stop the sewing machine. a Turn off the sewing machine. b Remove the needle. c If - Brother International XS2070 | Operation Manual - Page 93
plate. Remove the fabric and threads from the needle plate. If the fabric cannot be removed, even after completing these steps, contact your nearest authorized service center. Remove any threads in the race and around l the feed dogs. Turn the handwheel to raise the feed dogs. m Align the two screw - Brother International XS2070 | Operation Manual - Page 94
become tangled, the needle may break or sewing performance may suffer. For a new bobbin case (part code: XE7560-001), contact your nearest authorized service center. ● Make sure that you fit the bobbin case properly, otherwise the needle may break. Attach the needle plate cover according to q steps - Brother International XS2070 | Operation Manual - Page 95
and feed dogs operate correctly. If the needle or feed dogs contact the needle plate, the machine may be malfunctioning; therefore, contact your nearest authorized service center. 93 - Brother International XS2070 | Operation Manual - Page 96
If the error message "E6" appears in the LCD with the occurrence of one of the following symptoms, follow the procedure below to solve the problem. Symptom 1 : The machine rattles and then stops just after sewing is started. Symptom 2 : The upper thread is tangled, for example, in the race, or - Brother International XS2070 | Operation Manual - Page 97
Remove the upper thread and bobbin. c • Refer to "Fabric is caught in the machine and cannot be removed" (page 90). Remove the bobbin case. d • Refer to "Fabric is caught in the machine and cannot be removed" (page 90). If threads remain in the bobbin case, remove e it. • Refer to "Fabric is - Brother International XS2070 | Operation Manual - Page 98
is not turned on. Turn on the machine. The thread is not passed through the bobbin-winding thread guide correctly. Correctly pass the thread through the bobbin-winding thread guide. Bobbin thread Bobbin spins slowly. (for models Move the sewing speed controller to does not wind equipped with - Brother International XS2070 | Operation Manual - Page 99
tension. page 75 page 43 You are pulling the fabric too much. Lightly guide the fabric. - The area around the hole in the needle plate is scratched. Replace the needle plate. Contact your retailer or the nearest authorized service center. - The area around the hole in the presser foot is - Brother International XS2070 | Operation Manual - Page 100
spool cap that best fits the size of the spool being used. bar thread guide.) page 25 There are knots or tangles in the thread. Remove any knots . Replace the needle plate. Contact your retailer or the nearest authorised service center. - The area around the hole in the presser foot is - Brother International XS2070 | Operation Manual - Page 101
There is a highpitched noise while sewing. The bobbin case is scratched. Replace the bobbin case. Contact your retailer or the nearest authorized service center. - 4 You have not used bobbin that has been designed for this machine. Incorrect bobbins will not work properly. Only use a bobbin - Brother International XS2070 | Operation Manual - Page 102
APPENDIX ■ After sewing Symptom Possible cause How to put it right Reference The upper thread The bobbin thread is incorrectly has tightened up. installed. Correctly install the bobbin thread. page 22, 85 You have not threaded the upper thread properly. Correct the upper threading. page - Brother International XS2070 | Operation Manual - Page 103
an error message appears on the operation panel. Follow the instructions indicated in the table. If you press the stitch selection LCD" (page 94). The machine may be malfunctioning. Contact your nearest authorized service center. Operation beep Each time a key is pressed you will hear one beep - Brother International XS2070 | Operation Manual - Page 104
APPENDIX i INDEX Numerics 3-point zigzag stitch 47 A accessories 6 appliqués 63 B bar tack 68 basic stitching 49 blind hem stitching 50 bobbin 22 bobbin bobbin bobbin ccwaoisvneed.re...r 8....,......1....7....,......2....0....,......9....6...,9..,.9..72..2,..,.1. 022133 - Brother International XS2070 | Operation Manual - Page 105
T thick fabrics 44 thin fabrics 46 thread cutter 42 thread tension 43 trial sewing 44 triple stretch stitch 49 ttrwoiunbnleesehdoleot.i.n..g...3..3..,.. 3845 U upper tension-control dial 8, 43, 89 upper threading 25 W walking foot 65 wing needle 74 Z zigzag stitch 44, 47, 63 - Brother International XS2070 | Operation Manual - Page 106
- Brother International XS2070 | Operation Manual - Page 107
- Brother International XS2070 | Operation Manual - Page 108
Please visit us at http://support.brother.com/ where you can get product support and answers to frequently asked questions (FAQs). English 888-E44/E45/E46 Printed in Vietnam XG6163-101①
-
 1
1 -
 2
2 -
 3
3 -
 4
4 -
 5
5 -
 6
6 -
 7
7 -
8
-
9
-
10
-
11
-
12
-
13
-
14
-
15
-
16
-
17
-
18
-
19
-
20
-
21
-
22
-
23
-
24
-
25
-
26
-
27
-
28
-
29
-
30
-
31
-
32
-
33
-
34
-
35
-
36
-
37
-
38
-
39
-
40
-
41
-
42
-
43
-
44
-
45
-
46
-
47
-
48
-
49
-
50
-
51
-
52
-
53
-
54
-
55
-
56
-
57
-
58
-
59
-
60
-
61
-
62
-
63
-
64
-
65
-
66
-
67
-
68
-
69
-
70
-
71
-
72
-
73
-
74
-
75
-
76
-
77
-
78
-
79
-
80
-
81
-
82
-
83
-
84
-
85
-
86
-
87
-
88
-
89
-
90
-
91
-
92
-
93
-
94
-
95
-
96
-
97
-
98
-
99
-
100
-
101
-
102
-
103
-
104
-
105
-
106
-
107
-
108
 |
 |
APPENDIX
UTILITY STITCHES
SEWING BASICS
KNOWING YOUR
SEWING MACHINE
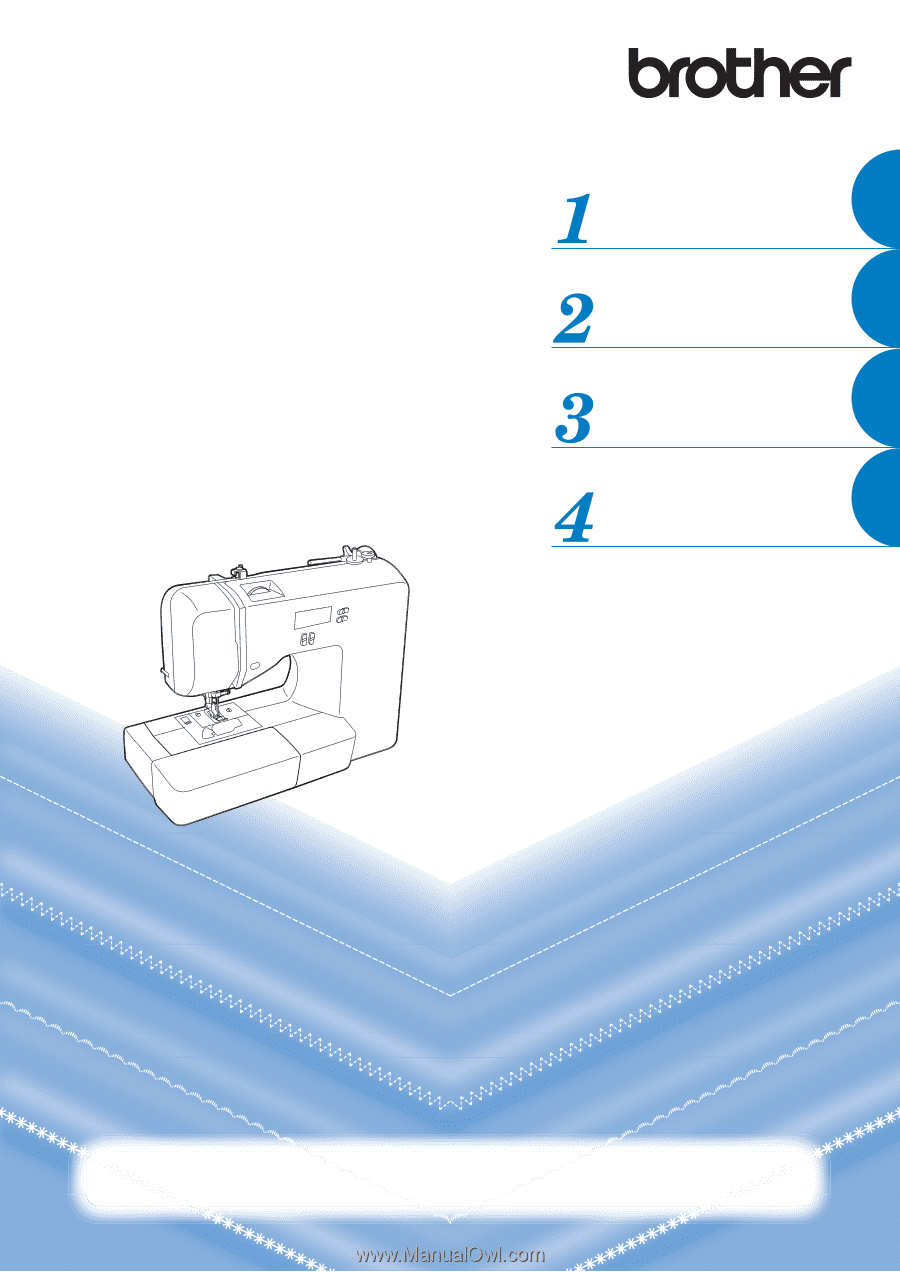
Operation Manual
Product Code: 888-E44/E45/E46
Sewing Machine
Be sure to read this document before using the machine.
We recommend that you keep this document nearby for future reference.
Operation Manual