Canon 0433B002 User Manual
Canon 0433B002 Manual
 |
View all Canon 0433B002 manuals
Add to My Manuals
Save this manual to your list of manuals |
Canon 0433B002 manual content summary:
- Canon 0433B002 | User Manual - Page 1
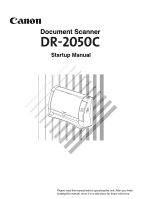
Document Scanner Startup Manual Please read this manual before operating this unit. After you finish reading this manual, store it in a safe place for future reference. - Canon 0433B002 | User Manual - Page 2
by any information storage or retrieval system without the prior written permission of CANON ELECTRONICS INC. Disclaimers The information in this document is subject to change without notice. CANON ELECTRONICS INC. MAKES NO WARRANTY OF ANY KIND WITH REGARD TO THIS MATERIAL, EITHER EXPRESS OR IMPLIED - Canon 0433B002 | User Manual - Page 3
you to use the SOFTWARE. No updates, fixes or support will be made available for the SOFTWARE. 4. LIMITED WARRANTY AND DISCLAIMER OF INDEMNITY: Canon, Canon's affiliate, their distributor or dealer will not guarantee uninterrupted service, or absence or correction of errors. Therefore, the SOFTWARE - Canon 0433B002 | User Manual - Page 4
- Canon 0433B002 | User Manual - Page 5
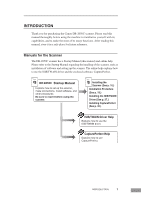
the scanner. The online help explains how to use the ISIS/TWAIN driver and the enclosed software, CapturePerfect. Document Scanner Startup Manual Startup Manual Read this manual thoroughly before using this scanner. Keep this manual in a safe place for future reference. Explains how to set up the - Canon 0433B002 | User Manual - Page 6
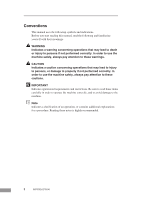
uses the following symbols and indications. Before you start reading this manual, read the following and familiarize yourself with their meanings. WARNING Indicates a warning concerning operations that may lead to death or injury to persons if not - Canon 0433B002 | User Manual - Page 7
Contents INTRODUCTION ...1 Manuals for the Scanner Using the ISIS/TWAIN Driver 36 Using CapturePerfect 37 Setting Up the Document Feed Tray 43 Using the Document Guide Adapter 44 Using the Feed Extension Plate 44 Placing a Troubleshooting ...67 Specifications ...73 Index ...76 Contents 3 - Canon 0433B002 | User Manual - Page 8
a spot, hang a heavy curtain, or similar object to shade the scanner. • Avoid dusty locations. Dust can get inside of the scanner and cause problems. • Avoid warm or humid locations, such as in the vicinity of a water faucet, water heater, or humidifier, and avoid locations where the fumes from - Canon 0433B002 | User Manual - Page 9
's AC adapter with any other product. Model: MG1-3607 • If you have any questions about the AC adapter, contact your local authorized Canon dealer or service representative for futher information. Moving the Scanner • When moving the scanner, always hold it with both hands to avoid dropping it. The - Canon 0433B002 | User Manual - Page 10
scanner does somehow become damaged, immediately turn the scanner OFF and unplug the Power Cord. Contact your local authorized Canon dealer or service representative to have the scanner serviced. • Always turn the scanner OFF and unplug the Power Cord before moving the scanner. CAUTION • Do not set - Canon 0433B002 | User Manual - Page 11
shock. If such foreign matter does get inside of the scanner, unplug the Power Cord immediately, and then contact your local authorized Canon dealer or service representative for assistance. • Do not set up the scanner in a dusty or humid location. Doing so creates a risk of fire or electrical - Canon 0433B002 | User Manual - Page 12
.) ■ USB 2.0 Interface Connecting to a computer is done with Hi-Speed USB 2.0 protocol. ■ Color/Grayscale Support Documents can be scanned in 24-bit color or 256-level grayscale. ■ Supports a Variety of Scanning Modes The scanner supports the following scanning modes, depending on the document type - Canon 0433B002 | User Manual - Page 13
■ Skip Blank Page Function The scanner is equipped with a Skip Blank Page function that allows it to scan a document regardless of whether every document is double-sided or single-sided. ■ Prescan Function The scanner is equipped with a Prescan function that allows you to adjust the contrast and - Canon 0433B002 | User Manual - Page 14
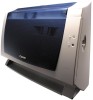
Canon dealer or service representative. DR-2050C Scanner AC Adapter Power Cord Feed Roller Document Guide Manual Scanner reaPdleinagsethriseamdatnhuisalm, satnourealitbienfoaresaofpeeprlaatcinegfothrisfuutunriet. rAeffteerreynocue.finish Startup Manual (This Manual) Adjustment Sheet Warranty - Canon 0433B002 | User Manual - Page 15
for information about installing the roller. Feed Roller • The DR-2050C/2080C Setup Disc is in the Startup Manual (this manual). • The Adjustment Sheet (Shading Sheet) is inserted at the back of this manual. Keep it in a safe place where it will not become lost. • Items included in this package may - Canon 0433B002 | User Manual - Page 16
Removing the Protective Packing Materials Remove all of the protective packing materials before using the scanner. 1 Remove the protective tape (indicated by the ▼) from the scanner. 2 Remove the protective sheet between the Document Feed Tray and the scanner. 3 Open the Document Feed Tray. Pressing - Canon 0433B002 | User Manual - Page 17
4 Remove the protective tape (indicated by ▼) and protective sheet. 5 Close the Upper Unit slowly. Be sure that the Upper Unit is completely closed by pushing on both edges with both hands until you hear a click. 6 Close the Document Feed Tray and Upper Cover. Before Using the Scanner 13 - Canon 0433B002 | User Manual - Page 18
and Document Feed Tray open) Feed Extension Plate Pull out this plate if documents tend to fall forward. Document Guide Adapter When documents are skewed, insert the adapter into the Document Guide. Front Unit Open when clearing a paper jam or cleaning inside. OPEN Knob Use this knob to open the - Canon 0433B002 | User Manual - Page 19
off. USB Connector Connect the USB cable provided or one that supports Hi-Speed USB 2.0. Power Connector Connect the bundled AC adaptor. Kensington Slot up, creating the risk of fire. ■ Conventions Align the Document Guide with the mark that matches the document size. Marks indicating document - Canon 0433B002 | User Manual - Page 20
• The Hi-Speed USB 2.0 interface is standard equipment on some computers and is supported on the scanner with the Hi-Speed USB 2.0 interface card driver when using the DR-2050C. Contact your local authorized Canon dealer or service representative for more detailed information. • If the Hi-Speed - Canon 0433B002 | User Manual - Page 21
manual or the online help. • Depending on the application software that you are using, the device driver the functions described in this guide. • Make sure that the device driver and application software that you you are using. • The ISIS/TWAIN driver provided with the scanner is not necessarily - Canon 0433B002 | User Manual - Page 22
Installation Procedure The procedure for installing the scanner is outlined below. (For a detailed outline of this procedure, see "Connecting the Scanner to Your PC," on p. 21.) 1. Check the interface card in your computer. (See "Interface Cards," on p. 19.) 2. Connect the Power Cord to the scanner. - Canon 0433B002 | User Manual - Page 23
the instructions in your computer's and the USB 2.0 interface card's manuals to install the USB 2.0 interface card into your computer. • Use the most recent version of the USB 2.0 driver provided by Microsoft. Note If the USB 2.0 interface is not compatible with Hi-Speed USB 2.0, scanning speed is - Canon 0433B002 | User Manual - Page 24
Connecting the Power Cord Perform the following steps to connect the Power Cord. WARNING • Be sure to use the Power Cord and AC adaptor provided with the scanner. • Be sure the scanner is turned OFF when performing this operation. 1 Connect the bundled Power Cord q to the AC adaptor. 2 Plug the AC - Canon 0433B002 | User Manual - Page 25
one (1) computer. USB Interface Connection • Be sure to use the USB cable bundled with the scanner or a Hi-Speed USB 2.0 compatible cable. • When using a USB extension card that supports Hi-Speed USB 2.0, be sure to choose one verified for use with the scanner. (See p. 19.) Computer DR-2050C USB - Canon 0433B002 | User Manual - Page 26
all even though the power is ON, immediately turn the scanner OFF and unplug the Power Cord. Contact your local authorized Canon dealer or service representative to have the scanner serviced. 3 Log on to Windows. IMPORTANT If you are using Windows 2000 Professional or Windows XP, be sure to log on - Canon 0433B002 | User Manual - Page 27
the Scanner When the computer recognizes the scanner, Windows Plug And Play displays the scanner driver's installation screen. Follow the instructions that appear on the screen to install the driver. • If you are using Windows 98SE, the [Add New Hardware Wizard] dialog box appears. 1. Click - Canon 0433B002 | User Manual - Page 28
(Advanced)], and then click the [Next] button. 3. Select [Search for the best driver in these locations], and then clear the [Search removable media (floppy, CD-ROM...)] check screen. Note The DR-2050C is registered as "CANON DR-2050C USB" in the Imaging Device directory. 24 Installing the Scanner - Canon 0433B002 | User Manual - Page 29
does not operate at all even though the power is ON, immediately turn the scanner OFF and unplug the Power Cord. Contact your local authorized Canon dealer or service representative to have the scanner serviced. Installing the Scanner 25 - Canon 0433B002 | User Manual - Page 30
use the scanner. • CapturePerfect CapturePerfect is software for scanning images that is ISIS compatible. You need to install the ISIS/TWAIN driver before installing CapturePerfect. For information about installing the bundled Adobe Acrobat, see the "How To Install" file on the Adobe Acrobat setup - Canon 0433B002 | User Manual - Page 31
log on as a user with administrator privileges. • If another ISIS compatible driver is already installed in your PC, you must back up the files listed below. These files may be overwritten when you install this ISIS/TWAIN driver. C:\Windows\System\pix*.dll C:\Windows\PixTran\*.* • The name of the - Canon 0433B002 | User Manual - Page 32
4 In the Open box, enter "D:\Driver\Setup.exe" (assuming that "D" is the letter assigned to your CD-ROM drive), and then click the [OK] button. The installer starts. 5 Follow the instructions that appear on the screen to install the software. 1. Read the Welcome text, and then click [Next]. 2. Read - Canon 0433B002 | User Manual - Page 33
. 6 After installation is complete, click the [Finish] button to exit the installer. Note When the ISIS/TWAIN driver is installed, Canon DR-2050C Help (see "Using the ISIS/TWAIN Driver," on p. 36.) and the DR-2050C & 2080C Adjustment Tool (see "Adjusting the Scanner," on p. 72.) icons are - Canon 0433B002 | User Manual - Page 34
Installing CapturePerfect CapturePerfect is ISIS compatible application software. You need to install the ISIS/TWAIN driver before installing CapturePerfect. Follow the procedure below to install CompturePerfect. 1 Turn ON your PC. Windows starts. IMPORTANT If you are using Windows 2000 Professional - Canon 0433B002 | User Manual - Page 35
5 Follow the instructions that appear on the screen to install the software. 1. Select the installation language. 2. Read the Welcome text, and then click [Next]. 3. Read the License Agreement - Canon 0433B002 | User Manual - Page 36
5. This starts the installer. 6. This completes the installation. 6 After installation is complete, click the [Finish] button to exit the installer. Note Installing CapturePerfect will put a CapturePerfect icon on your Windows Start Menu. (See "Using CapturePerfect," on p. 37.) 32 Installing the - Canon 0433B002 | User Manual - Page 37
Uninstalling Software Follow the procedure described below to uninstall the ISIS/TWAIN driver and CapturePerfect. IMPORTANT If you are using Windows 2000 Professional or Windows XP, be sure to log on as a user with administrator privileges. 1 Click the [ - Canon 0433B002 | User Manual - Page 38
The [Add/Remove Programs Properties] dialog box is displayed. Note If you are using Windows XP, the [Add or Remove Programs] dialog box is displayed. 3 On the list in the dialog box, select the application you want to delete, and then click [Add/Remove]. Note If you are using Windows XP, click the [ - Canon 0433B002 | User Manual - Page 39
4 The [Confirm File Deletion] dialog box appears. When [Canon DR-2050C/2080C Scanner Driver] is selected. When [CapturePerfect] is selected. 5 Click the [Yes] button to start the uninstaller. 6 After uninstall is complete, click the [OK] button to exit the uninstaller. Installing the Software 35 - Canon 0433B002 | User Manual - Page 40
& 2080C Help], or click the [Help] button displayed in the dialog box. Note Before using the ISIS/TWAIN Driver, select the scanner [Canon DR-2050C] with the software. For more information, refer to [Canon DR-2050C & 2080C Help] and the manual for the software you are using. 36 Using the Software - Canon 0433B002 | User Manual - Page 41
Using CapturePerfect This section explains the basic procedures to start and exit CapturePerfect. Details about actually using CapturePerfect can be found in CapturePerfect help. To view information about using CapturePerfect, click [Help] on the CapturePerfect menu bar. Starting CapturePerfect 1 - Canon 0433B002 | User Manual - Page 42
4 On the [Scan] menu, click [Select Scanner]. 5 Select [Canon DR-2050C], and then click the [OK] button. Note If [Canon DR-2050C] is not displayed in the list of scanners, reinstall the ISIS/TWAIN driver. (See "Installing the ISIS/TWAIN Driver," on p. 27.) 38 Using the Software - Canon 0433B002 | User Manual - Page 43
[Scan] menu, click [Scanner Setting], and then configure the scanning parameters. Note For details about how to configure scanning parameters, see ISIS/TWAIN driver help. (See p. 36.) 7 Execute the scan operation from the [Scan] menu. Note Details about actually using CapturePerfect can be found in - Canon 0433B002 | User Manual - Page 44
DR-2050C and CapturePerfect support Windows Scanner Event function. By installing the ISIS/TWAIN driver and CapturePerfect, CapturePerfect starts automatically when the scanners Start Button is pressed. Confirming Scanner Event 1. Double-click the [Scanners and Cameras] icon. Note The dialog - Canon 0433B002 | User Manual - Page 45
3. Click the [Events] tab. 4. Make sure that [CapturePerfect] is checked. Note • When an application is started by an event, it may not work correctly depending on the application. • To disable the Event function, check the [Disable device events] check box. • Restart Windows to enable new - Canon 0433B002 | User Manual - Page 46
The size of documents that can be scanned is shown below. Eject Direction Width Length Weight Page Separation mode 2.16" to 8.5" (55 mm to 216 mm) 2.75" to scanner to jam. • Scanning documents before the ink is dry can cause problems with the scanner. Always make sure that the ink on a document is - Canon 0433B002 | User Manual - Page 47
Wrinkled or creased documents Curled documents Torn documents Documents with paper clips or staples Carbon paper Coated paper Extremely thin, translucent paper Paper with square holes Preparing the Trays Prepare the Document Feed Tray in accordance with the document size and type. Setting Up the - Canon 0433B002 | User Manual - Page 48
skewed during scanning or when scanning a document that is folded in half (P. 52), install the Document Guide Adapter on the Document Guide to keep the document from becoming skewed. Install the Document Guide Adapter by positioning it as shown in the illustration. Insert the legs of the Document - Canon 0433B002 | User Manual - Page 49
Placing a Document for Scanning There are two methods for paper separation, called the Page Separation mode and Bypass mode for feeding documents. Feeding documents continuously from a stack of documents placed in the feed tray is called the Page Separation mode. Feeding documents one sheet at a - Canon 0433B002 | User Manual - Page 50
width of the document being scanned. In the case of an A4 or Letter size document, align the guide with the document positioning mark. IMPORTANT Do not hold the tips of the Document Guide Adaptor when installing it. Doing so can damage the Document Tray. 3 Fan the stack of documents to be - Canon 0433B002 | User Manual - Page 51
less when document pages are not being fed correctly. 5 Adjust the Document Guides so they match the width of the document. Note Before starting a scan, system error or a paper jam while the scanner is scanning, resolve the problem, make sure that the scanned image of the last page that was fed has - Canon 0433B002 | User Manual - Page 52
the Feed Selection Lever (Bypass mode). Bypass mode Page Separation mode 2 Adjust the Document Guide to the width of the document being scanned. In the case of an A4 or Letter size document, align the guide with the document positioning mark. 3 Start scanning from the application. 48 Using the - Canon 0433B002 | User Manual - Page 53
4 Set the document in the scanner with the back of the document facing forward and its top edge facing downwards. The document is scanned as it is detected. IMPORTANT • When scanning documents that are fastened together, such as invoices, set the edge that is fastened together as the leading edge. • - Canon 0433B002 | User Manual - Page 54
Clearing a Paper Jam When paper jams occur during scanning, use the following procedure to clear them. CAUTION Be careful when removing jammed paper. It is possible to cut your hand on the edge of a sheet of paper. 1 If the Document Feed Tray is closed, open it. 2 Pressing the OPEN Knob from both - Canon 0433B002 | User Manual - Page 55
3 Remove the jammed document from the feed side or the output side. IMPORTANT Be sure to pull the document out carefully, without applying too much force. Should the document tear, be sure to remove any part remaining in the scanner. 4 Gently press the left and right sides of the top of the Front - Canon 0433B002 | User Manual - Page 56
scanner also supports the Front) (Back) (Combined Image) IMPORTANT • Attach the Document Guide Adaptors to prevent documents from skewing when doing folio scan. or misaligned images. Note • Folio scanning is set in the ISIS/TWAIN driver. • The image on the front of the folded document appears as - Canon 0433B002 | User Manual - Page 57
Regular Maintenance Clean the scanner on a regular basis as described below to maintain peak scanning quality. CAUTION • When cleaning the scanner or inside of the scanner, turn OFF the power switch and unplug the Power Cord from the outlet. • Scanner power needs to be turned on when cleaning the - Canon 0433B002 | User Manual - Page 58
sensor glass may cause marks on the images and could cause feeding errors. If there are scratches on the sensor glass, contact your local authorized Canon dealer or service representative. 54 Regular Maintenance - Canon 0433B002 | User Manual - Page 59
5 Rotate the rollers q and w as you clean them. Moisten a cloth with plain water, wring out excess water, wipe the rollers and then dry it with a clean dry cloth. q : Rotate as you wipe. w : Rotate in the direction of the arrows as you wipe. e : (Retard Roller) Remove the roller from the scanner, - Canon 0433B002 | User Manual - Page 60
Cleaning the Metal Rollers 1 Turn on the scanner. 2 Open the Document Feed Tray. 3 Pressing the OPEN Knob from both sides (q), pull the Front Unit forward to open it (w). 4 Use a clean dry cloth to wipe the metal rollers (■ parts in the illustration). Press the Start Button and Stop Button at the - Canon 0433B002 | User Manual - Page 61
the message is displayed. • Be sure to reset the counter after replacing the rollers. (See "Resetting the Counter," on p. 58.) • Contact your local authrized Canon dealer or service representative for information about the exchange roller kit (feed roller and retard roller). Regular Maintenance 57 - Canon 0433B002 | User Manual - Page 62
Resetting the Counter After replacing the feed rollers, reset the counter according to the following procedure. 1 Click the [Start] button, point to [Settings], and then click [Control Panel]. 2 Double-click the [Scanners and Cameras] icon. 58 Regular Maintenance - Canon 0433B002 | User Manual - Page 63
3 Click on [Properties] for the scanner you are using. 4 Click the [Counter] tab. 5 Press the [Reset] button, and then make sure that the counter for the roller being used is set to 0. Regular Maintenance 59 - Canon 0433B002 | User Manual - Page 64
Removing and Attaching the Feed Roller Follow the procedure below to remove and attach the feed roller for cleaning or replacement. Note When attaching the feed roller during installation, operate the roller fastening lever according to the removal procedure and then attach the feed roller. CAUTION - Canon 0433B002 | User Manual - Page 65
3 Raise the roller lock lever (q), and then slide it to the left (w). 4 Shift the Feed Roller to the left to separate it from the shaft, and then remove it. Attaching the Feed Roller 1 Set the Feed Roller into the hollow inside the roller cover, and align the notch in the roller with the scanner - Canon 0433B002 | User Manual - Page 66
2 Slide the roller lock lever to the right, and then insert the shaft into the hole on the left side of the roller. 3 Lower the lever to lock the roller shaft. 4 Close the roller cover. Return the cover fully to its original position until you hear it click into place. 62 Regular Maintenance - Canon 0433B002 | User Manual - Page 67
5 Gently press the left and right sides of the top of the Front Unit. Return the unit fully to its original position until you hear it click into place. 6 Close the Document Feed Tray and Upper Cover. Regular Maintenance 63 - Canon 0433B002 | User Manual - Page 68
Removing and Attaching the Retard Roller Follow the procedure below to remove and attach the retard roller for cleaning or replacement. CAUTION Do not use excessive force when removing or attaching the rollers. Doing so may damage them. Removing the Retard Roller 1 Pressing the OPEN Knob from both - Canon 0433B002 | User Manual - Page 69
4 Shift the Retard Roller to the left to separate it from the shaft, and then remove it. Attaching the Retard Roller 1 Position the retard roller so the notch in the roller is facing the scanner's shaft. 2 Slide the roller lock lever to the right, and then insert the shaft into the hole on the left - Canon 0433B002 | User Manual - Page 70
3 Push the roller lock lever towards the back of the scanner to lock the retard roller in place. 4 Attach the roller cover. Be sure that the upper unit is completely closed by pushing on both edges with both hands until you hear a click. 66 Regular Maintenance - Canon 0433B002 | User Manual - Page 71
scanner, and how to resolve them. Refer to the troubleshooting section related to the problem that you have encountered. The Scanner Does Not Turn above section you still cannot resolve the problem, contact your local authorized Canon dealer or your service representative. The Scanner Does Not Turn - Canon 0433B002 | User Manual - Page 72
, referring to the instruction manual for the USB 2.0 support Hi-Speed 2.0. Remedy Use the USB cable provided with the scanner. (See p. 21.) Cause Remedy The USB HUB does not support Hi-Speed 2.0. Remove the HUB or replace it with one that supports HI-Speed 2.0. (See p. 21.) 68 Troubleshooting - Canon 0433B002 | User Manual - Page 73
driver been installed? • Has the application software been installed correctly? Has the application software been set up correctly? • Is there a problem weight that the scanner cannot scan. Remedy Check the size, thickness, and weight local authorized Canon dealer or service representative to purchase - Canon 0433B002 | User Manual - Page 74
, the scanner enters a standby state and pauses for the next sheet. It does not indicate a paper jam. To scan the next sheet of the document, manually remove the page that is engaged by the eject roller, or just start the next scan job. For details on how to clear jammed paper - Canon 0433B002 | User Manual - Page 75
authorized Canon dealer or service representative. driver, see "Installing the ISIS/TWAIN Driver," on p. 27. For details on how to install the application software, refer to the application software instruction manual. Cause Remedy Attempting to use a function of the DR-2050C that is not supported - Canon 0433B002 | User Manual - Page 76
in the case of WindowsXP), Canon Document Scanner, and then DR-2050C & 2080C Adjustment Tool, or use the scanner adjustment function of the ISIS/TWAIN driver. Follow the instructions on the dialog box that appears to be deleted. Once deleted, adjustment data cannot be recovered. 72 Troubleshooting - Canon 0433B002 | User Manual - Page 77
297 mm) (nonseparated documents) 2.75" to 13.9" (70 mm to 355 mm) Weight: (separated documents) 14 to 32 lb bond (0.0024" to 0.0059") 52 to 128 240 dpi, 300 x 300 dpi, 400 x 400 dpi 600 x 600 dpi Scanning Speed (Conditions: CPU Celeron 733 MHz; 256 MB RAM; Document Size: A4) Black and - Canon 0433B002 | User Manual - Page 78
Interface Other Functions Dimensions Dimensions (with trays open) Weight Power Supply Power Consumption Noise Operating Environment Hi-Speed USB 2.0 Auto document thickness adjustment, folio scan 11.7" Contact your local authorized Canon dealer or service representative for detailed information - Canon 0433B002 | User Manual - Page 79
7.7" (197) 12.7" (323) (Document Tray is open) External Dimensions Units: inches (units in parentheses are millimeters) 11.7" (298) 3.9" (100) 1.3" (32) Specifications 75 - Canon 0433B002 | User Manual - Page 80
14 Document Feed Opening 14 Document Feed Tray 14 Document Guide 14 Document Positioning Mark ........ 15, 46, 48 14 Feed Indicator 14 Feed Selection Lever 14 I ISIS/TWAIN Driver 36 Uninstall 33 Install 27 Using 36 OPEN Knob 14 Troubleshooting 67 V Ventilation Openings 15 76 Index - Canon 0433B002 | User Manual - Page 81
MEMO - Canon 0433B002 | User Manual - Page 82
MEMO - Canon 0433B002 | User Manual - Page 83
, if not installed and used in accordance with the instructions, may cause harmful interference to radio communications. However, there in the manual. If such changes or modifications should be made, you could be required to stop operation of the equipment. Canon U.S.A. Inc. One Canon Plaza, Lake - Canon 0433B002 | User Manual - Page 84
INC. 1248, SHIMOKAGEMORI, CHICHIBU-SHI, SAITAMA 369-1892, JAPAN CANON U.S.A. INC. ONE CANON PLAZA, LAKE SUCCESS, N.Y. 11042, U.S.A. CANON CANADA INC. 6390 DIXIE ROAD, MISSISSAUGA, ONTARIO L5T 1P7, CANADA CANON EUROPA N.V. BOVENKERKERWEG 59-61, P.O.BOX 2262, 1180 EG AMSTELVEEN, THE NETHERLANDS
-
 1
1 -
 2
2 -
 3
3 -
 4
4 -
 5
5 -
 6
6 -
 7
7 -
8
-
9
-
10
-
11
-
12
-
13
-
14
-
15
-
16
-
17
-
18
-
19
-
20
-
21
-
22
-
23
-
24
-
25
-
26
-
27
-
28
-
29
-
30
-
31
-
32
-
33
-
34
-
35
-
36
-
37
-
38
-
39
-
40
-
41
-
42
-
43
-
44
-
45
-
46
-
47
-
48
-
49
-
50
-
51
-
52
-
53
-
54
-
55
-
56
-
57
-
58
-
59
-
60
-
61
-
62
-
63
-
64
-
65
-
66
-
67
-
68
-
69
-
70
-
71
-
72
-
73
-
74
-
75
-
76
-
77
-
78
-
79
-
80
-
81
-
82
-
83
-
84
 |
 |
Startup Manual
Please read this manual before operating this unit. After you finish
reading this manual, store it in a safe place for future reference.
Document Scanner