Canon 2300N Copying Guide for imageCLASS 2300
Canon 2300N - ImageCLASS B/W Laser Manual
 |
UPC - 750845812596
View all Canon 2300N manuals
Add to My Manuals
Save this manual to your list of manuals |
Canon 2300N manual content summary:
- Canon 2300N | Copying Guide for imageCLASS 2300 - Page 1
- Canon 2300N | Copying Guide for imageCLASS 2300 - Page 2
0 Ot¯ imageCLASS 2300 Copying Guide - Canon 2300N | Copying Guide for imageCLASS 2300 - Page 3
are PDF manuals included on the CD-ROM accompanying CD-ROM. Installing and Setting Up the Machine Network and Printer Settings Basic Operations Set-Up Sheet for the Machine Set-Up Sheet for Networking and Printing Basic Guide Machine Settings Troubleshooting Copying Instructions Fax Instructions - Canon 2300N | Copying Guide for imageCLASS 2300 - Page 4
Chapter 4 Customizing Settings Chapter 5 Appendix Includes the Combination of Functions Chart and index. Considerable effort has been made to ensure that this manual is free of inaccuracies and omissions. However, as we are constantly improving our products, if you need an exact specification, please - Canon 2300N | Copying Guide for imageCLASS 2300 - Page 5
Required Number of Copies 2-2 Changing the Copy Quantity 2-2 Paper Selection 2-4 Automatic Paper Selection 2-4 Manual Paper Selection 2-6 Copy Exposure and Image Quality Adjustments 2-9 Copy Exposure (Manual 2-10 Image Quality (Manual 2-11 Copy Exposure and Image Quality (Automatic 2-12 iv - Canon 2300N | Copying Guide for imageCLASS 2300 - Page 6
Changing the Copy (Zoom) Ratio 2-14 Preset Zoom 2-15 Zoom by Percentage 2-16 Auto Zoom 2-17 Collating Copies 2-20 Page Order (Collate 2-21 Chapter 3 Special Copying Features Two-Page Separation 3-2 Margin Mode 3-5 Frame Erase 3-8 Original Frame Erase 3-10 Book Frame Erase 3-12 Hole Punch - Canon 2300N | Copying Guide for imageCLASS 2300 - Page 7
it in a safe place for future reference. How to Use This Manual Symbols Used in This Manual The following symbols are used in this manual to explain procedures, restrictions, handling precautions, and instructions that should be observed for safety. WARNING CAUTION IMPORTANT NOTE . Indicates - Canon 2300N | Copying Guide for imageCLASS 2300 - Page 8
Function Keys: + (Key Function) Example: F3 Press [F3] (DENSITY) F4 Press [F4] (L) vii - Canon 2300N | Copying Guide for imageCLASS 2300 - Page 9
WITHOUT LIMITATION, THEREOF, WARRANTIES AS TO MARKETABILITY, MERCHANTABILITY, FITNESS FOR A PARTICULAR PURPOSE OF USE OR AGAINST INFRINGEMENT OF ANY PATENT. CANON INC. SHALL NOT BE LIABLE FOR ANY DIRECT, INCIDENTAL, OR CONSEQUENTIAL DAMAGES OF ANY NATURE, OR LOSSES OR EXPENSES RESULTING FROM THE - Canon 2300N | Copying Guide for imageCLASS 2300 - Page 10
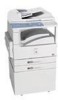
Introduction to Copying This chapter is an introduction to copying. 1 CHAPTER Overview of the imageCLASS 2300 1-2 Flow of Copy Operations 1-4 Placing Originals 1-9 Orientation 1-10 Platen Glass 1-11 Feeder 1-13 Canceling a Copy Job 1-16 Using the Stop Key 1-16 Using the System Monitor - Canon 2300N | Copying Guide for imageCLASS 2300 - Page 11
(Copy Basic Features screen). You can set the following basic copy features from this screen: Select the paper size automatically, or specify the paper size manually for a copy job. (See "Paper Selection," on p. 2-4.) Adjust the copy exposure and image quality automatically or - Canon 2300N | Copying Guide for imageCLASS 2300 - Page 12
Introduction to Copying [Margin]: Select to create margins along the sides of a copy sheet. (See "Margin Mode," on p. 3-5.) [Frame Erase]: Eliminates dark border areas and lines that appear around original images or shadows from punched holes. (See "Frame Erase," on p. 3-8.) [Image Combination]: - Canon 2300N | Copying Guide for imageCLASS 2300 - Page 13
learn the machine's basic features, and how to find information in this manual. Introduction to Copying NOTE For the following items: - Main power and platen glass clean. (See Chapter 6, "Routine Maintenance," in the Reference Guide.) Do not touch the platen glass cover while copying. Moving the - Canon 2300N | Copying Guide for imageCLASS 2300 - Page 14
Introduction to Copying The Copy Basic Features screen appears. 1 NOTE For instructions on using Department ID Management, see Chapter 5, "System Manager Settings," in the Reference Guide. 2 Place your original. You can place your original both vertically and horizontally in the feeder or on the - Canon 2300N | Copying Guide for imageCLASS 2300 - Page 15
set. NOTE On the Special Features screen, you can select the following copy modes: Two-Page Separation, Margin, Frame Erase, and Image Combination. For instructions on setting each copy mode from the Special Features screen, see Chapter 3, "Special Copying Features." 5 Enter the copy quantity. For - Canon 2300N | Copying Guide for imageCLASS 2300 - Page 16
it. Printing starts when the current job is complete. 7 If you want to stop, interrupt, or copy another original during a copy job, follow the instruction below. G If you want to stop a copy job while scanning: ❑ Press [Stop]. Stop The display for selecting whether to cancel copying or not appears - Canon 2300N | Copying Guide for imageCLASS 2300 - Page 17
copy job, see "Reserved Copying," on p. 1-18. 8 When scanning is complete, remove your original. 9 If you have set Department ID Management, press [ID]. For instructions on using Department ID Management, see Chapter 5, "System Manager Settings," in the Reference Guide. 1-8 Flow of Copy Operations - Canon 2300N | Copying Guide for imageCLASS 2300 - Page 18
Introduction to Copying Placing Originals Place originals on the platen glass or in the feeder, depending on the size and type 1 of paper that you are using, and the settings that you have specified. I Platen Glass Place originals on the platen glass when scanning bound originals (such as books and - Canon 2300N | Copying Guide for imageCLASS 2300 - Page 19
Orientation You can place an original either vertically or horizontally. Always align the top edge of your original with the back edge of the platen glass (by the arrow in the top left corner), or with the back edge of the feeder. 1 Platen Glass Introduction to Copying Place the original face - Canon 2300N | Copying Guide for imageCLASS 2300 - Page 20
Platen Glass You should use the platen glass when scanning bound originals (such as books and magazines), originals on heavy or lightweight paper, and transparencies. 1 Lift up the feeder. 1 Introduction to Copying IMPORTANT This machine is equipped with an open/close sensor on the underside of - Canon 2300N | Copying Guide for imageCLASS 2300 - Page 21
is detected after the feeder has been lowered. Be sure to lower the feeder before copying. STMT originals and postcards cannot be detected. Follow the instructions on the display and specify the original size or select the paper size. NOTE Remove the original from the platen glass when scanning is - Canon 2300N | Copying Guide for imageCLASS 2300 - Page 22
. If the feeder rollers are dirty from scanning an original written in pencil, perform the feeder cleaning procedure. (See Chapter 6, "Routine Maintenance," in the Reference Guide.) Placing Originals 1-13 - Canon 2300N | Copying Guide for imageCLASS 2300 - Page 23
as they will go. 1 Introduction to Copying Collate Display Contrast Special Features COPY FAX A beep sounds when the originals are set correctly. 2 Adjust the slide guides to fit the size of your originals. Collate Display Contrast Special Features COPY FAX 1-14 Placing Originals - Canon 2300N | Copying Guide for imageCLASS 2300 - Page 24
Introduction to Copying IMPORTANT Do not add or remove originals while they are being scanned. Do not place objects in the original output area. Blocking the paper delivery slot may damage the originals. When scanning is complete, remove the originals from the original output tray to avoid paper - Canon 2300N | Copying Guide for imageCLASS 2300 - Page 25
Canceling a Copy Job Introduction to Copying 1 You can cancel a copy job in several ways. Using the Stop Key Stop 1 Press [Stop] to stop scanning. G If only one copy job is being processed: F3 ❑ Press [F3] (YES). If you do not want to cancel the copy job, press F4 (NO). Scanning is - Canon 2300N | Copying Guide for imageCLASS 2300 - Page 26
Introduction to Copying Using the System Monitor Screen You can cancel a job while it is waiting to be processed, or during printing. Monitor 1 Press [Monitor]. 1 The status of all jobs is listed on the LCD display. F2 2 Press [F2] (M) or [F3] (L) to select the job to be canceled © F3 press - Canon 2300N | Copying Guide for imageCLASS 2300 - Page 27
Reserved Copying Introduction to Copying 1 You can select copy settings and scan originals even if the machine is currently printing. Your scanned documents are processed after the current job is complete. IMPORTANT The machine cannot scan originals while it is warming up, at power ON, or after - Canon 2300N | Copying Guide for imageCLASS 2300 - Page 28
4 When scanning is complete, remove the original from the machine. 1 Collate Display Contrast Special Features COPY FAX Introduction to Copying Reserved Copying 1-19 - Canon 2300N | Copying Guide for imageCLASS 2300 - Page 29
while Department ID Management is enabled, press ID (ID) © enter the Department ID and password. (See Chapter 2, "Basic Operations," in the Reference Guide.) (Interrupt) lights. NOTE If you press (Interrupt), the current job being output is not interrupted until the interrupt copy starts printing - Canon 2300N | Copying Guide for imageCLASS 2300 - Page 30
Introduction to Copying Start 4 Press [Start]. The interrupt copy job starts. 5 Once the original is scanned, remove it from the machine. 1 Collate Display Contrast Special Features COPY FAX When the interrupt copy job is complete, the interrupted printing operation resumes. IMPORTANT If - Canon 2300N | Copying Guide for imageCLASS 2300 - Page 31
1 1-22 Interrupt Mode Introduction to Copying - Canon 2300N | Copying Guide for imageCLASS 2300 - Page 32
of Copies 2-2 Changing the Copy Quantity 2-2 Paper Selection 2-4 Automatic Paper Selection 2-4 Manual Paper Selection 2-6 Copy Exposure and Image Quality Adjustments 2-9 Copy Exposure (Manual 2-10 Image Quality (Manual 2-11 Copy Exposure and Image Quality (Automatic 2-12 Changing the Copy - Canon 2300N | Copying Guide for imageCLASS 2300 - Page 33
Copy Quantity You can make up to 99 copies for each copy job. 2 Specifying the Required Number of Copies Basic Copying Features COPY 1 Press [COPY]. COPY lights, and the Copy Basic Features screen appears. @. ABC DEF 123 GHI JKL MNO 456 PRS TUV WXY 789 OPER 0 SYMBOLS 2 Enter the - Canon 2300N | Copying Guide for imageCLASS 2300 - Page 34
@. ABC DEF 123 GHI JKL MNO 456 PRS TUV WXY 789 OPER 0 SYMBOLS 2 Enter the desired copy quantity (1 to 99) using the numeric keys. The copy quantity appears in the upper right corner of the Copy Basic Features screen. 2 IMPORTANT You cannot change the copy quantity while copying. - Canon 2300N | Copying Guide for imageCLASS 2300 - Page 35
you to set the machine to automatically select the paper size, or to manually specify a paper size for a copy job. 2 NOTE If you are copying the Reference Guide. For instructions on loading paper into the stack bypass, see Chapter 2, "Basic Operations," in the Reference Guide. Automatic Paper - Canon 2300N | Copying Guide for imageCLASS 2300 - Page 36
OFF' in Common Settings (from the Additional Functions menu), is not displayed. (See Chapter 3, "Selecting and Storing Settings," in the Reference Guide.) 3 Make sure that is selected © press [OK]. The selected mode is set, and the display returns to the Copy Basic Features - Canon 2300N | Copying Guide for imageCLASS 2300 - Page 37
in the paper drawers or stack bypass. IMPORTANT If paper is selected manually, you cannot use the Rotate print mode even if ROTATE PRINT is menu. (See Chapter 3, "Selecting and 2 Storing Settings," in the Reference Guide.) NOTE The paper sizes/types loaded in the paper drawers can be set from - Canon 2300N | Copying Guide for imageCLASS 2300 - Page 38
if the paper size is set to '01 OFF' in the 06 USE STACK BYPASS menu. (See Chapter 3, "Selecting and Storing Settings," in the Reference Guide.) F2 ❑ Press [F2] (SELECT PAPER). The Paper Type setting menu appears. Paper Selection 2-7 - Canon 2300N | Copying Guide for imageCLASS 2300 - Page 39
F3 ❑ Press [F3] (M) or [F4] (L) to select the paper type © press [OK]. F4 OK F3 2 F4 OK The Paper Size setting menu returns. ❑ Press [F3] (M) or [F4] (L) to select the paper size © press [OK]. Basic Copying Features The Copy Basic Features screen returns. Start 4 Press [Start]. Copying - Canon 2300N | Copying Guide for imageCLASS 2300 - Page 40
and image quality can be adjusted when the original is scanned. I Copy Exposure (Manual) This mode enables you to manually adjust the exposure to the most appropriate level for 2 the original. I Image Quality (Manual) This mode enables you to adjust the image quality to the level best suited to - Canon 2300N | Copying Guide for imageCLASS 2300 - Page 41
Copy Exposure (Manual) You can manually adjust the exposure to the most appropriate level for the original. COPY 1 Press [COPY]. COPY lights, and the Copy Basic Features screen appears. 2 F3 2 Place - Canon 2300N | Copying Guide for imageCLASS 2300 - Page 42
. 2 NOTE The default setting is 'TEXT'. If you select the Text, Text/Photo, or Photo mode, the exposure can be adjusted only by the manual exposure control. The automatic exposure control cannot be selected. If the original is a transparency, select the Text, Text/Photo, or Photo mode and adjust the - Canon 2300N | Copying Guide for imageCLASS 2300 - Page 43
F4 2 Place your original © press [F4] (IMAGEQUALITY). The IMAGEQUALITY pull-up menu appears. 2 F4 3 Press [F4] to select the image quality of the original (TEXT, OK TEXT/PHOTO, or PHOTO) © press [OK]. Each time you press F4 (IMAGEQUALITY), the next or previous menu option becomes highlighted - Canon 2300N | Copying Guide for imageCLASS 2300 - Page 44
press F2 (AUTO EXPOSUR) again. If you are scanning transparencies, adjust the exposure manually as the automatic exposure control may not operate correctly on transparent originals. (See "Copy Exposure (Manual)," on p. 2-10.) Start 4 Press [Start]. Copying starts. NOTE To cancel all settings and - Canon 2300N | Copying Guide for imageCLASS 2300 - Page 45
Changing the Copy (Zoom) Ratio This mode enables you to set the machine to adjust the copy ratio automatically, or to specify the copy ratio manually for a copy job. 2 NOTE If you want to make copies at the copy ratio of 100%, press F1 (COPY RATIO) © F1 (DIRECT 100%). Basic Copying - Canon 2300N | Copying Guide for imageCLASS 2300 - Page 46
Basic Copying Features Preset Zoom This mode enables you to reduce or enlarge standard size originals to another standard paper size. IMPORTANT Place your originals horizontally in the following cases: - If you are enlarging LTR originals to 11'' x 17'' or LGL paper 2 NOTE Placing an original - Canon 2300N | Copying Guide for imageCLASS 2300 - Page 47
F3 3 Press [F3] (REDUCE) or [F4] (ENLARGE) to select a preset F4 reduction or enlargement ratio © press [OK]. OK Each time you press F3 (REDUCE) or F4 (ENLARGE), the next or previous menu option becomes highlighted. Basic Copying Features 2 The selected mode is set, the Copy Basic Features - Canon 2300N | Copying Guide for imageCLASS 2300 - Page 48
@. 1 GHI 4 PQRS 7 ABC DEF 23 JKL MNO 56 TUV WXYZ 89 OPER 0 SYMBOLS OK 3 Set the copy ratio using the numeric keys © press [OK]. If you make a mistake when entering the value, press C (Clear), and enter the correct value. If you enter a value outside the setting range, an error tone - Canon 2300N | Copying Guide for imageCLASS 2300 - Page 49
© press [F2] (PAPER SELECT). The display for selecting the paper size appears. 2 NOTE For details about specifying the copy paper, step 3 of "Manual Paper Selection," on p. 2-6. Basic Copying Features F3 3 Press [F3] (M) or [F4] (L) to select the desired paper size © F4 press [OK]. OK Each - Canon 2300N | Copying Guide for imageCLASS 2300 - Page 50
Start 6 Press [Start]. Copying starts. NOTE To return the copy ratio to 100%, press F1 (COPY RATIO) © F1 (DIRECT 100%). To cancel all settings and restore the machine's standard settings, press (Reset). 2 Basic Copying Features Changing the Copy (Zoom) Ratio 2-19 - Canon 2300N | Copying Guide for imageCLASS 2300 - Page 51
Collating Copies You can collate the copies by copy sets in two different modes: Collate or Rotate. The following paper sizes are supported for each mode: 2 Collate Mode: 11" x 17" , LGL , LTR , LTR , STMT Rotate Mode: LTR , LTR , STMT Basic Copying Features I If the Collate Mode Is Set: - Canon 2300N | Copying Guide for imageCLASS 2300 - Page 52
ON' for the paper drawer and stack bypass designated for the Rotate Collate mode. (See Chapter 3, "Selecting and Storing Settings," in the Reference Guide.) Page Order (Collate) 2 COPY Collate 1 Press [COPY]. COPY lights, and the Copy Basic Features screen appears. 2 Place your originals © press - Canon 2300N | Copying Guide for imageCLASS 2300 - Page 53
Number of Copies," on p. 2-2. Basic Copying Features 2 Start 4 Press [Start]. If the original is placed on the platen glass, follow the instructions that appear on the display © press (Start) once for each original. When scanning is complete, press (OK). Copying starts. NOTE To cancel this - Canon 2300N | Copying Guide for imageCLASS 2300 - Page 54
Special Copying Features 3 CHAPTER This chapter describes special copying features for document layout, image adjustment, image manipulation, and other document features. Two-Page Separation 3-2 Margin Mode 3-5 Frame Erase 3-8 Original Frame Erase 3-10 Book Frame Erase 3-12 Hole Punch Erase - Canon 2300N | Copying Guide for imageCLASS 2300 - Page 55
Two-Page Separation The Two-Page Separation mode enables you to copy facing pages in a book or a magazine to fit onto separate sheets of paper. Original Copies 3 1 1 Special Copying Features IMPORTANT If the machine is operating in the Two-Page Separation mode, you cannot use the Hole Punch - Canon 2300N | Copying Guide for imageCLASS 2300 - Page 56
Special Copying Features F1 3 Press [F1] (2-PAGE SEP). The display for selecting the book opening direction appears. 3 F3 4 Press [F3] (LEFT OPENING) or [F4] (RGHT OPENING) to select F4 the direction that the book opens © press [OK]. OK The Original Size setting menu appears. NOTE Open - Canon 2300N | Copying Guide for imageCLASS 2300 - Page 57
F4 5 Press [F4] (ORIGNAL SIZE) to select the paper size © press OK [OK]. Each time you press F4 (ORIGNAL SIZE), the next or previous menu option becomes highlighted. 3 The selected mode is set, and the Copy Basic Features screen returns. @. ABC DEF 123 GHI JKL MNO 456 PRS TUV WXY - Canon 2300N | Copying Guide for imageCLASS 2300 - Page 58
Special Copying Features Margin Mode The Margin mode enables you to make copies with the entire original image shifted by a designated width to the left, right, top, or bottom in order to create a margin on the copies. Use this mode to make copies ready for placement in ring binders. Original - Canon 2300N | Copying Guide for imageCLASS 2300 - Page 59
F2 3 Press [F2] (MARGIN). The display for specifying the margin mode appears. Special Copying Features F1 4 Press [F1] (LEFT MARGIN), [F2] (RIGHT MARGIN), [F3] (TOP 3 F2 MARGIN), or [F4] (BOTTOM MRGN) to specify the type of margin © press [OK]. F3 F4 OK The Margin Width setting menu - Canon 2300N | Copying Guide for imageCLASS 2300 - Page 60
@. ABC DEF 123 GHI JKL MNO 456 PRS TUV WXY 789 OPER 0 SYMBOLS 6 Enter the desired copy quantity (1 to 99) using the numeric keys. For details about entering the copy quantity, see "Specifying the Required Number of Copies," on p. 2-2. Start 7 Press [Start]. 3 Copying starts. NOTE - Canon 2300N | Copying Guide for imageCLASS 2300 - Page 61
Frame Erase The Frame Erase mode enables you to erase shadows and lines that appear when copying various types of originals. The following three Frame Erase modes are available. Special Copying Features IMPORTANT 3 Combinations of the Original Frame Erase, Book Frame Erase, or Hole Punch Erase - Canon 2300N | Copying Guide for imageCLASS 2300 - Page 62
Special Copying Features I Book Frame Erase This mode erases the dark border, as well as center and contour lines that appear when copying facing pages in a bound original onto a single sheet of paper. Original Book Frame Erase Mode Selected Copy Copy 3 Book Frame Erase Mode Not Selected I Hole - Canon 2300N | Copying Guide for imageCLASS 2300 - Page 63
Original Frame Erase This mode erases the dark borders and frame lines that appear around the copy when the original is smaller than the selected paper size. Also, it creates a blank border around the edge of the copy. IMPORTANT In order to use the Original Frame Erase mode, you must first set the - Canon 2300N | Copying Guide for imageCLASS 2300 - Page 64
selects the copy paper size according to the original size you set. is displayed; however, you can also select the paper size manually. @. ABC DEF 123 GHI JKL MNO 456 PRS TUV WXY 789 OPER 0 SYMBOLS 6 Enter the desired copy quantity (1 to 99) using the numeric keys - Canon 2300N | Copying Guide for imageCLASS 2300 - Page 65
Book Frame Erase This mode erases the dark border, as well as the center and contour lines that appear when copying facing pages in a book onto a single sheet of paper. IMPORTANT If the machine is operating in the Book Frame Erase mode, you cannot use the Image Combination, or Different Size - Canon 2300N | Copying Guide for imageCLASS 2300 - Page 66
automatically selects the copy paper size according to the original size you set. is displayed; however, you can also select the paper size manually. F3 6 Press [F3] (-) or [F4] (+) to set the desired book frame erase F4 width (3 mm to 50 mm) for the center line © press [OK]. OK - Canon 2300N | Copying Guide for imageCLASS 2300 - Page 67
@. ABC DEF 123 GHI JKL MNO 456 PRS TUV WXY 789 OPER 0 SYMBOLS 7 Enter the desired copy quantity (1 to 99) using the numeric keys. For details about entering the copy quantity, see "Specifying the Required Number of Copies," on p. 2-2. Special Copying Features 3 Start 8 Press [Start - Canon 2300N | Copying Guide for imageCLASS 2300 - Page 68
Special Features 2 Place your original © press [Special Features]. The display for selecting a copy function appears. F3 3 Press [F3] (FRAME ERASE). The display for selecting a frame erase type appears. 3 Special Copying Features F4 4 Press [F4] (HOLE/P ERASE) © [OK]. OK The Original Size - Canon 2300N | Copying Guide for imageCLASS 2300 - Page 69
automatically selects the copy paper size according to the original size you set. is displayed; however, you can also select the paper size manually. F3 6 Press [F3] (-) or [F4] (+) to set the desired hole punch erase F4 width (3 mm to 20 mm) © press [OK]. OK You can also use - Canon 2300N | Copying Guide for imageCLASS 2300 - Page 70
Special Copying Features Image Combination This mode enables you to automatically reduce two or four originals to fit onto one side of a selected paper size. IMPORTANT If the machine is operating in the Image Combination mode, you cannot use the Two-Page Separation, Original Frame Erase, Book - Canon 2300N | Copying Guide for imageCLASS 2300 - Page 71
I 4 on 1 This setting reduces four originals to fit onto one copy sheet, and allows you to select the layout order of each original. The following four layout types are available: No. 1 Copy No. 2 Special Copying Features Original (Vertical Placement) 1 2 2 1 3 1 3 4 The originals are - Canon 2300N | Copying Guide for imageCLASS 2300 - Page 72
Special Copying Features Special Features 2 Place your originals © press [Special Features]. The display for selecting a copy function appears. NOTE If AUTO SORT in Copy Settings (from the Additional Functions menu) is set to '01 ON', the Collate and Offset Collate mode is automatically set if - Canon 2300N | Copying Guide for imageCLASS 2300 - Page 73
F2 5 Press [F2] (2 ON 1 COMB) or [F3] (4 on 1) to select the type of F3 layout. Screen shown if a vertically placed original ( ) is selected in step 4: is grayed out if you selected a horizontally placed original ( ) in 3 step 4: Special Copying Features F4 6 Press [F4] (OPTIONS) - Canon 2300N | Copying Guide for imageCLASS 2300 - Page 74
Number of Copies," on p. 2-2. Special Copying Features Start 9 Press [Start]. When the original is placed on the platen glass, follow the instructions that appear on the display © press (Start) once for each original. When scanning is complete, press (OK). Copying starts. NOTE If you - Canon 2300N | Copying Guide for imageCLASS 2300 - Page 75
Different Size Originals This mode enables you to copy different size originals together in one group, as long as they have one side with an equal length (i.e., LTR and 11" x 17" ). Just make sure that the sides of the originals with the same length be lined up when you place them in the feeder - Canon 2300N | Copying Guide for imageCLASS 2300 - Page 76
NOTE If AUTO SORT in Copy Settings (from the Additional Functions menu) is set to '01 ON', the Collate mode is automatically set if you place your originals in the feeder. (See "Auto Sort," on p. 4-9.) 3 Set the desired copy modes. 3 Start 4 Press [Start]. Copying starts. NOTE To cancel all - Canon 2300N | Copying Guide for imageCLASS 2300 - Page 77
Special Copying Features 3 3-24 Different Size Originals - Canon 2300N | Copying Guide for imageCLASS 2300 - Page 78
Customizing Settings This chapter describes the setting/storing specifications of the copy functions. 4 CHAPTER Copy Settings Table 4-2 Changing the Current Standard Settings 4-3 Image Quality and Copy Exposure 4-3 Zoom Ratio 4-5 Copy Quantity 4-6 Frame Erase Width 4-8 Auto Sort 4-9 Sort - Canon 2300N | Copying Guide for imageCLASS 2300 - Page 79
09 PRESCAN ON*/OFF 4-14 An asterisk (*) indicates the default setting. NOTE For instructions on how to set the modes not described in this manual, refer to the other manuals listed in the front of this Copying Guide. (See "Manuals for the Machine.") The Copy Settings menu is made up of several - Canon 2300N | Copying Guide for imageCLASS 2300 - Page 80
Customizing Settings Changing the Current Standard Settings The standard settings refer to a combination of copy modes that the machine automatically applies at power ON or when [Reset] is pressed. This section explains the procedure for changing copy modes stored as standard settings. NOTE The - Canon 2300N | Copying Guide for imageCLASS 2300 - Page 81
F3 2 Press [F3] (M) or [F4] (L) to highlight F4 © press [OK]. OK Each time you press F3 (M) or F4 (L), the next or previous menu option becomes highlighted. The COPY SETTINGS menu appears. 4 F3 3 Press [F3] (M) or [F4] (L) to highlight © - Canon 2300N | Copying Guide for imageCLASS 2300 - Page 82
Customizing Settings Zoom Ratio This setting enables you to set the standard copy (zoom) ratio. NOTE The default setting is '100%'. Additional Functions F3 F4 1 Press [Additional Functions] © press [F3] (M) or [F4] (L) to highlight © press [OK]. The COPY SETTINGS menu appears. - Canon 2300N | Copying Guide for imageCLASS 2300 - Page 83
F2 3 Press [F2] (-) or [F3] (+) to set the desired standard zoom ratio F3 (50% to 200%) © press [OK]. OK You can also use the numeric keys to enter the standard zoom ratio, and C (Clear) to clear the value. If you enter a value outside the setting range, an error tone sounds. Enter a value - Canon 2300N | Copying Guide for imageCLASS 2300 - Page 84
F3 2 Press [F3] (M) or [F4] (L) to highlight © press [OK]. OK Each time you press F3 (M) or F4 (L), the next or previous menu option becomes highlighted. The display for entering the standard copy quantity appears. F2 3 Press [F2] (-) or [F3] (+) to set the desired - Canon 2300N | Copying Guide for imageCLASS 2300 - Page 85
Frame Erase Width This setting enables you to set the standard frame erase width for the Frame Erase mode. NOTE The default setting is '02 mm'. 1 Additional Functions Press [Additional Functions] © press [F3] (M) or [F4] (L) to highlight © press [OK]. F3 4 F4 The COPY - Canon 2300N | Copying Guide for imageCLASS 2300 - Page 86
Customizing Settings F2 3 Press [F2] (-) or [F3] (+) to set the desired frame erase width F3 (01 mm to 20 mm) © press [OK]. OK You can also use the numeric keys to enter the standard frame erase width, and C (Clear) to clear the value. If you enter a value outside the setting range, an error - Canon 2300N | Copying Guide for imageCLASS 2300 - Page 87
to '02 ON' for the paper drawer and stack bypass designated for the Rotate Collate mode. (See Chapter 3, "Selecting and Storing Settings," in the Reference Guide.) 4-10 Changing the Current Standard Settings - Canon 2300N | Copying Guide for imageCLASS 2300 - Page 88
NOTE The default setting is '01 ON'. Additional Functions F3 F4 1 Press [Additional Functions] © press [F3] (M) or [F4] (L) to highlight © press [OK]. The COPY SETTINGS menu appears. OK 4 F3 2 Press [F3] (M) or [F4] (L) to highlight © F4 press [OK]. OK - Canon 2300N | Copying Guide for imageCLASS 2300 - Page 89
Sharpness This setting enables you to make copies of the original image with a sharper or a softer contrast. To reproduce copies with text or lines with a sharper contrast, select [F3] (SHARP) as the setting. To reproduce copies with photographs or other halftones with a softer contrast, select [F2 - Canon 2300N | Copying Guide for imageCLASS 2300 - Page 90
Additional Functions F3 F4 1 Press [Additional Functions] © press [F3] (M) or [F4] (L) to highlight © press [OK]. The COPY SETTINGS menu appears. OK F3 2 Press [F3] (M) or [F4] (L) to highlight © F4 press [OK]. 4 OK Each time you press F3 (M) or F4 (L), the - Canon 2300N | Copying Guide for imageCLASS 2300 - Page 91
Prescan When you press [Start] in a regular scanning operation, the machine goes through a warming-up process each time before it actually starts scanning the document. The Prescan mode function keeps the machine warmed up so it starts scanning as soon as you press [Start], thereby shortening the - Canon 2300N | Copying Guide for imageCLASS 2300 - Page 92
F3 3 Press [F3] (M) or [F4] (L) to select or © F4 press [OK]. OK If you want to use the prescan function, select . If you do not want to use the prescan function, select . The selected mode is set, and the COPY SETTINGS menu returns. Reset 4 Press [Reset] to - Canon 2300N | Copying Guide for imageCLASS 2300 - Page 93
Using Shortcut Keys The shortcut keys enable you to assign the most frequently used copy functions to the shortcut keys, and to call up these functions with a single key press when making copies. You can assign up to four copy modes to the shortcut keys. NOTE The default settings for each - Canon 2300N | Copying Guide for imageCLASS 2300 - Page 94
Customizing Settings F3 2 Press [F3] (M) or [F4] (L) to highlight © press [OK]. OK Each time you press F3 (M) or F4 (L), the next or previous menu option becomes highlighted. The SHORTCUT KEY SET menu appears. F3 3 Press [F3] (M) or [F4] (L) to select a shortcut - Canon 2300N | Copying Guide for imageCLASS 2300 - Page 95
Copy Ratio Exposure Margin Frame Erase Two-Page Separation Image Combination Paper Size for the Stack Bypass Different Size Originals Applicable Page P. 2-14 P. 2-9 P. 3-5 P. 3-8 P. 3-2 P. 3-17 Reference Guide P. 3-22 Start 4 Press [Start]. Copying starts. 4-18 Using Shortcut Keys - Canon 2300N | Copying Guide for imageCLASS 2300 - Page 96
Appendix This chapter provides the Combination of Functions Chart and index. 5 CHAPTER Combination of Functions Chart 5-2 Index 5-6 5-1 - Canon 2300N | Copying Guide for imageCLASS 2300 - Page 97
Appendix TPZFPAArehouuuttexoonttsoocomettmZiaoDotZioenocsiomAgElmrxnepataiosdouynreSetControl ITASSCRRnttteuoeoltaatxelstccroa/aertkktrmPueevaBhBpettyiyCotcppoClColaaooPasstppaissyypn(egFrreSeelseicztieopnaper) Combination of Functions Chart This chart shows the setting combinations when you want - Canon 2300N | Copying Guide for imageCLASS 2300 - Page 98
FTZPAAPreouhuuttexoontstoocmeotmtZiaoDotZioenocsimoAgElmrxnepataiosdouynreSetControl ITASSRCRnttteuooeltaatxelstccroa/aertkktrmPueevaBBhpettyyCiotcppoClColaaooPasstppaissyypn(egFrreSeelseicztieopnaper) Combination available Combination unavailable Function to Be Set Two-Page Separation Image - Canon 2300N | Copying Guide for imageCLASS 2300 - Page 99
1) 1) IILTTFBBRDHOiimmerofoouowiffgltaatptonogehei-ggktorcnteMeMPePimFaaaMalnruorrtCCagannggMrooFiiecrSagminnirmmhAazelSngbbriiieemEEernnnperaaOaaaattrsriidEisreaooygetiainnnsSo((aeenl42tsoonn Combination available Combination unavailable Function to Be Set Preset Zoom Zoom Designation Auto - Canon 2300N | Copying Guide for imageCLASS 2300 - Page 100
1) 1) IILTTBBFHRDOiimmreofooouiwffgltaatptogonehei-ggktorcneeMtMPePimFaaalaMnrurortCCgaanggMnFrooiiecrSagminnimmrhaAzeSlnbbgriiiemeEErennnepraaOaaaattrrsEiiidsraeoogyetiainnsnoS((eanel24tsoonn Combination available Combination unavailable Function to Be Set Two-Page Separation Image Combination - Canon 2300N | Copying Guide for imageCLASS 2300 - Page 101
mode, 2-20, 2-21 Combination of Functions Chart, 5-2 Copy Basic Features screen, 1-2 Copy Exposure, 2-10, 4-3 Automatic, 2-9, 2-12 Manual, 2-9, 2-10 COPY key, 1-4 Copy Quantity, 2-2, 4-6 Changing, 2-2 Specifying, 2-2 Copy Settings menu, 4-2 Copy settings table, 4-2 D Department ID, 1-4 Different - Canon 2300N | Copying Guide for imageCLASS 2300 - Page 102
Punch Erase, 3-9 Horizontal placement, 1-10 I Image Combination, 3-17 2 on 1, 3-17 4 on 1, 3-18 Image Quality, 2-11, 4-3 Automatic, 2-9, 2-12 Manual, 2-9, 2-11 Interrupt mode, 1-20 L Left margin, 3-5 M Main power, 1-4 Margin mode, 3-5 N Numeric keys, 2-2 O OK key, 1-7 Orientation, 1-10 Horizontal - Canon 2300N | Copying Guide for imageCLASS 2300 - Page 103
Appendix Shortcut keys, 4-16 Sort rotate, 4-10 Special Features key, 1-2 Special Features screen, 1-2 Stack bypass, 2-4 Standard settings, 4-3 Start key, 1-7 Stop key, 1-7, 1-16 T Text mode, 2-11 Text/Photo mode, 2-11 Top margin, 3-5 5 Two-Page Separation, 3-2 U Using Shortcut Keys, 4-16 Assigning - Canon 2300N | Copying Guide for imageCLASS 2300 - Page 104
-
 1
1 -
 2
2 -
 3
3 -
 4
4 -
 5
5 -
 6
6 -
 7
7 -
8
-
9
-
10
-
11
-
12
-
13
-
14
-
15
-
16
-
17
-
18
-
19
-
20
-
21
-
22
-
23
-
24
-
25
-
26
-
27
-
28
-
29
-
30
-
31
-
32
-
33
-
34
-
35
-
36
-
37
-
38
-
39
-
40
-
41
-
42
-
43
-
44
-
45
-
46
-
47
-
48
-
49
-
50
-
51
-
52
-
53
-
54
-
55
-
56
-
57
-
58
-
59
-
60
-
61
-
62
-
63
-
64
-
65
-
66
-
67
-
68
-
69
-
70
-
71
-
72
-
73
-
74
-
75
-
76
-
77
-
78
-
79
-
80
-
81
-
82
-
83
-
84
-
85
-
86
-
87
-
88
-
89
-
90
-
91
-
92
-
93
-
94
-
95
-
96
-
97
-
98
-
99
-
100
-
101
-
102
-
103
-
104
 |
 |