Canon 350D Instruction Manual
Canon 350D - EOS Digital Camera SLR Manual
 |
View all Canon 350D manuals
Add to My Manuals
Save this manual to your list of manuals |
Canon 350D manual content summary:
- Canon 350D | Instruction Manual - Page 1
INSTRUCTION MANUAL E E INSTRUCTION MANUAL - Canon 350D | Instruction Manual - Page 2
a Canon product. The EOS DIGITAL REBEL XT/EOS 350D DIGITAL is a highperformance, digital AF SLR camera enabling highly versatile and speedy shooting. The camera has an 8-megapixel, high-resolution CMOS sensor, and it is compatible with all Canon EF lenses (including the EF-S lenses). The camera - Canon 350D | Instruction Manual - Page 3
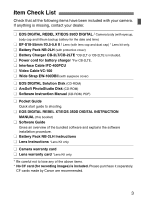
. ¢ EOS DIGITAL REBEL XT/EOS 350D DIGITAL INSTRUCTION MANUAL (this booklet) ¢ Software Guide Gives an overview of the bundled software and explains the software installation procedure. ¢ Battery Pack NB-2LH Instructions ¢ Lens Instructions *Lens Kit only. ¢ Camera warranty card ¢ Lens warranty card - Canon 350D | Instruction Manual - Page 4
37 Replacing the Date/Time Battery 38 Cleaning the CMOS sensor 39 Set the power-off time/Auto power off 41 CF Card Reminder 41 Dioptric Adjustment 42 Holding the Camera 42 Fully Automatic Shooting 43 Using Full Auto 44 Basic Zone Modes 46 Self-timer Operation 48 Wireless Remote Control - Canon 350D | Instruction Manual - Page 5
AE Lock ...92 Bulb Exposures 93 4 Mirror Lockup 94 6 Flash Photography 95 Using the Built-in Flash 96 5 Using EOS-Dedicated, External Speedlites 101 Using Non-Canon Flash Units 102 LCD Panel Illumination 102 7 Image Playback 6 103 Setting the Image Review Time 104 Auto Image Rotation - Canon 350D | Instruction Manual - Page 6
Prevent any battery leakage from contacting your eyes, skin, and clothing. It can cause blindness or skin problems. If the battery leakage contacts an infant, keep at least 1 meter away. • Before storing the camera or accessory when not in use, remove the battery pack and disconnect the power plug - Canon 350D | Instruction Manual - Page 7
the tripod is sturdy enough to support the camera and lens. • Do not leave a lens or lens-attached camera under the sun without the lens cap attached. Otherwise, the lens may concentrate the sun's rays and cause a fire. • Do not cover or wrap the battery-recharging apparatus with a cloth. Doing so - Canon 350D | Instruction Manual - Page 8
a blower to blow away dust on the lens, viewfinder, mirror, and focusing screen. Do not use cleaners that contain organic solvents to clean the camera body or lens.For stubborn dirt, take the camera to a Canon Service Center. ¡ Do not touch the camera's electrical contacts with your fingers. This is - Canon 350D | Instruction Manual - Page 9
be lost. ¡ Do not leave memory cards in direct sunlight or near a heat source. Doing so can warp the cards and make them unusable. ¡ Do not spill any liquid onto the CF card. ¡ Always store your CF cards in a case to protect the data stored on them. ¡ Non-Canon CF cards may not be able to record - Canon 350D | Instruction Manual - Page 10
battery, see page 20. 2 For EF-S lens For EF lens Attach the lens. (p.25) When attaching an EF-S lens, align it with the white dot on the camera. For other lenses, align it with the red dot. 3 Set the lens focus mode switch to . (p.25) 4 Open the CF card slot cover and insert a CF card - Canon 350D | Instruction Manual - Page 11
the necessary camera settings will be set automatically. 7 Focus the subject. (p.28) Aim the AF point over the subject and press the shutter button halfway to autofocus. 8 Take the picture. (p.28) Press the shutter button fully to take the picture. 9 Review the picture on the LCD monitor - Canon 350D | Instruction Manual - Page 12
control sensor (p.49) Grip Mirror (p.39,94) Contacts (p.9) Flash button (p.96) Terminal cover Lens release button (p.25) Depth-of-field preview button (p.85) Lens lock pin Lens mount Video OUT terminal (p.114) Body cap (p.25) 12 Remote control terminal (for Remote Switch RS-60E3) Digital - Canon 350D | Instruction Manual - Page 13
lever (p.22) Battery compartment cover (p.22) Cross keys (p.30) ISO speed set button (p.55) White balance selection button (p.56) Metering mode selection button (p.77) AF mode selection button (p.70) Setting button (p.31) CF card slot (p.26) CF card eject button (p.26 - Canon 350D | Instruction Manual - Page 14
Nomenclature LCD Panel Aperture AF point selection CF card full warning (FuLL CF) CF card error warning (Err CF) No CF card warning (no CF) Error code (Err) Cleaning image sensor (CLEA n) Shutter speed Busy (buSY) Built-in flash recycling (buSY) White balance Q Auto W Daylight E Shade R Cloudy - Canon 350D | Instruction Manual - Page 15
compensation amount AEB range Red-eye reduction lamp-on indicator Shutter speed FE lock (FEL) Busy (buSY) Built-in flash recycling (D buSY) CF card full warning (FuLL CF) CF card error warning (Err CF) No CF card warning (no CF) Aperture The actual display will show only the applicable items - Canon 350D | Instruction Manual - Page 16
Mode Dial The Mode Dial is divided into two function zones. reative zone C Full Auto BasiIcmzaogneezone q Basic Zone All you do is press the shutter Creative Zone Set the camera as you wish. d : Program AE (p.80) s : Shutter-priority AE (p.82) f : Aperture-priority AE (p.84) a : Manual exposure - Canon 350D | Instruction Manual - Page 17
Battery Charger CB-2LT This is a battery pack charger. (p.20) Battery pack slot Recharge lamp Battery pack slot index Battery Charger CB-2LTE This is a battery pack charger. (p.20) Battery pack slot Recharge lamp Nomenclature Power plug Power cord Power cord socket 17 - Canon 350D | Instruction Manual - Page 18
modes (d, s, f, a, 8). ¡All operations explained in this Instruction Manual assume that the power switch is already set to . ¡The Canon EF-S18-55mm f/3.5-5.6 ll lens is used as the sample lens in this Instruction Manual. ¡The procedures assume that the menu settings and Custom Functions are set - Canon 350D | Instruction Manual - Page 19
1 Getting Started This chapter explains a few preliminary steps and basic camera operations. Attaching the Strap Pass the end of the strap through the camera's strap mount from the bottom. Then pass it through the strap's buckle as shown in the illustration. Pull the strap to take up any slack - Canon 350D | Instruction Manual - Page 20
a power outlet. CB-2LTE For CB-2LTE Connect the power cord and recharge the battery. ¡ Connect the power cord to the charger and insert the plug into the power outlet. s Recharging starts automatically and the recharge lamp turns red. s When the battery is fully recharged, the recharge lamp will - Canon 350D | Instruction Manual - Page 21
excessively and the battery's service life may be affected. When not using the camera, remove the battery and attach the protective cover to prevent shorting. Before using the camera again, be sure to recharge the battery. ¡ You can attach the protective cover to the battery and set the direction of - Canon 350D | Instruction Manual - Page 22
and Removing the Battery Installing the Battery Load a fully-charged Battery Pack NB-2LH into the camera. 1 Open the battery compartment cover. ¡ Slide the lever as shown by the arrow and open the cover. 2 Insert the battery. ¡ Point the battery contacts downward. ¡ Insert the battery until it locks - Canon 350D | Instruction Manual - Page 23
decrease with more frequent use of the LCD monitor. ¡ Pressing the shutter button halfway for long periods or operating only the autofocus can also reduce the number of possible shots. ¡ The lens operation is powered by the camera's battery. Using certain lenses can reduce the number of possible - Canon 350D | Instruction Manual - Page 24
With AC Adapter Kit ACK700 (optional), you can connect the camera to a household power outlet and not worry about the battery level. 1 Connect the power cord. ¡ Connect the power cord . ¡ Close the cover. Do not connect or disconnect the power cord while the camera's power switch is set to . 24 - Canon 350D | Instruction Manual - Page 25
lens. ¡ Align the EF-S lens with the camera's white EF-S lens mount index and turn the lens as shown by the arrow until it clicks in place. ¡ When attaching a lens other than an EF lens mount index EF-S lens, align the lens with the red EF lens index mark. 3 On the lens, set the focus mode - Canon 350D | Instruction Manual - Page 26
small holes into the camera. s The CF card eject button pops up. 3 Close the cover. ¡ Close the cover and slide it in the direction shown by the arrow until it snaps shut. ¡ When you set the Power switch to , the number of remaining shots will be displayed on the LCD panel. The shots remaining - Canon 350D | Instruction Manual - Page 27
camera might be appended with a file number that continues on from the images already recorded on the CF card. If you want to start the file numbering from 0001, set [Auto reset] for the file numbering (p.67), then use a newly formatted CF card. ¡ If "Err CF" (Error CF) is displayed on the LCD panel - Canon 350D | Instruction Manual - Page 28
recorded onto the CF card, the remaining number of captured images to be recorded will be indicated on the top LCD panel with the number of symbols displayed.When all the images are finished recording, the display will turn off and the camera will turn off. Shutter Button The shutter button has - Canon 350D | Instruction Manual - Page 29
dial. When you press a button, its function remains on for 6 seconds (9). While turning the dial, look at the setting in the viewfinder or on the top LCD panel. When the timer ends or if you press the shutter button down halfway, the camera will be ready to shoot. ¡ Use it to select the AF point - Canon 350D | Instruction Manual - Page 30
for shooting-related settings and selecting LCD monitor menu items. (1) Press the key independently. With the camera ready to shoot, you can press any key to quickly use the key's respective menu function. ISO speed White balance Metering mode AF mode Press the key - Canon 350D | Instruction Manual - Page 31
the date/time, and Custom Functions. While looking at the LCD monitor, you use the button, Cross keys, and button on the camera back. button button LCD Monitor button Cross keys Shooting 2 menu Shooting 1 menu Tab Playback menu Set-up 1 menu Set-up 2 menu Menu items - Canon 350D | Instruction Manual - Page 32
Menu Operations Menu Setting Procedure 1 Display the menu. ¡ Press the button to display the menu. To turn off the menu, press the button again display the menu screen. ¡ Menu operation will also work after the picture is taken while the image is being recorded to the CF card (access lamp blinks - Canon 350D | Instruction Manual - Page 33
Operations Menu Settings (1) Shooting 1 menu (Red) Reference pages Quality 73/83/74/84/76/86/ RAW+7L / RAW 52 Red-eye On/Off Off / On 98 Beep On / Off 50 AF mode ONE SHOT / AI FOCUS / AI SERVO 70 Metering mode q: Evaluative / w: Partial / e: Center-weighted average metering 77 - Canon 350D | Instruction Manual - Page 34
camera to the default settings.) 35 Clear all Custom Functions (Resets all Custom Function settings to the default.) 147 Sensor cleaning Select to clean the sensor. 39 Firmware Ver. Select to update the firmware. - These shaded menu items are not displayed in Basic Zone modes. About the LCD - Canon 350D | Instruction Manual - Page 35
camera's default settings will be as shown below. Shooting Settings AF mode ONE SHOT AF point selection Automatic AF point selection Metering mode q (Evaluative metering) Drive mode u (Single shooting) Exposure compensation 0 (Zero) AEB Off Flash exposure compensation 0 (Zero) Custom - Canon 350D | Instruction Manual - Page 36
the Language The LCD monitor's interface language can be set to one of fifteen languages. 1 Select [Language]. ¡ Select the [b] tab. ¡ Press the key to select [Language], then press . s The Language screen will appear. 2 Set the desired language. ¡ Press the key to select the desired - Canon 350D | Instruction Manual - Page 37
select [Date/ Time], then press . s The date/time screen will appear. 2 Set the date and time. ¡ Press the key to select the digit, then press . ¡ The selection will then shift to the next item. 3 Set the date display format. ¡ Press the key to set the date format to [mm/dd/yy], [dd/mm - Canon 350D | Instruction Manual - Page 38
The date/time (back-up) battery maintains the camera's date and time. The battery's service life is about 5 years. If the date/time is reset when the battery is replaced, replace the back-up battery with a new CR2016 lithium battery as described below. The date/time setting will also be reset, so - Canon 350D | Instruction Manual - Page 39
have it cleaned by a Canon Service Center. While you clean the image sensor, the camera must be turned on. Using the AC Adapter Kit ACK700 (optional, see page 158) is recommended. If you use a battery, make sure the battery level is sufficient. Before cleaning the sensor, detach the lens from the - Canon 350D | Instruction Manual - Page 40
will blink on the LCD panel. Set the power switch to , replace the battery, and start over. ¡ You cannot clean the sensor if Battery Grip BG-E3 (optional) is attached to the camera and size-AA batteries supply the power. Use AC Adapter Kit ACK700 (optional) or use a battery having sufficient power - Canon 350D | Instruction Manual - Page 41
shooting modes. 1 Select [Shoot w/o card]. ¡ Select the [c] tab. ¡ Press the key to select [Shoot w/o card], then press . 2 Select [Off]. ¡ Press the key to select [Off], then press . If [Off] has been set and you press the shutter button while there is no CF card in the camera, "no CF - Canon 350D | Instruction Manual - Page 42
dioptric adjustment knob. ¡ Turn the knob left or right until the AF points in the viewfinder look sharp. ¡ The illustration shows the knob at the standard setting (-1 dpt). If the camera's dioptric adjustment still cannot provide a sharp viewfinder image, using Dioptric Adjustment Lens E (10 types - Canon 350D | Instruction Manual - Page 43
modes on the Mode Dial for quick and easy shooting. In each mode , the AF mode, metering mode, ISO speed, etc., are set automatically to suit the subject. In these modes, all you do is point and shoot. In addition, to help prevent mistakes caused by operating the camera - Canon 350D | Instruction Manual - Page 44
the shutter button. Everything is automatic so it is easy to photograph any subject. With seven AF points to focus the subject, anyone can easily take nice pictures. AF point 1 Set the Mode Dial to . s The AF mode will be set to , the drive mode will be set to , and the metering mode will - Canon 350D | Instruction Manual - Page 45
shooting will be disabled. Replace the CF card with one that is not full. ¡ If something obstructs the built-in flash from popping up, "Err 05" will blink on the LCD panel. If this happens, set the power switch to and again. ¡ Using a non-Canon lens with an EOS camera may not result in proper - Canon 350D | Instruction Manual - Page 46
of the image. s The AF mode will be set to , the drive mode will be set to , and the metering mode will be set to automatically. 4 Close-up 46 Use this mode to take close-up shots of flowers, insects, etc. ¡ Focus the subject at the lens' closest focusing distance as much as possible - Canon 350D | Instruction Manual - Page 47
you press the shutter button, focusing will continue for continuous shooting. ¡ Using a telephoto lens is recommended. ¡ When focus is achieved, the beeper will sound softly. s The AF mode will be set to , the drive mode will be set to , and the metering mode will be set to automatically - Canon 350D | Instruction Manual - Page 48
mode or Creative Zone mode. 1 Select . ¡ Look at the LCD panel and press the button to select . 2 Focus the subject. ¡ Look in the viewfinder and press the shutter button halfway to check that the focus confirmation light is on and the exposure setting is displayed. 3 Take the picture - Canon 350D | Instruction Manual - Page 49
5 meters/16.4 ft. directly in front of the camera. 1 Select . ¡ Look at the LCD panel and press the button to select . 2 Take the picture. ¡ Point the remote controller toward the camera's remote control sensor and press the transmit button. s The camera will autofocus. s When focus is - Canon 350D | Instruction Manual - Page 50
Cover During self-timer or remote control operation when your eye does not cover the viewfinder eyepiece, stray light may attach it. 3 Silencing the Beeper You can disable the beeper so it does not sound in any shooting mode. 1 Select [Beep]. ¡ Select the [z] tab. ¡ Press the key to select [Beep], - Canon 350D | Instruction Manual - Page 51
This chapter explains the digital image settings for the image-recording quality, ISO speed, white balance, color space, and processing parameters. ¡ For Basic Zone modes, only the image-recording quality (except RAW and RAW+7L), file numbering, and camera setting check will apply in this chapter - Canon 350D | Instruction Manual - Page 52
quality screen will appear. 2 Set the desired recording quality. ¡ Press the key to select the desired recording quality, then press . ¡ When you press the shutter button halfway, the image-recording quality will be displayed on the LCD panel. Image-recording Quality Settings Image - Canon 350D | Instruction Manual - Page 53
65), the file size will be smaller so the number of possible shots will be higher. ¡ On the top LCD panel, you can check the remaining number of images the CF card can record. ¡ A different image-recording quality can be set separately for the Basic Zone modes and Creative Zone modes. About the RAW - Canon 350D | Instruction Manual - Page 54
CF card. ¡ With white balance bracketing (p.60), the maximum burst will be 2 shots. ¡ The maximum burst is displayed even when the drive mode is set to (Single) or . The maximum burst is displayed even when a CF card is not in the camera. Therefore, before shooting, make sure that a CF card - Canon 350D | Instruction Manual - Page 55
action shots, but the image will look finer. The camera can be set between ISO 100 and 1600 in 1-stop increments. ISO Speed in the Basic Zone Modes The ISO speed is set automatically within ISO 100-400. ISO Speed in the Creative Zone Modes You can set the ISO speed to [100] [200] [400] [800 - Canon 350D | Instruction Manual - Page 56
type of lighting. With a digital camera, the color temperature can be adjusted with software so that the colors in the image look more natural. The subject's white color is used as the criteria for adjusting the other colors. The camera's setting uses the image sensor for auto white balance. 56 - Canon 350D | Instruction Manual - Page 57
. ¡ The plain, white object should fill the viewfinder center. ¡ Set the lens focus mode switch to , then focus manually. (p.76) ¡ Set any white balance setting (p.56). ¡ Shoot the white object so that a standard exposure is obtained. 2 Select [Custom WB]. ¡ Select the [m] tab. ¡ Press the key - Canon 350D | Instruction Manual - Page 58
White BalanceN 5 Select the custom white balance. ¡ Press the key to select , then press . ¡ When you press the shutter button halfway, the icon will be displayed on the LCD panel. ¡ If the exposure obtained in step 1 is underexposed or overexposed, a correct white balance might not - Canon 350D | Instruction Manual - Page 59
Users familiar with using color temperature conversion or color compensating filters will find this feature handy. Sample setting s The WB correction/WB bracketing screen will appear. 2 Set the white balance correction. ¡ Press ¡ Press to exit the setting and return to the menu. set white balance - Canon 350D | Instruction Manual - Page 60
recorded simultaneously. Based on the white balance mode's color temperature, the image will be bracketed turn the dial, the " " mark on the screen will change to " " (3 points). Turning the dial to the right sets the B/A bracketing, and turning it to the left sets the M/G bracketing. ¡ Set - Canon 350D | Instruction Manual - Page 61
bracketing, the possible number of shots displayed on the LCD panel will decrease to one-third the normal number. ¡ Since three images are recorded for one shot, the CF card will take longer to record the shot. ¡ You can also set white balance correction and AEB in combination with white balance - Canon 350D | Instruction Manual - Page 62
-processing of the image with software will be required. ¡ If the image is captured with the color space set to Adobe RGB, the file name will start with "_MG_" (first character is an underscore). ¡ The ICC profile is not appended. The ICC profile is explained in the Software Instruction Manual (PDF). 62 - Canon 350D | Instruction Manual - Page 63
is also a B/W parameter for black-and-white photos. In the Basic Zone modes, Parameter 1 will be set automatically. 1 Select [Parameters]. ¡ Select the [m] tab. ¡ Press the key to select [Parameters], then press . s Processing parameter setting screen will appear. 2 Press . 3 Select the - Canon 350D | Instruction Manual - Page 64
select [Parameters], then press . s The parameter setting screen will appear. 2 Press . 3 Select the set number. ¡ Press the key to select [Set 1], [Set 2], or [Set 3] then press . ¡ The default parameter settings for [Set 1], [Set 2], and [Set 3] are all "0" (Standard). 4 Select the - Canon 350D | Instruction Manual - Page 65
Processing ParametersN Black-and-White Shooting When you capture images with the processing parameter set to B/W, the camera will process and record the images as black-and-white images onto the CF card. 1 Select [B/W]. ¡ In step 3 on page 64, select [B/W], then press . 2 Select the item to be - Canon 350D | Instruction Manual - Page 66
3 Setting the Processing ParametersN Filter Effects The same effect as using filters with black-and-white film can be obtained with digital images. A When color toning is set, the selected color toning will be applied to the black-and-white image before being recorded to the CF card. It can make the - Canon 350D | Instruction Manual - Page 67
-0051 XXX-0052 personal computer is easier. Note that if the replacement CF card already contains Next sequential file number images captured with the camera, the file numbering will start after the highest file number in that CF card or after the last captured image's file number, whichever is - Canon 350D | Instruction Manual - Page 68
will be displayed on the LCD panel and in the viewfinder. Replace the CF card with a new one. For both JPEG and RAW images, the file name will start with "IMG_". The extension will be ".JPG" for JPEG images and ".CR2" for RAW images. B Checking Camera Settings When the camera is ready to shoot, press - Canon 350D | Instruction Manual - Page 69
4 Setting the AF, Metering, and Drive Modes The viewfinder has seven AF points. By selecting a suitable AF point, you can shoot with autofocus while framing the subject as desired. You can also set the AF mode to suit the subject or obtain the desired effect. Drive mode Metering mode AF mode - Canon 350D | Instruction Manual - Page 70
AI Servo AF ¡ When you press the shutter button halfway, the LCD panel will display an arrow next to the current AF mode. ¡ Although you can still set the AF mode while the lens focus mode switch is set to , the AF mode will not take effect during manual focus. ¡ If an Extender (optional) is - Canon 350D | Instruction Manual - Page 71
fully. Recompose the picture and try and focus again. Or see "When Autofocus Fails (Manual Focusing)" (p.76). AI Servo AF for Moving Subjects While you press the shutter button halfway, the camera focuses continuously. ¡ This AF mode is for moving subjects when the focusing distance keeps changing - Canon 350D | Instruction Manual - Page 72
focused in the OneShot AF mode, if the subject starts moving, the camera will detect the movement and change the AF mode automatically to AI Servo AF. When focus is achieved in the AI Focus AF mode with the Servo mode active, the beeper will sound softly. The focus confirmation light in the view - Canon 350D | Instruction Manual - Page 73
focusing. The AF point can be selected automatically by the camera or manually by you. In Basic Zone modes and the mode, the AF point is selected automatically. In the modes, you can switch between automatic and manual while looking in the viewfinder or at the LCD panel. s Press - Canon 350D | Instruction Manual - Page 74
selection mode. • Manual AF point selection Select the desired AF point so the < . > lights in red. Selecting with the Dial ¡ Press the button, then turn the dial. ¡ When you turn the dial, the selection will go in the looping sequence shown on the left. ¡ When looking at the LCD panel - Canon 350D | Instruction Manual - Page 75
AF point over the subject and press the shutter button halfway. 4 Keep pressing the shutter button halfway and recompose the picture as desired. 5 Take the picture. If the AF mode is AI Servo AF (or AI Focus AF set to Servo mode), focus lock will not work. Focus lock is also possible in Basic Zone - Canon 350D | Instruction Manual - Page 76
lens focus mode switch to and focus manually. Manual Focusing Focusing ring 1 Set the lens focus mode switch to . 2 Focus the subject. ¡ Focus by turning the lens focusing ring until the subject is in focus in the viewfinder. If you press the shutter button halfway during manual focusing - Canon 350D | Instruction Manual - Page 77
the LCD panel. q Evaluative Metering This is the camera's standard metering mode suited for most subjects even under backlit conditions. After detecting the main subject's position, brightness, background, front and back lighting, etc., the camera sets the proper exposure. ¡ During manual focusing - Canon 350D | Instruction Manual - Page 78
. Press the shutter button halfway to check in the viewfinder's bottom right the current remaining shots of the maximum burst. ¡ If "FuLL CF" is displayed in the viewfinder and on the LCD panel, wait until the access lamp stops blinking, then replace the CF card. ¡ When the battery level is low - Canon 350D | Instruction Manual - Page 79
5 Advanced Operations e zone With Creative Zone modes, you can set the desired shutter speed or aperture value to obtain the result you want. You take control of the camera. Creativ ¡ The asterisk M on the right of the page title indicates that the respective feature is available only in - Canon 350D | Instruction Manual - Page 80
-purpose shooting mode. The camera automatically sets the shutter speed and aperture value to suit the subject's brightness. This is called Program AE. * stands for Program * AE stands for Auto Exposure 1 Set the Mode Dial to . AF point 2 Focus the subject. ¡ Look through the viewfinder and - Canon 350D | Instruction Manual - Page 81
(FP flash) ¡ FE lock ¡ Metering mode selection ¡ Flash ratio control ¡ Program Shift ¡ Exposure compensation ¡ AEB ¡ AE lock with button ¡ Depth-of-field preview ¡ Clear all camera settings ¡ Custom Function (C.Fn) ¡ Clear all Custom Functions ¡ Sensor cleaning Flash Settings (Built-in flash - Canon 350D | Instruction Manual - Page 82
Slow shutter speed 1 Set the Mode Dial to . 2 Set the desired shutter speed. ¡ While looking at the LCD panel, turn the dial. ¡ It can be set in 1/3-stop increments. 3 Focus the subject. ¡ Press the shutter button halfway. s The aperture value is set automatically. 4 Check the viewfinder - Canon 350D | Instruction Manual - Page 83
, it indicates underexposure. Turn the dial to set a slower shutter speed until the aperture value stops blinking or set a higher ISO speed. ¡ If the minimum aperture blinks, it indicates overexposure. Turn the dial to set a faster shutter speed until the aperture value stops blinking or - Canon 350D | Instruction Manual - Page 84
opening 1 Set the Mode Dial to . 2 Set the desired aperture value. ¡ While looking at the LCD panel, turn the dial. ¡ It can be set in 1/3-stop increments. 3 Focus the subject. ¡ Press the shutter button halfway. s The shutter speed is set automatically. 4 Check the viewfinder display - Canon 350D | Instruction Manual - Page 85
to the current aperture setting. The diaphragm in the lens will close to the current aperture and you can check the depth of field (range of acceptable focus) through the viewfinder. ¡ The higher the f/number, the darker the viewfinder will look. ¡ In the mode, press the shutter button halfway to - Canon 350D | Instruction Manual - Page 86
level indicator in the viewfinder or use a handheld exposure meter. This method is called manual exposure. * stands for Manual. 1 Set the Mode Dial to . 2 Set the desired shutter speed. ¡ While looking at the LCD panel, turn the dial. 3 Set the desired aperture value. ¡ Hold down the - Canon 350D | Instruction Manual - Page 87
a Manual Exposure 4 Standard exposure index Focus the subject. ¡ Press the shutter button halfway. s The exposure setting will be Exposure level mark displayed on the LCD panel and in the viewfinder. ¡ The exposure level icon shows you how far you are from the standard exposure level. 5 - Canon 350D | Instruction Manual - Page 88
button to see the depth of field (range of acceptable focus). (p.85) 3 Take the picture. ¡ The mode cannot be used if the lens' focus mode switch is set to . The result will be the same as using the mode. ¡ If the "30"" shutter speed blinks, it indicates that the subject is too dark - Canon 350D | Instruction Manual - Page 89
up to ±2 stops in 1/3-stop increments. Increased exposure 1 Turn the Mode Dial to any Creative Zone mode except . 2 Check the exposure level indicator. ¡ Press the shutter button halfway and check the exposure level indicator. 3 Set the exposure compensation amount. ¡ Hold down the and - Canon 350D | Instruction Manual - Page 90
Exposure Bracketing (AEB)N By changing the shutter speed or aperture automatically, the camera can bracket the exposure up to Set the AEB amount. ¡ Press the key to set the AEB amount, then press . ¡ When you press the shutter button halfway, the icon and AEB amount will appear on the LCD - Canon 350D | Instruction Manual - Page 91
>. ¡ AEB will also be canceled automatically if you turn the power switch to , change lenses, obtain flash-ready, replace the battery, or replace the CF card. AEB cannot be used with flash or bulb exposures. ¡ If the drive mode is set to continuous (i), the three bracketed shots will be taken - Canon 350D | Instruction Manual - Page 92
setting. AE lock indicator 3 Recompose and take the picture. ¡ If you want to maintain the AE lock while taking more shots, hold down the button and press the shutter button to take another shot. ¡ If the AF mode is One-Shot AF or AI Focus AF (when not AI Servo AF) and the metering mode - Canon 350D | Instruction Manual - Page 93
heavens, and other subjects requiring long exposures. 1 Set the Mode Dial to . 2 Set the shutter speed to "buLb." ¡ Look at the LCD panel and turn the dial to select "buLb." ¡ The next setting after "30"" is "buLb." Aperture 3 Set the desired aperture value. ¡ Hold down the button and - Canon 350D | Instruction Manual - Page 94
countdown, if you let go of the shutter button, there will be a shutter-release sound. This is not the shutter being released (no picture is taken). ¡ During mirror lockup, the drive mode will be set to single shooting regardless of the current drive mode setting (single or continuous). ¡ If you use - Canon 350D | Instruction Manual - Page 95
or an EOSdedicated, EX-series Speedlite enables E-TTL II autoflash (evaluative flash metering with preflash), making flash photography as easy as normal shooting. The result is naturallooking flash photos. In the Basic Zone modes (except ), flash photography is fully automatic. In Creative Zone - Canon 350D | Instruction Manual - Page 96
Auto) mode. s : Enables you to set the desired shutter speed (30 sec. - 1/ 200 sec.). The camera then automatically sets the flash aperture value to obtain the proper exposure at the shutter speed you have set. f : Enables you to set the desired aperture value. The camera then automatically sets the - Canon 350D | Instruction Manual - Page 97
The built-in flash's coverage is effective with lens focal lengths as short as 17mm. If the lens is shorter than 17mm, the periphery of the flash photo will look dark. ¡ To retract the flash, push it back down. ¡ In the modes, even if you set the shutter speed to one faster than 1/200 sec., it - Canon 350D | Instruction Manual - Page 98
the retina of the eyes. The camera's red-eye reduction feature turns on the red-eye reduction lamp Set the red-eye reduction. ¡ Press the key to select [On], then press . ¡ When you press the shutter button halfway, the icon will be displayed in the viewfinder. ¡ When you press the shutter - Canon 350D | Instruction Manual - Page 99
and retained in memory. s In the viewfinder, "FEL" is displayed for a moment and will light. ¡ Each time you press the button, a preflash is fired and the required flash output is calculated and retained in memor y. 4 Take the picture. ¡ Compose the shot and press the shutter button fully. s The - Canon 350D | Instruction Manual - Page 100
in the viewfinder and on the LCD panel. 3 Take the picture. ¡ The flash exposure compensation amount will remain in effect even after you turn the power switch to . ¡ The procedure is the same with EX-series Speedlites. The flash exposure compensation amount can be set with the camera. 100 - Canon 350D | Instruction Manual - Page 101
the Speedlite's instruction manual. ¡E-TTL II Autoflash E-TTL II is a new autoflash exposure system incorporating improved flash exposure control and lens focusing distance information, making it more precise than the previous E-TTL (evaluative flash metering with preflash) system. The camera can execute - Canon 350D | Instruction Manual - Page 102
the button again. Use it to read the LCD panel in the dark. ¡ Pressing any shooting-related button or turning the Mode Dial while the LCD panel is illuminated prolongs the illumination. ¡ When the camera is connected to a printer and the button turns blue, the button functions as a Direct print - Canon 350D | Instruction Manual - Page 103
explains image playback operations such as how to view and erase captured images and how to connect the camera to a TV monitor. For images taken with another camera: The camera might not be able to properly display images captured with a different camera or edited with a personal computer or whose - Canon 350D | Instruction Manual - Page 104
the shutter button halfway. However, if auto power off has been set, the camera will turn off automatically after the auto power off time elapses. ¡ During the image review for single-shooting, you can delete the displayed image by pressing the button and selecting [OK]. ¡ To view the images - Canon 350D | Instruction Manual - Page 105
¡ The image review right after image capture will not display the image vertically on the LCD monitor. 4 camera is pointed up or down, the image might not rotate automatically for playback. When you change the camera's orientation between horizontal and vertical, the camera orientation sensor - Canon 350D | Instruction Manual - Page 106
Select the [c] tab. ¡ Press the key to select [LCD brightness], then press . s The LCD Brightness screen will appear. 2 Adjust the brightness. ¡ While looking at the gray chart on the left, press the key to adjust. ¡ Press to exit the setting and return to the menu. To check the image - Canon 350D | Instruction Manual - Page 107
the button. The LCD monitor will turn off. ¡ Even in display formats other than single image (index display, magnified view, etc.), you can press the button to display or hide the basic info. ¡ After continuous shooting while data is being written to the CF card (access lamp blinking), press - Canon 350D | Instruction Manual - Page 108
Shutter speed Images recorded/ Total images recorded Aperture Image protect Exposure compensation amount Image-recording quality File No. Histogram ISO speed Color space Metering mode Shooting mode in the overexposed areas, set the exposure compensation to a negative amount and shoot again. 108 - Canon 350D | Instruction Manual - Page 109
displayed on one screen. 1 Playback the image. ¡ Press the button. s The last captured image will appear on the LCD monitor. 2 mode ¡ To display a single image, press the button. ¡ Pressing the button switches to the single image display and pressing it again switches to magnified view - Canon 350D | Instruction Manual - Page 110
Image Playback u/y Magnified View You can magnify the image by 1.5x to 10x on the LCD monitor. 1 Playback the image. ¡ Display the image in the single-image or image info display mode. 2 Magnify the image. ¡ Press the button. s At first, the center of the image will be magnified. ¡ To increase the - Canon 350D | Instruction Manual - Page 111
on the CF card. 1 Playback the picture. Jumping in the magnified view Turn the dial counterclockwise to jump ten images backward, or turn it clockwise to jump ten images forward. The magnified position and magnification will be maintained during the image jump. Jumping in the index display mode - Canon 350D | Instruction Manual - Page 112
CF card's images in an automatic slide show. Each image will be displayed for about 3 sec. 1 Select [Auto play]. ¡ Select the [x] tab. ¡ Press the key to select [Auto play], then press . s The Autoplay screen display format. ¡ During pause, you can press the key to view another image. 112 - Canon 350D | Instruction Manual - Page 113
screen and return to the menu, press the button. ¡ If you have set [c Auto rotate] to [On] (p.105) before taking the vertical shots, you need not rotate the image as described above. ¡ You can rotate the image even after you change the display format to shooting info display, magnified view - Canon 350D | Instruction Manual - Page 114
the Images on TV By connecting the camera to a TV set with the video cable (provided), you can view the captured images on a TV set. Always turn off the camera and the television before connecting or disconnecting them. 1 Connect the camera to the TV. ¡ Open the camera's terminal cover. ¡ Use the - Canon 350D | Instruction Manual - Page 115
, repeat step 2. ¡ To exit the Protect screen and return to the menu, press the button. ¡ Once an image is protected, it cannot be erased by the camera's Erase function. To erase a protected image, you display format to shooting info display, magnified view, or index display after step 1. 115 - Canon 350D | Instruction Manual - Page 116
individually or erase all the images at one time in the CF card. Protected images (p.115) will not be erased. Once the Erase menu. ¡ Press the button. s The Erase menu will appear at the bottom of the screen. 4 Erase the image. ¡ Press the key to select [Erase], then press . s The access - Canon 350D | Instruction Manual - Page 117
. ¡ Press the button. s The Erase menu will appear at the bottom of the screen. 3 Select [All]. ¡ Press the key to select [All], then press . s pressing . After continuous shooting, while data is being written to the CF card (access lamp blinking), you can press the button and then - Canon 350D | Instruction Manual - Page 118
first. Then it might work with the camera. ¡ The CF card's capacity displayed on the Format screen may be lower than the capacity indicated on the card. Handling "Err CF" "Err CF" (CF error) displayed on the LCD panel indicates a problem with the CF card that prevents images from being recorded or - Canon 350D | Instruction Manual - Page 119
8 Direct Printing from the Camera You can connect the camera directly to a printer and print out the images in the CF card. This chapter explains how to print your digital camera photos with a printer capable of direct printing via " PictBridge" or Canon's own " CP Direct" or " Bubble Jet - Canon 350D | Instruction Manual - Page 120
], then press . When connecting the camera to a personal computer, set [Communication] to [PC connection].Communication between the camera and personal computer will not work if [Print/PTP] is set. Connecting the Camera to the Printer 1 Turn the camera's power switch to . 2 Set up the printer - Canon 350D | Instruction Manual - Page 121
one plug has the icon. ¡ When connecting the cable plug to the camera's terminal, the cable plug's icon must face the front side of the camera. ¡ To connect to the printer, refer to the printer's instruction manual. 4 Turn on the printer. 5 Turn the camera's power switch to . s Some - Canon 350D | Instruction Manual - Page 122
the print setting screen, select [Print]. The error message will be displayed on the LCD monitor. See "Error Messages" on page 128. ¡ Before disconnecting the cable, turn off the camera and printer. Pull out the cable while holding the plug, not the cord. ¡ When connecting the camera to the printer - Canon 350D | Instruction Manual - Page 123
date imprinting, borders on/off, etc.). Printer-connected icon Print settings wPictBridge Date Printing effects Paper size Paper type Borders 1 Select the image(s) to be printed. ¡ Check that the icon is displayed on the upper left of the LCD monitor. ¡ If the icon is displayed, you - Canon 350D | Instruction Manual - Page 124
Easy Printing for the first time, see the respective pages to set the print settings (paper size, etc.): w: p.125 - 128, S: p. 132 - 134 AEasy Printing with CP Direct The camera will read the CP printer's ink cassette and paper size information and execute optimum printing accordingly. The default - Canon 350D | Instruction Manual - Page 125
, refer to your printer's instruction manual. Printer-connected icon 1 Select the image(s) to be printed. ¡ Check that the icon is displayed on the upper left of the LCD monitor. ¡ Press the key to select the image to be printed. 2 Press . s The Print setting screen will appear. ¡ When - Canon 350D | Instruction Manual - Page 126
: Photo Photo Paper Plus Glossy Fast Photo Photo Paper Pro Default Photo Paper Plus Glossy If you are using a non-Canon printer, refer to the printer's instruction manual. USetting the Layout ¡ Press the key to select the desired layout, then press . s The Print setting screen will - Canon 350D | Instruction Manual - Page 127
Option to print 2, 4, 8, 9, 16, or 20 copies of same image on one sheet. With a Canon printer, the default is borderless. HDate imprinting 4 Set the other options. ¡ If desired, also set the date imprinting, printing effects, and number of copies. EPrinting effects RNumber of copies - Canon 350D | Instruction Manual - Page 128
on the printer to resume printing. For details, see the printer's instruction manual. Error Messages If a problem occurs during printing, an error message will appear on the camera's LCD monitor. Press to stop printing. After resolving the problem, resume printing. For details on how to resolve - Canon 350D | Instruction Manual - Page 129
A Printing with CP Direct Printer-connected icon 1 Select the image to be printed. ¡ Check that the icon is displayed on the upper left of the LCD monitor. ¡ Press the key to select the image to be printed. 2 Press . s The Print setting screen will appear. ¡ When the lamp lights in - Canon 350D | Instruction Manual - Page 130
when credit card-size paper is used. If you select [Multiple], 8 small images of the same picture will be printed on the paper. ¡ Check the [Borders] and [Date] settings and set them if necessary. ¡ When you are done, press the button to return to the Print setting screen. 5 Set the number - Canon 350D | Instruction Manual - Page 131
are printing multiple images, the printing will stop after the current image is finished printing. ¡ If a problem occurs during printing, an error message will appear on the camera's LCD monitor. Select [Stop] or [Resume] (after resolving the problem). If [Resume] is not displayed, select [Stop]. 131 - Canon 350D | Instruction Manual - Page 132
Printing with Bubble Jet Direct Printer-connected icon 1 Select the image to be printed. ¡ Check that the icon is displayed on the upper left of the LCD monitor. ¡ Press the key to select the image to be printed. 2 Press . s The Print setting screen will appear. ¡ When the lamp lights - Canon 350D | Instruction Manual - Page 133
, press the button to return to the Print setting screen. 5 Set the number of copies. ¡ Set as necessary. ¡ Press the key to select [copies]. ¡ Press the key to set the desired quantity. ¡ Set a number from 1 to 99. 6 Set the trimming. ¡ Set as necessary. ¡ For details on trimming, see - Canon 350D | Instruction Manual - Page 134
the screen will return to step 1. ¡ To stop the printing, press while [Stop] is displayed, then select [OK] and press . If [Borders] is set, the paper will be discharged. ¡ If a problem occurs during printing, an error message will appear on the camera's LCD monitor. Select [Stop] or [Continue - Canon 350D | Instruction Manual - Page 135
and then set the print settings, you may have to set the trimming again. 1 Select [Trimming]. ¡ Press the key to select [Trimming], then press . s The trimming screen will appear. 2 Trim the image. ¡ The image area within the trimming frame will be printed. ¡ The operation guide disappears - Canon 350D | Instruction Manual - Page 136
the trimming frame will turn red. ¡ While trimming the image, look at the camera's LCD monitor. If you look at the image on a TV screen, the trimming frame might not be displayed accurately. The trimming frame shape will be different depending on the [Paper settings], [Image] / [Paper], [Page layout - Canon 350D | Instruction Manual - Page 137
a standard for recording print ordering instructions to the CF card. It is for images taken with a digital camera, and you can specify which photos and the quantity to print. With a DPOF-compatible digital camera, you can do the following: ¡ By inserting a CF card into a printer compatible with DPOF - Canon 350D | Instruction Manual - Page 138
to select [Print Order], then press . s The Print Order screen will appear. 2 Select [Set up]. ¡ Press the key to select [Set up], then press . s The Print setting screen will appear. [Print type] 3 Set the options as desired. ¡ Set the [Print type], [Date], and [File No.]. ¡ Press the - Canon 350D | Instruction Manual - Page 139
the button. s The Print Order screen will reappear. ¡ Next, select [ instruction manual. Or check with your photo lab about compatibility when ordering prints. ¡ Do not insert into the camera a CF card whose print order specifications have already been set by a different camera and then try to set - Canon 350D | Instruction Manual - Page 140
Press the key to select [Order], then press . s The Order screen will appear. 2 Select the image to be printed. ¡ Press the depending on the [Print Type] setting (p.138). For [Standard] and [Both] ¡ For standard-type prints, you can set the quantity (up to 99) for each image. ¡ Press the - Canon 350D | Instruction Manual - Page 141
3 Print Ordering 4 Exit the menu. ¡ Press the button. s The Print Order screen will reappear. ¡ Press the button again to save the print order to the CF card. The menu will then reappear. 141 - Canon 350D | Instruction Manual - Page 142
images selected for printing will be deselected. ¡ If you select [Cancel], the Print Order screen will reappear. 3 Exit the menu. ¡ On the Print Order screen, press the button. s The settings will be saved to the CF card, and the menu will reappear. ¡ Note that RAW images cannot be selected for - Canon 350D | Instruction Manual - Page 143
], then press . ¡ [Print] will be displayed only if the camera is connected to the printer and printing is possible. s The Print setting screen will appear. 4 Set the printing options. ACP Direct SBubble Jet Direct wPictBridge ¡ Set the [Paper settings] and printing effects. (p.125) 143 - Canon 350D | Instruction Manual - Page 144
[Print type] is set to [Index], the number of images printed on one index sheet will be as follows: • Credit card size: 20 images • L size: 42 images • Postcard size: 63 images As for the number of index images with Bubble Jet Direct, see the BJ printer's instruction manual. ¡ If you stopped - Canon 350D | Instruction Manual - Page 145
10 Customizing the Camera Custom Functions enable you to customize various camera features to suit your picture-taking preferences. ¡ Custom Functions work only in Creative Zone modes. 145 - Canon 350D | Instruction Manual - Page 146
steps 2 and 3 if you want to set other Custom Functions. ¡ On the bottom of the screen, you can see the current Custom Function settings. 4 Exit the menu. ¡ Press the button to return to the menu. ¡ When you press the shutter button halfway, the icon will be displayed on the LCD panel. 146 - Canon 350D | Instruction Manual - Page 147
3 Setting a Custom FunctionN Resetting All Custom FunctionsN 1 Select [Clear settings]. ¡ Select the [b] tab. ¡ Press the key to select [Clear settings], then press . 2 Select [Clear all Custom Functions]. ¡ Press the key to select [Clear all Custom Functions], then press . 3 Select [ - Canon 350D | Instruction Manual - Page 148
Quality] menu appears so you can quickly change the setting. 2: SET:Parameter When you press , the [m Parameters] menu appears so you can quickly change the setting. 3: SET:Playback When you press , the images recorded in the CF card will be played. Assigns the same function as the button - Canon 350D | Instruction Manual - Page 149
3 Custom Function SettingsN C.Fn-4 Shutter button/AE lock button 0: AF/AE lock 1: AE lock/AF Convenient when you want to focus and meter separately. Press the button to autofocus and press the shutter button halfway to attain AE lock. 2: AF/AF lock, no AE lock In the AI Servo AF mode, you can - Canon 350D | Instruction Manual - Page 150
3 Custom Function SettingsN C.Fn-7 Mirror lockup 0: Disable 1: Enable Effective for close-up and telephotos shots to prevent camera shake caused by the mirror's reflex action. For more on mirror lockup, see page 94. C.Fn-8 E-TTL II 0: Evaluative Fully automatic flash photography under all - Canon 350D | Instruction Manual - Page 151
11 Reference This section will help you understand your camera better. It covers information on camera features, system accessories, and other reference information. 151 - Canon 350D | Instruction Manual - Page 152
Preset WB, Custom WB, WB correction, WB bracketing Parameters o (Parameter 1) kkkkk kkkkk One-Shot ooo o kkkko AI Servo o kkkk - AF AI Focus o okkkk - AF Auto o o o o o o o k k k k o point selection Manual kkkk Evaluative oooooookkkkk Exposure Metering mode Drive Built-in - Canon 350D | Instruction Manual - Page 153
-weighted Average Metering AF point selection Automatic AF point selection Manual AF point selection AE lock is applied at the AF AE lock is applied at the point that achieved focus. selected AF point. AE lock is applied at the center AF point. * When the lens' focus mode switch is set to - Canon 350D | Instruction Manual - Page 154
the CF card. s When the camera finishes recording the image to the CF card, the access lamp will stop blinking and the power will turn off automatically. The battery becomes exhausted quickly. ¡ The battery is not fully charged. s Recharge the battery fully. (p.20) ¡ The battery's service life has - Canon 350D | Instruction Manual - Page 155
viewfinder blinks.) s Press the shutter button halfway again and focus the subject. If you still cannot focus properly, focus manually. (p.28, 76) The LCD monitor does not display a clear image. ¡ The LCD monitor screen is dirty. s Use a soft, lens cloth to clean the screen. ¡ The LCD's service life - Canon 350D | Instruction Manual - Page 156
mode switch is set to . s Set the lens focus mode switch to . (p.25) ¡ Camera shake occured when you pressed the shutter button. s To prevent camera shake, hold the camera still and press the shutter button gently. (p.28, 42) The CF card cannot be used. ¡ [Err **] is displayed on the LCD - Canon 350D | Instruction Manual - Page 157
the button to see if the image appears on the LCD monitor. Error Code Err 01 Err 02 Err 04 Err 05 Err 99 Countermeasures Communications between the camera and lens is faulty. Clean the lens contacts. (p.9) There is a problem with the CF card. Try any of the following: Remove and re-insert the - Canon 350D | Instruction Manual - Page 158
two NB-2LH packs or six size-AA batteries. It provides a vertical-grip shutter button, electronic dial, AE lock/FE lock button, AF point selection button, and exposure compensation/aperture setting button. Semi-Hard Case EH18-L Dedicated case to protect the camera. It can accommodate the - Canon 350D | Instruction Manual - Page 159
lenses (-4 to +3 diopters) can be attached to the camera's eyepiece to further expand the dioptric adjustment range. CF card Data storage media where the captured images are recorded. CF cards made by Canon are recommended. PC card adapter Enables a CF card to be inserted into a PC card slot or PC - Canon 350D | Instruction Manual - Page 160
E-series Dioptric Adjustment Lenses Bundled Accessories Eyecup Ef * The Lens Kit includes the EF-S 18-55mm lens. Angle Finder C Wide Strap EW-100DBll Semi-hard Case EH18-L Battery Pack NB-2LH Date / time CR2016 lithium battery Battery Grip BG-E3 AC Adapter Kit ACK700 Battery Charger CB-2LT - Canon 350D | Instruction Manual - Page 161
PC card adapter PC card slot USB port (2.0/1.1) Windows XP (Home Edition / Professional) Windows 2000 Professional Windows ME Windows 98 Second Edition Mac OS X 10.1.5-10.3 Mac OS 9.0-9.2 • EOS DIGITAL Solution Disk • ArcSoft PhotoStudio Disk • Software Instruction Manual (PDF) Interface - Canon 350D | Instruction Manual - Page 162
Specifications • Type Type: Recording media: Image size: Compatible lenses: Lens mount: Digital, single-lens reflex, AF/AE camera with built-in flash CF card (Type I or II) *Compatible with Microdrive and 2GB and larger CF cards 22.2 x 14.8mm Canon EF lenses (including EF-S lenses) (35mm-equivalent - Canon 350D | Instruction Manual - Page 163
screen: Fixed, precision matte Mirror: Quick-return half mirror (Transmission:reflection ratio of 40:60, no mirror cut-off with EF600mm f/4 or shorter lenses) Viewfinder information: AF information (AF points, focus confirmation light), exposure information (shutter speed, aperture value - Canon 350D | Instruction Manual - Page 164
: Auto: Applied in One-Shot AF mode with evaluative metering when focus is achieved Manual: By AE lock button in all metering modes • Shutter Type: Shutter speeds: Shutter release: Self-timer: Remote control: Electronically-controlled, focal-plane shutter 1/4000 to 30 sec. (1/3- and 1/2-stop - Canon 350D | Instruction Manual - Page 165
, RAW+JPEG (Large/Fine): Approx. 4 shots * With a Canon 512MB CF card. * Varies depending on the subject, ISO speed, processing parameters, CF card, etc. • LCD Monitor Type: TFT color liquid-crystal monitor Monitor size: 1.8 in. Pixels: Approx. 115,000 Coverage: 100% with respect to the - Canon 350D | Instruction Manual - Page 166
• Customization Custom Functions: 9 Custom Functions with 24 settings • Power Source Battery: Battery life: Battery check: Power saving: Date/Time battery: Battery Pack NB-2LH, quantity 1 * AC Adapter Kit ACK700 enables a household AC outlet to supply power. * Battery Grip BG-E3 enables size-AA - Canon 350D | Instruction Manual - Page 167
Specifications • Battery Charger CB-2LT Compatible battery: Battery Pack NB-2LH Recharging time: Approx oz (excluding power cord) ¡ All the specifications above are based on Canon's testing standards. ¡ The camera's specifications and physical appearance are subject to change without notice. 167 - Canon 350D | Instruction Manual - Page 168
used in accordance with the instructions, may cause harmful interference be determined by turning the equipment off and on, the user is encouraged to try connected. - Consult the dealer or an experienced radio/TV technician for help. The cable with the ferrite core provided with the digital camera - Canon 350D | Instruction Manual - Page 169
, 158 Battery Charger 17 Battery check 22 Battery life 23 Beeper 50 Bubble Jet Direct 132 Built-in flash 96 Bulb exposures 93 Bundled Items 3 C C.Fn 148 Camera setting display 68 Center-weighted average metering... 77 CF card 9, 26, 118, 159 Clear all camera settings 35 Clear all Custom - Canon 350D | Instruction Manual - Page 170
36 LCD brightness 106 LCD monitor 9, 34 LCD panel 9, 14 LCD panel illumination 102 Lens 9, 25 M M (Manual 86 Magnified view 110 Main Dial 18, 29 Manual AF point selection 73 Manual Focusing 76 Max. Burst 54 Menus 31, 33, 34 Metering mode 77 MF 76 Mirror lockup 94 Mode Dial 16 - Canon 350D | Instruction Manual - Page 171
reduction 98 Remote control 49, 159 Replacing the date/time battery ......38 Rotate 113 S Selecting all images 142 Selecting Individual Images ..........140 Self-timer 48, 78 Sensor cleaning 39 Setting the date/time 37 Set-up menu 31, 34 Sharpness 64 Shoot w/o card 41 Shooting information - Canon 350D | Instruction Manual - Page 172
, New Zealand CANON SALES CO., INC. 16-6, Kohnan 2-chome, Minato-ku, Tokyo 108-8011, Japan This Instruction Manual booklet is current as of January 2005. For information on the camera's compatibility with any accessories and lenses introduced after this date, contact any Canon Service Center
-
 1
1 -
 2
2 -
 3
3 -
 4
4 -
 5
5 -
 6
6 -
 7
7 -
8
-
9
-
10
-
11
-
12
-
13
-
14
-
15
-
16
-
17
-
18
-
19
-
20
-
21
-
22
-
23
-
24
-
25
-
26
-
27
-
28
-
29
-
30
-
31
-
32
-
33
-
34
-
35
-
36
-
37
-
38
-
39
-
40
-
41
-
42
-
43
-
44
-
45
-
46
-
47
-
48
-
49
-
50
-
51
-
52
-
53
-
54
-
55
-
56
-
57
-
58
-
59
-
60
-
61
-
62
-
63
-
64
-
65
-
66
-
67
-
68
-
69
-
70
-
71
-
72
-
73
-
74
-
75
-
76
-
77
-
78
-
79
-
80
-
81
-
82
-
83
-
84
-
85
-
86
-
87
-
88
-
89
-
90
-
91
-
92
-
93
-
94
-
95
-
96
-
97
-
98
-
99
-
100
-
101
-
102
-
103
-
104
-
105
-
106
-
107
-
108
-
109
-
110
-
111
-
112
-
113
-
114
-
115
-
116
-
117
-
118
-
119
-
120
-
121
-
122
-
123
-
124
-
125
-
126
-
127
-
128
-
129
-
130
-
131
-
132
-
133
-
134
-
135
-
136
-
137
-
138
-
139
-
140
-
141
-
142
-
143
-
144
-
145
-
146
-
147
-
148
-
149
-
150
-
151
-
152
-
153
-
154
-
155
-
156
-
157
-
158
-
159
-
160
-
161
-
162
-
163
-
164
-
165
-
166
-
167
-
168
-
169
-
170
-
171
-
172
 |
 |
E
INSTRUCTION MANUAL
E
INSTRUCTION
MANUAL