Canon 50 MC ZR50 ZR45MC Instruction Manual - Page 108
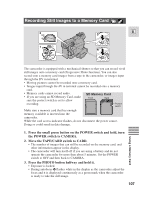
Press the PHOTO button fully down to record the still picture.
 |
UPC - 013803010503
View all Canon 50 MC manuals
Add to My Manuals
Save this manual to your list of manuals |
Page 108 highlights
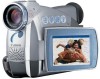
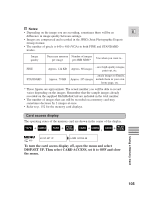
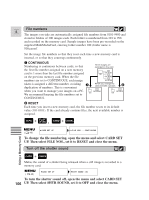
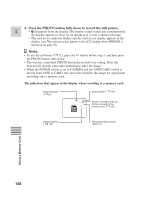
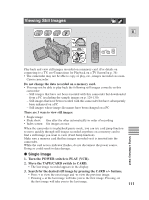
4. Press the PHOTO button fully down to record the still picture. E • F disappears from the display. The shutter sound sounds and simultaneously the display appears to close for an instant as if it were a shutter releasing. • The card access indicator flashes and the card access display appears in the display. (see "The indicators that appear in the LCD display when MIRROR is turned on"on page 29). Notes: • To use the self-timer ( 72), press the button before step 3, and then press the PHOTO button fully down. • The wireless controllers' PHOTO button has no half-way setting. Press the button fully and the camcorder immediately takes the image. • When the POWER switch is set to CAMERA and the TAPE/CARD switch is moved from TAPE to CARD, the camcorder modifies the image for appropriate recording onto a memory card. The indicators that appear in the display when recording to a memory card: Image stabilizer ( 58) Image quality ( 104) FINE >>>> 50 Number of images that can still be recorded on the memory card ( 105) Backup battery ( 135) Remaining battery power ( 134) Using a Memory Card 108
-
 1
1 -
2
-
3
-
4
-
5
-
6
-
7
-
8
-
9
-
10
-
11
-
12
-
13
-
14
-
15
-
16
-
17
-
18
-
19
-
20
-
21
-
22
-
23
-
24
-
25
-
26
-
27
-
28
-
29
-
30
-
31
-
32
-
33
-
34
-
35
-
36
-
37
-
38
-
39
-
40
-
41
-
42
-
43
-
44
-
45
-
46
-
47
-
48
-
49
-
50
-
51
-
52
-
53
-
54
-
55
-
56
-
57
-
58
-
59
-
60
-
61
-
62
-
63
-
64
-
65
-
66
-
67
-
68
-
69
-
70
-
71
-
72
-
73
-
74
-
75
-
76
-
77
-
78
-
79
-
80
-
81
-
82
-
83
-
84
-
85
-
86
-
87
-
88
-
89
-
90
-
91
-
92
-
93
-
94
-
95
-
96
-
97
-
98
-
99
-
100
-
101
-
102
-
 103
103 -
 104
104 -
 105
105 -
 106
106 -
 107
107 -
 108
108 -
 109
109 -
 110
110 -
 111
111 -
 112
112 -
 113
113 -
114
-
115
-
116
-
117
-
118
-
119
-
120
-
121
-
122
-
123
-
124
-
125
-
126
-
127
-
128
-
129
-
130
-
131
-
132
-
133
-
134
-
135
-
136
-
137
-
138
-
139
-
140
-
141
-
142
-
143
-
144
-
145
-
146
-
147
-
148
-
149
-
150
-
151
-
152
-
153
-
154
-
155
-
156
-
157
-
158
-
159
-
160
-
161
-
162
-
163
-
164
 |
 |