Canon Color imageCLASS LBP7110Cw Quick Setup Guide - Page 2
Download the manual and the printer driver that supports this printer from the Canon Web site
 |
View all Canon Color imageCLASS LBP7110Cw manuals
Add to My Manuals
Save this manual to your list of manuals |
Page 2 highlights
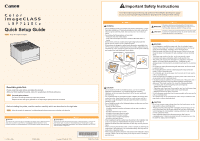
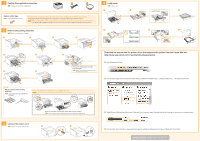
1 Confirm the supplied accessories. SPA Verifique los accesorios suministrados. A B 4 Load paper. SPA Cargue papel. 1 2 Remove all the tape. SPA Retire la totalidad de la cinta. Remove all the orange tape attached to the printer when performing the following procedure. The packing materials may be changed in form or placement, or may be added or removed without notice. SPA Retire la totalidad de la cinta naranja acoplada a la impresora cuando lleve a cabo el siguiente procedimiento. Los materiales de embalaje pueden diferir en su forma o posición y pueden añadirse o eliminarse sin previo aviso. 2 Remove the packing materials. 4 SPA Retire los materiales de embalaje. 1 2 3 4 Longer than A4 3 5 6 Up to here 5 6 1 2 8 9 7 12 Pull out the sealing tapes of all the toner cartridges. SPA Tire de las cintas de sellado de todos los cartuchos de tóner. Check! Did you remove all the packing materials? SPA ¿Ha retirado todos los materiales de embalaje? Make sure that all the orange tape is completely removed. SPA Asegúrese de retirar completamente la totalidad de la cinta naranja. Download the manual and the printer driver that supports this printer from the Canon Web site (http://www.usa.canon.com/). See the following procedure. 1 Select [Support & Drivers]. 2 From [Product Type], select [Consumer & Home Office], and [Printers & Multifunction] → [imageCLASS Series] → the desired model name. 3 Connect the power cord. SPA Conecte el cable de alimentación. Close the covers and insert the paper drawer after you finish checking. SPA Cierre las tapas e inserte la bandeja de papel una vez finalizada la comprobación. 1 2 A 3 Select [Drivers & Software] and [Brochures & Manuals] from the product page. Download the files by following the instructions on the each screen. 4 Run the printer driver file that you downloaded and make the settings by following the procedure in "Read_first" in the folder. Setup finished. SPA Ha finalizado la configuración.
-
 1
1 -
 2
2
 |
 |
