Canon Color imageCLASS MF8180c imageCLASS MF8180c Quick Start Guide - Page 17
Specifying Automatic Network Settings (dynamic allocation
 |
View all Canon Color imageCLASS MF8180c manuals
Add to My Manuals
Save this manual to your list of manuals |
Page 17 highlights
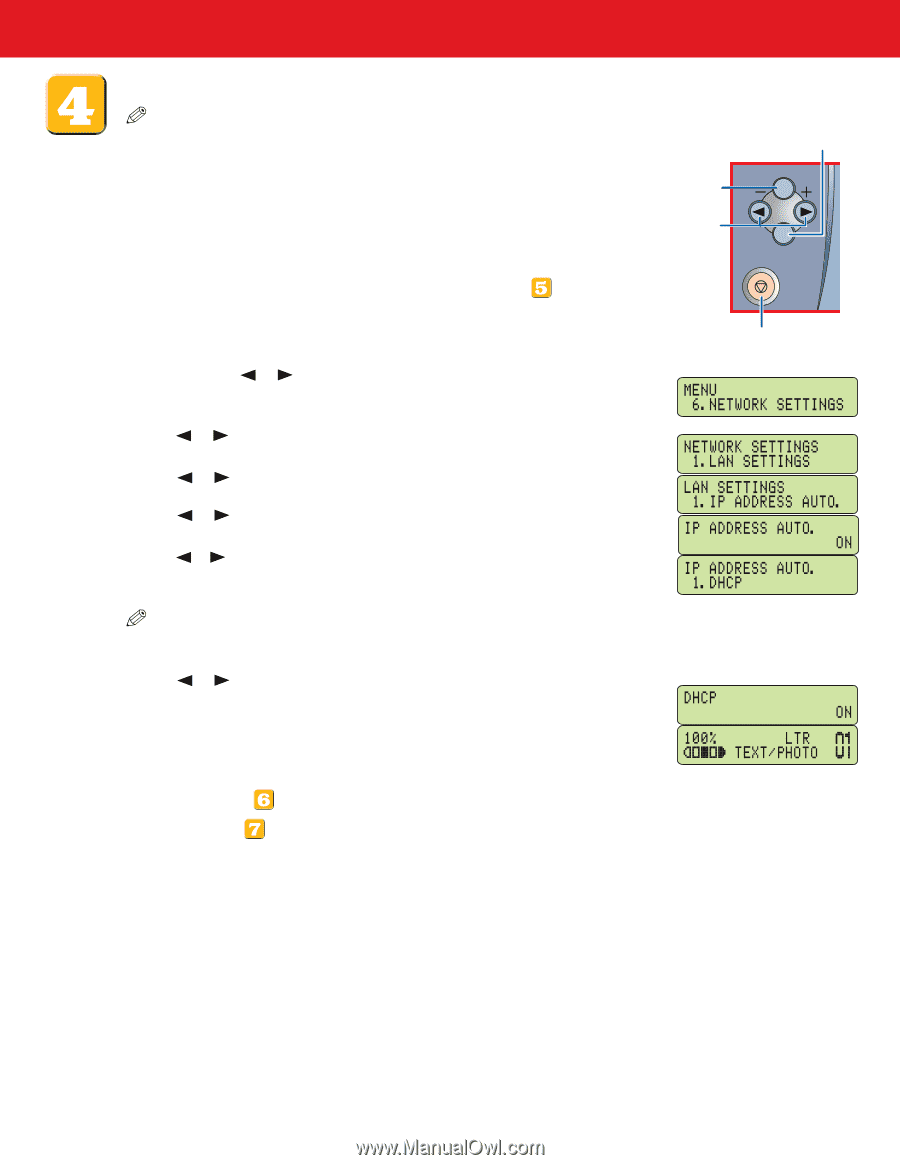
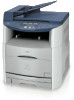
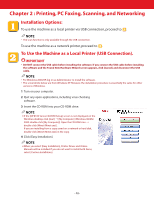
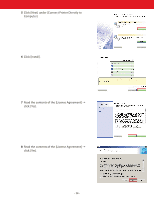
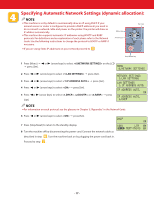
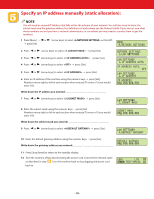
Specifying Automatic Network Settings (dynamic allocation): NOTE ● This machine is set by default to automatically draw an IP using DHCP. If your network server or router is configured to provide a DHCP address all you need to do is connect a network cable and power on the printer. The printer will draw an IP address automatically. ● This machine also supports automatic IP addresses using BOOTP and RARP protocols. For definitions and an explanation of each please refer to the Network Guide. Use the following instructions to change the protocol to BOOTP or RARP if necessary. ● If you are using Static IP addresses on your network proceed to Menu key Set key Menu Arrow keys Set Stop/Reset Stop/Reset key 1 Press [Menu] ➝ or (arrow keys) to select on the LCD ➝ press [Set]. 2 Press or (arrow keys) to select ➝ press [Set]. 3 Press or (arrow keys) to select ➝ press [Set]. 4 Press or (arrow keys) to select ➝ press [Set]. 5 Press or [Set]. (arrow keys) to select , , or ➝ press NOTE ● For information on each protocol, see the glossary in Chapter 3,"Appendix," in the Network Guide. 6 Press or (arrow keys) to select ➝ press [Set]. 7 Press [Stop/Reset] to return to the standby display. 8 Turn the machine off by disconnecting the power cord. Connect the network cable as described in step . Turn the machine back on by plugging the power cord back in. Proceed to step . - 17 -
-
 1
1 -
2
-
3
-
4
-
5
-
6
-
7
-
8
-
9
-
10
-
11
-
 12
12 -
 13
13 -
 14
14 -
 15
15 -
 16
16 -
 17
17 -
 18
18 -
 19
19 -
 20
20 -
 21
21 -
 22
22 -
23
-
24
 |
 |