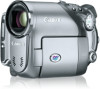
Canon DC40 DC40 Instruction Manual
Canon DC40 Manual
 |
UPC - 013803041606
View all Canon DC40 manuals
Add to My Manuals
Save this manual to your list of manuals |
Canon DC40 manual content summary:
- Canon DC40 | DC40 Instruction Manual - Page 1
a la guía de instalación. • Digital Video Software Digital Video Software Instruction Manual Manuel d'instruction Manual de Instrucciones PUB.DIM-717 E Version 19 F Es This instruction manual explains how to install the software, connect the camcorder to a computer, and download still images from - Canon DC40 | DC40 Instruction Manual - Page 2
REDUCE ANNOYING INTERFERENCE, USE THE RECOMMENDED ACCESSORIES ONLY. COPYRIGHT WARNING: Unauthorized recording of copyrighted materials may infringe on the rights of copyright owners and be contrary to copyright laws. DVD Camcorder, DC40 A systems This device complies with Part 15 of the FCC Rules - Canon DC40 | DC40 Instruction Manual - Page 3
Power Sources - The CA-570 Compact refers to the Canon DVD Camcorder DC40 A Power Adapter should be operated only E and all its accessories. from the type of power source indicated on the marking label. If you are not sure of 1. Read Instructions - All the safety and the type of power supply - Canon DC40 | DC40 Instruction Manual - Page 4
performance. This indicates a need for service. 19.Replacement Parts - When replacement parts are required, be sure the service technician has used replacement parts that are specified by Canon or that have the same characteristics as the original part. Unauthorized substitutions may result in fire - Canon DC40 | DC40 Instruction Manual - Page 5
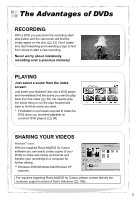
players ( 98). SHARING YOUR VIDEOS Windows** users: With the supplied Roxio MyDVD for Canon software you can easily create copies of your DVDs to share with family and friends and transfer your recordings to a computer for further editing. ** Windows 2000/Windows Me/Windows XP systems. For inquiries - Canon DC40 | DC40 Instruction Manual - Page 6
I have the disc... What disc standard do I choose to initialize it? VIDEO mode Once finalized, a disc recorded in VIDEO mode will play in most common DVD players. However, you cannot edit the recordings. VR* mode You can easily edit the recordings. However, the disc can only be played back with - Canon DC40 | DC40 Instruction Manual - Page 7
on the type of disc you use and the disc specification selected when initializing it. Feature Disc Type/Specification DVD-R DVD-RW VIDEO mode VIDEO mode VR mode Editing scenes with this camcorder (deleting scenes, editing the Playlist) - - 85 Deleting a scene or still image immediately - Canon DC40 | DC40 Instruction Manual - Page 8
of DVDs 5 An Introduction to DVDs 6 Differences in Available Features Depending on the Disc 7 About this Manual 11 Checking the Supplied Accessories 13 Components Guide 14 Screen Displays 18 Preparations Step 1: Preparing the Power Supply 21 Step 2: Preparing the Camcorder 24 Step - Canon DC40 | DC40 Instruction Manual - Page 9
the MENU Settings Changing Settings with the MENU Button 79 Available Settings List (MENU 80 Camera Setup (Digital Zoom, Image Stabilizer, etc 80 Disc Operations (Photomovie, Finalize, etc 82 Still Image Operations (Card Initialization, Disc-Card Copy, etc.)..........82 Display Setup (LCD - Canon DC40 | DC40 Instruction Manual - Page 10
Trouble? Troubleshooting 122 List of Messages 126 Do's & Don'ts Handling Precautions 129 Maintenance/Others 132 Additional Information System Diagram 134 Optional Accessories 135 Specifications 137 Product Codes 139 Index...140 10 - Canon DC40 | DC40 Instruction Manual - Page 11
Thank you for purchasing the Canon DC40. Please read this manual carefully before you use the camcorder and retain it for future reference. Should your camcorder fail to E operate correctly, refer to the Troubleshooting table ( 122). Conventions Used in the Manual : Precautions related to the - Canon DC40 | DC40 Instruction Manual - Page 12
or memory card. Trademark Acknowledgements • miniSD™ is a trademark of SD Card Association. • Windows® is a registered trademark of Microsoft Corporation in the United States and/ or other countries. • Macintosh and Mac OS are trademarks of Apple Computer, Inc., registered in the United States - Canon DC40 | DC40 Instruction Manual - Page 13
the Supplied Accessories CA-570 Compact Power Adapter (incl. power cord) BP-208 Battery Pack WL-D86 Wireless Controller Lithium Button Battery CR2025 for Wireless E Controller MTC-100 Multi Cable IFC-300PCU USB Cable Blank DVD-R Disc (8 cm Mini DVD) DIGITAL VIDEO SOLUTION DISK Software CD - Canon DC40 | DC40 Instruction Manual - Page 14
) RESET button ( 122) Mode dial ( 46) 14 FINALIZE button ( 98) Memory card slot ( 30) Multi selector ( 11) / EXP button ( 53) / FOCUS button ( 54) BATT. (battery release) button ( 21) Serial number Flash ( 57) Disc compartment cover ( 31) Mini video light ( 56) Remote sensor ( 25) Stereo microphone - Canon DC40 | DC40 Instruction Manual - Page 15
) WIDE SCR button ( 38) / PLAYLIST button ( 85) / (Movies/Still images) switch ( 12) Dioptric adjustment lever ( 24) AV OUT terminal ( 102, 104) Operating mode indicator ( 12) CAMERA (red), PLAY (green) DISC access indicator ( 33) Start/stop button ( 33) Power switch ( 11 - Canon DC40 | DC40 Instruction Manual - Page 16
Top view Bottom view Speaker ( 43) Grip belt ( 24) Zoom lever ( 37) PHOTO button ( 35) Tripod socket ( 34) OPEN (disc cover) switch ( 31) Strap mount ( 136) 16 - Canon DC40 | DC40 Instruction Manual - Page 17
Wireless Controller WL-D86 E Introduction START/STOP button ( 33) FUNC. button ( 60) MENU button ( 79) PLAYLIST button ( 85) Navigation buttons ( / / / ) PREV./NEXT buttons: Scene skip ( 40)/ Index screen page up/down ( 39) Reverse SEARCH button ( 40) / Reverse SLOW button ( 40) PLAY - Canon DC40 | DC40 Instruction Manual - Page 18
balance ( 64) Image effect ( 66) Digital effects ( 71) Recording mode ( 61) Still image quality/size ( 76) Self timer ( 59) Disc type DVD-R, DVD-RW ( 6) Disc specification (VIDEO mode, VR mode) ( 6) Finalized disc mark ( 98) Recording reminder Manual focus ( 54) Image stabilizer ( 81 - Canon DC40 | DC40 Instruction Manual - Page 19
next to the number of images available while the camcorder is writing on the memory card or disc. Remaining battery charge • When " " starts flashing in red replace the battery pack with a fully charged one. • When you attach an empty battery pack, the power may turn off without displaying - Canon DC40 | DC40 Instruction Manual - Page 20
Playing Movies (Index Screen) Current scene number/Total number of scenes ( 39) Date and time of recording Playing Movies (During Playback) Disc operation Playback time (hours : minutes : seconds) Scene number Data code ( 45) Viewing Still Images Image number ( 84) Current image / Number of - Canon DC40 | DC40 Instruction Manual - Page 21
: 1. Disconnect the power adapter from the camcorder. 2. Unplug the power cord from the power outlet and the adapter. To remove the battery pack: Hold the BATT. button pressed down to release it, and pull out the battery from the ridge on its bottom part. Attaching the Ferrite Core (Asia only - Canon DC40 | DC40 Instruction Manual - Page 22
household power outlet to use the camcorder without worrying about the battery power. You can keep the battery pack attached; the battery power will not be consumed. 1. Turn off the camcorder. 2. Connect the power cord to the power adapter. 3. Plug the power cord into a power outlet. 4. Connect the - Canon DC40 | DC40 Instruction Manual - Page 23
Outside the temperature range of 0 °C to 40 °C (32 °F to 104 °F), the charging will not start. If you connect a faulty power adapter or battery pack, the CHARGE indicator E flashes rapidly (approx. twice per second) and the charging stops. The CHARGE indicator also serves as a rough estimate - Canon DC40 | DC40 Instruction Manual - Page 24
Adjusting the Viewfinder (Dioptric Adjustment) 1. Turn on the camcorder and keep the LCD panel closed. 2. Adjust the dioptric adjustment lever as necessary. Fastening the Grip Belt Adjust the grip belt so that you can - Canon DC40 | DC40 Instruction Manual - Page 25
tab in the direction of the arrow and pull out the battery holder. 2. Place the lithium button battery with the + side facing up. 3. Insert the battery holder. Tab Using the Wireless Controller Point the controller at the camcorder's remote sensor when you press the buttons. Preparations The - Canon DC40 | DC40 Instruction Manual - Page 26
does not affect the brightness of the recording or the viewfinder screen. Using the brighter LCD setting will shorten the effective usage time of the battery. 26 - Canon DC40 | DC40 Instruction Manual - Page 27
, Italian, Polish, Russian, Simplified Chinese, Traditional Chinese, Korean, Thai or Japanese. MENU ( 79) DISPLAY SETUP LANGUAGE ENGLISH 1. Turn on the camcorder. 2. Press the MENU button. Preparations 3. Use the multi selector to select ( ) the [DISPLAY SETUP] menu and press ( ). 4. Use the - Canon DC40 | DC40 Instruction Manual - Page 28
) DATE/TIME SETUP T.ZONE/DST NEW YORK 1. Turn on the camcorder. 2. Press the MENU button to open the menu. 3. Use the to ( ) to move to the day setting. • The next part of the date/time is displayed in orange. • Set the day to a specific setting you want to change. 8. Press the MENU button to - Canon DC40 | DC40 Instruction Manual - Page 29
camcorder for about 3 months, the built-in rechargeable lithium battery may discharge completely and the date and time setting may be lost. In such case, recharge the built-in lithium battery Moscow Dubai Karachi Dacca Bangkok Singapore Tokyo Sydney Solomon GMT/UTC Wellington (WELLINGTN) +12 - Canon DC40 | DC40 Instruction Manual - Page 30
Step 7: Inserting a Memory Card Only miniSD cards can be used with this camcorder. Inserting the Card 1. Turn off the camcorder. Make sure the CARD access indicator is not flashing before you turn the camcorder off. 2. Open the cover. 3. Insert the memory card straight all the way into the memory - Canon DC40 | DC40 Instruction Manual - Page 31
or DVD-RW logo. Before inserting the disc be sure to check that the recording surface is clean. If necessary, use a soft lens-cleaning cloth to remove any fingerprints, dirt buildup or smudges from the disc surface. Preparations 1. Move the power switch to ON to set the camcorder in CAMERA mode - Canon DC40 | DC40 Instruction Manual - Page 32
[NO] and press ( ) to return and select a different disc specification. A confirmation message will appear on the screen. Use the multi selector camcorder finishes recognizing the disc before you start recording. Removing the Disc 1. Move the power switch to ON to set the camcorder in CAMERA - Canon DC40 | DC40 Instruction Manual - Page 33
recording first to check if the camcorder operates correctly. Since E recordings made on a DVD-R cannot be deleted, we recommend you use a DVD-RW disc (commercially available) to make the test recordings. 1. Move the power switch to ON to set the camcorder in CAMERA mode. 2. Move the / switch to - Canon DC40 | DC40 Instruction Manual - Page 34
camcorder is powered by a battery pack, the camcorder the pixels operating to specification. Less than 0.01% tripods with fastening screws longer than 5.5 mm (0.2 inch). Doing so may damage the camcorder. Reviewing the Last Scene Recorded Press and release the (record review) button. • The camcorder - Canon DC40 | DC40 Instruction Manual - Page 35
be sure to initialize it with this camcorder ( 97). E 1. Move the power switch to ON to set the camcorder in CAMERA mode ( 11). 2. Move the autofocus, turns yellow. Keep the PHOTO button pressed halfway and adjust the focus manually with the multi selector ( ). When the subject is too bright, " - Canon DC40 | DC40 Instruction Manual - Page 36
card. As long as you do not change the recording destination, still images will be recorded to the last selected media. 1. Set the camcorder to record or view still images ( or ). 2. Press the MENU button. Using the multi selector select ( ) the [SYSTEM SETUP] menu and press ( ). 3. Select - Canon DC40 | DC40 Instruction Manual - Page 37
), in addition to the 10x optical zoom you can also use the 200x digital zoom E Zoom out Zoom in 10x Optical Zoom Move the zoom lever toward . The zoom speed with the wireless controller will be the same as with the camcorder (when one of the fixed zoom speed levels is selected) or fixed at [SPEED - Canon DC40 | DC40 Instruction Manual - Page 38
your TV. WIDE SCR button 1. Set the camcorder to record movies ( ). 2. Press the in LP mode if the disc specification is VIDEO mode (DVD-R or DVD-RW). Selecting the LP recording Video ID-1 system will automatically switch to wide (16:9) mode. Otherwise, change the aspect ratio of the TV manually - Canon DC40 | DC40 Instruction Manual - Page 39
first scene. 4. Use the multi selector ( , ) to move the selection frame to the scene you want to play back. Press the + or - button on the camcorder or the NEXT/PREV. buttons on the wireless controller to move to the next or previous index page. 5. Press the / button to begin the playback - Canon DC40 | DC40 Instruction Manual - Page 40
. Playback Pause During normal playback, press the / button on the camcorder or the PAUSE on the wireless controller. Slow Forward Playback / Slow modes. Slow playback is not available with discs recorded in VIDEO mode (DVD-R or DVD-RW). Depending on the recording, you might occasionally notice - Canon DC40 | DC40 Instruction Manual - Page 41
last. 5. Use the multi selector to move ( ) between images. The following may not be displayed correctly: Images not recorded with this camcorder, images edited on or uploaded from a computer (except for the sample images for the Card Mix function), and images whose file names have been - Canon DC40 | DC40 Instruction Manual - Page 42
button. 3. Move the zoom lever toward T. The index screen closes and the selected image is displayed. Image Jump Function You can also quickly locate a specific image without having to browse all of them one by one. Push the multi selector ( ) and keep it pressed down. Image numbers will quickly run - Canon DC40 | DC40 Instruction Manual - Page 43
. If you close the LCD panel the E sound will be muted. Speaker Multi Selector MENU button MENU ( 79) SYSTEM SETUP VOLUME 1. Set the camcorder to play movies ( ). 2. Press the MENU button. 3. Use the multi selector to select ( ) the [SYSTEM SETUP] menu and press ( ). 4. Use the multi - Canon DC40 | DC40 Instruction Manual - Page 44
lever toward T. To reduce the magnification to less than 2 times, move the zoom lever toward W. • will appear for images that cannot be enlarged. 2. Select the part of the image to be magnified with the multi selector. • Use the multi selector to move ( , ) the frame to the - Canon DC40 | DC40 Instruction Manual - Page 45
Basic Functions Playback Selecting the Recording Data Display The camcorder keeps a data code containing the recording date and time and other camera data such as shutter speed and exposure (f-stop). You can select the data to be E displayed when playing back a movie ( ) or viewing a still - Canon DC40 | DC40 Instruction Manual - Page 46
the Recording Programs AdvancedFeatures Recording Programs Program AE ( 50) Shutter-Priority AE ( 51) Aperture-Priority AE ( 52) Easy Recording: Let the camcorder select the best settings according to your subject. Flexible Recording: Have the freedom to change the settings to get the picture you - Canon DC40 | DC40 Instruction Manual - Page 47
Selecting the Recording Program Mode dial E 1. Set the camcorder to a recording mode ( or ). 2. Turn the mode dial to switch between the recording programs. The symbol may not work as well as in other modes. In such case, adjust the focus manually. Advanced Features Recording Programs 47 - Canon DC40 | DC40 Instruction Manual - Page 48
as necessary depending on the illumination level. Mode dial Assist lamp Night Mode Multi selector Super Night Mode 1. Set the camcorder to a recording mode ( or ). 2. Turn the mode dial to and press ( ). 3. Select ( ) [ as well as in other modes. In such case, adjust the focus manually. 48 - Canon DC40 | DC40 Instruction Manual - Page 49
Fireworks Use this mode to record fireworks. Advanced Features Recording Programs 1. Set the camcorder to a recording mode ( or ). 2. Turn the mode dial to and Fireworks: To avoid camcorder shake, we recommend using a tripod. Make sure to use a tripod especially in , as the shutter speed slows - Canon DC40 | DC40 Instruction Manual - Page 50
some settings. Set the camcorder to a recording mode ( or ) and turn the mode dial to . If the optimal exposure cannot be obtained, try the following actions: Manually adjust the exposure ( 53). Change the metering method ( 63). Use the flash ( 57). Use the mini video light ( 56). 50 - Canon DC40 | DC40 Instruction Manual - Page 51
dark places, you can obtain a brighter image, but the image quality may be lower, and the autofocus may not work well. Do not point the camcorder directly at the sun when the shutter speed is set to 1/1000 or higher. The image may flicker when recording with high shutter speeds. Recording - Canon DC40 | DC40 Instruction Manual - Page 52
high aperture values (small aperture) to achieve a broad depth of field for recording landscapes. Aperture values: 1.8, 2.0, 2.4, 2.8, 3.4, 4.0, 4.8, 5.6, 6.7, 8.0 1. Set the camcorder to a recording mode ( or ) and turn the mode dial to Av. 2. Press ( ). The current aperture value will be - Canon DC40 | DC40 Instruction Manual - Page 53
Manually Adjusting the Exposure MoreRecordingOptions Adjust the exposure when a subject is too bright or glaring in the image). Mode dial Multi Selector/EXP button Exposure Lock 1. Set the camcorder to a recording mode ( or ) and set the mode dial to a position other than . Exposure - Canon DC40 | DC40 Instruction Manual - Page 54
following subjects. In such case, focus manually. Reflective surfaces Subjects with low contrast or without vertical lines Fast Moving Subjects Through dirty or wet windows Night Scenes Zoom lever Mode dial Multi Selector/FOCUS button 1. Set the camcorder to a recording mode ( or ) and - Canon DC40 | DC40 Instruction Manual - Page 55
you want it. AF Frame Selection You can select the AF frame you want to focus on, out of the nine frames available. 1. Set the camcorder to record still images ( mode dial to a position other than . The setting differs depending on the position of the mode dial. : 9 Point AiAF only 9 Point - Canon DC40 | DC40 Instruction Manual - Page 56
the Mini Video Light You can turn on the mini video light (assist lamp) at any time regardless of the recording program. LIGHT button Mini video light Set the camcorder to a recording mode ( or press the LIGHT button. • " " appears on the screen. • Press again to turn the mini video light off - Canon DC40 | DC40 Instruction Manual - Page 57
Options PHOTO button (flash) button Flash Assist lamp 1. Set the camcorder to record still images ( ) and select a recording program other Assist mode. The flash will not fire in the following cases: - When you manually adjust the exposure in (auto) or (red-eye reduction) mode. - During auto - Canon DC40 | DC40 Instruction Manual - Page 58
subject is too dark the assist lamp may light up briefly in order to enable the camcorder to focus more accurately (AF-assist lamp). You can also set [AF AST LAMP] to [OFF] so the assist lamp does not light up. - The camcorder may not be able to focus even if the AF-assist lamp is on. - The - Canon DC40 | DC40 Instruction Manual - Page 59
Timer PHOTO button E Start/stop button MENU button Multi Selector MENU ( 79) CAMERA SETUP SELF TIMER OFF 1. Set the camcorder to a recording mode ( or ). When recording movies ( ) set the camcorder to record pause. 2. Press the MENU button. 3. Using the multi selector ( , ) select - Canon DC40 | DC40 Instruction Manual - Page 60
the ChangingtheFUNC.Settings FUNC. Button Many of the camcorder's functions can be adjusted from the menu that the [CUSTOM] option for the image effect function ( 66), or the [MULTI-S] option for the digital effect function ( 73). 4. Press the FUNC. button to save the settings and close the menu. - Canon DC40 | DC40 Instruction Manual - Page 61
page. E CAMERA, PLAY, , 69 Digital effects REVIEW] setting (or immediately after recording it, if set to [OFF]). Recording mode: You can choose between XP (high quality), SP (standard play) or LP (long play). Approximate recording times with the supplied DVD-R blank disc are as follows: XP - Canon DC40 | DC40 Instruction Manual - Page 62
at the point where the scene changes. The camcorder uses a variable bit rate (VBR) when encoding the video data so the actual recording times will vary depending on option is available only from the original movies index screen. 2 This option is available only from the playlist index screen. 62 - Canon DC40 | DC40 Instruction Manual - Page 63
AE point frame. Use this setting for adjusting the exposure to match the subject in the center of the screen. ( 60) EVALUATIVE 1. Set the camcorder to record still images ( mode dial to , Tv or Av. ) and set the 2. Press the FUNC. button. 3. First, select ( ) the current light metering symbol - Canon DC40 | DC40 Instruction Manual - Page 64
, or set a custom white balance to obtain the setting best suited to your specific recording conditions. AUTO DAYLIGHT SHADE CLOUDY TUNGSTEN FLUORESECENT FLUORESCENT H SET Settings are automatically set by the camcorder. Use this setting for outdoor scenes. For recording outdoors on a bright day - Canon DC40 | DC40 Instruction Manual - Page 65
result will still be better than with the [AUTO] setting. - Reset the white balance when the lighting condition changes. - Turn off the digital zoom. The camcorder retains the custom white balance setting even if you turn it off. Custom white balance may provide better results in the following - Canon DC40 | DC40 Instruction Manual - Page 66
and shade [SHARPNESS]: (-) Vaguer outlines, (+) Sharper outlines [COL.DEPTH]: (-) Shallower colors, (+) Richer color tonality ( 60) IMAGE EFFECT OFF 1. Set the camcorder to a recording mode ( or ) and set the mode dial to . 2. Press the FUNC. button. 3. First, select ( ) the current image - Canon DC40 | DC40 Instruction Manual - Page 67
allowing you to choose the shot you like the best. DRIVE MODE button PHOTO button Advanced Features Changing the FUNC. Settings Mode dial 1. Set the camcorder to record still images on the card ( and set the mode dial to a position other than . /) If you are recording still images on the disc - Canon DC40 | DC40 Instruction Manual - Page 68
60 images These figures are approximate and vary with the recording conditions and subjects. The actual number of frames per second will be lower when " " (camcorder shake warning) is displayed on the screen. 68 - Canon DC40 | DC40 Instruction Manual - Page 69
). For further details E about the procedure refer to the software's instruction manual on the supplied software CD-ROM. Advanced Features Changing the FUNC. Settings PHOTO button FUNC. button Multi Selector ( 60) SINGLE 1. Set the camcorder to record still images on the card ( and set the - Canon DC40 | DC40 Instruction Manual - Page 70
image. • Try to include a distinctive item (landmark, etc.) in the overlapping portion. Minor discrepancies in the overlapping area can be corrected with the software. • You can retake an image using the multi selector ( ) to cancel the image recorded last and return to the previous one. • Up to - Canon DC40 | DC40 Instruction Manual - Page 71
Using the Digital Effects The digital effects include faders, video effects, multi-image screen and card mix. All digital effects are available only when recording movies ( ), except for the E [BLK & WHT] (Black and White) effect, which is available also when recording still images ( ). - Canon DC40 | DC40 Instruction Manual - Page 72
) Combines a still image from the memory card with your recording. Turn off the digital effects [D.EFFECT OFF] when you are not using them. The camcorder retains the setting last used even if you turn off the digital effects or change the recording program. However, you will need to select again - Canon DC40 | DC40 Instruction Manual - Page 73
camcorder to a recording mode ( or ) and set the mode dial to a position other than . 2. Press the FUNC. button. 3. First, select ( ) the current digital 4. Select ( ) the [S.SPEED] option and set ( • Manual: For capturing images manually. • Fast: Every 4 frames • Moderate [MOD.]: Every 6 - Canon DC40 | DC40 Instruction Manual - Page 74
screen, press the D.EFFECTS button. • [MANUAL]: Images will be captured every time you supplied DIGITAL VIDEO SOLUTION DISK and combine it with your live video Camera Chroma Key [CAM. CHROMA] Combines backgrounds with your recordings. Record your subject in front of a blue background and any part - Canon DC40 | DC40 Instruction Manual - Page 75
( 60) D.EFFECT OFF 1. Set the camcorder to record movies ( ). 2. Upload a sample image from the supplied CD-ROM to the memory card. Refer to Adding Still Images from Your Computer to the Memory Card in the Digital Video Software instruction manual (electronic version on PDF file). 3. Set - Canon DC40 | DC40 Instruction Manual - Page 76
M2 1280X960 S 640X480 Image Quality DVD-R/RW VIDEO Mode 545 855 1815 1025 1585 2910 1630 2495 4595 7945 9999 9999 DVD-RW VR Mode 545 855 Windows: more than 1800 images; Macintosh: more than 1000 images), you may not be able to download images to a computer. Try using a card reader to download - Canon DC40 | DC40 Instruction Manual - Page 77
L 2304x1736/FINE ( 60) 1. Set the camcorder to record still images ( ). E 2. Press the FUNC. button. 3. First, select ( ) the current image size and quality symbol from the left side column and then select ( ) - Canon DC40 | DC40 Instruction Manual - Page 78
quality can be selected. ( 60) STILL I. REC OFF 1. Set the camcorder to record movies ( ). 2. Press the FUNC. button. 3. First, on the memory card while the screen continues to show the video recording. The still image cannot be recorded simultaneously on digital effect is activated. 78 - Canon DC40 | DC40 Instruction Manual - Page 79
Changing Settings with the MENU ChangingtheMENUSettings Button You can modify many aspects of how your camcorder operates from the various setup E menus that open after pressing the MENU button. For a list of the settings that can be changed using these setup - Canon DC40 | DC40 Instruction Manual - Page 80
shake warning) appears, we recommend stabilizing the camcorder, for example, by mounting it on a tripod. D.ZOOM: Determines the operation of the digital zoom. When the digital zoom is activated, the camcorder will switch automatically to the digital zoom when you zoom in beyond the optical - Canon DC40 | DC40 Instruction Manual - Page 81
. We recommend turning off the image stabilizer when using a tripod. FOCUS PRI.: The camcorder records the still image only after the focus has been adjusted. ND filter can only be used when the mode dial is set to . REVIEW: Selects the time to display a still image after it has been recorded - Canon DC40 | DC40 Instruction Manual - Page 82
regarding the disc. The disc information includes the disc title, the disc type (DVD-R or DVD-RW), the disc specification (VIDEO mode or VR mode), and icons that indicate if the disc is finalized ( ) or protected ( ). Still Image Operations (Card Initialization, Disc-Card Copy, etc.) STILL IMAGE - Canon DC40 | DC40 Instruction Manual - Page 83
To cancel the demo mode once it started, press any button, turn off the camcorder or load a recording media. System Setup (Volume, Beep, Media Select, etc.) SYSTEM SETUP Menu Items Setting Options CAMERA PLAY Advanced Features Changing the MENU Settings MEDIA SEL. WL. REMOTE VOLUME BEEP POWER - Canon DC40 | DC40 Instruction Manual - Page 84
camcorder is powered by a battery pack, it will automatically shut off if left without any operation for five minutes. Approximately 30 seconds before the camcorder . Date/Time Setup DATE/TIME SETUP Menu Items Setting Options CAMERA PLAY T.ZONE/DST DATE/TIME DATE FORMAT Y.M.D (2006.1.1 AM12 - Canon DC40 | DC40 Instruction Manual - Page 85
have two index screens: that of your original recordings (the scene index screen) and the one you edit as a playlist (the playlist index screen). Available only with DVD-RW discs recorded in VR mode. Adding Scenes to the Playlist 1. Set the camcorder to play movies ( ). 2. From the index screen - Canon DC40 | DC40 Instruction Manual - Page 86
. Deleting a Scene After Recording As long as you haven't turned the camcorder off or changed the operation mode after recording a scene, you can delete it while reviewing it. This option is only available with DVD-RW discs (VIDEO or VR mode). 1. Immediately after recording a scene ( (record - Canon DC40 | DC40 Instruction Manual - Page 87
All Scenes This option is only available with DVD-RW discs recorded in VR mode. MENU DISC OPERATIONS MOVIES ALL DEL E ( 79) 1. Set the camcorder to play movies ( ). 2. Press the option. Continue the procedure as described. Editing Functions Disc Options (DVD-RW in VR mode only) 87 - Canon DC40 | DC40 Instruction Manual - Page 88
in the playlist, you do not affect your original recordings. Photomovie scenes and scenes created by converting single still images cannot be divided. Available only with DVD-RW discs recorded in VR mode. Dividing Scenes 1. Set the camcorder to play movies ( ). 2. From the index screen, select - Canon DC40 | DC40 Instruction Manual - Page 89
even if the disc is protected. MENU ( 79) DISC OPERATIONS DISC PROTECT 1. Set the camcorder to play movies or view still images recorded on the disc ( or / ). 2. Press protect the disc. 5. Press the MENU button to close the menu. Editing Functions Disc Options (DVD-RW in VR mode only) 89 - Canon DC40 | DC40 Instruction Manual - Page 90
option. 4. Select ( ) the disc specification and press ( ). • [VIDEO] mode: Most DVD players will play the disc, but except for the disc title, the recordings cannot be edited with the camcorder. • [VR] mode: You will have the option to edit the recordings with the camcorder, but the disc can only - Canon DC40 | DC40 Instruction Manual - Page 91
be displayed on the index screen when playing the finalized disc in most DVD players. E MENU ( 79) DISC OPERATIONS DISC TITLE 1. Set the camcorder to play movies ( ). 2. Press the title. 7. Press the MENU button to close the menu. Editing Functions Disc Options (DVD-RW in VR mode only) 91 - Canon DC40 | DC40 Instruction Manual - Page 92
: This option is only available with DVD-RW discs recorded in VR mode. ( 60) IMAGE ERASE 1. Set the camcorder to view still images ( ). 2. disc: This option is only available with DVD-RW discs (VIDEO or VR mode). ( 60) IMAGE ERASE 1. While reviewing the image after recording it ( FUNC. - Canon DC40 | DC40 Instruction Manual - Page 93
recorded on the disc: This option is only available with DVD-RW discs recorded in VR mode. E MENU STILL IMG OPER. ERASE ALL IMAGES ( 79) 1. Set the camcorder to view still images ( ). 2. Press the MENU 5. Press the MENU button to close the menu. Editing Functions Still Image Options 93 - Canon DC40 | DC40 Instruction Manual - Page 94
79) STILL IMG OPER. ALL COPY [ ] ALL COPY [ ] 1. Set the camcorder to view still images ( ). Select as the media for the still images, the media MENU button to close the menu. Still images not recorded with this camera may not be copied correctly. When the available space on the copy - Canon DC40 | DC40 Instruction Manual - Page 95
scenes in your DVD, first you CONVERT TO SCENE 1. Set the camcorder to view still images ( ). original recordings index. 5. Press the FUNC. button to close the menu. Converting All Images MENU ( 79) DISC OPERATIONS PHOTOMOVIE 1. Set the camcorder new scene to the original recordings index. - Canon DC40 | DC40 Instruction Manual - Page 96
if you press the FUNC. button while reviewing the still image ( 81) within the time selected for the [REVIEW] setting (or immediately after recording it, the Index Screen MENU ( 79) STILL IMG OPER. PROTECT 1. Set the camcorder to view still images recorded on the memory card ( / ). 2. Move - Canon DC40 | DC40 Instruction Manual - Page 97
original still images cannot be recovered. Initialize all memory cards before using them with this camcorder. MENU ( 79) STILL IMG OPER. CARD INITIALIZE 1. Set the camcorder ( ) [YES] again and press ( ). 6. Press the MENU button to close the menu. Editing Functions Still Image Options 97 - Canon DC40 | DC40 Instruction Manual - Page 98
or from the [DISC OPERATIONS] menu using the MENU button ( 79). Restrictions after Disc Finalization DVD-R in VIDEO mode DVD-RW in VIDEO mode DVD-RW in VR mode Additional Recordings - * Edit Recordings - - * You will need to unfinalize the disc first. Initializing the Disc - Unfinalizing the - Canon DC40 | DC40 Instruction Manual - Page 99
Select [YES] and press ( ) to start the disc finalization. • A progress bar and the remaining time are displayed. • Avoid moving the camcorder while the disc finalization is in progress. • When using a finalized disc in a recording mode, the finalization mark " " will appear next to the disc type - Canon DC40 | DC40 Instruction Manual - Page 100
Disc on a Computer's DVD Drive 1. Insert a finalized disc in the computer's DVD drive. 2. If your DVD playback software does not launch automatically when inserting a DVD, run the DVD playback software. • Refer also to the instruction manual and help modules of your DVD playback software. • To view - Canon DC40 | DC40 Instruction Manual - Page 101
battery pack. Do not disconnect the power adapter while the disc unfinalization is in progress. Doing so can interrupt the process and result in a disc that cannot be recognized. Only discs that were finalized using this camcorder can be unfinalized with this camcorder. DVD-R in VIDEO mode DVD - Canon DC40 | DC40 Instruction Manual - Page 102
Multi Cable to the camcorder, make sure to insert the cable straight and in the correct direction - aligning the marks on the cable's connector and on the AV OUT terminal. Signal flow MTC-100 Multi Cable (Supplied) Open the terminal cover TVs with S-Video Input Terminal INPUT S-VIDEO VIDEO AUDIO - Canon DC40 | DC40 Instruction Manual - Page 103
. 2. Connect the MTC-100 Multi Cable to the camcorder's AV OUT terminal and the audio and video terminals on the TV or VCR. Video terminal. TV sets compatible with the Video ID-1 system will automatically switch to the appropriate aspect ratio. Otherwise, change the aspect ratio of the TV manually - Canon DC40 | DC40 Instruction Manual - Page 104
a VCR You can copy your recordings by connecting the camcorder to a VCR or a digital video device. For a connection diagram showing how to connect the camcorder to a VCR see the previous section Playing Back on a TV Screen ( 102). 1. Set the camcorder to play movies ( disc. ) and load a recorded - Canon DC40 | DC40 Instruction Manual - Page 105
Transferring Recordings to a ConnectingtoaComputer Computer Windows users only: E With the supplied USB cable and the Roxio MyDVD for Canon software you can transfer the movies and still images you recorded, from the disc to a computer and easily edit them. For further details about using Roxio - Canon DC40 | DC40 Instruction Manual - Page 106
• China/Taiwan Web Based Service: http://www.sonictaiwan.com/support/techsupport.aspx [email protected] Phone assistance: 02-2658-8765 (Taiwan) Installing the Software Start your computer and insert the Roxio MyDVD for Canon software CDROM to your computer's CD or DVD drive. Continue the - Canon DC40 | DC40 Instruction Manual - Page 107
Do not connect the camcorder to a computer with the USB cable during the following operations: - Deleting all scenes - Protecting the disc - Setting the disc title - Initializing the disc - Finalizing or Unfinalizing the disc DVD copies and DVD backup discs created with MyDVD for Canon cannot be - Canon DC40 | DC40 Instruction Manual - Page 108
the movies and still images recorded on a disc, even one not yet finalized, to your computer for further editing. 1. Connect the camcorder to the computer and run MyDVD for Canon as previously described ( 107). 2. Click on the "DVD-Video" option in the New Project tab. 3. Click on the "Open Disc - Canon DC40 | DC40 Instruction Manual - Page 109
for Canon as previously described ( 107). 2. Insert a finalized disc in the camcorder and load a brand new media in your computer's DVD drive. • To make a copy of a DVD-RW recorded in VR mode, load a blank DVD-RW in your computer's DVD drive. To make a copy of a DVD-R or DVD-RW recorded in VIDEO - Canon DC40 | DC40 Instruction Manual - Page 110
the Software in the Digital Video Software instruction manual (electronic version on PDF file). 2. Set the camcorder to view still images ( ). 3. Connect the camcorder to the computer using the USB cable. See Connecting the Camcorder to a Computer in the Digital Video Software instruction manual - Canon DC40 | DC40 Instruction Manual - Page 111
Users of Windows XP and Mac OS X: Your camcorder is equipped with the standard Picture Transfer Protocol (PTP) allowing you to download still images (JPEG only) by simply connecting the camcorder to a computer via USB cable without installing the software from the DIGITAL VIDEO SOLUTION DISK. - Canon DC40 | DC40 Instruction Manual - Page 112
images, instead of the button. With [ ALL IMAGES], [ NEW IMAGES] or [ TRANSFER ORDERS], a confirmation message appears. Select [OK] and press ( ). When the camcorder is connected to the computer and the image selection screen is displayed, press the MENU button to return to the transfer menu - Canon DC40 | DC40 Instruction Manual - Page 113
order. These transfer order settings are compatible with the Digital Print Order Format (DPOF) standards. Up to 998 images can be selected. Selecting Still Images to Transfer (Transfer Order) Do not connect the USB cable to the camcorder while setting the transfer orders. ( 60) TRANSFER ORDER - Canon DC40 | DC40 Instruction Manual - Page 114
Erasing All Transfer Orders MENU ( 79) STILL IMG OPER. ORD. ALL ERASE 1. Set the camcorder to view still images recorded on the memory card ( / ). 2. Press the MENU button and use the multi selector ( , ) to select the [STILL IMG OPER.] menu - Canon DC40 | DC40 Instruction Manual - Page 115
still images recorded on the memory card ( 120). Canon printers: SELPHY CP, SELPHY DS and PIXMA printers Connecting the Camcorder to the Printer Open the terminal cover USB Cable (supplied) PictBridge compatible printer 1. Set the camcorder to view still images ( ). 2. Insert the memory card - Canon DC40 | DC40 Instruction Manual - Page 116
from a computer, edited on a computer and images whose file names have been changed may not be printed correctly. Observe the following precautions during printing: - Do not turn off the camcorder or the printer. - Do not change the position of the / switch. - Do not disconnect the USB cable. - Do - Canon DC40 | DC40 Instruction Manual - Page 117
dialog appears. Select [OK] and press ( ). With Canon's PictBridge compatible printers, the printing will stop immediately (even if the printer's instruction manual for details. - If the error still persists and printing does not restart, disconnect the USB cable and turn the camcorder off. Turn - Canon DC40 | DC40 Instruction Manual - Page 118
the printer model. For details, refer to the printer's instruction manual. [BORDERED]: The image area remains relatively unchanged from set the [PAPER SIZE] to [10 x 14.8 cm] or [9 x 13 cm]. Canon PIXMA/SELPHY DS printers: You can also print on the specially designed Photo Stickers sheets. When - Canon DC40 | DC40 Instruction Manual - Page 119
The trimming setting applies only to one image. The trimming setting is canceled in the following cases: - When you turn off the camcorder. - When you disconnect the USB cable. - When you expand the trimming frame beyond its maximum size. - When you change the [PAPER SIZE] setting. Printing 119 - Canon DC40 | DC40 Instruction Manual - Page 120
are compatible with the Digital Print Order Format (DPOF) standards and can be used for printing on DPOF compatible printers ( 115). Up to 998 still images can be selected. Selecting Still Images for Printing (Print Order) Do not connect the USB cable to the camcorder while setting the print - Canon DC40 | DC40 Instruction Manual - Page 121
canceled. 4. Press the MENU button to close the menu. Printing MENU ( 79) PRINT 1. Set the camcorder to view still images recorded on the memory card ( / ). 2. Connect the printer to the camcorder ( 115). 3. Press the MENU button and select [ PRINT]. • The print setting menu appears. • The - Canon DC40 | DC40 Instruction Manual - Page 122
If you have a problem with your camcorder, refer to this checklist. Consult your dealer or a Canon Service Center if the problem persists. Power Source Problem Solution • Camcorder will not turn on. Battery pack is exhausted. Replace or charge the battery 21 • The camcorder switches off pack - Canon DC40 | DC40 Instruction Manual - Page 123
Problem Solution " " flashes red on the screen. The camcorder malfunctions. Consult a Canon Service - Center. Image will not appear on the Set the camcorder battery pack and let the camcorder cool down before resuming use. Cancel the disc protection. 89 Unfinalize the disc (DVD-RW in VIDEO - Canon DC40 | DC40 Instruction Manual - Page 124
or delete scenes on a disc that was protected - in another digital device. Cannot edit the disc title. You cannot add a title to a DVD-R disc after it was finalized. 98 Unfinalize the disc first (DVD-RW in VIDEO mode). 101 You may not be able to edit the title if you entered it with - another - Canon DC40 | DC40 Instruction Manual - Page 125
the memory card. Initialize the memory card if flashing persists. Trouble? Printing Problem Solution The printer is not operating 1. Set the camcorder to . - even though the camcorder 2. Disconnect and reconnect the USB cable. and printer are correctly 3. Turn off the printer and turn - Canon DC40 | DC40 Instruction Manual - Page 126
you attempted to play back a disc type not - supported (not DVD-R/RW). This message can also appear if condensation has formed. Wait 132 until the camcorder dries completely before resuming use. CANNOT EDIT DISC There are no scenes to edit or the recording is damaged. - This message can also - Canon DC40 | DC40 Instruction Manual - Page 127
appeared on the computer screen, close it and then reconnect the USB cable. Direct Print Related Messages About Canon PIXMA/SELPHY DS Printers: If the printer's error indicator flashes or an error message appears on the printer's operation panel, refer to the printer's instruction manual. 127 - Canon DC40 | DC40 Instruction Manual - Page 128
back on. Check the printer status. If the error still persists, refer to the printer's instruction manual and contact the appropriate customer support center or service center. Cancel printing, disconnect the USB cable and turn off the printer. After a while, turn the printer back on and reconnect - Canon DC40 | DC40 Instruction Manual - Page 129
by lighting equipment. Do not disassemble the camcorder. If the camcorder does not function properly, consult qualified service personnel. Handle the camcorder with care. Do not subject the camcorder to shocks or vibration as this may cause damage. Battery Pack Do's & Don'ts DANGER! Treat - Canon DC40 | DC40 Instruction Manual - Page 130
lead to problems when recording or playing back the disc. Carefully inspect the recording surface of the disc before inserting it in the camcorder. If the high humidity. Make sure to finalize a disc before inserting it in a DVD player, DVD recorder or a computer's DVD drive. Failing to do so can - Canon DC40 | DC40 Instruction Manual - Page 131
to static electricity. Canon Inc. makes no warranties for corrupted or lost data. E Do not turn off the camcorder, disconnect the power memory card or the camcorder. Do not attach any labels or stickers on the memory card. Lithium Button Battery WARNING! • The battery used in this device - Canon DC40 | DC40 Instruction Manual - Page 132
time, store it in a place free of dust, in low humidity, and at temperatures not higher than 30 °C (86 °F). Cleaning Camcorder Body Use a soft, dry cloth to clean the camcorder body. Never use chemically treated cloth or volatile solvents such as paint thinner. Pick Up Lens Remove any dust or - Canon DC40 | DC40 Instruction Manual - Page 133
Abroad Power Sources You can use the compact power adapter to operate the camcorder and to charge battery packs in any country with power supply between 100 and 240 V AC, 50/60 Hz. Consult the Canon Service Center for information on plug adapters for overseas use. Playback on a TV Screen You - Canon DC40 | DC40 Instruction Manual - Page 134
H37U Filter Set SC-2000 Soft Carrying Case Mini DVD Disc DVD-R/RW CG-300 Battery Charger BP-208 Battery Pack BP-208 Battery Pack CA-570 Compact Power Adapter MTC-100 Multi Cable TV VCR DVD player/ recorder IFC-300PCU USB Cable PictBridge-compliant printers miniSD Card Card Adapter/ miniSD - Canon DC40 | DC40 Instruction Manual - Page 135
Canon accessories, although you may request such repairs on a chargeable basis. Battery Packs When you need extra battery packs, select only the BP-208 battery pack. CG-300 Battery Charger Use the battery charger for charging the battery packs. It plugs directly into a power outlet without a cable - Canon DC40 | DC40 Instruction Manual - Page 136
for active shooting. SC-2000 Soft Carrying Case A handy camcorder bag with padded compartments and plenty of space for accessories. This mark identifies genuine Canon video accessories. When you use Canon video equipment, we recommend Canon-brand accessories or products bearing the same mark. 136 - Canon DC40 | DC40 Instruction Manual - Page 137
Specifications DC40 E System Disc Recording System Video: DVD-VIDEO (VIDEO mode) DVD-VR (VR mode) only with 8 cm DVD-RW Video Compression: MPEG2 Audio Compression: Dolby Digital 2ch Still Images: Exif 2.2** compliant with JPEG compression Television System EIA standard (525 lines, 60 fields) - Canon DC40 | DC40 Instruction Manual - Page 138
Terminals AV OUT Terminal USB Terminal 10-pin multiconnector; Output only Video: 1 Vp-p/75 ohms unbalanced S-Video: Luminance (Y) signal -1 AF on) Operating temperature Dimensions (W x H x D) Weight (camcorder body only) 7.4 V DC (battery pack), 8.4 V DC (compact power adapter) 4.9 W (viewfinder), - Canon DC40 | DC40 Instruction Manual - Page 139
CA-570 Compact Power Adapter BP-208 Battery Pack WL-D86 Wireless Controller MTC-100 Multi Cable IFC-300PCU USB Cable Optional Accessories CG-300 Battery Charger TL-H37 Tele-converter WD-H37C Wide-converter FS-H37U Filter Set WS-20 Wrist Strap SC-2000 Soft Carrying Case 8468A002AA E 0802B002AA - Canon DC40 | DC40 Instruction Manual - Page 140
, disc 90 D Data code 45 Date and time 28 Daylight saving time 28 Digital effects 71 Digital zoom 80 Direct printing 115 Direct transfer 110 Disc title 91 Drive mode 67 DVD discs 6 DVD-R/RW discs 6 E Effects 71 Erasing still images 92 Error messages 126 Exposure adjustment - Canon DC40 | DC40 Instruction Manual - Page 141
programs 46 Recording reminder 19 Remote sensor 25 RESET 122 Review - Movies 34 Review - Still images 81 Roxio MyDVD for Canon 105 V VIDEO mode (disc specification 6 Viewfinder - Dioptric adjustment 24 Volume 43 VR mode (disc specification 6 W White balance 64 Wide angle 37 Wide TV (16 - Canon DC40 | DC40 Instruction Manual - Page 142
commercial, industrial, or institutional applications. These uses are covered only by such specific warranty as Canon may issue with such sales. This Limited Warranty does not apply to accessories or consumables for the DVD Camcorder, which are sold "AS IS", without warranty of any kind by CUSA - Canon DC40 | DC40 Instruction Manual - Page 143
in the instruction manual; ii) the use of accessories, attachments, products, supplies, parts or devices with this Canon product that do not conform to Canon specifications or that cause abnormally frequent service problems; iii) repairs or services performed by any party other than a Canon Service - Canon DC40 | DC40 Instruction Manual - Page 144
LATIN AMERICA, INC. 703 Waterford Way Suite 400 Miami, FL 33126 USA CANON HONGKONG COMPANY LTD. 19/F, The Metropolis Tower, 10 Metropolis Drive, Hunghom, Kowloon, Hong Kong The information on this manual is verified as of February 1st, 2006. Les informations contenues dans ce manuel ont été vérifi
-
 1
1 -
 2
2 -
 3
3 -
 4
4 -
 5
5 -
 6
6 -
 7
7 -
8
-
9
-
10
-
11
-
12
-
13
-
14
-
15
-
16
-
17
-
18
-
19
-
20
-
21
-
22
-
23
-
24
-
25
-
26
-
27
-
28
-
29
-
30
-
31
-
32
-
33
-
34
-
35
-
36
-
37
-
38
-
39
-
40
-
41
-
42
-
43
-
44
-
45
-
46
-
47
-
48
-
49
-
50
-
51
-
52
-
53
-
54
-
55
-
56
-
57
-
58
-
59
-
60
-
61
-
62
-
63
-
64
-
65
-
66
-
67
-
68
-
69
-
70
-
71
-
72
-
73
-
74
-
75
-
76
-
77
-
78
-
79
-
80
-
81
-
82
-
83
-
84
-
85
-
86
-
87
-
88
-
89
-
90
-
91
-
92
-
93
-
94
-
95
-
96
-
97
-
98
-
99
-
100
-
101
-
102
-
103
-
104
-
105
-
106
-
107
-
108
-
109
-
110
-
111
-
112
-
113
-
114
-
115
-
116
-
117
-
118
-
119
-
120
-
121
-
122
-
123
-
124
-
125
-
126
-
127
-
128
-
129
-
130
-
131
-
132
-
133
-
134
-
135
-
136
-
137
-
138
-
139
-
140
-
141
-
142
-
143
-
144
 |
 |
PUB.DIM-749
NTSC
English
Français
Español
DVD Camcorder
Instruction Manual
Caméscope DVD
Manuel d’instruction
Cámara DVD
Manual de Instrucciones
Please read also the following instruction manual
(electronic version on PDF file). For further details refer to
the installation guide.
Veuillez lire aussi le manuel d’instruction suivant (version
électronique sur fichier PDF). Pour d’autres détails référez-
vous au guide d’installation.
Lea también el siguiente manual de instrucciones (versión
electrónica en archivo PDF). Para mayores detalles,
refiérase a la guía de instalación.
• Digital Video Software
E
F
Es
Digital Video Software
Version 19
Instruction Manual
Manuel d’instruction
Manual de Instrucciones