Canon EOS C300 PL Instruction Manual
Canon EOS C300 PL Manual
 |
View all Canon EOS C300 PL manuals
Add to My Manuals
Save this manual to your list of manuals |
Canon EOS C300 PL manual content summary:
- Canon EOS C300 PL | Instruction Manual - Page 1
HD Camcorder Instruction Manual PUB. DIE-0440-002 - Canon EOS C300 PL | Instruction Manual - Page 2
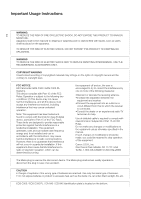
HD Camcorder, EOS C300 / EOS C300 PL tested and found to comply with the limits for class B digital manual. If such changes or modifications should be made, you could be required to stop operation of the equipment. Canon U.S.A., Inc. One Canon Park, Melville, NY 11747, USA Tel No. 1-800-OK-CANON - Canon EOS C300 PL | Instruction Manual - Page 3
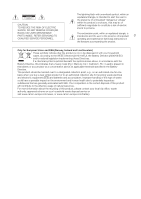
to alert the user to the presence of important 3 operating and maintenance (servicing) instructions in the literature accompanying the product. Only for European Union and EEA ( , waste authority, approved scheme or your household waste disposal service or visit www.canon-europe.com/weee, or www - Canon EOS C300 PL | Instruction Manual - Page 4
Canon HD Camcorder EOS C300 / EOS C300 PL and all its accessories. 1. Read these instructions. 2. Keep these instructions. 3. Heed all warnings. 4. Follow all instructions servicing to qualified service personnel. Servicing HDMI logo and High-Definition Multimedia Interface are ENCODING VIDEO - Canon EOS C300 PL | Instruction Manual - Page 5
variety of highquality Canon EF lenses, including the new high-end Cinema lenses, as well as other lenses. The EOS C300 PL features a PL lens mount, allowing you to use a vast array of Super 35mm cinematography lenses commonly used in motion picture production. Superb HD video The camcorder uses the - Canon EOS C300 PL | Instruction Manual - Page 6
C300 PL camcorders in order to use them in the same way. Other Functions #Automatic Functions (AF/AE) With compatible EF lenses, you can automatically adjust the aperture or focus once with the press of a single button (A 71, 80) and even use continuous autofocus (A 81), making it easier to support - Canon EOS C300 PL | Instruction Manual - Page 7
Operation Using Wi-Fi Remote 54 Onscreen Displays 55 Rear Panel Displays 57 Canon Log Gamma and CINEMA Preset 58 Using the Fan 58 Video Configuration: Type of Recording, Bit Rate, Resolution and Frame Rate 59 Changing Main Camera Functions with the FUNC. Button 61 Using the Direct Setting Mode 61 - Canon EOS C300 PL | Instruction Manual - Page 8
Video Signal Output 90 Time Code Signal Output 90 Recording Audio 91 Connecting an External Microphone or External Audio Input Source to the Camcorder GPS Information (Geotagging) 103 Reviewing a Recording 105 Special Camera Settings 124 Saving Camera Settings to an SD Card 124 Loading Camera - Canon EOS C300 PL | Instruction Manual - Page 9
Status Screens 165 Troubleshooting 172 List of Messages Connections 139 Video Output Configuration 139 Video Output Canon XF Utility (Windows) 143 Installing Canon XF Utility (Mac OS) 144 Viewing the Software Instruction Manuals 146 7. Photos 147 Taking Photos 147 Taking Photos in CAMERA - Canon EOS C300 PL | Instruction Manual - Page 10
10 - Canon EOS C300 PL | Instruction Manual - Page 11
1 Introduction 11 About this Manual Thank you for purchasing the Canon EOS C300/C300 PL. Please read this manual carefully before you use the camcorder and retain it for future reference. Should the camcorder fail to operate correctly, refer to Troubleshooting (A 172). Conventions Used in this - Canon EOS C300 PL | Instruction Manual - Page 12
About this Manual The arrow is used to abbreviate menu selections. For a detailed explanation on indicates that the function is not available. For a detailed explanation, refer to Turning the Camcorder On and Off (A 26). When a procedure requires selecting an option, the available options - Canon EOS C300 PL | Instruction Manual - Page 13
cord) SS-1200 Shoulder Strap Thumb Rest Adapter Base for 0.64 cm (1/4 in.) Tripods WFT Attachment Bracket2 Tape Measure Hooks1 (x 2) 1 Comes pre-attached to the camcorder. 2 Used to secure the optional WFT-E6 Wireless File Transmitter or optional GP-E1 GPS Receiver, when it is attached to the - Canon EOS C300 PL | Instruction Manual - Page 14
66, 69) 11 STATUS button (A 165) 12 Å (white balance adjustment) button (A 74)/ INDEX button (A 126)/Ñ (stop) button (A 127) 13 u (review recording) button (A 105)/Ò (play/pause) button (A 127) 14 HEADPHONE + button (A 129)/Assignable button 5 (A 111) 15 HEADPHONE - button (A 129)/Assignable button - Canon EOS C300 PL | Instruction Manual - Page 15
Names of Parts 17 15 18 29 19 20 21 22 23 30 24 25 31 26 27 28 17 WFT terminal (A 49, 103) 18 EXT (external signal) terminals 1 and 2 (A 36) 19 REMOTE terminal For connecting commercially available remote controllers. 20 SYNC OUT (synchronizing signal output) terminal (A 90,141) 21 - Canon EOS C300 PL | Instruction Manual - Page 16
button (A 51) 33 # EF Lens mount index (A 32) 34 # EF-S Lens mount index (A 32) 35 # Lens release button (A 32) 36 # EF Lens lock pin (A 32) 37 # EF Lens mount (A 32) 38 # EF Lens contacts (A 32) 39 $ PL Lens mount (A 36) 40 $ Bayonet ring handles (A 36) 41 $ PL Lens index pin (A 36) 42 $ Bayonet - Canon EOS C300 PL | Instruction Manual - Page 17
Names of Parts 43 44 45 46 47 48 49 50 51 52 53 61 62 63 64 54 17 55 56 57 58 59 60 43 Viewfinder unit 44 Viewfinder unit LOCK/RELEASE screw (A 181) 45 (rear panel's backlight) button (A 57) 46 FUNC. (main functions) button (A 61) 47 START/STOP button (A 51) 48 Joystick (A 29)/SET button (A 29) - Canon EOS C300 PL | Instruction Manual - Page 18
. 66 Focal plane marks 67 Socket for the WFT Attachment Bracket (A 49) 68 Strap mounts (A 41) 69 Accessory shoe with mounting hole for 0.64 cm (1/4 in.) screws For attaching accessories such as the optional VL-10Li II Battery Video Light. 72 73 70 71 70 TB-1 Tripod Base for tripods with 0.95 cm - Canon EOS C300 PL | Instruction Manual - Page 19
Monitor Unit Operation panel (A 20) 1 LCD panel 2 MIRROR button (A 38) 3 Microphone lock screw (A 91) 4 Microphone holder (A 91) 5 Microphone cable clamp (A 91) 6 XLR terminals CH1 (right) and CH2 (left) (A 91) Names of Parts 19 1 2 3 4 5 6 - Canon EOS C300 PL | Instruction Manual - Page 20
Names of Parts Operation panel 20 13 14 15 16 17 18 7 8 19 9 10 11 20 12 21 22 23 24 7 DISP. (display) button (A 55, 128) 8 Ñ (stop) button (A 127)/ Assignable button 14 (A 111) 9 WFM (waveform monitor) button (A 99)/ Assignable button 8 (A 111) 10 Ú (skip backward) button (A 129)/ - Canon EOS C300 PL | Instruction Manual - Page 21
7 (A 111) 2 Control dial (A 66, 69) 3 START/STOP button (A 51) Handle Unit 1 2 4 Grip belt (A 41) 5 Joystick (A 29)/SET button (A 29) 6 Connection plug (A 40) 7 Lock screw (A 40) 3 4 1 Mounting hole for 0.64 cm (1/4 in.) screws 2 Front accessory shoe 3 Top accessory shoe 4 Lock screw (A 41) - Canon EOS C300 PL | Instruction Manual - Page 22
Names of Parts 22 - Canon EOS C300 PL | Instruction Manual - Page 23
that you can check the remaining battery time. * The optional BP-970G / BP-975 Battery Pack was not originally designed for use with this camcorder. Because of its size, you will not be able to close the battery compartment cover when using one (A 179). Charging the Battery Pack Charge battery - Canon EOS C300 PL | Instruction Manual - Page 24
you can check the remaining battery charge by looking at any recording/ playback screen or the [Battery/Hour Meter] status screen (A 169). When the camcorder is turned off, use one of the following methods to check the approximate remaining battery charge. Press the CHECK button on the battery pack - Canon EOS C300 PL | Instruction Manual - Page 25
powers the product is recyclable. Please call 1-800-8-BATTERY for information on how to recycle this battery. Using a Power Outlet You can also power the camcorder directly from a power outlet using the supplied CA-945 AC Adapter. 1 Set the Q switch to OFF. 2 Connect the AC adapter's DC plug to the - Canon EOS C300 PL | Instruction Manual - Page 26
the Power Supply Turning the Camcorder On and Off The camcorder has two operating modes: CAMERA ( ) mode for making recordings and MEDIA ( ) mode for playing back recordings. Select the operating mode using the Q switch. 26 To turn on the camcorder Set the Q switch to CAMERA for mode. mode or - Canon EOS C300 PL | Instruction Manual - Page 27
-in lithium battery (A 180) and set the time zone, date and time again. • Using the optional GP-E1 GPS Receiver, you can have the camcorder adjust settings automatically according to the date/time information received from the GPS signal (A 103). Changing the Time Zone Change the time zone to match - Canon EOS C300 PL | Instruction Manual - Page 28
the menu. • The selected date/time display will appear at the bottom of the screen. Changing the Language The default language of the camcorder is English. You can change it to German, Spanish, French, Italian, Polish, Russian, Simplified Chinese, Korean or Japanese. Please note that some settings - Canon EOS C300 PL | Instruction Manual - Page 29
an option from the menu. In the procedures throughout the rest of this manual, opening and closing the menu is assumed and not included in the procedure item that was selected the previous time the menu was closed (unless the camcorder was turned off). 2 Push the joystick up/down or turn the SELECT - Canon EOS C300 PL | Instruction Manual - Page 30
, you can use the remote controller's up/down/left/right/SET buttons in the same way as the camcorder's joystick. • You can check the current settings on the status screens (A 165). Using the Customized Submenu (My Menu) You can register up to 14 frequently - Canon EOS C300 PL | Instruction Manual - Page 31
Removing Menu Settings 1 Open the My Menu [Delete] screen. [ My Menu] > [Edit] > [Delete] 2 Push the joystick up/down or turn the SELECT dial to select the setting you want to remove and then press SET. 3 Select [OK] and then press SET twice. Resetting the My Menu Submenu 1 Reset all the menu - Canon EOS C300 PL | Instruction Manual - Page 32
free of dust. Refer also to the instruction manual of the lens used. IMPORTANT • When attaching/removing a lens, avoid direct sunlight or strong light sources. Also, be careful not to drop the camcorder or lens. NOTES • Be careful not touch the lens mount or any components inside the lens - Canon EOS C300 PL | Instruction Manual - Page 33
: Align the red mark on the lens with the red EF Lens mount index mark on the camcorder. • EF-S lenses: Align the white mark on the lens with the white EF-S Lens mount index mark on the camcorder. NOTES • Turning on the image stabilization function of an EF lens may reduce the effective usage - Canon EOS C300 PL | Instruction Manual - Page 34
Visit your local Canon Web site and check if there is correction data available for the lens you are using. If so, download the necessary update package and upgrade the camcorder's firmware following the instructions supplied therein. 3 Select [On] and then press SET. • As long as [~ Camera Setup - Canon EOS C300 PL | Instruction Manual - Page 35
EF Lens You can update the lens firmware of the EF lens attached to the camcorder. For details about firmware updates for EF lenses, visit your local Canon Web site. Operating modes: 1 Download the lens firmware update file from the Canon Web site and save it on an SD card. Insert the SD card - Canon EOS C300 PL | Instruction Manual - Page 36
the lens to the camcorder aligning a groove on the lens with the PL lens index pin on the mount. 4 Turn the bayonet ring clockwise to fix the lens in place. $ Removing a PL Lens 1 Turn the bayonet ring counter-clockwise. 2 Remove the lens and replace the body cap to the camera and the dust cap - Canon EOS C300 PL | Instruction Manual - Page 37
Removing the Monitor Unit 1 Set the Q switch to OFF. 2 Disconnect the monitor unit's cables from the camcorder's EXT 1 and EXT 2 terminals. • Pull back the metallic tips of the cable to release the cable and then disconnect the cable. 37 3 Unscrew the lock - Canon EOS C300 PL | Instruction Manual - Page 38
and operation from the side of the camcorder. Additionally, the independently articulated LCD panel to the desired position. Adjusting the LCD Panel for Shoulder Mounted Use 1 Open the LCD panel 90º until it screen at the same time extremely high-precision manufacturing techniques, with more than - Canon EOS C300 PL | Instruction Manual - Page 39
in using the viewfinder while the monitor unit is attached, you can set [£ LCD/VF Setup] > [LCD/VF Simul.] to [Off] to conserve the camcorder's power. Even when [LCD/VF Simul.] is set to [Off], closing the LCD panel will automatically activate the viewfinder. • While recording with the LCD panel - Canon EOS C300 PL | Instruction Manual - Page 40
tripods with 0.95 cm (3/8 in.) screws. You can mount the camcorder on a tripod but do not use tripods with mounting 40 screws longer than 5.5 mm (0.2 in.) as this may cause damage to the camcorder. 5.5 mm Using a Tripod with 0.64 cm (1/4 in.) Mounting Screws To use a tripod with 0.64 cm (1/4 in - Canon EOS C300 PL | Instruction Manual - Page 41
convenient grip angle for high- and low-angle shooting. 1 Set the Q switch to OFF. 2 Unscrew the thumb rest and remove it from the camcorder. 3 Firmly insert the ends through the strap mount and adjust the length of the strap. IMPORTANT • Be careful not to drop the camcorder when attaching or - Canon EOS C300 PL | Instruction Manual - Page 42
Preparing the Camcorder Removing and Attaching the Terminal Covers You can remove the plastic covers of the following terminals and SD card slot to access them more readily. • - Canon EOS C300 PL | Instruction Manual - Page 43
for the first time. 43 * The camcorder can record custom picture files and a camera settings file onto the SD card as well. The SD card serves also to store user memo files created with the Canon XF Utility software (A 143) that you can then read and embed in the clips' metadata. Compatible - Canon EOS C300 PL | Instruction Manual - Page 44
set the [w Other Functions] > [Media Access LED] function to [Off], the access indicators will not illuminate. Inserting and Removing an SD Card 1 Turn off the camcorder. 2 Open the SD card slot cover. 3 Insert the SD card all the way into the SD card slot until it clicks. • The SD card slot - Canon EOS C300 PL | Instruction Manual - Page 45
. Inserting an SD card facing the wrong direction can cause a malfunction of the camcorder. Be sure to insert the SD card as described in step 3. NOTES • Media The first time you use any recording media with this camcorder, initialize it first. You can also initialize a recording media - Canon EOS C300 PL | Instruction Manual - Page 46
button to open the initialization 46 submenu. Switching Between the CF Card Slots The camcorder features two CF card slots, CF2 (CF card slot A) and CF3 (CF a CF card and you open the cover of the selected slot, the camcorder will automatically switch to the other slot. • You cannot use the SLOT - Canon EOS C300 PL | Instruction Manual - Page 47
use and the available recording time (in minutes*) that remains on each CF card. The same information is displayed in the rear panel. When the camcorder is in mode, the available recording time is displayed only in the rear panel. On the [Media] status screen (A 167), you can check the total - Canon EOS C300 PL | Instruction Manual - Page 48
the camcorder adjust the black balance automatically when ambient temperature changes considerably or if there is a noticeable change in a true black video signal. 48 Operating modes: 1 Open the [ABB] screen. [~ Camera Setup] > [ABB] [~ Camera Setup] 2 Attach the body cap to the lens mount. [ABB - Canon EOS C300 PL | Instruction Manual - Page 49
camcorder. For details on how to connect and use the remote controller, refer to its instruction manual Standard] NOTES • The camcorder's ND filter cannot be camcorder only when a compatible EF lens (A 187) is attached to the camcorder to the camcorder. * Depending on when you purchased the lens - Canon EOS C300 PL | Instruction Manual - Page 50
attach an optional WFT-E6 Wireless File Transmitter to the camcorder's WFT terminal and complete the wireless network setup. Download 'WFT-E6 Wireless File Transmitter - Guide for Canon Camcorders' (PDF file) from your local Canon Web site and follow the instructions to complete the necessary setup. - Canon EOS C300 PL | Instruction Manual - Page 51
51 Recording Video This section explains the recording basics. Before you begin recording, make a test recording first to check if the camcorder operates correctly. Record for approximately 6 minutes at 50 Mbps (A 59). Should the camcorder fail to operate correctly, refer to Troubleshooting (A 172 - Canon EOS C300 PL | Instruction Manual - Page 52
Video 2 Press the START/STOP button to begin recording. • Recording starts. The tally lamp illuminates and the recording indicator [ÜREC] appears at the top of the screen. 52 • You can use the START/STOP button on the back of the camcorder, the front of the camcorder (next to the lens mount - Canon EOS C300 PL | Instruction Manual - Page 53
Video Locking the Controls in Recording Mode Once in mode, you can set the Q switch to C (key lock) to lock all the physical controls (buttons and switches) on the camcorder one of the buttons. Return the Q switch to the CAMERA position to reactivate the controls. * The Wi-Fi Remote - Canon EOS C300 PL | Instruction Manual - Page 54
Recording Video Remote Operation Using Wi-Fi Remote After completing the necessary preparations (A 49), you can start and stop recording from a Wi-Fi-enabled device using the Wi-Fi Remote application. 54 1 Press [LIVE VIEW ON/OFF] to show the camcorder's live view image on the Wi-Fi Remote screen. 2 - Canon EOS C300 PL | Instruction Manual - Page 55
Recording Video Onscreen Displays Refer to this section for an explanation of displayed value is an estimate. 2 Only when an optional WFT-E6 Wireless File Transmitter is connected to the camcorder. 3 During slow & fast motion recording mode, this indicates the shooting frame rate. 4 Only when an - Canon EOS C300 PL | Instruction Manual - Page 56
Recording Video NOTES • You can press the DISP. button to switch the onscreen displays , replace the battery pack with a fully charged one. • Depending on the conditions under which the camcorder and the battery pack are used, the actual battery charge may not be indicated accurately. 2 CF card - Canon EOS C300 PL | Instruction Manual - Page 57
Recording Video Rear Panel Displays You can check the following information on the rear panel. This allows you to easily adjust main camera functions like the shutter speed, white balance and ISO speed/gain even when the monitor unit is not attached to the camcorder without having to use the - Canon EOS C300 PL | Instruction Manual - Page 58
Recording Video Canon Log Gamma and CINEMA Preset You can easily set the camcorder to use a number of preset picture- [~ Camera Setup] related settings especially designed with professional cinematography 58 and motion picture production in mind. With the CINEMA preset settings, the gamma and - Canon EOS C300 PL | Instruction Manual - Page 59
of Recording, Bit Rate, Resolution and Frame Rate Video Configuration: Type of Recording, Bit Rate, Resolution [w Other Functions] > [24.00P] 2 Select [On] and then press SET. • The camcorder will reset and restart in 24.00P mode. For recordings compatible with analog NTSC/PAL broadcast standards 1 - Canon EOS C300 PL | Instruction Manual - Page 60
Video Configuration: Type of Recording, Bit Rate, Resolution and Frame Rate Available bit rate, resolution and frame rate settings [24.00P] set to [On] 60 Bit - Canon EOS C300 PL | Instruction Manual - Page 61
the FUNC. Button You can adjust three main camera functions -shutter speed, white balance and ISO speed desired white balance mode and then press SET. • The selected value will be set and the camcorder will exit the direct setting mode. • On the screen: The onscreen display of the selected function - Canon EOS C300 PL | Instruction Manual - Page 62
Speed Set the shutter speed based on the recording conditions. For example, you may want to set slower shutter speeds in darker environments. The camcorder offers the following 5 modes. 62 Operating modes: [Speed]: Allows you to set the shutter speed (in fractions of a second). You can select the - Canon EOS C300 PL | Instruction Manual - Page 63
scale to use when adjusting the shutter speed; otherwise, skip to step 5. 3 Open the [Shutter Increment] submenu. [~ Camera Setup] > [Shutter] > [Shutter Increment] 4 Select [1/3 stop] or [1/4 stop] and then press SET. 5 displayed on the Wi-Fi Remote screen and will be applied on the camcorder. - Canon EOS C300 PL | Instruction Manual - Page 64
, you may not get the exactly the same image brightness as you would on an EOS digital SLR camera set to the same shutter speed. • When an optional RC-V100 Remote Controller is connected to the camcorder, you can change the shutter mode with the remote controller's SHUTTER SELECT button. Flicker - Canon EOS C300 PL | Instruction Manual - Page 65
dB Fine 0 dB to 24 dB in 0.5 dB increments - 1 Settings available only when [~ Camera Setup] > [ISO/Gain] > [Extended Range] is set to [On]. 2 The minimum scale is selected. 3 ISO speed required for a suitable dynamic range for Canon Log gamma. Equivalent to a gain value of 2.5 dB. 4 This value - Canon EOS C300 PL | Instruction Manual - Page 66
adjust the value of the ISO speed or gain using the control dial on the camcorder or that on the grip unit. You will need to set a control dial's Control to a Control Dial 1 Open the [Control Dial] (control dial on the camcorder) or [Grip Ctrl Dial] (control dial on the grip unit) submenu. [w Other - Canon EOS C300 PL | Instruction Manual - Page 67
. • The selected value will be displayed on the Wi-Fi Remote screen and will be applied on the camcorder. NOTES • When high ISO speeds or gain levels are set, the picture may flicker slightly. • When high ISO speeds or gain levels are set, bright red, green or blue dots may appear on the - Canon EOS C300 PL | Instruction Manual - Page 68
identical to that of the ND FILTER + and - buttons on the camcorder. • The selected ND filter setting will be displayed on the Wi-Fi Remote screen and will be applied on the camcorder. NOTES • Depending on the scene, the color may change when turning the - Canon EOS C300 PL | Instruction Manual - Page 69
application to temporarily adjust the aperture automatically. Automatic aperture*: The camcorder adjusts the aperture automatically. * Available only with lenses compatible with automatic aperture (A 187). Operating modes: Manual Aperture Using the Control Dial You can adjust the aperture value - Canon EOS C300 PL | Instruction Manual - Page 70
a Wi-Fienabled device using the Wi-Fi Remote application. 1 On the camcorder, set [~ Camera Setup] > [Iris] > [Mode] to [Manual] (A 70). • This is only necessary when using a lens compatible with automatic aperture. For other lenses, [Manual] is the default setting and cannot be changed. 2 Press the - Canon EOS C300 PL | Instruction Manual - Page 71
an EF Cinema lens (except for a CINE-SERVO CN7x17 KAS S/E1 lens), you cannot adjust the aperture using the camcorder. Adjust camcorder, set [~ Camera Setup] > [Iris] > [Mode] to [Manual] (A 70). • This is only necessary when using a lens compatible with automatic aperture. For other lenses, [Manual - Canon EOS C300 PL | Instruction Manual - Page 72
appear on [~ Camera Setup] [Iris] [Mode] NOTES • If you set an assignable button to [Iris Mode] (A 111), you can press the button to toggle between the [Automatic] and [Manual] settings when a lens compatible with automatic aperture is attached to the camcorder. [Manual] Exposure Compensation - Canon EOS C300 PL | Instruction Manual - Page 73
displayed above the exposure bar and the camcorder will attempt to adjust the exposure accordingly. Available AE Shift Levels +2.0 +1.5 +1.25 +1.0 +0.75 +0.5 +0.25 ±0 -0.25 -0.5 -0.75 -1.0 -1.25 -1.5 -2.0 [~ Camera Setup] [AE Shift] 73 [±0] NOTES • During manual aperture, you can also set the - Canon EOS C300 PL | Instruction Manual - Page 74
been stored, the custom white balance icon ÅA or ÅB and default value (5,500 K) will flash slowly. To establish the custom white balance: 2 Point the camcorder at a white object so that it fills the whole screen. • Use the same lighting conditions you plan to use when recording. 3 Press the Å button - Canon EOS C300 PL | Instruction Manual - Page 75
/down or turn the SELECT dial to change the color temperature value and then press SET. • The selected color temperature will be set and the camcorder will exit the direct setting mode. • On the screen: The selected color temperature will appear next to the white balance icon. On the rear panel - Canon EOS C300 PL | Instruction Manual - Page 76
flash slowly. • During the procedure, [Å] will flash quickly. When it stops flashing, the procedure is completed and the setting will be applied on the camcorder. NOTES • Using the custom white balance setting: - Readjust the custom white balance if you turn the ND filter on/off or when the light - Canon EOS C300 PL | Instruction Manual - Page 77
the Wi-Fi Remote application to temporarily let the camcorder focus automatically. Continuous AF*: The camcorder focuses automatically all the time. * Available only with compatible EF lenses (A 187). # Focusing Methods and Required Settings Manual Focus Focusing Method Focus Ring Wi-Fi Remote - Canon EOS C300 PL | Instruction Manual - Page 78
operation may not work correctly. • If you operate the zoom after focusing, the focus on the subject may be lost. • If you focus manually and then leave the camcorder with the power turned on, the focus on the subject may be lost after a while. This possible slight shift in focus is a result - Canon EOS C300 PL | Instruction Manual - Page 79
settings to set the color, gain and frequency of the two peaking levels independently of each other. • When using the camcorder's screen to focus: - The camcorder features professional video scopes (A 99). You can display the edge monitor to help you focus even more accurately. - You can use peaking - Canon EOS C300 PL | Instruction Manual - Page 80
One-Shot AF During manual focus, you can use the one-shot AF function to have the camcorder focus automatically only once 1 On the camcorder, set [~ Camera Setup] > [AF Mode] to [One Shot] (A 80). • This is only necessary when using a lens compatible with continuous AF. For other lenses, [One Shot - Canon EOS C300 PL | Instruction Manual - Page 81
SET. [~ Camera Setup] 81 [AF Mode] [One Shot] NOTES • About the autofocus (AF) functions: - One-shot AF is available for any EF lens equipped with autofocus (AF) function; Continuous AF is available only for EF lenses compatible with continuous AF (A 187). Refer to the instruction manual of the - Canon EOS C300 PL | Instruction Manual - Page 82
zebra 82 pattern will not affect your recordings. Operating modes: Displaying Onscreen Markers The camcorder offers 5 types of onscreen markers. You can display multiple onscreen markers simultaneously. 1 [1.75:1], [1.66:1], [14:9], [13:9] and [4:3]. Safety zone 80% Level marker Aspect guide 4:3 - Canon EOS C300 PL | Instruction Manual - Page 83
set an assignable button to [Markers] (A 111), you can press the button to turn the onscreen markers on and off. Displaying Zebra Patterns The camcorder has a zebra pattern feature that shows black and white diagonal stripes over areas that are overexposed. This is displayed only on the screen and - Canon EOS C300 PL | Instruction Manual - Page 84
the same terminals. Additionally, you can superimpose the time code on video output from the HDMI OUT terminal or SYNC OUT terminal. For NTSC to select this option and keeps running regardless of the camcorder's operation. [Regen.]: The camcorder will read the selected CF card and the time code - Canon EOS C300 PL | Instruction Manual - Page 85
Setting the Time Code Setting the Time Code's Initial Value If you set the time code mode to [Preset], you can set the initial value of the time code. 1 Open the time code [Setting] submenu. [¤ TC/UB Setup] [Time Code] 85 [¤ TC/UB Setup] > [Time Code] > [Setting] 2 Select [Set] and then press - Canon EOS C300 PL | Instruction Manual - Page 86
will not be put on hold. The time code superimposed on the video signal output from the other terminals will be put on hold. About even if you disconnect all other power sources. However, this is less accurate than when the camcorder is on. • If you set an assignable button to [Time Code] (A 111), - Canon EOS C300 PL | Instruction Manual - Page 87
to set the identification code. 3 Select [Set] and then press SET. • The user bit setting screen appears with an orange selection frame on the leftmost digit. • To reset the user bit to [00 00 00 00], select [Reset] instead. 4 Use the joystick (Ý) or SELECT dial to select the first character and - Canon EOS C300 PL | Instruction Manual - Page 88
signal to that of an external video device. Similarly, using an external time code signal, you can synchronize this camcorder's time code to the 88 external signal. Using the external time code signal with multiple cameras allows you to set up a multi-camera recording. You can also output the time - Canon EOS C300 PL | Instruction Manual - Page 89
synchronization to be disrupted; the correct time code will be restored once you reconnect the cable. - Turning the camcorder off/on - Changing the operating mode to mode - Changing the video configuration - Changing the frame rate • If the external time code signal is incorrect or there is no - Canon EOS C300 PL | Instruction Manual - Page 90
(analog blackburst or tri-level signal) through the SYNC OUT terminal to synchronize an external device to this camcorder. 90 Operating modes: 1 Open the [SYNC Output] submenu. [¢ Video Setup] > [SYNC Output] 2 Select [HD Sync] (tri-level signal) or [Blk Burst]* (black burst) and then press SET - Canon EOS C300 PL | Instruction Manual - Page 91
channel 2. 91 An audio signal will also be output with the video signal from the HD/SD SDI terminal. You can record this audio channels. In addition to XLR microphones, you can also attach to the camcorder's MIC terminal commercially available condenser microphones with their own power supply and - Canon EOS C300 PL | Instruction Manual - Page 92
from a microphone or analog audio input source. Note that the camcorder's MIC terminal is given priority over the XLR 92 terminals. To Channel] [CH1] IMPORTANT • When connecting a microphone or device that does not support phantom power, make sure to set the XLR terminal switch to MIC or LINE - Canon EOS C300 PL | Instruction Manual - Page 93
manual for each channel. Automatic Audio Level Adjustment 93 Set the ã switch of the desired channel to A (automatic) to let the camcorder headphones when adjusting the audio level. If the input level is too high, audio may become distorted even if the audio level indicator shows an appropriate - Canon EOS C300 PL | Instruction Manual - Page 94
you do not need to perform the rest of the procedure. If you selected [Manual], continue the procedure to set the microphone's audio recording level. 3 Open the [ when adjusting the audio level. If the input level is too high, audio may become distorted even if the audio level indicator shows - Canon EOS C300 PL | Instruction Manual - Page 95
Activating the Microphone's Attenuator If the audio level is too high and the sound sounds distorted, activate the microphone attenuator (20 dB). 1 Open the [MIC Att.] submenu. [¡ Audio Setup] > [Audio Input] > [MIC Att.] 2 Select [On] and - Canon EOS C300 PL | Instruction Manual - Page 96
user memo to an SD card. • For details, refer to Managing User Memo Profiles in the Canon XF Utility Instruction Manual. 2 Insert the SD card into the SD card slot of the camcorder. 3 Open the metadata [Setting] submenu. [w Other Functions] > [Set Metadata] > [Setting] 4 Select [SD Card] and then - Canon EOS C300 PL | Instruction Manual - Page 97
additional advantages over user memos created with Canon XF Utility: you can change the user a user memo in advance; and you can enter manually 97 the GPS information of your shooting location. 1 Press transferred and applied to the clips on the camcorder. 5 Press to close the message. Options - Canon EOS C300 PL | Instruction Manual - Page 98
standard-definition color bars, EBU color bars and ARIB multi-format HDTV color bars. 1 Open the color bars [Type] submenu. [~ Camera Setup] the country/region of purchase. [~ Camera Setup] [Color Bars] [Enable] [Off] Recording an Audio Reference Signal The camcorder can output a 1 kHz audio - Canon EOS C300 PL | Instruction Manual - Page 99
on the LCD screen. They do not appear in the viewfinder or on an external monitor. In order to use the video scopes, the monitor unit must be attached to the camcorder. 99 * The edge monitor looks at the focus of the entire picture and displays the results as a waveform. The edge - Canon EOS C300 PL | Instruction Manual - Page 100
Video Scopes 100 Configuring the Vectorscope The camcorder's vectorscope function offers 2 modes. You can also change the gain. Operating waveform. [Normal]: Displays the vectorscope. Configuring the Edge Monitor Using this video scope allows you to focus with more precision. You can use the edge - Canon EOS C300 PL | Instruction Manual - Page 101
to flag clips you want to set apart. You can add all four types of marks remotely using the Wi-Fi Remote application. When the camcorder is in mode, you can add or delete shot marks (A 137). You can also display an index screen of all the shot marks (A 135), allowing - Canon EOS C300 PL | Instruction Manual - Page 102
a 0.5 second delay from when you press the button to when the camcorder adds the shot mark. When using the Wi-Fi Remote application, the or check mark (%) to the clip to flag it and set it apart. When the camcorder is in mode, you can display an index screen that contains only clips with an $ - Canon EOS C300 PL | Instruction Manual - Page 103
about attaching and configuring the receiver, refer to the GP-E1's instruction manual. 103 Attaching the GPS Receiver Turn off the camcorder and attach the optional GP-E1 GPS Receiver to the camcorder's WFT terminal. ቢ ብ ቧ ባ ቤ ቦ Activating the GPS Receiver Operating modes: 1 Open the GPS - Canon EOS C300 PL | Instruction Manual - Page 104
current GPS information and satellite signal strength. • GPS signal reception may take some time after replacing the battery pack or when first turning on the camcorder after a long period without use. - Canon EOS C300 PL | Instruction Manual - Page 105
the u button. • The last clip that was recorded is played back without audio for the selected duration. [Ð REVIEW] appears at the top of the screen. • Press the CANCEL button to stop reviewing the clip and change the camcorder back to record pause mode. • After the clip finishes playing back, the - Canon EOS C300 PL | Instruction Manual - Page 106
allows you to change the shooting frame rate to achieve a slow motion or fast motion effect during playback. Pre-recording ([Pre Rec]): The camcorder will start recording approximately 3 seconds before you press the START/STOP button. This is especially useful when it is difficult to predict when to - Canon EOS C300 PL | Instruction Manual - Page 107
is changed or turned off. It will be deactivated also if you change the video configuration. • During this special recording mode, the running mode of the time number of frames in advance. We recommend operating the camcorder remotely or stabilizing the camcorder, for example, on a tripod. Sound is - Canon EOS C300 PL | Instruction Manual - Page 108
changed or turned off. It will be deactivated also if you change the video configuration. • During this special recording mode, the running mode of the you set the frame rate to a progressive frame rate (A 59), the camcorder can record with a frame rate (shooting frame rate) that is different from - Canon EOS C300 PL | Instruction Manual - Page 109
fast motion mode will be deactivated if the special recording mode is changed or turned off. It will be deactivated also if you change the video configuration. • When the bit rate is set to 50 Mbps (A 59), relay recording is not available during slow motion recording. • During this special recording - Canon EOS C300 PL | Instruction Manual - Page 110
[PRE REC STBY] changes to [Ü PRE REC] while recording. 4 Press the START/STOP button again to stop recording. • The camcorder records the clip, including approximately 3 seconds of video and audio recorded before the START/STOP button was pressed. • The tally lamp goes out and [PRE REC STBY] appears - Canon EOS C300 PL | Instruction Manual - Page 111
of available functions appears. • The quick reference shows the default settings for each assignable button. For assignable buttons 1 to 9, the label on the camcorder, grip unit or monitor unit indicates also the button's default setting. By default, buttons 10 to 15 have no assignable function set - Canon EOS C300 PL | Instruction Manual - Page 112
without affecting other camera settings, with the camcorder automatically adjusts the aperture (f/stop). # [Iris Mode] Switches the aperture adjustment mode between automatic and manual of onscreen displays on video output from the camcorder's terminals (both HD and SD video output). [Add Shot - Canon EOS C300 PL | Instruction Manual - Page 113
Assignable Buttons Function name Description [Photo]* Records a photo. Ü [FUNC.] Enters the direct setting mode, replicating the function of the camcorder's FUNC. button. Ü [FUNC. Shutter] Enters the direct setting mode with the shutter speed highlighted and ready to be Ü adjusted. [ - Canon EOS C300 PL | Instruction Manual - Page 114
are compatible only with other C300 and C300 PL camcorders. Operating modes: Selecting Custom Picture Files Select a custom picture file to apply its settings to your recordings or to edit, rename, protect, or transfer it. When [~ Camera Setup] > [/ CINEMA Locked] is set to [On], the custom - Canon EOS C300 PL | Instruction Manual - Page 115
(high contrast, vibrant colors) of an EOS digital SLR camera with its picture style set to [Standard] P. [C8: Wide DR]: Applies a gamma curve with a very wide dynamic range and an appropriate color matrix that nevertheless do not require post-production processing. [C9: CINEMA]: Uses the Canon Log - Canon EOS C300 PL | Instruction Manual - Page 116
screen appears, press SET. 4 Press the CUSTOM PICTURE button to exit the custom picture menu. Copying a File from an SD Card to the Camcorder 1 After selecting a file on the SD card, open the [Copy To Cam.] submenu. [+ / Transfer File] > [Copy To Cam.] [+ / Transfer File] [Copy To Cam - Canon EOS C300 PL | Instruction Manual - Page 117
image file. Later, those embedded settings in the video or photo can be copied to the camcorder (A 152) and be applied to future recordings. for a gamma curve that results in a picture with a cinema-like feel and cinema-like tones. [Cine 2] has softer contrasts than does [Cine 1] but is - Canon EOS C300 PL | Instruction Manual - Page 118
Custom Picture Settings [EOS Std.]: [Wide DR]: 118 [Canon Log]: This gamma curve approximates the look of an EOS digital SLR camera when the picture style is set to [Standard] P (high contrast, vibrant colors). Applies a gamma curve with a very wide dynamic range, optimized for playback on an HDTV - Canon EOS C300 PL | Instruction Manual - Page 119
image from being overexposed. When [Gamma] is set to [Cine 1], [Cine 2], [EOS Std.], [Wide DR] or [Canon Log], this setting has no effect on the picture. [Enable]: [Slope]: Activates/deactivates from -8 to 8. (Default: ±0) [Coring]: Reduces noise artifacts caused by high sharpness levels. - Canon EOS C300 PL | Instruction Manual - Page 120
is not available when the video configuration is 720P. This to [Cine 1], [Cine 2], [EOS Std.], [Wide DR] or [Canon Log], this setting has no effect : [Off]) [Skin Detail] The camcorder applies a softening filter to areas in [Off], [Low], [Middle] and [High]. (Default: [Off]) [Hue]: Adjusts - Canon EOS C300 PL | Instruction Manual - Page 121
options are [Off], [Low], [Middle] and [High]. (Default: [Off]) [Hue]: Adjusts the hue for [Cine 1] and [Cine 2], [EOS Std.], [Wide DR] and [Canon Log]. Generally, this should be the to 50. (Default: ±0) [Color Correction] The camcorder detects the characteristics of a certain color (color - Canon EOS C300 PL | Instruction Manual - Page 122
On] and [Off]. (Default: [Off]) [Clip At 100%]: When the video signal exceeds 100%, this function clips the white level at 100%. Available options • When an optional RC-V100 Remote Controller is connected to the camcorder, the following custom picture settings can be changed using the buttons and - Canon EOS C300 PL | Instruction Manual - Page 123
unit. [SELECT Dial Dir.] Changes the direction of the adjustment when operating the SELECT dial. [Retract Lens] When one of the following optional lenses is attached to the camcorder and the focus mode switch on the lens is set to AF, if this setting is set to [On], the lens will retract - Canon EOS C300 PL | Instruction Manual - Page 124
on an SD card. You can load those settings at a later date or on another C300 or C300 PL camcorder so that you can 124 use that camcorder in that same exact way. Operating modes: Saving Camera Settings to an SD Card 1 Open the [Save To *] submenu. [w Other Functions] > [Transfer Menu//] > [Save - Canon EOS C300 PL | Instruction Manual - Page 125
Playback functions are accessed from the clip index screen. To open the clip index screen, set the camcorder to mode. If the CF card contains a type of recordings (NTSC/PAL/24.00P) different from the camcorder's current settings, you will not be able to play back the clips. In such case, change - Canon EOS C300 PL | Instruction Manual - Page 126
Playback 126 1 $ mark/% mark (A 102, 132) 2 Orange selection frame 3 Relay recording: Appears when a clip begins on one CF card and continues on the other. (A 46) 4 Shot mark (A 101, 137) 5 Recording date and time 6 Clip name (A 53) 7 Temperature warning (A 173) 8 Clip thumbnail (A 138) 9 - Canon EOS C300 PL | Instruction Manual - Page 127
(play/pause/stop only) with the buttons on the camcorder and full playback control options using the joystick and joystick guide. 1 Move the orange selection frame to the clip Do not disconnect the power source or turn off the camcorder. - Do not open the cover of the CF card slot being accessed. NOTES - Canon EOS C300 PL | Instruction Manual - Page 128
12 13 14 15 16 17 18 19 1 Remaining battery time (A 56) 2 Joystick guide (A 129) 3 Shutter speed1 (A 62) 4 # Aperture value1 (A 69) 5 ISO 19 Audio level meter 1 Appears when [£ LCD/VF Setup] > [Metadata Display] > [Camera Data] is set to [On]. 2 Appears when [£ LCD/VF Setup] > [Metadata Display - Canon EOS C300 PL | Instruction Manual - Page 129
a clip, operate the buttons on camcorder's body or on the monitor unit or use the joystick and joystick guide to use fast playback, play back 50.00P) and 0.5 seconds for other video configurations. • You can press the DISP. button to turn the joystick guide display on and off. Adjusting the Volume - Canon EOS C300 PL | Instruction Manual - Page 130
User Memo] Deletes the user memo and GPS information of a clip. Ü [Copy / File] Copies the custom picture file from a clip to the camcorder. Ü [Add Shot Mark 1]/ Adds or deletes a " mark. - [Del. Shot Mark 1] [Add Shot Mark 2]/ Adds or deletes a # mark. - [Del. Shot Mark 2] [Fewer Index - Canon EOS C300 PL | Instruction Manual - Page 131
indicator is illuminated in red. Failure to do so may result in permanent data loss. - Do not disconnect the power source or turn off the camcorder. - Do not open the cover of the either CF card slot. Displaying Clip Information Select [Display Clip Info] in the clip menu to display the - Canon EOS C300 PL | Instruction Manual - Page 132
Clip Operations 132 Displaying the Lens Information and User Memo From the [Clip Info] screen, push the joystick up or turn the SELECT dial up to display the [Lens & Q] screen. In this screen you can check details about the lens used to record the clip. If the clip has an embedded user memo, you - Canon EOS C300 PL | Instruction Manual - Page 133
Clip Operations Deleting $ Marks or % Marks Deleting an $ Mark or % Mark from a Clip 1 Select the desired clip and then press SET to open the clip menu. 2 Select [Delete $ Mark] or [Delete % Mark] and then press SET. • The clip information screen appears and it prompts you to confirm the - Canon EOS C300 PL | Instruction Manual - Page 134
if either CF card slot cover is open. • If a clip is being copied to a card that already has a clip with the same number (the last 4 digits in the clip name), then the copied clip will be renamed with the following number. Deleting Clips You can delete any clip except those with - Canon EOS C300 PL | Instruction Manual - Page 135
] instead to cancel the operation. 135 Copying a Custom Picture File Embedded in a Clip You can copy the custom picture file embedded in a clip to the camcorder. 1 Select the desired clip (a clip with the / icon) and then press SET to open the clip menu. 2 Select [Copy / File] and then press SET - Canon EOS C300 PL | Instruction Manual - Page 136
Clip Operations 136 Time code of the frame with the shot mark NOTES • After you finish playing back a clip from this index screen, the index screen that was open before the [Shot Mark] index screen will appear. Displaying a Frame Index Screen of a Single Clip You can display an index screen of a - Canon EOS C300 PL | Instruction Manual - Page 137
# marks combined) can be added to a single clip. • There may be up to a 0.5 second delay from when you press the button to when the camcorder adds the shot mark. Deleting Shot Marks 1 Open the [Shot Mark] index screen or [Expand Clip] index screen. 2 Select the desired frame (thumbnail) and then - Canon EOS C300 PL | Instruction Manual - Page 138
Clip Operations 138 Changing a Clip's Thumbnail You can change the thumbnail that appears in the clip index screen to a thumbnail of a frame that appears in the [Shot Mark] index screen or [Expand Clip] index screen. 1 Open the [Shot Mark] index screen or [Expand Clip] index screen. 2 Select the - Canon EOS C300 PL | Instruction Manual - Page 139
switch to HD or SD, depending on the capability of the external monitor. 4 Set [¢ Video Setup] > [SYNC Output] to [HD-Y] (HD component video, luminance signal) or [Composite] (SD analog composite signal). 5 When the camcorder is connected via HDMI OUT terminal to an external monitor, the - Canon EOS C300 PL | Instruction Manual - Page 140
wish to use on the monitor. Then, select the video signal output configuration (A 139). The camcorder can output video from all of the video output terminals simultaneously. Operating modes: Connection Diagram When you connect the camcorder to an external monitor using the SYNC OUT terminal, use - Canon EOS C300 PL | Instruction Manual - Page 141
HD/SD SDI Terminal The digital signal output from the HD/SD SDI terminal includes the video signal, audio signal and time code signal. If necessary, perform the following procedure to change the output to HD or SD*. Turning the output off will conserve the camcorder's power. * Not available for 24 - Canon EOS C300 PL | Instruction Manual - Page 142
video displayed on the external monitor (A 142). 142 SD Output When HD video with a 16:9 aspect ratio is converted and output from the HD/SD SDI terminal, HDMI OUT terminal or SYNC OUT terminal as SD video Video Setup] > [SD Output] [¢ Video video Video Setup] [HD Onscreen Video Video - Canon EOS C300 PL | Instruction Manual - Page 143
software. The following plugins are available. - Canon XF Plugin for Avid Media Access (Windows or Mac OS) - Canon XF Plugin 64 for Avid Media Access (Windows or Mac OS) - Canon XF Plugin for Final Cut Pro (Mac OS) - Canon XF Plugin for Final Cut Pro X (Mac OS) The instruction manual for each module - Canon EOS C300 PL | Instruction Manual - Page 144
Access (Windows) 1 From the Start menu, open All Programs > Canon Utilities > Desired plugin > Uninstall Canon XF Plugin for Avid Media Access Instruction Manual or Uninstall Canon XF Plugin 64 for Avid Media Access Instruction Manual. 2 When the confirmation screen appears, click Yes and then click - Canon EOS C300 PL | Instruction Manual - Page 145
/Application Support/ProApps/Avid/AVX2_Plug_ins/AMA/MVP_CanonXF64.avx Canon XF MPEG2 Decoder /Library/QuickTime/XFMpeg2Dec.component Instructions for the plugins /Applications/Canon Utilities/ • For , select Canon XF Plugin for Avid Media Access, Canon XF Plugin 64 - Canon EOS C300 PL | Instruction Manual - Page 146
, select All Programs > Canon Utilities > Desired plugin > Canon XF Plugin for Avid Media Access Instruction Manual or Canon XF Plugin 64 for Avid Media Access Instruction Manual. 2 Select the desired language. Instructions for Canon XF Plugin for Final Cut Pro and Canon XF Plugin for Final Cut Pro - Canon EOS C300 PL | Instruction Manual - Page 147
. If the clip is 1280x720, the photo size is 1280x720. * At this size, the camcorder can save approximately 670 photos on a 1 GB SD card. 147 Taking Photos in CAMERA Mode You can take a photo while the camcorder is recording a clip or is in record pause mode. If a custom picture file is selected - Canon EOS C300 PL | Instruction Manual - Page 148
card access indicator is flashing. Failure to do so may result in permanent data loss. - Do not disconnect the power source or turn off the camcorder. - Do not remove the SD card. NOTES • If the LOCK switch on the SD card is set to prevent writing, you will not be able - Canon EOS C300 PL | Instruction Manual - Page 149
modes: 149 Displaying the [Photos] Index Screen Display the [Photos] index screen to view photos. 1 Set the Q switch to MEDIA. • The camcorder switches to appears. mode and the clip index screen 2 Press the INDEX button. • The index screen selection menu appears. 3 Select [Photo Index - Canon EOS C300 PL | Instruction Manual - Page 150
Photo Operations Photo Operations You can use the photo menu to protect or unprotect a photo, delete a photo, or copy a custom picture file embedded in a photo. You can display the photo menu from the [Photos] index screen or photo playback 150 screen. Using the Photo Menu 1 From the [Photos] index - Canon EOS C300 PL | Instruction Manual - Page 151
Photo Operations Deleting All Photos 1 Open the [Delete All Photos] submenu. [w Other Functions] > [Delete All Photos] 2 Select [OK] and then press SET. • All of the photos on the SD card, except for protected ones, will be deleted. • Select [Cancel] instead to cancel the operation. • While the - Canon EOS C300 PL | Instruction Manual - Page 152
the photo menu. 3 Select [Copy / File] and then press SET. • The [/ Data 1/3] screen appears with the orange selection frame indicating a file slot in the camcorder. • Alternatively, you can press the CUSTOM PICTURE button. • You can push the joystick up/down or turn the SELECT dial to display the - Canon EOS C300 PL | Instruction Manual - Page 153
that of the last photo on the SD card. Photo numbers will continue from the number following that of the last photo recorded with the camcorder. NOTES • If you select [Continu.] and the SD card you insert already contains a photo with a larger number, a new photo will be assigned a number one - Canon EOS C300 PL | Instruction Manual - Page 154
Photo Operations 154 - Canon EOS C300 PL | Instruction Manual - Page 155
Camera Setup] menu [¡ Audio Setup] menu [¢ Video Camera Setup] menu ( mode only) Menu item # [Light Metering] # [AE Shift] Submenu [ISO/Gain] # [Iris] [Shutter] # [AF Mode]* [Flicker Reduction] [/ CINEMA ], [Manual] [1/2 lenses (A 187). **The default value depends on the country/region - Canon EOS C300 PL | Instruction Manual - Page 156
Ü [Linked], [Separated] Ü [On], [Off] Ü [-12 dB], [-18 dB], [-20 dB], [Off] Ü [Automatic], [Manual] Ü 0 to 99 (50) Ü [On], [Off] Ü [CH1/CH2], [CH1/CH1], [CH2/CH2], [All/All] Ü [Off], 1 to 15 (8) Ü [¢ Video Setup] menu Menu item [SDI Output] [SYNC Output] Setting options [HD], [SD - Canon EOS C300 PL | Instruction Manual - Page 157
Menu Options [£ LCD/VF Setup] menu Menu item [LCD Setup] [VF Setup] [LCD/VF B&W] [LCD/VF Simul.] [View Assist.] [Peaking] [Select] [Peaking 1] [Peaking 2] [Zebra] [Select] [Zebra 1 Level] Submenu [Brightness] [Contrast] [Color] [Sharpness] [Backlight] [Brightness] [Contrast] [Color] [Sharpness] [ - Canon EOS C300 PL | Instruction Manual - Page 158
Rate] [Character Rec] [Output Display] [SDI Rec Command] [User Memo] [User Bit] [Audio Output CH] [Audio Level] [Wi-Fi] [GPS] [Date/Time] [Date/Time] [Camera Data] Setting options [On], [Off] [On], [Off] [On], [Off] [On], [Off] [On], [Off] [On], [Off] [On], [Off] [On], [Off] [On], [Off] [On], [Off - Canon EOS C300 PL | Instruction Manual - Page 159
Menu Options # [Focal Length]: Displays the current focal length of an attached EF lens when set to [On]. [ND Filter]: Displays the ND filter indicator when set to [On]. # [AF Mode]: When set to [On], displays the autofocus icon (AF) if the focus mode switch on the attached EF lens is set to AF. - Canon EOS C300 PL | Instruction Manual - Page 160
On]. [Metadata Display]: Displays the date and time of recording and/or the camera data (shutter speed, aperture value, gain) during playback. [¤ TC/UB Setup or 24.00P. [XF Legacy]: Synchronization mode compatible with Canon XF series camcorders. Synchronizes the time code at a 30-frame signal and - Canon EOS C300 PL | Instruction Manual - Page 161
Menu Options Menu item [Set Clock] [WFM (LCD)]1 [Language !] [REMOTE Term.] [Assign Button]1 [Tally Lamp] [Media Access LED] [Fan] [Genlock Adjust.] [24.00P]1 [NTSC/PAL]1 [Relay Rec] [Double Slot Rec] [Bit Rate/Resolution] [Frame Rate] [Special Rec] [Interval Rec] [Frame Rec] Submenu [Date/Time] [ - Canon EOS C300 PL | Instruction Manual - Page 162
Menu Options Menu item [Slow & Fast Motion] 162 Submenu [S&F Frame Rate] [Clips] [Delete All $ Marks]5 [Rec Review] [Set Metadata] [SDI Rec Command] [Photo Numbering]1 [Delete All Photos]6 [Add / File] [Custom Function] [Reset Hour Meter] [Title Prefix] [Number setting] [Delete Last Clip] [Copy - Canon EOS C300 PL | Instruction Manual - Page 163
Camera Settings] [Select User] [User Setting] [Setting] [Auto Time Setting] [CF A] [CF B] [SD Card] Setting options For details refer to "WFT-E6 Wireless File Transmitter - Guide for Canon Camcorders clip name. [Number Setting]: Determines the last 4 digits of the clip name. Combined with the [Title - Canon EOS C300 PL | Instruction Manual - Page 164
time since the last time the second hour meter was reset with this function. [Firmware]: You can verify the current version of the camcorder's firmware. This menu option is usually unavailable. [ My Menu] ( mode only) Menu item Submenu Setting options A [Edit] [Register] [Cancel], [OK] 30 - Canon EOS C300 PL | Instruction Manual - Page 165
respective menu. , Status screen [Camera] Description Displays settings related to media. Ü [Video] Displays the settings for the video terminals and which Transmitter - Guide for Ü Canon Camcorders" (PDF file) from your local Canon Web site and follow the instructions to complete the - Canon EOS C300 PL | Instruction Manual - Page 166
Displaying the Status Screens [Camera] Status Screen ( mode only) 166 1 2 3 4 5 6 7 8 1 ISO speed/Gain increment (A 65) 2 # Iris mode (A 69) 3 # Iris increment (A 69) 4 Shutter speed increment (A 63) 5 # Correction for peripheral illumination (A 34) 6 # - Canon EOS C300 PL | Instruction Manual - Page 167
Displaying the Status Screens [Audio] Status Screen In mode 1 2 3 4 5 6 7 In mode 7 8 167 9 10 1 XLR terminal recording channel (A 92) 2 Microphone sensitivity (XLR terminal) (A 93) 3 Audio peak limiter (A 93, 94) 4 Microphone mode (MIC terminal) (A 94) 5 Microphone recording level (MIC - Canon EOS C300 PL | Instruction Manual - Page 168
Displaying the Status Screens [Video] Status Screen 168 1 5 2 6 3 4 7 8 9 1 HDMI OUT terminal status 2 HD/SD SDI mode only) 1 2 3 4 5 1 User memo file name (A 96) 2 Clip title 3 Camera operator 4 Filming location 5 Clip description [Metadata 2/2] Status Screen ( mode only) 1 2 3 1 - Canon EOS C300 PL | Instruction Manual - Page 169
Displaying the Status Screens [Battery/Hour Meter] Status Screen 1 Remaining recording time 2 Remaining recording time indicator 3 Battery life indicator 1 2 3 4 5 4 Total operation time (A 164) 5 Operation time since using [Reset Hour Meter] (A 164) 169 [/ Data 1/3] Status Screen ( mode only) - Canon EOS C300 PL | Instruction Manual - Page 170
Displaying the Status Screens [/ Data 2/3] Status Screen ( mode only) 1 170 2 3 4 5 6 7 1 Sharpness settings (level, horizontal detail frequency, horizontal/vertical detail balance, and limit) (A 119) 2 Sharpness settings (select, knee aperture gain and slope) (A 119) 3 Level depend - Canon EOS C300 PL | Instruction Manual - Page 171
Displaying the Status Screens [GPS Information Display] Status Screen ( mode only) 1 171 2 3 4 5 1 Latitude 2 Longitude 3 Elevation 4 UTC (coordinated universal time) date and time 5 Satellite signal strength For details refer to Recording GPS Information (Geotagging) (A 103). - Canon EOS C300 PL | Instruction Manual - Page 172
Troubleshooting Troubleshooting If you have a problem with your camcorder, refer to this section. Consult your dealer or a Canon Service Center if the problem persists. 172 Power source The camcorder be locked as well.) Set the Q switch to CAMERA. Pressing the START/STOP button will not start - Canon EOS C300 PL | Instruction Manual - Page 173
Troubleshooting After using the camcorder for a long time, it becomes hot. - The camcorder may become hot after using it continuously for long periods of time; this is not a malfunction. If the camcorder camcorder and back on again. If this does not solve the problem, consult a Canon Service - Canon EOS C300 PL | Instruction Manual - Page 174
Video noise appears on screen. - Keep a distance between the camcorder and devices that emit strong electromagnetic fields such as near powerful magnets and motors, MRI machines or high Setup] > [Audio Input] > [MIC Mode] is set to [Manual] and the [MIC Level] setting is too low. Check the audio - Canon EOS C300 PL | Instruction Manual - Page 175
associated plugins. Cannot record - The file control information is corrupted or there was an encoder error. Turn off the camcorder and back on again. Then, remove the CF card being used and reinsert it. Alternatively, replace the CF card. If this does not solve the problem, consult a Canon Service - Canon EOS C300 PL | Instruction Manual - Page 176
does not solve the problem, consult a Canon Service Center. • Corrupted file control information cannot be recovered. CF cards or clips with corrupt file control information cannot be read by the Canon XF Utility software or associated plugins. CF A/CF B Using a card that supports UDMA mode 4 or - Canon EOS C300 PL | Instruction Manual - Page 177
Troubleshooting immediately reviewing a recording made in a special recording mode. • Pressing the START/STOP button when there is no CF card in the camcorder. # camcorder and back on again. If this does not solve the problem, there may be a malfunction with the camcorder. Consult a Canon Service - Canon EOS C300 PL | Instruction Manual - Page 178
or audio or video noise to appear. • Do not use or store the camcorder in dusty or sandy places. The camcorder is not waterproof - avoid also water, mud or salt. If any of the above should get into the camcorder it may damage the camcorder and/or the lens. Consult a Canon Service Center as soon - Canon EOS C300 PL | Instruction Manual - Page 179
if a fully charged battery pack is used continuously in high temperatures or it is left unused for long periods of Canon battery packs • We recommend using genuine Canon battery packs bearing the Intelligent System mark. • If you attach to the camcorder battery packs that are not genuine Canon - Canon EOS C300 PL | Instruction Manual - Page 180
high temperature. • Do not disassemble, bend, drop, or subject recording media to shocks and do not expose them to water. • Check the direction before inserting the recording media. Forcing recording media into the slot if it is not correctly oriented may damage the recording media or the camcorder - Canon EOS C300 PL | Instruction Manual - Page 181
and remove the viewfinder unit by sliding it up. 2 Wipe away dirt with a cotton swab. 3 Reattach the viewfinder unit by sliding it back onto the camcorder and turn back the LOCK/ RELEASE screw to the LOCK position. IMPORTANT • Be careful not to scratch the glass and screen when cleaning them. - Canon EOS C300 PL | Instruction Manual - Page 182
the lens mount. 4 Return the cover and tighten the screw. Using the Camcorder Abroad Power Sources You can use the AC adapter and battery charger to operate the camcorder and to charge battery packs in any country with power supply between 100 and 240 V AC, 50/60 Hz. Consult a Canon Service Center - Canon EOS C300 PL | Instruction Manual - Page 183
: Call or visit your local retailer/dealer for genuine Canon video accessories. You can also obtain genuine accessories for your Canon camcorder by calling: 1-800-828-4040, Canon U.S.A. Information Center. Use of genuine Canon accessories is recommended. This product is designed to achieve excellent - Canon EOS C300 PL | Instruction Manual - Page 184
listed below are approximate times for shooting with repeated operations such as start/stop, and power on/off. # EF lenses with lens contacts draw power from the camcorder to operate some functions. Effective usage times may decrease depending on the lens used. Other accessories attached to the - Canon EOS C300 PL | Instruction Manual - Page 185
Optional Accessories # Approximate times using the viewfinder (monitor unit not attached) Type of recording Bit rate Usage time BP-950G BP-955 NTSC / 24.00P 50 Mbps Recording (maximum) 200 min. 200 min. Recording (typical) 130 min. 130 min. 35 Mbps Recording (maximum) 200 min. 200 - Canon EOS C300 PL | Instruction Manual - Page 186
315 min. 200 min. 315 min. 205 min. TA-100 Tripod Adapter The TA-100 allows you to quickly mount/unmount the camcorder on/from a tripod. This mark identifies genuine Canon video accessories. When you use Canon video equipment, we recommend Canon-brand accessories or products bearing the same mark. - Canon EOS C300 PL | Instruction Manual - Page 187
pixels (3840x2160) • Viewfinder: 1.3 cm (0.52 in.), approx. 1,555,000 dots, 100% coverage • Lens Mount # Canon EF mount compatible with Canon EF lenses (including EF-S lenses) $ PL Lens mount without data interface terminals Lens multiplication factor: approx. 1.53 (for 35mm equivalent focal length - Canon EOS C300 PL | Instruction Manual - Page 188
Lens Peripheral Illumination Correction: Available for Canon EF lenses5 5 Some Canon EF lenses are not compatible with peripheral illumination tri-level signal, Analog blackburst signal, SD composite video • MIC Terminal ∅ 3.5 mm stereo mini-jack, -72 dBV (manual volume center, full scale -18 dB) / - Canon EOS C300 PL | Instruction Manual - Page 189
* All dimensions are approximate. • Weight ** Camcorder unit only: # 1430 g (3.2 lb.) $ 1630 g (3.6 lb.) Camcorder with grip unit and grip belt, monitor unit, Sensitivity MIC setting: -60 dBu (manual volume center, full scale -18 dB) / 600 Ω LINE setting: 4 dBu (manual volume center, full scale -18 - Canon EOS C300 PL | Instruction Manual - Page 190
Wh / 4,900 mAh • Dimensions (W x H x D): 38.2 x 43.5 x 70.5 mm (1.5 x 1.7 x 2.8 in.) • Weight: 220 g (7.8 oz) Weight and dimensions are approximate. Errors and omissions excepted. The information in this manual is verified as of October 2015. Subject to change without notice. - Canon EOS C300 PL | Instruction Manual - Page 191
48 Built-in backup battery 180 C Camera settings 124 CF card Inserting 43 Recording CF card slots 46, 126 Check marks 102, 132 CINEMA (preset custom picture 58 Clips Adding an $ mark/% code 85 E Edge monitor 100 EF lens mount 32 Exposure compensation 72 EXT 1/2 terminals 36 - Canon EOS C300 PL | Instruction Manual - Page 192
ISO speed 65 J Joystick 29 Joystick guide 129 K Key lock 53 L Language Deleting 150 Protecting 151 Viewing 149 PL lens mount 36 Playback Clips 127 Photos 149 Power Remote operation 49 Resetting all camcorder settings 160 Resolution (frame size 59 Reviewing a recording 105 Running mode - Canon EOS C300 PL | Instruction Manual - Page 193
42 Thumb rest 40 Time code 84 TIME CODE terminal 89, 90 Tripod 40 Troubleshooting 172 Turning the camcorder on/off 26 U User bit 87 User memo 96 V Vectorscope 100 Video configuration 59 Video output configuration 139 View assistance 58 Viewfinder 39 W Waveform monitor 99 WFT terminal - Canon EOS C300 PL | Instruction Manual - Page 194
CANON INFORMATION CENTER AT 855-CINE-EOS (855-246-3367) or on the internet at pro.usa.canon.com/support. You will be directed to the nearest service use of non-Canon accessories or failure to follow operating, maintenance or environmental instructions prescribed in Canon USA's user's manual; B. If - Canon EOS C300 PL | Instruction Manual - Page 195
by Canon Canada Inc. ('Canon Canada') with respect to (a) the Canon Cinema EOS product, and (b) the accessories for the Canon Cinema EOS Product service calls or service problems; D. If defects or damages are caused by service other than Canon Canada's factory service centers or authorized service - Canon EOS C300 PL | Instruction Manual - Page 196
, S DE RL DE CV 52 (55) 5249-4905 USA http://pro.usa.canon.com CANON U.S.A., INC. http://pro.usa.canon.com/support (855) CINE-EOS (855-246-3367) (USA only) Visit your local Canon Web site to download the latest version of this Instruction Manual. 0157W376 © CANON INC. 2016 PUB. DIE-0440-002
-
 1
1 -
 2
2 -
 3
3 -
 4
4 -
 5
5 -
 6
6 -
 7
7 -
8
-
9
-
10
-
11
-
12
-
13
-
14
-
15
-
16
-
17
-
18
-
19
-
20
-
21
-
22
-
23
-
24
-
25
-
26
-
27
-
28
-
29
-
30
-
31
-
32
-
33
-
34
-
35
-
36
-
37
-
38
-
39
-
40
-
41
-
42
-
43
-
44
-
45
-
46
-
47
-
48
-
49
-
50
-
51
-
52
-
53
-
54
-
55
-
56
-
57
-
58
-
59
-
60
-
61
-
62
-
63
-
64
-
65
-
66
-
67
-
68
-
69
-
70
-
71
-
72
-
73
-
74
-
75
-
76
-
77
-
78
-
79
-
80
-
81
-
82
-
83
-
84
-
85
-
86
-
87
-
88
-
89
-
90
-
91
-
92
-
93
-
94
-
95
-
96
-
97
-
98
-
99
-
100
-
101
-
102
-
103
-
104
-
105
-
106
-
107
-
108
-
109
-
110
-
111
-
112
-
113
-
114
-
115
-
116
-
117
-
118
-
119
-
120
-
121
-
122
-
123
-
124
-
125
-
126
-
127
-
128
-
129
-
130
-
131
-
132
-
133
-
134
-
135
-
136
-
137
-
138
-
139
-
140
-
141
-
142
-
143
-
144
-
145
-
146
-
147
-
148
-
149
-
150
-
151
-
152
-
153
-
154
-
155
-
156
-
157
-
158
-
159
-
160
-
161
-
162
-
163
-
164
-
165
-
166
-
167
-
168
-
169
-
170
-
171
-
172
-
173
-
174
-
175
-
176
-
177
-
178
-
179
-
180
-
181
-
182
-
183
-
184
-
185
-
186
-
187
-
188
-
189
-
190
-
191
-
192
-
193
-
194
-
195
-
196
 |
 |

PUB. DIE-0440-002
Instruction Manual
HD Camcorder
nual