Canon HF10 VIXIA HF10/VIXIA HF100 Instruction Manual - Page 85
Connecting, Recording
 |
UPC - 013803091991
View all Canon HF10 manuals
Add to My Manuals
Save this manual to your list of manuals |
Page 85 highlights
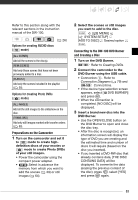
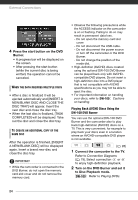
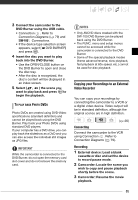
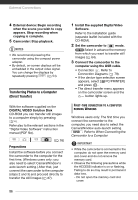
3 Connect the camcorder to the DVD Burner using the USB cable. • Connection . Refer to Connection Diagrams ( 79) and DW-100 Connections. • If the device type selection screen appears, select [ DVD BURNER] and press . 4 Insert the disc you want to play back into the DVD Burner. • Use the OPEN/CLOSE button on the DVD Burner to open and close the disc tray. • After the disc is recognized, the disc's content will be displayed in an index screen. 5 Select ( , ) the scene you want to play back and press to begin the playback. TO PLAY BACK PHOTO DVDS Photo DVDs are created using DVD-Video specifications (standard definition) and cannot be played back using the DVD Burner. Play back your Photo DVDs using standard DVD players. If your computer has a DVD drive, you can play back the slideshow as a DVD and you can also access the individual still images as JPG files. IMPORTANT While the camcorder is connected to the DVD Burner, do not open the memory card slot cover and do not remove the memory card. NOTES • Only AVCHD discs created with the DW-100 DVD Burner can be played back using the DVD Burner. • The FUNC. menu and setup menus cannot be accessed while the camcorder is connected to the DVD Burner. • Some of the special playback modes (frame advance/reverse, slow playback, fast playback at 60x speed, etc.) cannot be used for disc playback. Copying your Recordings to an External Video Recorder You can copy your recordings by connecting the camcorder to a VCR or a digital video device. Video output will be in standard definition, although the original scenes are in high definition. ( 26) Connecting Connect the camcorder to the VCR using Connection . Refer to Connection Diagrams ( 79). Recording 1 External device: Load a blank cassette or disc and set the device to record pause mode. 2 Camcorder: Locate the scene you wish to copy and pause playback shortly before the scene. 3 Camcorder: Resume the movie playback. 85
-
 1
1 -
2
-
3
-
4
-
5
-
6
-
7
-
8
-
9
-
10
-
11
-
12
-
13
-
14
-
15
-
16
-
17
-
18
-
19
-
20
-
21
-
22
-
23
-
24
-
25
-
26
-
27
-
28
-
29
-
30
-
31
-
32
-
33
-
34
-
35
-
36
-
37
-
38
-
39
-
40
-
41
-
42
-
43
-
44
-
45
-
46
-
47
-
48
-
49
-
50
-
51
-
52
-
53
-
54
-
55
-
56
-
57
-
58
-
59
-
60
-
61
-
62
-
63
-
64
-
65
-
66
-
67
-
68
-
69
-
70
-
71
-
72
-
73
-
74
-
75
-
76
-
77
-
78
-
79
-
 80
80 -
 81
81 -
 82
82 -
 83
83 -
 84
84 -
 85
85 -
 86
86 -
 87
87 -
 88
88 -
 89
89 -
 90
90 -
91
-
92
-
93
-
94
-
95
-
96
-
97
-
98
-
99
-
100
-
101
-
102
-
103
-
104
-
105
-
106
-
107
-
108
-
109
-
110
-
111
-
112
-
113
-
114
-
115
-
116
-
117
-
118
-
119
-
120
-
121
-
122
-
123
-
124
-
125
-
126
-
127
-
128
-
129
 |
 |