Canon HV30E Instruction Manual
Canon HV30E Manual
 |
View all Canon HV30E manuals
Add to My Manuals
Save this manual to your list of manuals |
Canon HV30E manual content summary:
- Canon HV30E | Instruction Manual - Page 1
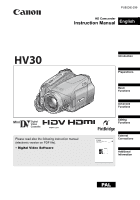
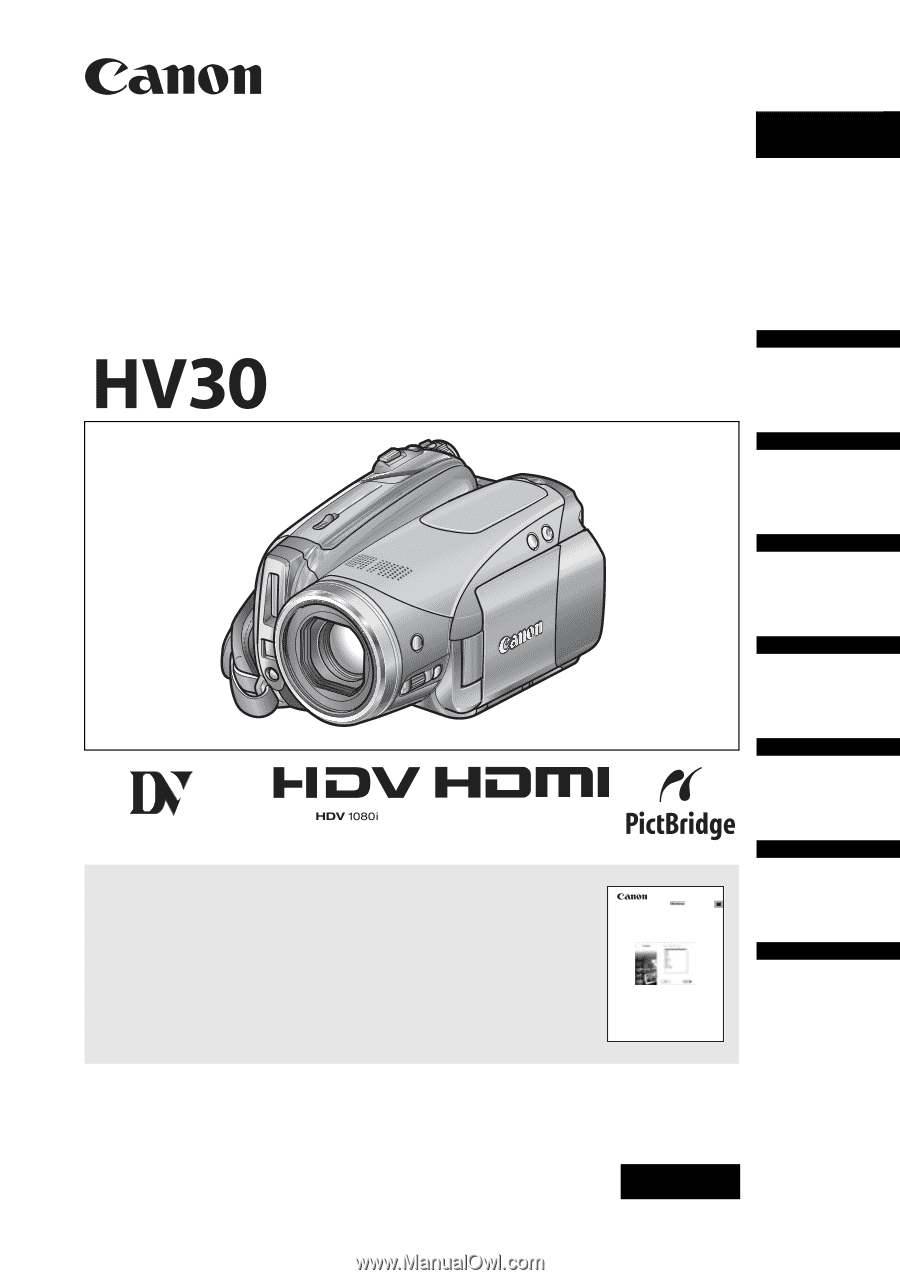
HD Camcorder Instruction Manual English Mini Digital Video Cassette Please read also the following instruction manual (electronic version on PDF file). • Digital Video Software Introduction Preparations Basic Functions Advanced Functions Editing Functions Digital Video Software Instruction - Canon HV30E | Instruction Manual - Page 2
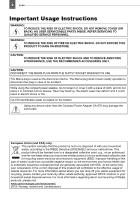
Instructions WARNING! TO REDUCE THE RISK OF ELECTRIC SHOCK, DO NOT REMOVE COVER (OR BACK). NO USER SERVICEABLE PARTS INSIDE. REFER SERVICING TO QUALIFIED SERVICE damage the camcorder. European will service. For more information regarding return and recycling of WEEE products, please visit www.canon - Canon HV30E | Instruction Manual - Page 3
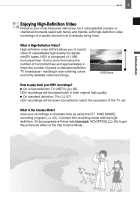
recordings? On a high-definition TV (HDTV) ( 66) HDV recordings will be played back in their original high quality. On standard definition TVs ( 67) HDV recordings will be down-converted to match the resolution of the TV set. What is the Cinema Mode? Give your recordings a cinematic look by using - Canon HV30E | Instruction Manual - Page 4
of contents Introduction Enjoying High-Definition Video 3 About this Manual 7 Getting to Know the Camcorder Supplied Accessories 9 Components Guide 10 Screen Displays 13 Preparations Getting Started Charging the Battery Pack 16 Inserting and Removing a Tape 18 Inserting and Removing a Memory - Canon HV30E | Instruction Manual - Page 5
Analog/Digital Conversion 72 Connecting to a Computer PC Connection Diagrams 74 Transferring Video Recordings 75 Transferring Still Images - Direct Transfer 76 Transfer Orders 77 Connecting to a Printer Printing Still Images - Direct Print 78 Selecting the Print Settings 79 Trimming Settings - Canon HV30E | Instruction Manual - Page 6
Trouble? Troubleshooting 83 List of Messages 87 Do's and Don'ts Handling Precautions 90 Maintenance/Others 93 Cleaning the Video Heads 93 Using the Camcorder States and other countries. • is a trademark. • HDV and the HDV logo are trademarks of Sony Corporation and Victor Company of Japan - Canon HV30E | Instruction Manual - Page 7
Thank you for purchasing the Canon HV30. Please read this manual carefully before you use the camcorder and retain it for future reference. Should your camcorder fail to operate correctly, refer to the Troubleshooting table ( 83). Conventions Used in the Manual IMPORTANT: Precautions related to the - Canon HV30E | Instruction Manual - Page 8
to the joystick change according to the operation mode and the camcorder's settings. Press ( ) to display/hide the joystick guide to remind you of the joystick's functions. When the guide contains multiple `pages´, [NEXT] and the page number icon ( ) will appear at the bottom position. Push the - Canon HV30E | Instruction Manual - Page 9
Component STV-250N Stereo Video IFC-300PCU Cable Cable USB Cable DIGITAL VIDEO SOLUTION DISK Software CD-ROM1 Red • Green • Blue plugs Yellow • Red • White plugs SS-900 Shoulder Strap2 Introduction 1 Includes the electronic version of the Digital Video Software instruction manual on PDF file - Canon HV30E | Instruction Manual - Page 10
10 Getting to Know the Camcorder Components Guide Left side view Right side view Front view FOCUS lever ( ( 25)/ CHARGE indicator ( 16) Memory card slot ( 18) / (tape/card) switch ( 8) Mode switch ( 43) Terminal cover MIC (microphone) terminal ( 60) AV terminal ( 65)/ (headphones) terminal ( 28) - Canon HV30E | Instruction Manual - Page 11
to Know the Camcorder 11 LCD screen ( 20) Dioptric adjustment lever ( 19) Viewfinder ( 19) Terminal cover START/STOP button ( 24) switch ( 8) Power indicator ( 8) Joystick ( 8) FUNC. button ( 21, 33) RESET button ( 83) Serial number/Battery attachment unit ( 16) DC IN terminal ( 16) HDV/DV terminal - Canon HV30E | Instruction Manual - Page 12
12 Getting to Know the Camcorder Wireless Controller WL-D87 START/ STOP PHOTO ZOOM CARD DATE SEARCH REW PLAY FF STOP PAUSE SLOW ZERO SET MEMORY DISP. TV SCREEN WIRELESS CONTROLLER WL-D87 START/STOP button ( 24) CARD -/+ buttons ( 31) DATE SEARCH / buttons ( 30) REW button ( 27) -/ - Canon HV30E | Instruction Manual - Page 13
Image effect ( 50) Digital effects ( 61) Still image quality/size (simultaneous recording) ( 52) Microphone attenuator ( 59) Self timer ( 58) Recording reminder Instant AF ( 35)/Manual focus ( 47) Recording standard (HDV or DV) ( 36) DV recording mode ( 37) Tape operation Time code (hours - Canon HV30E | Instruction Manual - Page 14
will be able to record on the tape the number of minutes that appears on the videocassette's label (for example, 85 minutes). Remaining battery charge • When " " starts flashing in red, replace the battery under which the camcorder and the battery pack are used, the actual battery charge may not be - Canon HV30E | Instruction Manual - Page 15
Playing Movies Viewing Still Images Getting to Know the Camcorder 15 Tape operation Time code (hours : minutes : seconds : frames) Remaining tape Data code ( 56) Search function display END SEARCH ( 30)/ DATE SEARCH ( 30) Quality/size for capturing still images ( 52) Audio level indicator ( 59) - Canon HV30E | Instruction Manual - Page 16
pack. • When the compact power adapter is connected, even if a battery is attached its power will not be consumed. ONCE THE BATTERY PACK IS FULLY CHARGED 1 Disconnect the compact power adapter from the camcorder. 2 Unplug the power cord from the power outlet and the compact power adapter. TO REMOVE - Canon HV30E | Instruction Manual - Page 17
cold places, the effective usage time of the battery will decrease. We recommend that you prepare battery packs 2 to 3 times longer than you depending on the actual charging, recording or playback conditions. Battery Pack Charging Time HDV Maximum Recording Time Viewfinder LCD [NORMAL] LCD [BRIGHT] - Canon HV30E | Instruction Manual - Page 18
with the logo. To record in HDV standard we recommend using tapes specifically designed for high definition. IMPORTANT cassette compartment cover. NOTES If the camcorder is connected to a power source, cassettes can be inserted/removed even if the switch is set to . 1 Slide OPEN/EJECT fully - Canon HV30E | Instruction Manual - Page 19
the battery holder. 2 Place the lithium button battery with the + side facing up. 3 Insert the battery holder. Using the Wireless Controller Preparations 1 Turn on the camcorder. The lens cover will open not work, check that [WL.REMOTE] is not set to [OFF ] ( 42). Otherwise, replace the battery. - Canon HV30E | Instruction Manual - Page 20
seconds. Repeat this action to toggle between the normal and bright settings. NOTES This setting does not affect the brightness of the recording or the viewfinder screen. Using the bright setting will shorten the effective usage time of the battery pack. You can also adjust the brightness of the LCD - Canon HV30E | Instruction Manual - Page 21
camcorder's functions can be adjusted from the menus that open after pressing the FUNC. button ( FUNC. ). For details about the available menu options and settings With some settings you will need to press ( ) and make further selections. Follow the additional operation guides that will appear on 1 - Canon HV30E | Instruction Manual - Page 22
time displayed on the screen. NOTES If you changed the language by mistake, follow the mark next to the menu item to change the setting. The displays and that appear in some menu screens refer to the name of buttons on the camcorder and will not change, regardless of the language selected. - Canon HV30E | Instruction Manual - Page 23
close the menu. IMPORTANT If you do not use the camcorder for about 3 months, the built-in rechargeable lithium battery may discharge completely and the date and time setting may be lost. In such case, recharge the built-in lithium battery ( 92) and set the time zone, date and time again. You can - Canon HV30E | Instruction Manual - Page 24
first to check if the camcorder operates correctly. If necessary, clean the video heads ( 93). ( 8) 1 Holding the lock button pressed down, set the switch to CAMERA. 2 Move the / switch to (tape). If necessary, you can change the recording standard (HDV or DV) ( 36). 3 Press START - Canon HV30E | Instruction Manual - Page 25
malfunction. About the Power Save mode: To save power when the camcorder is powered by a battery pack, the camcorder will automatically shut off if left without to initialize it with this camcorder ( 64). ( 8) 1 Holding the lock button pressed down, set the switch to CAMERA. 2 Move the / switch - Canon HV30E | Instruction Manual - Page 26
. The zoom speed with these buttons will be the same as with the camcorder (when one of the fixed zoom speed levels is selected) or fixed at [ SPEED 3] (when [ VARIABLE] is selected). When set to [ VARIABLE], the zoom speed will be faster in the record pause mode. Keep at least 1 m away from the - Canon HV30E | Instruction Manual - Page 27
NOTES You can display the date and time of the recording and other camcorder data registered when the recording was made ( 56). During some special playback modes, you may notice some video problems (blocky video artifacts, banding, etc.) in the playback picture. During playback, you may notice some - Canon HV30E | Instruction Manual - Page 28
tape and video heads, the camcorder will enter the stop mode ( ) if left in playback pause ( ) mode for 4 minutes 30 seconds. To resume the playback press / . Adjusting the Volume: Speaker and Headphones The camcorder plays 8) PLAY/OUT SETUP2 ( 8) Default value 1 If the joystick guide does not - Canon HV30E | Instruction Manual - Page 29
the camcorder rewinds/fast forwards the tape. • The tape stops at or near the zero mark, disappears and the correct time code will be displayed again. NOTES If there are blank sections between recordings or sections recorded in different standards (HDV/DV) on the same tape, the zero set memory - Canon HV30E | Instruction Manual - Page 30
"END SEARCH" appears. • The camcorder rewinds/fast forwards the tape, plays back the last few seconds of the recording and stops the tape. • To cancel the search press . If there are sections recorded in different standards (HDV/DV) on the same tape, the date search may not work correctly. NOTES - Canon HV30E | Instruction Manual - Page 31
down, set the switch to PLAY. 2 camcorder. - Do not change the position of the / switch or the operating mode. The following may not be displayed correctly. - Images not recorded with this camcorder through the still images even if the joystick guide above does not appear on the screen. Push - Canon HV30E | Instruction Manual - Page 32
and display the image. You can press ( ) again to hide the joystick guide. Magnifying the Playback Image During playback, movies and still images can be magnified toward T. To reduce the magnification, move the zoom lever toward W. • will appear for images that cannot be enlarged. 2 Select ( , ) the - Canon HV30E | Instruction Manual - Page 33
Still image simultaneous recording ( 52) Advanced Functions Mode switch: [ AUTO], [ DAYLIGHT], [ SHADE], [ CLOUDY], [ TUNGSTEN], [ FLUORESCENT], [ FLUORESCENT H], [ SET] Size: When [HD STANDARD] is set to one of the widescreen (16:9) modes, [ HDV], [ HDV(PF25)] or [ DV(WIDE)]: [ STILL I.REC - Canon HV30E | Instruction Manual - Page 34
you can continue to select the still images for which you want to set print orders. [CANCEL], [EXECUTE] TRANSFER ORDER ( 77) Still image capturing ( 52) Recordings made in HDV ([ HDV] or [ HDV(PF25)]): [ LW S.FINE/1920x1080], [ LW FINE/1920x1080], [ LW NORMAL/1920x1080] Recordings made in - Canon HV30E | Instruction Manual - Page 35
speeds down to 1/25 (1/12 in mode or in with cinema effect [ HDV(PF25)]). : Set the flash mode to (flash off). If a trailing afterimage appears, set the slow shutter to [ OFF]. If (camcorder shake warning) appears, we recommend stabilizing the camcorder, for example, by mounting it on - Canon HV30E | Instruction Manual - Page 36
made in different video standards on the same tape. During the playback of a recording made in [ HDV(PF25)], will appear on the screen (not ). Playing back a widescreen recording: TV sets compatible with the WSS system will automatically switch to wide (16:9) mode. Otherwise, change the - Canon HV30E | Instruction Manual - Page 37
point where the recording mode changes. When playing back in this camcorder tapes recorded in LP mode with other devices or vice versa, you may notice some problems in the playback picture or the sound may stop briefly. DV AUDIO DV [ 16bit], [ 12bit] When [HD STANDARD] is set to one of the - Canon HV30E | Instruction Manual - Page 38
Standard, Component Video Out, DV Out etc.) PLAY/OUT SETUP* * In mode, the following menu options are divided into two menus, [ PLAY/OUT SETUP1] and [ PLAY/OUT SETUP2]; this will be indicated with the respective menu icon. PLAYBACK STD [ AUTO], [ HDV], [ DV] Select the video standard to be - Canon HV30E | Instruction Manual - Page 39
Menu Options Lists 39 This setting will be unavailable while the camcorder is connected to an external device using the HDMI cable. OUTPUT CH The camcorder will retain the audio balance adjustment; however if you turn off the camcorder, [AUDIO OUT] will be reset to [ STEREO1]. AV/PHONES ( 28) [ - Canon HV30E | Instruction Manual - Page 40
40 Menu Options Lists This setting will be unavailable while the camcorder is connected to an external device using the HDMI cable. DV OUTPUT [ DV LOCKED], [ HDV/DV] You can select the video standard to use when connecting to an external device using the HDV/DV terminal. [ HDV/DV]: Switch - Canon HV30E | Instruction Manual - Page 41
order to allow you to focus manually more easily. Using the assist functions will not affect the recordings on the tape or memory card. AUDIO LEVEL ( will not affect the recordings on the tape or memory card. ASSIST FUNC. [ ON]*, [ OFF] When set to [ ON], the camcorder's on-screen displays will - Canon HV30E | Instruction Manual - Page 42
], [ENGLISH], [ESPAÑOL], [FRANÇAIS], [ITALIANO], [POLSKI], [ ], [TÜRKÇE], [ ], [ ], [ ], [ ], [ ], [ ], [ ], [ ], [] DEMO MODE [ ON], [ OFF] In order to save power when the camcorder is powered by a battery pack, it will automatically shut off if left without any operation for 5 minutes - Canon HV30E | Instruction Manual - Page 43
Programs ( 44) [ PROGRAM AE] [ SHUTTER-PRIO. AE] The camcorder sets the You select the shutter aperture and shutter speed. speed. [ APERTURE-PRIO . [ SNOW] Use this mode to record in bright ski resorts. It prevents the subject from being underexposed. [ CINE MODE]* Give a cinematic look to - Canon HV30E | Instruction Manual - Page 44
program, the camcorder adjusts various image settings to give a cinematic look to your recordings. POINTS TO CHECK Mode switch: ( 8) Mode switch: Set the recording program to [ CINE MODE], as described in the previous section. FUNC. MENU REC/IN SETUP HD STANDARD HDV(PF25) YES NOTES - Canon HV30E | Instruction Manual - Page 45
[8.0] NOTES When the mode switch is set to , the joystick guide will not appear. Do not change the position of the mode switch while recording, as the brightness of the image may change abruptly. When setting a numeric value (aperture or shutter speed), the number display will flash if the aperture - Canon HV30E | Instruction Manual - Page 46
actual range of values available for selection will vary depending on the initial zoom position modes. In such case, adjust the focus manually. [ SNOW]/[ BEACH] - The subject may become overexposed on cloudy days or in shaded places. Check the image on the screen. [ FIREWORKS] - To avoid camcorder - Canon HV30E | Instruction Manual - Page 47
mode. 1 If the joystick guide does not appear on screen, press ( ) to display it. 2 Push the joystick ( ) toward [EXP]. • If [EXP] does not appear on the joystick guide EXP] again will return the camcorder to automatic exposure. Manual Exposure Adjustment POINTS TO CHECK Manual Focus Adjustment - Canon HV30E | Instruction Manual - Page 48
for you to focus manually. 1 Press FOCUS . "MF" appears. 2 Adjust the focus as necessary with the FOCUS dial until the image appears focused. Pressing FOCUS again will return the camcorder to autofocus. NOTES The camcorder will automatically return to autofocus when you set the mode switch to - Canon HV30E | Instruction Manual - Page 49
will not affect the recordings on the tape or memory card. When you start recording, the assist functions will be canceled. You can also apply the peaking function (without the magnification) by setting . The camcorder will automatically return to autofocus when you set the mode switch to - Canon HV30E | Instruction Manual - Page 50
H]. If the color looks unnatural, adjust it using [ AUTO] or [ SET]. [ NEUTRAL] Tones down the contrast and color saturation. [ LOW SHARPENING] . Icon of the currently selected Image Effect POINTS TO CHECK ( 8) Mode switch: (except for the Special Scene recording programs) Options Default - Canon HV30E | Instruction Manual - Page 51
setting. NOTES Depending on the number of images on the memory card (Windows: more than 1,800 images; Macintosh: more than 1,000 images), you may not be able to download images to a computer. Try using a card reader. Connection to a PictBridge compatible printer will not work when the memory card - Canon HV30E | Instruction Manual - Page 52
You can record still images on the memory card even while the camcorder is set to mode. You can also capture simultaneously, as a still image on the memory card, the same picture you are recording as video on the tape. The size and quality of the still image can be selected. POINTS TO CHECK - Canon HV30E | Instruction Manual - Page 53
tape. A still image captured from a scene with lots of fast movement may be blurred. FUNC. ( 21) FUNC. Icon of the currently selected Light Metering Mode Light Metering Mode The camcorder measures the light reflected from the subject in order to calculate the optimal exposure settings. Depending - Canon HV30E | Instruction Manual - Page 54
on them. [ ON:CENTER] (Mode switch: *) In this mode, a single focusing frame appears in CAMERA SETUP NOTES In the [ FIREWORKS] recording program the focus priority is automatically set below. [ AEB] (Auto Exposure Bracketing) The camcorder records a still image in three different exposures (dark - Canon HV30E | Instruction Manual - Page 55
Mode FUNC. Desired option Other Functions Other Functions On-Screen Displays The camcorder keeps a data code containing the date and time and other camera will be tape-related displays1 On-screen displays + Data code2 on Æ Only on-screen displays on Æ Only tape-related displays (in stop mode - Canon HV30E | Instruction Manual - Page 56
code to be displayed when playing back movies. Options and time of the recording. [ CAMERA DATA] Displays the aperture (f-stop) and will appear also after recording a still image while reviewing it within the time set for the [REVIEW] option (or immediately after recording it, if [REVIEW] is set - Canon HV30E | Instruction Manual - Page 57
guide does not appear setting the flash mode is the same as described above. For details about attaching and using the flash, refer to the instruction manual of the VFL-1. The VFL-1 can also be used as a video light. When a video accessory is attached to the advanced accessory shoe, will - Canon HV30E | Instruction Manual - Page 58
or theaters. Self Timer POINTS TO CHECK Mini Video Light You can turn on the mini video light (assist lamp) at any time regardless of the recording program. ( 8) ( 8) : Set the camcorder in record pause mode. FUNC. ( 21) FUNC. MENU CAMERA SETUP Press LIGHT . • appears on the screen. • Press - Canon HV30E | Instruction Manual - Page 59
audio level indicator. To avoid changing the level by mistake, after you manually adjust the audio recording level be sure to press ( ) to hide the joystick guide. When the mode switch is set to , the camcorder will adjust the audio level automatically. We recommend using headphones ( 28) to check - Canon HV30E | Instruction Manual - Page 60
the camcorder an optional DM-50 Directional Stereo Microphone or any commercially available microphone compatible with the advanced accessory shoe. For details, refer to the instruction manual of the microphone. When a video accessory is attached to the advanced accessory shoe, will appear - Canon HV30E | Instruction Manual - Page 61
you apply a fader, not only the picture but also the sound will fade in or out. When you apply an effect, the sound will be recorded normally. The camcorder retains the setting last used even if you turn off the digital effects or change the recording program. FUNC. Icon of the currently selected - Canon HV30E | Instruction Manual - Page 62
, then press / to fade out and pause the playback. TO ACTIVATE AN EFFECT Push the joystick ( ) toward D.EFFECTS ... : ...while recording or in record pause mode. : ...during playback. : ...and then press PHOTO , first halfway to activate the autofocus and then fully to record the still image. - Canon HV30E | Instruction Manual - Page 63
within the time set for the [REVIEW] option (or immediately after recording it, if [REVIEW] is set to [ OFF]). ( 8) ERASE ALL IMAGES FUNC. YES Protecting Still Images You can protect still images from accidental erasure. ( 8) IMPORTANT Initializing the memory card ( 64) will permanently erase all - Canon HV30E | Instruction Manual - Page 64
Options FUNC. PROTECT Initialize all memory cards before using them with this camcorder. Press ( ) ( 8) [ PROTECT]: The image selection screen appears the image files will be erased and the memory card can be used without any problem. IMPORTANT Initializing the memory card will erase all - Canon HV30E | Instruction Manual - Page 65
refer also to the instruction manual of the connected device. AV/ Terminal Open the terminal cover to access. COMPONENT OUT Terminal The component video terminal is for video only. When you use connection type 1 do not forget the audio connections using the AV/ terminal. HDV/DV Terminal • Check - Canon HV30E | Instruction Manual - Page 66
Sets (HDTV) Terminal on the Camcorder 1 Output connection (Signal Flow Connecting Cable Terminal on the Connected Device ) to an HDTV with component video ) terminal. Input connection (Signal Flow ) from a TV or other digital video source with a DV (IEEE1394) output. CV-150F/CV-250F DV Cable - Canon HV30E | Instruction Manual - Page 67
or VCR 67 Standard Definition TV Sets Terminal on the Camcorder Connecting Cable Terminal on the Connected Device 2 Output connection (Signal Flow ) to a TV with a DV (IEEE1394) terminal. Input connection (Signal Flow ) from a TV or other digital video source with a DV (IEEE1394) output. CV - Canon HV30E | Instruction Manual - Page 68
of the video output in the [HDMI OUT] information display at the bottom of the PLAY/OUT SETUP2 menu screen in mode ( PLAY/OUT SETUP menu in other modes). - Correct operation cannot be guaranteed when connecting the camcorder to DVI monitors. - Some HDTVs have their HDCP digital content protection - Canon HV30E | Instruction Manual - Page 69
Recording on the Tape HDV HDV DV Standard Supported by the External Digital Device* [PLAYBACK STD] Setting HDV [ [ AUTO] or HDV] [ DV [ [ AUTO] or HDV] [ [ AUTO] or [ DV [ DV] [ [DV OUTPUT] Setting HDV/DV] DV LOCKED] HDV/DV] or DV LOCKED] * To output video in high definition verify - Canon HV30E | Instruction Manual - Page 70
cassette or disc and set the device to record pause mode. 3 This camcorder: Locate the scene you wish to copy and pause the playback shortly before the scene. When the connection is recognized " HDV/DV" will be displayed. When the video output starts, the display will change to " HDV-OUT" or " DV - Canon HV30E | Instruction Manual - Page 71
power adapter. Digital Video Dubbing You can input video from other digital video devices and record the input video on the tape in the camcorder. Video input will be recorded on the tape in the same standard of the original (HDV or DV). Connecting Connect the camcorder to the video input source - Canon HV30E | Instruction Manual - Page 72
Verify that the DV terminal on the external digital device is compatible with the DV standard. Converting the Video FUNC. ( 21) 1 Set [AV DV] to [ ON] ( 37). 2 Start the playback on the video source and the recording on the recording device. Refer to the instruction manuals of the connected devices. - Canon HV30E | Instruction Manual - Page 73
it is set to [ ON], you cannot connect video input signals to the camcorder using the HDV/DV terminal. NOTES We recommend powering the camcorder using the compact power adapter. You can also use the analog/digital conversion to transfer analog video recordings to a computer as digital video. The - Canon HV30E | Instruction Manual - Page 74
Connection Diagrams USB Terminal Open the LCD panel cover to access. HDV/DV Terminal • Check the type and orientation of the terminal and on the Camcorder 1 Output connection (Signal Flow USB port. Connecting Cable Terminal on the Connected Device ) to a PC or PictBridge compatible printer with - Canon HV30E | Instruction Manual - Page 75
" HDV/DV" will be displayed. 4 Start the video editing software. Refer to the instruction manual of the editing software. IMPORTANT The video transfer may not work correctly depending on the software and the specifications/settings of your computer. If the computer freezes while the camcorder - Canon HV30E | Instruction Manual - Page 76
on, you will only need to connect the camcorder to the computer to transfer images. 1 Install the supplied Digital Video Software. See Installing the Digital Video Software in the Digital Video Software instruction manual (electronic version on PDF file). 2 Set the camcorder to mode. 3 Connect the - Canon HV30E | Instruction Manual - Page 77
You can mark the still images you want to transfer to the computer as transfer orders. You can set transfer orders for up to 998 still images. Selecting Still Images to Transfer (Transfer Order) Set the transfer orders in advance, before connecting the camcorder to the computer using the USB cable - Canon HV30E | Instruction Manual - Page 78
if does not appear, the camcorder is not correctly connected to the printer. In such case, disconnect the USB cable and turn off the camcorder and the printer. After a short while, turn them on again, set the camcorder to mode and restore the connection. NOTES will appear for images that cannot be - Canon HV30E | Instruction Manual - Page 79
powering the camcorder using the compact power adapter. Refer also to the printer's instruction manual. Printing with the Button (Print/Share) You can print a still image without changing the settings simply by pressing . Options [PAPER] [ PAPER SIZE] Available paper sizes vary depending - Canon HV30E | Instruction Manual - Page 80
printing. Refer also to the printer's instruction manual for details. - If the error still persists and printing does not restart, disconnect the USB cable and turn off the camcorder and the printer. After a short while, turn them on again, set the camcorder to mode and restore the connection. WHEN - Canon HV30E | Instruction Manual - Page 81
the camcorder or the printer. - Do not change the position of the / switch. - Do not disconnect the USB cable. - Do not remove the memory card. If the message "BUSY." does not disappear, disconnect the USB cable and restore the connection after a short while. Trimming Settings Set the paper size and - Canon HV30E | Instruction Manual - Page 82
( ). The remaining images will be printed. Printing cannot be restarted when the print order settings have been changed or if you deleted a still image with print order settings. Erasing All Print Orders PRINT ( 8) FUNC. ( 21) FUNC. ( 21) 1 Connect the camcorder to the printer using the USB - Canon HV30E | Instruction Manual - Page 83
Information Trouble? Troubleshooting If you have a problem with your camcorder, refer to this checklist. Consult your dealer or a Canon Service Center if the problem persists. Power Source Problem Solution • Camcorder will not turn on. Battery pack is exhausted. Replace or charge the battery pack - Canon HV30E | Instruction Manual - Page 84
. may seem slightly warped. Recording Problem Solution Image will not appear on the Set the camcorder to . 24 screen. "SET THE TIME ZONE, DATE Set the time zone, date and time. 22 AND TIME" appears on the screen. Recharge the built-in lithium battery and set the time zone, date 92 and - Canon HV30E | Instruction Manual - Page 85
. Adjust the volume with the joystick 28 and joystick guide in mode. When playing back a tape Video heads are dirty. Clean the video heads. 93 recorded in HDV standard the playback is jerky or the sound stutters on and off. Image will not appear on the Set [AV DV] to [OFF]. 37 TV screen - Canon HV30E | Instruction Manual - Page 86
them on again, set the and printer are correctly camcorder to mode and restore the connection. connected. Editing Problem Solution Cannot record with this Set [AV DV] to [OFF]. 37 camcorder video input from an Wrong signal standard. Refer also to the instruction manual of - external - Canon HV30E | Instruction Manual - Page 87
standard not supported by this camcorder. INPUT SIGNAL NOT SUPPORTED The digital device connected with the DV cable is incompatible with - the camcorder. PLAYBACK STD LOCKED Current camcorder settings do not match the HDV/DV standard of 38 INCOMPATIBLE VIDEO the video input signal. Change - Canon HV30E | Instruction Manual - Page 88
panel, refer to the printer's instruction manual. Message PAPER ERROR NO PAPER PAPER JAM INK ERROR NO INK LOW INK LEVEL INK ABSORBER FULL • FILE ERROR • CANNOT PRINT! Explanation/Solution There is a problem with the paper. The paper is not correctly loaded or the paper size is wrong. Alternatively - Canon HV30E | Instruction Manual - Page 89
style after you set the trimming settings. PRINTER ERROR Cancel printing. Turn the printer off and then on again. Check the printer status. If the error still persists, refer to the printer's instruction manual and contact the appropriate customer support center or service center. HARDWARE ERROR - Canon HV30E | Instruction Manual - Page 90
the above should get into the camcorder it may damage the camcorder and/or the lens. Be careful of heat generated by lighting equipment. Do not disassemble the camcorder. If the camcorder does not function properly, consult qualified service personnel. Handle the camcorder with care. Do not subject - Canon HV30E | Instruction Manual - Page 91
between charged and uncharged battery packs. Back side of the battery pack Terminal cover attached Charged terminals with a cotton swab after about 10 times of removing and reinserting the cassette. The memory function is not supported by the camcorder. Protecting Tapes from Accidental Erasure To - Canon HV30E | Instruction Manual - Page 92
private data. Lithium Button Battery Built-in Rechargeable Lithium Battery The camcorder has a built-in rechargeable lithium battery to keep the date/time and other settings. The built-in lithium battery is recharged while you use the camcorder, however, it will become totally discharged if - Canon HV30E | Instruction Manual - Page 93
problems (blocky video artifacts, banding, etc.). - When playing back a tape recorded in HDV standard the playback is jerky or the sound stutters on and off. To maintain the best picture quality, we recommend using cassettes designed for high definition recording (Canon Digital Videocassette HDVM - Canon HV30E | Instruction Manual - Page 94
camcorder and to charge battery packs in any country with power supply between 100 and 240 V AC, 50/60 Hz. Consult the Canon Service Center for information on plug adapters for overseas use. Playback on a TV Screen You can only play back your recordings on TVs compatible with the PAL system. The PAL - Canon HV30E | Instruction Manual - Page 95
BP-2L14, NB-2LH, BP-2L24H Battery Pack CA-570 Compact Power Adapter Additional Information TL-H43 Tele-converter FS-43U II Filter Set SC-2000 Soft Carrying Case VFL-1 Video Flash Light VL-3 Video Light DM-50 Directional Stereo Microphone Stereo Microphone (commercially available) STV-250N Stereo - Canon HV30E | Instruction Manual - Page 96
for charging the battery packs. Battery Pack NB-2LH BP-2L13 BP-2L14 BP-2L24H Charging Time* 90 min. 175 min. 170 min. 330 min. * Charging time varies according to the charging condition. TL-H43 Tele-converter This Tele-converter lens increases the focal length of the camcorder lens by a factor - Canon HV30E | Instruction Manual - Page 97
-43U II Filter Set Neutral density and MC protector filters help you to control difficult lighting conditions. General Information 97 VFL-1 Video Flash Light This video flash light allows you to record still images and movies even at night or in dark places. It attaches to the camcorder's advanced - Canon HV30E | Instruction Manual - Page 98
for active shooting. SC-2000 Soft Carrying Case A handy camcorder bag with padded compartments and plenty of space for accessories. This mark identifies genuine Canon video accessories. When you use Canon video equipment, we recommend Canon-brand accessories or products bearing the same mark. - Canon HV30E | Instruction Manual - Page 99
Stabilization Optical 1 You can play back with this camcorder tapes recorded in HDV standard with a Canon XL H1, XH G1 or XH A1 (both, 50i and 25F mode). Video shot with the [ HDV(PF25)] standard will be recorded on the tape as 50i. Memory Card Recording Media Size of Still Images miniSD - Canon HV30E | Instruction Manual - Page 100
mm stereo minijack -57 dBV (with 600 ohm microphone)/5 kohms or more Power/Others Power supply (rated) Power consumption (HDV, AF on) Operating temperature Dimensions (W x H x D) Weight (camcorder body only) 7.4 V DC (battery pack), 8.4 V DC (compact power adapter) 4.3 W (viewfinder), 4.5 W (LCD - Canon HV30E | Instruction Manual - Page 101
code 55 Date and time 23 Date search 30 Daylight saving time 22 Digital effects 61 Digital video input (DV dubbing 71 Digital zoom 35 Direct print 78 Direct transfer 76 Drive mode 54 DV audio mode 37 DV recording mode 37 E End Search 30 Erasing still images 63 Error messages 87 F File - Canon HV30E | Instruction Manual - Page 102
51 Still image size 51 Sunset (recording program 43 T Tape recording standards - HDV/DV . . .36 Telephoto 26 Time zone 22 Transfer order 77 Transferring still images 76 Tripod 25 Troubleshooting 83 Tv (recording program 44 U USB terminal 74 V Video heads, cleaning 93 Videocassettes - Canon HV30E | Instruction Manual - Page 103
W White balance 49 Wide angle 26 Wide TV (16:9 38 Wind screen 37 Wireless controller 19 Z Zero set memory 29 Zoom 26 Zoom speed 35 General Information 103 Additional Information - Canon HV30E | Instruction Manual - Page 104
Company Ltd 19/F., The Metropolis Tower, 10 Metropolis Drive, Hunghom, Kowloon, Hong Kong Canon Latin America, Inc. Sales & Enquiries: 703 Waterford Way Suite 400 Miami, FL 33126 USA The information on this manual is verified as of 1 February 2008. 0115W407 PUB.DIE-299 Printed on 70% reused
-
 1
1 -
 2
2 -
 3
3 -
 4
4 -
 5
5 -
 6
6 -
 7
7 -
8
-
9
-
10
-
11
-
12
-
13
-
14
-
15
-
16
-
17
-
18
-
19
-
20
-
21
-
22
-
23
-
24
-
25
-
26
-
27
-
28
-
29
-
30
-
31
-
32
-
33
-
34
-
35
-
36
-
37
-
38
-
39
-
40
-
41
-
42
-
43
-
44
-
45
-
46
-
47
-
48
-
49
-
50
-
51
-
52
-
53
-
54
-
55
-
56
-
57
-
58
-
59
-
60
-
61
-
62
-
63
-
64
-
65
-
66
-
67
-
68
-
69
-
70
-
71
-
72
-
73
-
74
-
75
-
76
-
77
-
78
-
79
-
80
-
81
-
82
-
83
-
84
-
85
-
86
-
87
-
88
-
89
-
90
-
91
-
92
-
93
-
94
-
95
-
96
-
97
-
98
-
99
-
100
-
101
-
102
-
103
-
104
 |
 |
PUB.DIE-299
PAL
HD Camcorder
Instruction Manual
Please read also the following instruction manual
(electronic version on PDF file).
• Digital Video Software
Digital Video Software
Version 23
Instruction Manual
English
Introduction
Preparations
Basic
Functions
Advanced
Functions
Editing
Functions
External
Connections
Additional
Information
Mini
Digital
Video
Cassette