Canon MF3240 imageCLASS MF3200 Series Basic Guide
Canon MF3240 - ImageCLASS B/W Laser Manual
 |
UPC - 013803059915
View all Canon MF3240 manuals
Add to My Manuals
Save this manual to your list of manuals |
Canon MF3240 manual content summary:
- Canon MF3240 | imageCLASS MF3200 Series Basic Guide - Page 1
Document Handling Print Media Sending Faxes Receiving Faxes Copying Printing Scanning PC Faxing Maintenance Troubleshooting Machine Settings Appendix Please read this guide before operating this equipment. After you finish reading this guide, store it in a safe place for future reference. ENG - Canon MF3240 | imageCLASS MF3200 Series Basic Guide - Page 2
Faxing Features Software Guide CD-ROM CD-ROM Indicates the manual is supplied in PDF format in the accompanying CD-ROM. ● To view the manuals in PDF format, Adobe Reader/Acrobat Reader/Acrobat is required. If Adobe Reader/Acrobat Reader/Acrobat is not installed on your system, please download it - Canon MF3240 | imageCLASS MF3200 Series Basic Guide - Page 3
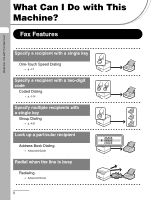
a recipient with a two-digit code Coded Dialing → p. 4-14 Specify multiple recipients with a single key Group Dialing → p. 4-21 Look up a particular recipient Address Book Dialing → Advanced Guide Redial when the line is busy Redialing → Advanced - Canon MF3240 | imageCLASS MF3200 Series Basic Guide - Page 4
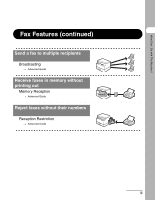
What Can I Do with This Machine? Fax Features (continued) Send a fax to multiple recipients Broadcasting → Advanced Guide Receive faxes in memory without printing out Memory Reception → Advanced Guide Reject faxes without their numbers Reception Restriction → Advanced Guide iii - Canon MF3240 | imageCLASS MF3200 Series Basic Guide - Page 5
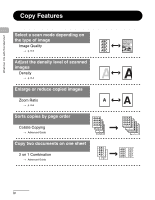
ABC ABC → p. 6-3 ABC Adjust the density level of scanned images Density → p. 6-4 Enlarge or reduce copied images Zoom Ratio A → p. 6-6 Sorts copies by page order Collate Copying → Advanced Guide AAAA ABABABAB ABACBACBACBC ABBACCCBB1ADDDCCC2BBADDDCCCBBDDDCCCDDD DD3 DD 4 Copy two documents - Canon MF3240 | imageCLASS MF3200 Series Basic Guide - Page 6
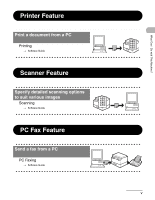
What Can I Do with This Machine? Printer Feature Print a document from a PC Printing → Software Guide ABC ABC ABC ABC Scanner Feature Specify detailed scanning options to suit various images ABC ABC Scanning ABC ABC → Software Guide PC Fax Feature Send a fax from a PC PC Faxing → - Canon MF3240 | imageCLASS MF3200 Series Basic Guide - Page 7
iv Printer Feature v Scanner Feature v PC Fax Feature v Contents vi Preface xi Important Safety Instructions xi Handling and Maintenance xi Location xii Power Supply xiii Customer Support (U.S.A xiv Customer Support (Canada xiv How to Use This Guide xv Symbols Used in This Manual xv - Canon MF3240 | imageCLASS MF3200 Series Basic Guide - Page 8
What Can I Do with This Machine? Users in Canada xxiii Pre-Installation Requirements for Canon Facsimile Equipment xxiii Notice xxiv Laser Safety xxvi CDRH Regulations xxvi 1 Before Using the Machine 1-1 Machine Components 1-1 Operation Panel 1-3 Main Operation Panel 1-3 Facsimile - Canon MF3240 | imageCLASS MF3200 Series Basic Guide - Page 9
Paper Guidelines 3-3 Loading Paper 3-4 Into the Multi-Purpose Feeder 3-4 Setting Paper Size and Type 3-7 Selecting the Paper Output Area 3-10 Paper Type and Paper Output Area 3-11 Face Down Paper Output Area 3-12 Face Up Paper Output Area 3-13 4 Sending Faxes 4-1 Scan Settings 4-3 Image - Canon MF3240 | imageCLASS MF3200 Series Basic Guide - Page 10
10-6 Recycling Used Cartridges 10-9 The Clean Earth Campaign 10-9 U.S.A. PROGRAM 10-11 CANADA PROGRAM-CANADA PROGRAMME ......10-14 Transporting the Machine 10-16 11 Troubleshooting 11-1 Clearing Paper Jams 11-1 LCD Messages 11-7 Common 11-7 Facsimile 11-11 Printer 11-14 Error Codes - Canon MF3240 | imageCLASS MF3200 Series Basic Guide - Page 11
-6 TIMER SETTINGS 12-7 FAX SETTINGS 12-7 BROADCAST 12-10 ADDRESS BOOK SET 12-11 REPORT SETTINGS 12-11 13 Appendix 13-1 Specifications 13-1 General 13-1 Copier 13-2 Printer 13-3 Facsimile 13-3 Telephone 13-5 Index 13-6 x - Canon MF3240 | imageCLASS MF3200 Series Basic Guide - Page 12
Center, or a Canon Authorized Service Facility. Handling and Maintenance - Follow all warnings and instructions marked on the machine. - Do not subject the machine to strong physical shocks or vibrations. - Always unplug the machine before moving or cleaning it. - To avoid paper jams, never unplug - Canon MF3240 | imageCLASS MF3200 Series Basic Guide - Page 13
. - If the machine exhibits a distinct change in performance, indicating a need for servicing. Location - Place the machine on a flat, stable, vibration-free surface that is strong enough to support its weight. - Place the machine in a cool, dry, clean, well ventilated place. - Make sure the area is - Canon MF3240 | imageCLASS MF3200 Series Basic Guide - Page 14
telephone line cord, and to avoid the expense of installing a new outlet. - Place the machine near a around the power outlet. Keep the area free so you can reach the outlet quickly. If the machine, unplug the power cord immediately. Contact Canon Customer Care Center. - Do not allow anything to - Canon MF3240 | imageCLASS MF3200 Series Basic Guide - Page 15
For step-by-step troubleshooting, e-mail technical support, the latest driver or document downloads, and answers to frequently asked questions, visit http://www.canon.ca/ - Automated step-by-step telephone support on most current products 24 hours, 7 days a week 1-800-652-2666 - Free live technical - Canon MF3240 | imageCLASS MF3200 Series Basic Guide - Page 16
Machine? How to Use This Guide Symbols Used in This Manual The following symbols are used throughout the manuals for the machine and indicate the Stop/Reset]. - Information in the LCD appears in angle brackets: . The numbers that point to the keys on the operation panel diagram correspond - Canon MF3240 | imageCLASS MF3200 Series Basic Guide - Page 17
What Can I Do with This Machine? Illustrations Used in This Manual Unless otherwise mentioned, illustrations used in this manual are those taken from the imageCLASS MF3240. When there is any difference between MF3240 and MF3241, it is clearly indicated in the text, e.g., "MF3240 Only." xvi - Canon MF3240 | imageCLASS MF3200 Series Basic Guide - Page 18
in any form or by any means, electronic, mechanical, magnetic, optical, chemical, manual, or otherwise, without the prior written permission of Canon Inc. Disclaimer The information in this document is subject to change without notice. CANON INC. MAKES NO WARRANTY OF ANY KIND WITH REGARD TO THIS - Canon MF3240 | imageCLASS MF3200 Series Basic Guide - Page 19
of the images scanned, printed or otherwise reproduced, you should consult in advance with your legal advisor for guidance. - Paper Money - Canon, the Canon logo, and imageCLASS are trademarks of Canon Inc. All other product and brand names are registered trademarks, trademarks or service - Canon MF3240 | imageCLASS MF3200 Series Basic Guide - Page 20
This Machine? Users in the U.S.A. Pre-Installation Requirements for Canon Facsimile Equipment A. Location Supply a suitable cause a fax error. This machine is not supported on Voice Over Internet Protocol (VOIP). C. Power Air conditioners, electric typewriters, copiers, and machines of this sort - Canon MF3240 | imageCLASS MF3200 Series Basic Guide - Page 21
described in this guide, disconnect the equipment from the telephone line and unplug the power cord. The telephone line should not be reconnected or the power cord plugged in until the problem is completely resolved. Users should contact Canon Authorized Service Facilities for servicing of equipment - Canon MF3240 | imageCLASS MF3200 Series Basic Guide - Page 22
to make changes in facilities and services which may affect the operation of this equipment. When such changes are necessary, the telephone company is required to give adequate prior notice to the user. FCC Notice imageCLASS MF3240: Model F189402 imageCLASS MF3241: Model F189402 This device complies - Canon MF3240 | imageCLASS MF3200 Series Basic Guide - Page 23
unless otherwise specified in this manual. If such changes or modifications should be made, you could be required to stop operation of the equipment. Canon U.S.A., Inc. One Canon Plaza, Lake Success, NY to program this information into the machine, follow the instructions in the Starter Guide. xxii - Canon MF3240 | imageCLASS MF3200 Series Basic Guide - Page 24
Do with This Machine? Users in Canada Pre-Installation Requirements for Canon Facsimile Equipment A. Location Supply a suitable table, cabinet grounded receptacle (Single or Duplex). It should be independent from copiers, heaters, air conditioners or any electric equipment that is thermostatically - Canon MF3240 | imageCLASS MF3200 Series Basic Guide - Page 25
of the local telecommunications company. The equipment must also be installed using an acceptable method of connection. The customer should be aware compliance with the above conditions may not prevent degradation of service in some situations. Repairs to certified equipment should be coordinated - Canon MF3240 | imageCLASS MF3200 Series Basic Guide - Page 26
of the Canadian Interference- Causing Equipment Regulations. Cet appareil numérique de la classe B respecte toutes les exigences du Règlement sur le matériel brouilleur du Canada de tous les appareils ne soit pas supérieure à 5. CANON CANADA INC. 1-800-263-1121 24 HOURS A DAY, SEVEN DAYS A WEEK xxv - Canon MF3240 | imageCLASS MF3200 Series Basic Guide - Page 27
Chapter 1 Subchapter J as a Class 1 laser product under the U.S. Department of Health and Human Services (DHHS) Radiation Performance Standard according than those specified in this manual may result in hazardous radiation exposure. The label is attached to the laser scanner machine inside the - Canon MF3240 | imageCLASS MF3200 Series Basic Guide - Page 28
What Can I Do with This Machine? xxvii - Canon MF3240 | imageCLASS MF3200 Series Basic Guide - Page 29
panel Controls the machine. D Output tray C Outputs printouts. E Front cover D Open this cover when installing the toner cartridge or clearing paper jams. E F Multi-purpose feeder F Feeds paper when you insert one by one manually. G G Paper cassette Holds the paper supply. 1-1 - Canon MF3240 | imageCLASS MF3200 Series Basic Guide - Page 30
cable. I External device jack Connect an external device. J USB port Connect the USB (Universal Serial Bus) cable. K Face up cover Open this cover when outputting paper face K up or clearing paper jams. L Power socket Connect the power cord. L M Extension cover M Protects - Canon MF3240 | imageCLASS MF3200 Series Basic Guide - Page 31
to return the machine to standby mode. D [SCAN] key J [Energy Saver] key Press to switch to Scan mode. Press to set or cancel Sleep mode manually. E Error indicator Flashes or lights when an error has occurred. The key lights green when Sleep mode is set, and goes off when the mode - Canon MF3240 | imageCLASS MF3200 Series Basic Guide - Page 32
the menu. Press to collate copies, or press to set 2 on 1 R [OK] key copying. Press to accept a set function or mode. N [Image Quality] key S [ ] key Press to select image quality for copy, fax, or Press to decrease the value for various scan. settings. Also press to see the previous item - Canon MF3240 | imageCLASS MF3200 Series Basic Guide - Page 33
Before Using the Machine Facsimile Operation Panel A BC ED A One-Touch Speed Dial keys D [Redial/Pause] key Press to use one-touch speed dialing (Pre- Press to redial the last dialed number when registered frequently used numbers or group fax is standing by, or press to insert a pause - Canon MF3240 | imageCLASS MF3200 Series Basic Guide - Page 34
A 12/31/2005 SAT 10:50 FaxOnly STANDARD B C A Date & Time B Receive mode C Image quality Scan Mode SCANNING MODE Copy Mode A B C 100% LTR TEXT 1 D E A Zoom ratio B Paper size C Quantity D Density E Image quality NOTE - When the machine is plugged in, the LCD displays - Canon MF3240 | imageCLASS MF3200 Series Basic Guide - Page 35
monochromatic electrophotographic printers and multi-function devices that may contain printer components" issued by ISO (International Organization for Standardization). Toner Cartridge name: Canon Cartridge X25 Model Name MF3240 MF3241 Supported Canon Genuine Cartridge Canon Cartridge X25 Print - Canon MF3240 | imageCLASS MF3200 Series Basic Guide - Page 36
Do not open the bag until you are ready to install the toner cartridge in the machine. ● Save the toner cartridge's protective bag in case you need to repack and transport the toner cartridge at a later date. ● Do not store the toner cartridge in a salty atmosphere or where there are corrosive gases - Canon MF3240 | imageCLASS MF3200 Series Basic Guide - Page 37
Before Using the Machine Timer Settings Setting Sleep Mode When the machine remains idle for a certain period of time, it automatically enters Sleep mode. 1 2 3 [OK] 1 Press [Additional Functions]. 2 Press [ ] or [ ] to select , then press [OK]. 3 Press [ ] or [ ] to select - Canon MF3240 | imageCLASS MF3200 Series Basic Guide - Page 38
Before Using the Machine 4 6 5 [OK] 4 Press [ ] or [ ] to select , then press [OK]. 5 Press [ ] or [ ] to select the desired interval, then press [OK]. You can set the interval from 3 to 30 minutes (in one-minute increments). You can also enter values with the numeric keys. 6 Press [Stop/ - Canon MF3240 | imageCLASS MF3200 Series Basic Guide - Page 39
press [Energy Saver] on the operation panel. - To enter Sleep mode manually, press [Energy Saver] on the operation panel. - The machine will the Error indicator flashes • no paper is loaded in the paper cassette • paper is loaded in the multi-purpose feeder • a paper jam occurs in the machine - The - Canon MF3240 | imageCLASS MF3200 Series Basic Guide - Page 40
Before Using the Machine Setting the Daylight Saving Time In some countries or areas, time is advanced throughout the summer season. This is called "Daylight Saving Time." 1 2 5 3 4 [OK] 1 Press [Additional Functions]. 2 Press [ ] or [ ] to select , then press [OK]. 3 Press [ - Canon MF3240 | imageCLASS MF3200 Series Basic Guide - Page 41
(35 mm)) Max. 8.5" × 11 3/4" (Max. 216 × 297 mm) Max. 4.4 lb (2 kg) 1 sheet * When copying a transparent document such as tracing paper or transparencies, use a piece of plain white paper to cover the document after placing it face-down on the platen glass. NOTE Do not place the document on the - Canon MF3240 | imageCLASS MF3200 Series Basic Guide - Page 42
Document Handling Scanning Area Make sure your document's text and graphics fall within the shaded area in the following diagram. Note that the margin widths listed are approximate and there may be slight variations in actual use. 0.04" (1 mm) 0.08" (2 mm) 0.04" (1 mm) 0.08" (2 mm) 2-2 - Canon MF3240 | imageCLASS MF3200 Series Basic Guide - Page 43
Document Handling Loading Documents 1 Lift up the platen glass cover. 2 Place your document face down. 2-3 - Canon MF3240 | imageCLASS MF3200 Series Basic Guide - Page 44
marks. If your document does not match any of the paper size marks, align the center of your document with the arrow mark. 4 Gently lower the platen glass cover. The document is ready for scanning. CAUTION - - Canon MF3240 | imageCLASS MF3200 Series Basic Guide - Page 45
18 to 32 lb bond (64 to 128 g/m2) Max. 250 sheets Max. 1 sheet Plain Paper, Plain Paper L, Heavy Paper, Heavy Paper H, Transparency NOTE The default paper size is LTR. If you use a different paper size, you must change the paper size settings. (See "Setting Paper Size and Type," on p. 3-7.) 3-1 - Canon MF3240 | imageCLASS MF3200 Series Basic Guide - Page 46
Print Media Printable Area The shaded area indicates the approximate printable area of LTR-size paper and envelope. 0.20" (5 mm) 0.20" (5 mm) 0.20" (5 mm) 0.20" (5 mm) 3-2 - Canon MF3240 | imageCLASS MF3200 Series Basic Guide - Page 47
until ready for use. Keep opened packs in their original packaging in a cool, dry location. ● Store paper at 64.4°F-75.2°F (18°C-24°C), 40%-60% relative humidity. ● Use only the transparencies designed for laser printers. Canon recommends you to use Canon type transparencies with this machine. 3-3 - Canon MF3240 | imageCLASS MF3200 Series Basic Guide - Page 48
sure to set the correct paper size in the printer driver. (See the Software Guide.) - When printing received documents, it is possible to feed paper only from the paper cassette. If paper is loaded into the multi-purpose feeder, appears. 1 Slide the paper guides to the mark of the - Canon MF3240 | imageCLASS MF3200 Series Basic Guide - Page 49
the multi-purpose feeder with the print side up. NOTE When you load paper with a logo on, position the paper with the print side up (logo side) and insert it so that the top of the paper feeds first in the multi-purpose feeder. When setting an envelope, insert the envelope into the - Canon MF3240 | imageCLASS MF3200 Series Basic Guide - Page 50
Print Media 3 Specify the size and the type of the paper you load. For details on how to specify the paper size and type, see "Setting Paper Size and Type," on p. 3-7. 3-6 - Canon MF3240 | imageCLASS MF3200 Series Basic Guide - Page 51
, follow this procedure to change the settings. The procedure is same for the paper cassette and multi-purpose feeder except for selecting the paper cassette or multi-purpose feeder in step 4. 1 2 [OK] 1 Press [Additional Functions]. 2 Press [ ] or [ ] to select , then press [OK - Canon MF3240 | imageCLASS MF3200 Series Basic Guide - Page 52
then press [OK]. 4 Press [ [OK]. ] or [ ] to select or , then press 5 Press [ ] or [ ] to select , then press [OK]. 6 Press [ ] or [ ] to select the paper size, then press [OK]. , , , , , , , , , 3-8 - Canon MF3240 | imageCLASS MF3200 Series Basic Guide - Page 53
then press [OK]. 9 Press [ ] or [ ] to select the paper type, then press [OK]. You can select from the following paper types: or *1 for Plain paper (18 lb to 24 lb (64 g/m2 to 90 g/m2)) or *2 for Heavy paper (28 lb to 32 lb (105 g/m2 to 128 - Canon MF3240 | imageCLASS MF3200 Series Basic Guide - Page 54
output. NOTE Do not open or close the face up cover while copying and printing. Face down paper output delivers paper with the printed side down on the output tray. Face up paper output delivers paper with the printed side up from the output area. Select the area depending on your purpose by opening - Canon MF3240 | imageCLASS MF3200 Series Basic Guide - Page 55
Area Select the suitable paper output area depending on the paper type and your purpose. Paper Type Plain Paper Plain Paper L Heavy Paper Heavy Paper H Transparencies Paper Output Area The Number of Output Sheets face up 1 sheet face down approx. 60 sheets (18 to 24 lb (64 to 90 g/m2)) face - Canon MF3240 | imageCLASS MF3200 Series Basic Guide - Page 56
printed side down on the output tray. Paper is stacked in printed order. 1 Close the face up cover, and attach the output tray. NOTE - Do not place the delivered paper back on the output tray. Doing so may result in paper jams. - Do not place objects other than paper on the output tray. Doing so - Canon MF3240 | imageCLASS MF3200 Series Basic Guide - Page 57
out of the machine. 1 Open the face up cover. Remove the delivered paper one by one. NOTE - Do not pull the paper forcibly. - This machine has no face up output tray. Remove the delivered paper with your hand. - Do not place an object in front of the face up paper output to prevent a paper jam. 3-13 - Canon MF3240 | imageCLASS MF3200 Series Basic Guide - Page 58
Print Media 3-14 - Canon MF3240 | imageCLASS MF3200 Series Basic Guide - Page 59
Sending Faxes Sending Faxes Follow this procedure to send a fax. 1 Set a Document 2 Enter the Fax Mode Place the document on the platen glass. For documents you can fax, see "Document Requirements," on p. 2-1. Press [FAX]. The FAX indicator lights and the machine enters fax standby mode. What - Canon MF3240 | imageCLASS MF3200 Series Basic Guide - Page 60
. Then try again. Press [Start]. After all scanning is complete, press [OK] to start dialing. If the output paper in the recipient's machine is not equal to the scanned size, the original image may be reduced in size or divided into smaller parts before it is sent. What if... ● You press [Stop - Canon MF3240 | imageCLASS MF3200 Series Basic Guide - Page 61
You can adjust the image quality and density of the document you send. The higher image quality you set, the better the output will be, but the longer the transmission will take. Adjust the scan settings according to the type of document you are sending. Image Quality 1 2 1 Press [FAX]. 2 Press - Canon MF3240 | imageCLASS MF3200 Series Basic Guide - Page 62
) for documents that contain photographs (the resolution is twice that of ). (200 × 200 dpi) for documents that contain fine print and images (the resolution is four times that of ). (200 × 400 dpi) 4-4 - Canon MF3240 | imageCLASS MF3200 Series Basic Guide - Page 63
Sending Faxes Density 1 2 3 [OK] 1 Press [FAX]. 2 Press [Density]. Ex. DENSITY -LT DK+ 3 Press [ ] or [ ] to adjust the density, then press [OK]. [ ]: to make light documents darker [ ]: to make dark documents lighter 4-5 - Canon MF3240 | imageCLASS MF3200 Series Basic Guide - Page 64
Sending Faxes Speed Dialing Speed dialing allows you to dial fax/telephone numbers by simply pressing one or a few keys. The following speed dialing methods are available: ● One-Touch Speed Dialing (p. 4-7) - Register a fax/telephone number for one-touch speed dialing, then to dial the number, - Canon MF3240 | imageCLASS MF3200 Series Basic Guide - Page 65
● Registering One-Touch Speed Dialing 2 3 4 1 [OK] 1 Press [Additional Functions]. 2 Press [ ] or [ ] to select , then press [OK]. 3 Press [ ] or [ ] to select , then press [OK]. 4 Press a one-touch speed dialing key (01 to 08) for a registering fax number, - Canon MF3240 | imageCLASS MF3200 Series Basic Guide - Page 66
Sending Faxes 5 6 7 [OK] 5 Enter the destination name (max. 20 characters, including spaces) with the numeric keys, then press [OK]. Ex. NAME CAN [A] 6 Enter the fax number you register (max. 50 digits, including spaces and pauses) with the numeric keys, then press [OK]. Ex. TEL NUMBER ENTRY - Canon MF3240 | imageCLASS MF3200 Series Basic Guide - Page 67
● Editing One-Touch Speed Dialing 2 3 4 1 [OK] 1 Press [Additional Functions]. 2 Press [ ] or [ ] to select , then press [OK]. 3 Press [ ] or [ ] to select , then press [OK]. 4 Press the one-touch speed dialing key (01 to 08) you want to edit, then press [OK - Canon MF3240 | imageCLASS MF3200 Series Basic Guide - Page 68
5 6 [OK] 5 Press [ ] repeatedly to go to the wrong character, then press [Clear] to delete it. To delete the entire name, press and hold [Clear]. 6 Enter a new character with the numeric keys, then press [OK]. Sending Faxes 4-10 - Canon MF3240 | imageCLASS MF3200 Series Basic Guide - Page 69
Sending Faxes 8 9 7 [OK] 7 Press [ ] repeatedly to go to the wrong number, then press [Clear] to delete it. To delete the entire number, press and hold [Clear]. 8 Enter a new number with the numeric keys, then press [OK]. 9 Press [Stop/Reset] to return to standby mode. 4-11 - Canon MF3240 | imageCLASS MF3200 Series Basic Guide - Page 70
● Deleting One-Touch Speed Dialing 2 3 4 1 [OK] 1 Press [Additional Functions]. 2 Press [ ] or [ ] to select , then press [OK]. 3 Press [ ] or [ ] to select , then press [OK]. 4 Press the one-touch speed dialing key (01 to 08) you want to delete, then press - Canon MF3240 | imageCLASS MF3200 Series Basic Guide - Page 71
Sending Faxes 7 6 [OK] 5 Press [OK]. You can also use [ ] and [Clear] to delete the characters one by one. 6 Press and hold [Clear] to delete all the numbers, then press [OK]. You can also use [ ] and [Clear] to delete the numbers one by one. NOTE When deleting all numbers, the registered name is - Canon MF3240 | imageCLASS MF3200 Series Basic Guide - Page 72
● Registering Coded Dialing 1 2 3 4 [OK] 1 Press [Additional Functions]. 2 Press [ ] or [ ] to select , then press [OK]. 3 Press [ ] or [ ] to select , then press [OK]. 4 Press [ [OK]. ] or [ ] to select a coded dialing code (00 to 99), then press You can also - Canon MF3240 | imageCLASS MF3200 Series Basic Guide - Page 73
Sending Faxes 5 6 7 [OK] 5 Enter the destination name (max. 20 characters, including spaces) with the numeric keys, then press [OK]. Ex. NAME CAN [A] 6 Enter the fax number you register (max. 50 digits, including spaces and pauses) with the numeric keys, then press [OK]. Ex. TEL NUMBER ENTRY - Canon MF3240 | imageCLASS MF3200 Series Basic Guide - Page 74
Sending Faxes ● Editing Coded Dialing 1 2 3 4 [OK] 1 Press [Additional Functions]. 2 Press [ ] or [ ] to select , then press [OK]. 3 Press [ ] or [ ] to select , then press [OK]. 4 Press [ ] or [ ] to select the coded dialing code (00 to 99) that you want to edit, - Canon MF3240 | imageCLASS MF3200 Series Basic Guide - Page 75
5 6 [OK] 5 Press [ ] repeatedly to go to the wrong character, then press [Clear] to delete it. To delete the entire name, press and hold [Clear]. 6 Enter a new character with the numeric keys, then press [OK]. Sending Faxes 4-17 - Canon MF3240 | imageCLASS MF3200 Series Basic Guide - Page 76
Sending Faxes 8 9 7 [OK] 7 Press [ ] repeatedly to go to the wrong number, then press [Clear] to delete it. To delete the entire number, press and hold [Clear]. 8 Enter a new number with the numeric keys, then press [OK]. 9 Press [Stop/Reset] to return to standby mode. 4-18 - Canon MF3240 | imageCLASS MF3200 Series Basic Guide - Page 77
Sending Faxes ● Deleting Coded Dialing 1 2 3 4 [OK] 1 Press [Additional Functions]. 2 Press [ ] or [ ] to select , then press [OK]. 3 Press [ ] or [ ] to select , then press [OK]. 4 Press [ ] or [ ] to select the coded dialing code (00 to 99) that you want to delete, - Canon MF3240 | imageCLASS MF3200 Series Basic Guide - Page 78
Sending Faxes 7 6 [OK] 5 Press [OK]. You can also use [ ] and [Clear] to delete the characters one by one. 6 Press and hold [Clear] to delete all the numbers, then press [OK]. You can also use [ ] and [Clear] to delete the numbers one by one. NOTE When deleting all numbers, the registered name is - Canon MF3240 | imageCLASS MF3200 Series Basic Guide - Page 79
Sending Faxes ● Registering Group Dialing 2 3 4 1 [OK] 1 Press [Additional Functions]. 2 Press [ ] or [ ] to select , then press [OK]. 3 Press [ ] or [ ] to select , then press [OK]. 4 Specify an empty one-touch speed dialing key that you want to set as the group - Canon MF3240 | imageCLASS MF3200 Series Basic Guide - Page 80
, including spaces) with the numeric keys, then press [OK]. Ex. NAME CANON GROUP [A] 6 Select the speed dialing numbers you want to register in the press [Coded Dial] between each entry. NOTE You can review the destinations which has been already entered with [ ] or [ ]. 7 Press - Canon MF3240 | imageCLASS MF3200 Series Basic Guide - Page 81
Sending Faxes ● Adding New Destination to Group 1 2 3 4 7 6 [OK] 1 Press [Additional Functions]. 2 Press [ ] or [ ] to select , then press [OK]. 3 Press [ ] or [ ] to select , then press [OK]. 4 Press [ ] or [ ] to select a group dial to edit, then press [OK]. - Canon MF3240 | imageCLASS MF3200 Series Basic Guide - Page 82
Sending Faxes ● Deleting Destination from Group 1 2 3 4 [OK] 1 Press [Additional Functions]. 2 Press [ ] or [ ] to select , then press [OK]. 3 Press [ ] or [ ] to select , then press [OK]. 4 Press [ ] or [ ] to select a group dial to delete, then press [OK]. The group - Canon MF3240 | imageCLASS MF3200 Series Basic Guide - Page 83
Sending Faxes 9 6 7 6 Press [ ] or [ ] to display the speed dial number you want to delete from the group. 7 Press [Clear]. 8 Repeat steps 6 and 7 if you want to delete another speed dialing number, then press [OK]. 9 Press [Stop/Reset] to return to standby mode. 4-25 - Canon MF3240 | imageCLASS MF3200 Series Basic Guide - Page 84
Sending Faxes ● Changing Group Name 1 2 3 4 [OK] 1 Press [Additional Functions]. 2 Press [ ] or [ ] to select , then press [OK]. 3 Press [ ] or [ ] to select , then press [OK]. 4 Press [ ] or [ ] to select a group dial to edit, then press [OK]. 4-26 - Canon MF3240 | imageCLASS MF3200 Series Basic Guide - Page 85
Sending Faxes 6 7 5 [OK] 5 Press [ ] repeatedly to go to the wrong character, then press [Clear] to delete it. To delete the entire character, press and hold [Clear]. 6 Enter a new name with the numeric keys, then press [OK]. 7 Press [Stop/Reset] to return to standby mode. 4-27 - Canon MF3240 | imageCLASS MF3200 Series Basic Guide - Page 86
Sending Faxes ● Deleting Group Dialing 1 2 3 4 [OK] 1 Press [Additional Functions]. 2 Press [ ] or [ ] to select , then press [OK]. 3 Press [ ] or [ ] to select , then press [OK]. 4 Press [ ] or [ ] to select a group dial to delete, then press [OK]. The group name - Canon MF3240 | imageCLASS MF3200 Series Basic Guide - Page 87
Sending Faxes 9 6 [OK] 7 6 Press [ ] or [ ] to display a speed dial number. 7 Press [Clear]. 8 Repeat steps 6 and 7 until all speed dial numbers are deleted, then press [OK]. NOTE When deleting all speed dial numbers, the group name is cleared automatically. 9 Press [Stop/Reset] to return to - Canon MF3240 | imageCLASS MF3200 Series Basic Guide - Page 88
dialing. For easy reference, print out the list of recipients registered for speed dialing. (See Chapter 4, "Reports and Lists," in the Advanced Guide.) ● Using One-Touch Speed/Group Dialing 2 4 [OK] 1 Place the document on the platen glass. 2 Press [FAX]. 3 Adjust any necessary settings for your - Canon MF3240 | imageCLASS MF3200 Series Basic Guide - Page 89
. For details, see "Scan Settings," on p. 4-3. 4 Press [Coded Dial]. 5 Enter the desired two-digit code (00 to 99) with the numeric keys. Ex. =012XXXXXXX [ 01]CANON If you want to scan multiple pages, set the documents one by one, then press [Start]. 6 Press [OK] to start dialing. 4-31 - Canon MF3240 | imageCLASS MF3200 Series Basic Guide - Page 90
Sending Faxes 4-32 - Canon MF3240 | imageCLASS MF3200 Series Basic Guide - Page 91
procedure to set the machine for receiving faxes. For advanced receiving features, see Chapter 1, "Advanced Fax Features," in the Advanced Guide. 1 Enter the Setting Menu 2 Enter the Receive Mode Receiving Faxes Press [Additional Functions]. Select with [ ] or [ ], then press - Canon MF3240 | imageCLASS MF3200 Series Basic Guide - Page 92
manually receive faxes. NOTE - For , make sure an answering machine is connected to the machine. - For , subscription to a DRPD service mode. ● The message appears: The toner cartridge is almost empty. Replace the toner cartridge. For details on this error - Canon MF3240 | imageCLASS MF3200 Series Basic Guide - Page 93
Copying Follow this procedure to make a copy. For advanced copying features, see Chapter 2, "Advanced Copy Features," in the Advanced Guide. 1 Set a Document 2 Enter the Copy Mode Copying Place the document on the platen glass. For documents you can copy, see "Document Requirements," on p. 2-1. - Canon MF3240 | imageCLASS MF3200 Series Basic Guide - Page 94
3 Enter the Copy Quantity 4 Start Copying Copying Enter the copy quantity (1 to 99) with the numeric key. Ex. 100% LTR TEXT 3 What if... ● You enter a wrong number: Press [Clear] and enter a new number. Press [Start]. What if... ● You press [Stop/Reset] to cancel a job while scanning - Canon MF3240 | imageCLASS MF3200 Series Basic Guide - Page 95
2 1 Press [COPY]. 2 Press [Image Quality] repeatedly to select the document type. : For text documents. : For documents that contain fine text or photos. : For documents that contain text and photos. NOTE Copy density automatically changes to manual mode when or - Canon MF3240 | imageCLASS MF3200 Series Basic Guide - Page 96
Copying Density You can adjust the density to the most appropriate level for the document either automatically or manually. ● Adjusting Automatically 1 [OK] 1 Press [Density] until appears, then press [OK]. NOTE The image quality is automatically set to . 6-4 - Canon MF3240 | imageCLASS MF3200 Series Basic Guide - Page 97
● Adjusting Manually 1 2 [OK] 1 Press [Density] until the manual mode appears. Ex. DENSITY -LT 2 Press [ ] or [ DK+ ] to adjust the copy density, then press [OK]. [ ]: to make light documents darker [ ]: to make dark documents lighter Copying 6-5 - Canon MF3240 | imageCLASS MF3200 Series Basic Guide - Page 98
[Enlarge/Reduce]. 2 Press [ ] or [ ] to select the copy ratio, then press [OK]. - 200 % MAX. - 129 % STMT → LTR - 100 % - 78 % - 64 % - 50 % MIN. NOTE When in the menu is set to or , the preset copy ratios change as follows: A: 50%, 70%, 100%, 141%, 200 - Canon MF3240 | imageCLASS MF3200 Series Basic Guide - Page 99
● Zoom Designation (MF3240 Only) You can reduce or enlarge images by any copy ratio, in 1 % increments. The available copy ratios are from 50 % to 200 %. 1 2 [OK] 1 Press [Enlarge/Reduce] twice. 2 Enter the copy ratio with - Canon MF3240 | imageCLASS MF3200 Series Basic Guide - Page 100
Copying 6-8 - Canon MF3240 | imageCLASS MF3200 Series Basic Guide - Page 101
that the printer driver is installed. For details on printing features, see Chapter 2, "Printing," in the Software Guide. 1 2 Start the Print Command Select the Printer From an open document on an application, click [File] > [Print]. Select the printer icon for the machine ([Canon MF3200 Series - Canon MF3240 | imageCLASS MF3200 Series Basic Guide - Page 102
3 Adjust Preferences 4 Print the Document Printing Click [Preferences] or [Properties] to open the dialog box. After finished, click [OK]. Click [Print] or [OK]. What if... ● You want to cancel printing: See Chapter 3, "System Monitor," in the Advanced Guide. 7-2 - Canon MF3240 | imageCLASS MF3200 Series Basic Guide - Page 103
Scanning Follow this procedure to scan a document to your computer. Make sure that the scanner driver is installed. For details on scanning features, see Chapter 3, "Scanning a Document," in the Software Guide. 1 Set a Document 2 Enter the Scan Mode Place the document on the platen glass. For - Canon MF3240 | imageCLASS MF3200 Series Basic Guide - Page 104
to your computer and processed by the scan application. For more information on the scan application settings, see Chapter 3, "Scanning a Document," in the Software Guide. What if... ● You want to cancel scanning: Press [Stop/Reset] on the operation panel, then click [OK] on the computer screen. 8-2 - Canon MF3240 | imageCLASS MF3200 Series Basic Guide - Page 105
PC Faxing Follow this procedure to send a fax from your computer. Make sure that the fax driver is installed. For details on PC Faxing features, see Chapter 4, "PC Faxing," in the Software Guide. 1 2 Start the Print Command Select the Fax PC Faxing From an open document on an application, click - Canon MF3240 | imageCLASS MF3200 Series Basic Guide - Page 106
cover sheet attachment. Click [OK] in the Fax Sending Settings. What if... ● You want to cancel sending a fax: See Chapter 3, "System Monitor," in the Advanced Guide. 9-2 - Canon MF3240 | imageCLASS MF3200 Series Basic Guide - Page 107
paper towels, or similar materials for cleaning; they can stick to the components or generate static charges. Exterior 1 Disconnect the power cord. 2 Wipe the machine's exterior with a clean, soft, lint-free cloth dampened with water or diluted dishwashing detergent solution. 3 Wait for the machine - Canon MF3240 | imageCLASS MF3200 Series Basic Guide - Page 108
quality may deteriorate if the drum surface is exposed to light or is damaged. 4 Use a clean, soft, dry, lint-free cloth to remove any toner or paper debris from the machine's interior. 3 Remove the toner cartridge. CAUTION - Do not touch the fixing assembly (A) as it becomes very hot during use - Canon MF3240 | imageCLASS MF3200 Series Basic Guide - Page 109
and align the protrusions (A) on both sides of the toner cartridge to the guides (B) in the machine, then gently slide the toner cartridge into the machine as far as it will go. Be sure to position the arrow mark (C) on the toner cartridge towards the inside of the machine. A B B C 6 Close the front - Canon MF3240 | imageCLASS MF3200 Series Basic Guide - Page 110
avoid dirty copies or faxes to be sent. 1 Open the platen glass cover. 3 Close the platen glass cover. 2 Clean the platen glass and the underside of the platen glass cover with a cloth dampened with water. Then, wipe the area with a soft, dry cloth. CAUTION - Canon MF3240 | imageCLASS MF3200 Series Basic Guide - Page 111
front cover. 2 Remove the toner cartridge. 4 Insert the toner cartridge into the machine as far as it will go. Hold the toner cartridge and align the protrusions (A) on both sides of the toner cartridge to the guides (B) in the machine, then gently slide the toner cartridge into the machine as far - Canon MF3240 | imageCLASS MF3200 Series Basic Guide - Page 112
with a New One 1 Open the front cover. CAUTION Be careful not to get your fingers caught. 2 Remove the toner cartridge. CAUTION Do not open the drum protective shutter on the toner cartridge. Print quality may deteriorate if the drum surface is exposed to light or is damaged. Maintenance 10-6 - Canon MF3240 | imageCLASS MF3200 Series Basic Guide - Page 113
machine as far as it will go. five or six times to distribute toner inside. Hold the toner cartridge and align the protrusions (A) on both sides of the toner cartridge to the guides (B) in the machine, then gently slide the toner cartridge into the machine as far as it will go. Be sure to position - Canon MF3240 | imageCLASS MF3200 Series Basic Guide - Page 114
7 Close the front cover. CAUTION Be careful not to get your fingers caught. 10-8 Maintenance - Canon MF3240 | imageCLASS MF3200 Series Basic Guide - Page 115
concerning this program are enclosed in each PC Cartridge box. The Clean Earth Campaign ● THE Canon CARTRIDGE RECYCLING PROGRAM The Canon Cartridge Recycling Program fulfills the first initiative of Canon's Clean Earth Campaign, which supports four critical environmental areas: ● Recycling in the - Canon MF3240 | imageCLASS MF3200 Series Basic Guide - Page 116
use, simply follow the instructions detailed for U.S. or Canadian residents. We appreciate your support of The Canon Cartridge Recycling Program. Working together we can make a significant contribution to a cleaner planet. ● Cartridges collected through this program are not refilled. ● You are not - Canon MF3240 | imageCLASS MF3200 Series Basic Guide - Page 117
box. ■ Option B: Volume Box Return We encourage you to use this option as a more efficient way to ship cartridges. ● Place as many cartridges as possible into one box. Carefully seal the box with tape; or ● Call 1-800-OK-Canon to receive your free eight cartridge collection box. 10-11 Maintenance - Canon MF3240 | imageCLASS MF3200 Series Basic Guide - Page 118
exceeds the above limits, please call 1-800-OK-Canon for special shipping information. Please Note: Do not send defective cartridges for replacement. Defective cartridges under warranty should be exchanged by an authorized dealer or service facility as provided in the warranty. 10-12 Maintenance - Canon MF3240 | imageCLASS MF3200 Series Basic Guide - Page 119
returning label. For Alaska and Hawaii Canon set up alternative mail service with the U.S. Postal Service. Please call 1-800-OK-Canon to receive U.S. Postal Service merchandise returning label. ■ Option A: UPS Pick-up ● Give the shipment to your UPS driver when you receive your next regular - Canon MF3240 | imageCLASS MF3200 Series Basic Guide - Page 120
local Canada Post outlet or franchise. ■ Option B: Volume Box Return (eight or more cartridges) We encourage you to use this option as a more efficient way to ship cartridges. ● Call 1-800-667-2666 to receive your free Canon collection box kit. ● The collection box can accommodate eight individual - Canon MF3240 | imageCLASS MF3200 Series Basic Guide - Page 121
interest. To this end, for every cartridge collected, Canon Canada donates $1, shared equally between World Wildlife Fund Canada and the Nature Conservancy of Canada. This donation is utilized in Canada. ● For further information about The Clean Earth Campaign in Canada, please call or write to - Canon MF3240 | imageCLASS MF3200 Series Basic Guide - Page 122
the front cover. CAUTION Be careful not to get your fingers caught. 5 Pull out the paper cassette completely, and remove the paper. 3 Remove the toner cartridge. Maintenance CAUTION - To avoid exposing the toner cartridge to light, place it in its protective bag or wrap it in a thick cloth. - Do - Canon MF3240 | imageCLASS MF3200 Series Basic Guide - Page 123
. 9 Detach the output tray. Maintenance 7 Detach the paper cassette extension from the paper cassette. 1 2 2 10 Make sure all the covers machine and lift it carefully, as shown in the illustration below. 8 Insert the paper cassette into the machine. CAUTION - Do not lift the machine by any of - Canon MF3240 | imageCLASS MF3200 Series Basic Guide - Page 124
Maintenance 10-18 - Canon MF3240 | imageCLASS MF3200 Series Basic Guide - Page 125
Remove the toner cartridge. machine. - Check that the paper you are using meets the requirements for use. (See "Print Media," on p. 3-1.) - Make sure you have removed any scraps of paper from inside the machine. NOTE Do not force jammed paper out of the machine. Contact Canon Customer Care - Canon MF3240 | imageCLASS MF3200 Series Basic Guide - Page 126
protective shutter on the toner cartridge. Print quality may push down the green paper release levers (B) on both sides deteriorate if the drum surface is of the face up paper output. exposed to light or is damaged. B B A A Troubleshooting B - When removing the jammed paper, do not touch - Canon MF3240 | imageCLASS MF3200 Series Basic Guide - Page 127
the jammed paper out of the machine. CAUTION - Do not pull the jammed paper forward from the paper cassette. It may cause a machine malfunction. - Do not pull the jammed paper upward. The toner on the paper will stain the machine and cause a permanent reduction in print quality. Troubleshooting - Canon MF3240 | imageCLASS MF3200 Series Basic Guide - Page 128
Close the front cover. 9 Pull out the paper cassette 7 Carefully pull the jammed paper completely. straight out through the rollers. If the jammed paper is badly folded, similar to the folds of an accordion, ease the jammed paper loose and then pull it out of the machine. Troubleshooting 11-4 - Canon MF3240 | imageCLASS MF3200 Series Basic Guide - Page 129
10 Hold both sides of the jammed paper and slowly pull it out in the direction of the arrow. - When feeding paper from the paper cassette: NOTE - Be sure to push the paper release levers back to their original position. If the levers are left pushed down, the paper jam error will not be resolved. - - Canon MF3240 | imageCLASS MF3200 Series Basic Guide - Page 130
Be careful not to get your fingers caught. NOTE After you replace the toner cartridge and close the front cover, the machine should be ready for operating. If the machine returns to the ready state for operating, troubleshooting has been successful. If the machine does not return to the ready state - Canon MF3240 | imageCLASS MF3200 Series Basic Guide - Page 131
or . A problem has occurred in the printer. The front cover is not closed completely. Action Set the paper size to , , or and load paper of the same size. contact Canon Customer Care Center. Check the front cover, and make sure that it is completely closed. Troubleshooting 11-7 - Canon MF3240 | imageCLASS MF3200 Series Basic Guide - Page 132
one by one. If you load paper while making copies, do not load a different paper size. On the second line in the LCD the message or and the paper size may appear. In this case, load the corresponding paper in the paper cassette or multi-purpose feeder. Troubleshooting 11-8 - Canon MF3240 | imageCLASS MF3200 Series Basic Guide - Page 133
printing without replacing the toner cartridge, set to in the of the menu. However, the toner cartridge is almost empty, so you should replace the toner cartridge with a new one. Remove the printouts from the output tray. Troubleshooting 11-9 - Canon MF3240 | imageCLASS MF3200 Series Basic Guide - Page 134
type of error. A toner cartridge is not installed or not installed correctly. An invalid number was entered in the of the menu. Action Clear the paper jam (See "Clearing Paper Jams," on p. 11-1) and reload paper in the paper cassette or multipurpose feeder - Canon MF3240 | imageCLASS MF3200 Series Basic Guide - Page 135
onetouch speed dialing key for group dialing. Hang up the phone. Check if the recipient's number is correct or the telephone cable is properly connected. Troubleshooting 11-11 - Canon MF3240 | imageCLASS MF3200 Series Basic Guide - Page 136
sending and receiving jobs. (Based on the condition that the other party sends the fax by the imageCLASS MF3200 Series with ITU-T Standard Chart No.1, standard mode.) Wait for the machine to send any the information registered under the onetouch speed dialing before using. Troubleshooting 11-12 - Canon MF3240 | imageCLASS MF3200 Series Basic Guide - Page 137
replace the toner cartridge, or clear the paper jams. For more information, see the following: - "Loading Documents," on p. 2-3. - "Replacing the Toner Cartridge with a New One," on p. 10-6. - "Clearing Paper Jams," on p. 11-1. Select a different one-touch speed dialing key. Troubleshooting 11-13 - Canon MF3240 | imageCLASS MF3200 Series Basic Guide - Page 138
PRINTER DATA ERROR CHECK PRINTER PRINTING Description The data from the PC was not printed. The printer is processing a print job. Action Check if the software is installed properly or if the printer cable is properly connected. No action required. Wait for printing to finish. Troubleshooting - Canon MF3240 | imageCLASS MF3200 Series Basic Guide - Page 139
Guide. paper. Transmission was manually canceled on the machine. There is a document jam paper is loaded in their machine. Resend the document if necessary. Clear the document jam. Check if the recipient's number is correct or the telephone cable is properly connected, and try again. Troubleshooting - Canon MF3240 | imageCLASS MF3200 Series Basic Guide - Page 140
have the following information ready when you contact Canon: - Product name (imageCLASS MF3240/MF3241) - Serial number (On the label located at the back of the machine) - Place of purchase - Nature of problem - Steps you have taken to solve the problem and the results CAUTION If the machine makes - Canon MF3240 | imageCLASS MF3200 Series Basic Guide - Page 141
Machine Settings Machine Settings You can adjust the machine settings from the Setting Menu to customize the way the machine works. To see the list of current settings, print out User's Data List. Printing User's Data List 1 2 [OK] 1 Press [Additional Functions]. 2 Press [ ] or [ ] to select < - Canon MF3240 | imageCLASS MF3200 Series Basic Guide - Page 142
3 4 [OK] 3 Press [ 4 Press [ ] or [ ] or [ ] to select , then press [OK]. ] to select - Canon MF3240 | imageCLASS MF3200 Series Basic Guide - Page 143
Accessing the Setting Menu 1 2 [OK] 1 Press [Additional Functions]. 2 Press [ [OK]. ] or [ ] to select the menu you want to access, then press Machine Settings 12-3 - Canon MF3240 | imageCLASS MF3200 Series Basic Guide - Page 144
5 3 [OK] 3 Press [ ] or [ ] to select a submenu, then press [OK]. 4 To register the settings or go to a submenu item, press [OK]. 5 When finished, press [Stop/Reset] to return to standby mode. NOTE Press [Stop/Reset] to exit from the menu. If you press [Stop/Reset] before pressing [OK], the - Canon MF3240 | imageCLASS MF3200 Series Basic Guide - Page 145
this section are based on the model imageCLASS MF3240. Depending on the model of your machine , some settings may not be available and the number on the top of each menu may vary. COMMON SETTINGS Setting Item 1 DEFAULT SETTINGS 2 TONER SAVER MODE 3 PAPER - Canon MF3240 | imageCLASS MF3200 Series Basic Guide - Page 146
IMAGE QUALITY 3 AUTO COLLATE 4 PAPER SIZE GROUP Description Sets the density for copying. - MANUAL (1-9) - AUTO* * When is set, Image set to . Sets whether to collate the copies automatically. - OFF - ON Selects a paper size group for your machine. - INCHES -A - AB Machine Settings - Canon MF3240 | imageCLASS MF3200 Series Basic Guide - Page 147
time. (3 MIN.-30 MIN.) (See "Setting Sleep Mode," on p. 1-9.) - ON - OFF Sets the current date and time. (See "Set Up the Machine," in the Starter Guide.) Sets the date format. - MM/DD/YYYY - DD/MM YYYY - YYYY MM/DD Sets daylight saving time mode. (See "Setting the Daylight Saving Time," on - Canon MF3240 | imageCLASS MF3200 Series Basic Guide - Page 148
ON REDIAL TIMES REDIAL INTERVAL OFF DIALING LINE CHCK Sets the default image quality for faxing. - STANDARD - FINE - PHOTO - SUPER transmission error occurs. (See Chapter 1, "Advanced Fax Features," in the Advanced Guide.) Customizes the redial operation. Sets the number of retries. (1 TIMES-10 - Canon MF3240 | imageCLASS MF3200 Series Basic Guide - Page 149
of paper loaded. (See Chapter 1, "Advanced Fax Features," in the Advanced Guide.) Reduces the image to fit on the size of paper loaded. Retains the original size of the image. The image that Receiving Faxes," in the Starter Guide.) - FaxOnly - AnsMode - DRPD - FAX/TEL - MANUAL Machine Settings 12-9 - Canon MF3240 | imageCLASS MF3200 Series Basic Guide - Page 150
that sends the TSI signal. Sets whether to use remote receiving. (See Chapter 1, "Advanced Fax Features," in the Advanced Guide.) - ON - OFF Sets whether to stop printing when toner has run out. This function is only for Fax printing and printing reports. - OFF - ON Sets the communication setting - Canon MF3240 | imageCLASS MF3200 Series Basic Guide - Page 151
Setting Item 1 SETTINGS TX RESULT REPORT RX RESULT REPORT Description Sets the report functions. (See Chapter 4, "Reports and Lists," in the Advanced Guide.) Sets whether the fax transmission report prints out. - PRINT ERROR ONLY - OUTPUT NO - OUTPUT YES Sets whether the fax reception report prints - Canon MF3240 | imageCLASS MF3200 Series Basic Guide - Page 152
- OUTPUT NO Prints reports/lists. Prints the fax transmission report manually. Prints the fax reception report manually. Prints the fax transaction report manually. Prints the list of the reserved jobs in memory. Prints the information and image of the first page of the reserved job. Prints the list - Canon MF3240 | imageCLASS MF3200 Series Basic Guide - Page 153
● Power Consumption ● Warm-up Time ● Weight ● Dimensions ● Installation Space Personal Desktop 120 V, 60 Hz Max: Approx. 580 W lb (11 kg) (including toner cartridge) 14 1/2 in. (H) × 21 1/2 in. (D) × 17 3/4 in. (W) (369 mm (H) × 546 mm (D) × 449 mm (W)) (with the paper cassette attached) 14 1/2 - Canon MF3240 | imageCLASS MF3200 Series Basic Guide - Page 154
● Display Languages ● Acceptable Documents ● Acceptable Paper Stock ● Printable Area ● Scanning Area Temperature: 59°F-81.5°F (15°C-27.5°C) Humidity: 27%-75% RH ENGLISH / FRENCH / SPANISH / PORTUGUESE » p. 2-1. » p. 3-1. » p. 3-2. » p. 2-2. Copier ● Scanning Resolution ● Printing Resolution - Canon MF3240 | imageCLASS MF3200 Series Basic Guide - Page 155
\ Printer ● Printing Method ● Paper Handling ● Paper Delivery ● Print Speed ● Printing Resolution ● Number of Tones ● Printing Cartridge Indirect electrostatic method (On-demand fixing) - Paper cassette: 250 sheets × 1 cassette (18 lb (64 g/m2)) - Multi-purpose feeder: 1 sheet » p. 3-11. See "Copy - Canon MF3240 | imageCLASS MF3200 Series Basic Guide - Page 156
) Group dialing (50 destinations) Address Book dialing (with Address Book key) - Regular dialing (with numeric keys) - Automatic redialing - Manual redialing (with Redial/Pause key) - Sequential broadcast (124 destinations) - Automatic reception - Remote reception by telephone (Default ID: 25 - Canon MF3240 | imageCLASS MF3200 Series Basic Guide - Page 157
Telephone ● Connection - External telephone/answering machine (CNG detecting signal)/data modem *1 The Public Switched Telephone Network (PSTN) currently supports 28.8 Kbps modem speed or lower, depending on telephone line conditions. *2 Based on ITU-T Standard Chart No. 1, MMR standard mode. NOTE - Canon MF3240 | imageCLASS MF3200 Series Basic Guide - Page 158
] key 1-4 [Address Book] key 1-5 ADDRESS BOOK SET. 12-3, 12-11 B BROADCAST 12-3, 12-10 C Cleaning machine 10-1 Exterior 10-1 Interior 10-2 Scanning area 10-4 [Clear] key 1-4 Clearing Paper Jams 11-1 [Coded Dial] key 1-5, 4-31 Coded dialing 4-6 Deleting 4-19 Editing 4-16 Registering 4-14 Using 4-31 - Canon MF3240 | imageCLASS MF3200 Series Basic Guide - Page 159
a Problem 11-16 Image quality Copying 6-3 Faxes 4-3 [Image Quality] key 1-4 L LCD 1-4, 1-6 Messages 11-7 Loading Document 2-3 Envelopes 3-4 Paper 3-4 cartridge 10-9 [Redial/Pause] key 1-5 Redistributing toner 10-5 Registering speed dialing 4-6 REPLACE TONER message 10-5 Replacing toner cartridge - Canon MF3240 | imageCLASS MF3200 Series Basic Guide - Page 160
S Safety instructions xi [SCAN] key 1-3 Scan settings Copying 6-3 Faxes 4-3 Scanning 8-1 Selecting the paper output area 3-10 Sending faxes 4-1 Setting paper size and type 3-7 Sleep Mode 1-9 Specifications 13-1 Copier 13-2 Facsimile 13-3 General 13-1 Printer 13-3 Telephone 13-5 Speed dialing 4-6 - Canon MF3240 | imageCLASS MF3200 Series Basic Guide - Page 161
6390 Dixie Road Mississauga, Ontario L5T 1P7, Canada CANON EUROPA N.V. Bovenkerkerweg 59-61 1185 XB Amstelveen, The Netherlands CANON FRANCE S.A.S. 17, quai du Président Paul Doumer 92414 Courbevoie Cedex, France CANON COMMUNICATION & IMAGE FRANCE S.A.S. 12, rue de l'Industrie 92414 Courbevoie Cedex
-
 1
1 -
 2
2 -
 3
3 -
 4
4 -
 5
5 -
 6
6 -
 7
7 -
8
-
9
-
10
-
11
-
12
-
13
-
14
-
15
-
16
-
17
-
18
-
19
-
20
-
21
-
22
-
23
-
24
-
25
-
26
-
27
-
28
-
29
-
30
-
31
-
32
-
33
-
34
-
35
-
36
-
37
-
38
-
39
-
40
-
41
-
42
-
43
-
44
-
45
-
46
-
47
-
48
-
49
-
50
-
51
-
52
-
53
-
54
-
55
-
56
-
57
-
58
-
59
-
60
-
61
-
62
-
63
-
64
-
65
-
66
-
67
-
68
-
69
-
70
-
71
-
72
-
73
-
74
-
75
-
76
-
77
-
78
-
79
-
80
-
81
-
82
-
83
-
84
-
85
-
86
-
87
-
88
-
89
-
90
-
91
-
92
-
93
-
94
-
95
-
96
-
97
-
98
-
99
-
100
-
101
-
102
-
103
-
104
-
105
-
106
-
107
-
108
-
109
-
110
-
111
-
112
-
113
-
114
-
115
-
116
-
117
-
118
-
119
-
120
-
121
-
122
-
123
-
124
-
125
-
126
-
127
-
128
-
129
-
130
-
131
-
132
-
133
-
134
-
135
-
136
-
137
-
138
-
139
-
140
-
141
-
142
-
143
-
144
-
145
-
146
-
147
-
148
-
149
-
150
-
151
-
152
-
153
-
154
-
155
-
156
-
157
-
158
-
159
-
160
-
161
 |
 |
ENG
Basic Guide
Series
Please read this guide before operating this equipment.
After you finish reading this guide, store it in a safe place for future reference.
Before Using the Machine
Document Handling
Print Media
Sending Faxes
Receiving Faxes
Copying
Printing
Scanning
PC Faxing
Troubleshooting
Machine Settings
Appendix
Maintenance
What Can I Do with This Machine?