Canon PIXMA iP6000D iP6000D Diect Print Guide
Canon PIXMA iP6000D Manual
 |
View all Canon PIXMA iP6000D manuals
Add to My Manuals
Save this manual to your list of manuals |
Canon PIXMA iP6000D manual content summary:
- Canon PIXMA iP6000D | iP6000D Diect Print Guide - Page 1
Photo Printer Direct Printing Guide - Canon PIXMA iP6000D | iP6000D Diect Print Guide - Page 2
Card Memory Cards Supported by This Printer 10 Inserting a Memory Card 11 Removing a Memory Card 13 Loading Paper Printing Photograph Printing a Photo Displayed on the LCD - Photo Gallery 22 Specifying How Many Copies to Print for Each Photo - Photo Print 25 Changing the Print Settings 27 - Canon PIXMA iP6000D | iP6000D Diect Print Guide - Page 3
Replacing Ink Tanks 67 Printing Maintenance When Printing Becomes Faint or Colors are Incorrect 70 Printing the Nozzle Check Pattern 71 Examining the Nozzle Check Pattern 72 Print Head Cleaning 73 Print Head Deep Cleaning 74 Aligning Print Head - Auto head align 75 Troubleshooting A Message - Canon PIXMA iP6000D | iP6000D Diect Print Guide - Page 4
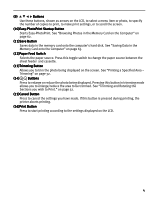
orange and green alternately: an error has occurred that may require a service call. (3) RESUME Button Press to resume printing after resolving a printer problem. (4) Menu Button Displays menus. See "Menu Displays" on page 5. (5) Search Button Looks up target photos in the memory card using - Canon PIXMA iP6000D | iP6000D Diect Print Guide - Page 5
. (10)Easy-PhotoPrint Startup Button Starts Easy-PhotoPrint. See "Browsing Photos in the Memory Card on the Computer" on page 62. (11)Save Button Saves data in the memory card onto the computer's hard disk. See "Saving Data in the Memory Card onto the Computer" on page 63. (12)Paper Feed Switch - Canon PIXMA iP6000D | iP6000D Diect Print Guide - Page 6
well as maintain the printer using items on the Menus. Photo Gallery You can view the photos in the memory card on the LCD and print them. See "Printing a Photo Displayed on the LCD Photo Gallery" on page 22. Photo Print You can specify how many copies to print for each photo and print them at once - Canon PIXMA iP6000D | iP6000D Diect Print Guide - Page 7
Sticker print Prints photos on the Canon-branded sticker. See "Printing on the Sticker - Sticker Print" on page 37. Color balance Prints 9 color samples of a photo on a sheet of paper. You can select your favorite color tone from them and print. See "Printing in Your Favorite Color Tone - Color - Canon PIXMA iP6000D | iP6000D Diect Print Guide - Page 8
communication from the mobile phone. See "Printing Photos in the Mobile Phone through Infrared Communication - Printbeam" on page 58. Manual head align Aligns the print head manually. See "Adjusting the Print Head Manually" on page 78. Reset Resets all settings other than the display language - Canon PIXMA iP6000D | iP6000D Diect Print Guide - Page 9
the procedure for printing photos from the memory card inserted in the card slot of the printer. Step 1 Turn on the Printer. Step 2 Load the paper. Step 3 Ensure the paper source. Step 4 Insert the memory card. See "Loading Paper" on page 15. See page 22. See "Using a Memory Card" on page 10. 8 - Canon PIXMA iP6000D | iP6000D Diect Print Guide - Page 10
photos to print. Select photos to print using the buttons. Step 7 Check print setting. The setting confirmation screen appears when pressing the OK button. Press the Settings button to change the print settings. See "Changing the Print Settings" on page 27. Step 8 Start printing. Press the Print - Canon PIXMA iP6000D | iP6000D Diect Print Guide - Page 11
of memory cards supported by the digital camera, refer to your digital camera user's manual. To format a memory card, use the digital camera. Memory card data formats may not be compatible with computer-specific formats. Photos edited on the computer may result in improper printing. Please use only - Canon PIXMA iP6000D | iP6000D Diect Print Guide - Page 12
Computer" on page 64. If you used a computer to edit or process the data stored in the memory card, be sure to print photos from the computer. Using the operation panel to print photos may result in improper printing. 1 Turn on the printer. 2 Open the card slot cover. 3 Install the memory card - Canon PIXMA iP6000D | iP6000D Diect Print Guide - Page 13
The Indicator lamp lights. •If you use a SmartMedia card, insert it until it stops with its end projecting as shown left. The Indicator lamp lights. •If you use a Memory Stick, SD card or MultiMedia card, insert it until it stops with its end projecting as shown left. 12 - Canon PIXMA iP6000D | iP6000D Diect Print Guide - Page 14
Removing a Memory Card Note If you use the printer connected to your computer, follow the instructions for removal of the memory card from the computer. For the procedure, refer to the on-screen User's Guide. 1 Ensure that the Indicator lamp is not flashing, then remove the memory card. - Canon PIXMA iP6000D | iP6000D Diect Print Guide - Page 15
•If you use a Memory Stick, SD card or MultiMedia card, hold the exposed portion of the memory card with your fingers to remove the memory card. 2 Close the Card Slot Cover. 14 - Canon PIXMA iP6000D | iP6000D Diect Print Guide - Page 16
results, but can also cause the printer to jam or malfunction. • Folded, curled or wrinkled paper • Damp paper • Excessively thin paper (less than 64 gsm or 17 lb) • Excessively thick paper* (more than 105 gsm or 28 lb) *non-Canon branded paper • Picture postcards • Postcards affixed with - Canon PIXMA iP6000D | iP6000D Diect Print Guide - Page 17
. To change the paper source, use the paper feed switch on the printer. • Choosing the paper source to match the location of the printer You can use just the sheet feeder or cassette according to the location of the printer. For example, if you intend to install the printer in a small place, such - Canon PIXMA iP6000D | iP6000D Diect Print Guide - Page 18
opposite direction until the paper becomes completely flat. Refer to "Uncurling the Media" on the User's Guide. 2 Preparing to Load Paper. (1) Open and pull out the paper support. (3) Press the paper feed switch so that the sheet feeder lamp is lit. (2) Open the paper output tray and pull out the - Canon PIXMA iP6000D | iP6000D Diect Print Guide - Page 19
of the photo. (2) Align the paper stack snug against the right side of the sheet feeder. (3) Press the paper guide and slide it against the left side of the stack of paper. Note Do not touch the printed surface until the ink dries. For specific drying times, refer to the instructions packaged with - Canon PIXMA iP6000D | iP6000D Diect Print Guide - Page 20
in the Cassette In this example, description is provided using Photo Paper Plus Glossy 4" x 6" in your printer. • Refer to "Media Types for Card Direct Printing" on page 21 for compatible paper. Caution You cannot load sticker paper in the cassette. Load one sheet at a time in the sheet feeder - Canon PIXMA iP6000D | iP6000D Diect Print Guide - Page 21
of the printer. 1 Cassette Lamp 2 (1) Open the paper output tray and pull out the extension completely. (2) Press the paper feed switch so that the cassette lamp is lit. Note Do not touch the printed surface until the ink dries. For specific drying times, refer to the instructions packaged with - Canon PIXMA iP6000D | iP6000D Diect Print Guide - Page 22
Types for Card Direct Printing You can use the following Canon media: Media Type Plain Paper Photo Paper Pro Photo Paper Plus Glossy Photo Paper Plus Semigloss Matte Photo Paper Glossy Photo Paper Photo Stickers*3 Paper Support Load Limit Letter: Up to 150 sheets Letter: 10 sheets*1 4" x 6": up to - Canon PIXMA iP6000D | iP6000D Diect Print Guide - Page 23
digital camera and print it. Printing a Photo Displayed on the LCD - Photo Gallery 1 Turn on the printer. 2 Load the Paper. See "Loading Paper" on page 15. 3 Ensure the paper source. Ensure that the proper paper source is selected. Press the paper feed switch to change the paper source. Sheet Feeder - Canon PIXMA iP6000D | iP6000D Diect Print Guide - Page 24
Important If you leave the printer more than 5 minutes without using any button on the operation panel, the LCD goes into screen-saver mode automatically. Press the OK button to turn on the LCD again. 6 Select the photo to print. (1) Using the print. buttons, select the photo to (2) Press the OK - Canon PIXMA iP6000D | iP6000D Diect Print Guide - Page 25
the shooting date as the search key. See "Searching for Photos with the Shooting Date" on page 30. For each photo selected you can also set the area to print using the Trimming function. See "Printing a Specified Area - Trimming" on page 32. 7 Confirm the settings. To change any of the settings - Canon PIXMA iP6000D | iP6000D Diect Print Guide - Page 26
Print for Each Photo Photo Print You can specify how many copies to print for each photo. In addition, you can trim each photo before it is printed. 1 Prepare to print. (1) Turn on the printer. (2) Load the paper. See "Loading Paper" on page 15. (3) Ensure the paper source. See page 22. (4) Install - Canon PIXMA iP6000D | iP6000D Diect Print Guide - Page 27
have specified the number of copies to print for photos before using the search function, the photos will be printed even if they are excluded by the search. For each photo selected you can also set the area to print using the Trimming function. See "Printing a Specified Area - Trimming" on page 32 - Canon PIXMA iP6000D | iP6000D Diect Print Guide - Page 28
You can change the print settings such as paper size, paper type, bordered or borderless print, etc. To Change Print Settings This section describes the steps to change the print settings using the Effects setting as an example. For information on each item, see "Print Setting Items" on page - Canon PIXMA iP6000D | iP6000D Diect Print Guide - Page 29
to set the paper size, paper type, Bordered/ (1) Borderless printing, and printing with the date. (2) (3) (1)Select the paper size. (4) 8.5"x11", 4"x6", 5"x7" (5) (2)Select the paper type. Photo Paper Pro, Photo Paper Plus Glossy, Matte Photo Paper, Glossy Photo Paper, Plain Paper (3)Select - Canon PIXMA iP6000D | iP6000D Diect Print Guide - Page 30
contrast. Contrast +2, Contrast +1, Contrast Standard, Contrast -1, Contrast -2 (3)Adjust color hue. Color hue Red +2, Color hue Red +1, Color hue Original, Color hue Yellow +1, Color hue Yellow +2 4: Effects Applying the effect to print a photo in sepia or like an illustration. No effects, Sepia - Canon PIXMA iP6000D | iP6000D Diect Print Guide - Page 31
selecting the menus below, you can display and print the photos searched for by date: Photo Gallery, Photo Print, Layout print, Sticker print, and Color balance. If you have specified the number of copies to print for photos, or have pasted photos on a certain layout before using the search function - Canon PIXMA iP6000D | iP6000D Diect Print Guide - Page 32
for and displayed. The total number of the photos in the memory card Colors change and the number of photos selected is displayed. Note To cancel the search is canceled and all the photos in the memory card can be displayed and printed. Removing the memory card also cancels the search mode. 31 - Canon PIXMA iP6000D | iP6000D Diect Print Guide - Page 33
selection will be lost. 1 Select the photo to trim. Use the buttons to select the photo. 2 Set the Trimming Mode. Press theTrimming button. The printer is now in Trimming Mode. Trimming Guide 3 Trimming and Rotating the Sections you wish to Print. Rotate the trimming area Using the Trimming - Canon PIXMA iP6000D | iP6000D Diect Print Guide - Page 34
4 Finalize the trimmed area. (1) Press the OK button. The trimming area is fixed and the color of the trimming guide changes into yellow. Notes Once the trimmed area is finalized, if you press the Trimming button again, you can modify the trimmed area. If you - Canon PIXMA iP6000D | iP6000D Diect Print Guide - Page 35
x2/x4/x8, postcard, album Mixed). Bordered Postcard Album Borderless Postcard with Rule Mixed 1 Prepare to print. (1) Turn on the printer and load the paper. See "Loading Paper" on page 15. (2) Ensure the paper source. See page 22. (3) Insert the memory card into the card slot. See "Inserting - Canon PIXMA iP6000D | iP6000D Diect Print Guide - Page 36
The Layout print screen is displayed. (1) Press the buttons to specify the layout. (2) Press the OK button. The paste method screen is displayed. 4 Select the paste method. (1) Use the buttons, select the paste method. • After selecting Paste all and pressing the OK button, all the photos in the - Canon PIXMA iP6000D | iP6000D Diect Print Guide - Page 37
selected you can also set the area to print using the Trimming function. Trim the photo after specifying paper size, paper type, and bordered/borderless print. See "Printing a Specified Area - Trimming" on page 32. 6 Start printing. (1) Confirm the print settings. To change any of the settings - Canon PIXMA iP6000D | iP6000D Diect Print Guide - Page 38
on the Sticker - Sticker Print You can print your favorite photo on the Canon-Brand sticker. 1 Prepare to print. (1) Turn on the printer and load a sheet of sticker paper in the sheet feeder. See "Loading Paper" on page 15. Caution You cannot load sticker paper in the cassette. Load one sheet - Canon PIXMA iP6000D | iP6000D Diect Print Guide - Page 39
with the Shooting Date" on page 30. For each photo selected you can also set the area to print using the Trimming function. Trim the photo after specifying paper size, paper type, and bordered/borderless print. See "Printing a Specified Area - Trimming" on page 32. 5 Select the frame. (1) Using - Canon PIXMA iP6000D | iP6000D Diect Print Guide - Page 40
6 Start printing. (1) Confirm the print settings. (2) Press the Print button. The specified number of copies for each photo will be printed. Caution You cannot load sticker paper in the cassette. Load one sheet at a time in the sheet feeder. 39 - Canon PIXMA iP6000D | iP6000D Diect Print Guide - Page 41
in Your Favorite Color Tone - Color Balance You can print 9 color balance sample photos on a sheet of paper and select a color tone you like from them before printing. 1 Prepare to print. (1) Turn on the printer and load the paper. See "Loading Paper" on page 15. (2) Ensure the paper source. See - Canon PIXMA iP6000D | iP6000D Diect Print Guide - Page 42
. To change any other settings, press the Settings button. (4) Start printing the color balance sample. Press the Print button. Printing the color balance sample starts. Note Since the ink takes a few minutes to set on some types of paper, wait for a short while before going to Step 5. 41 - Canon PIXMA iP6000D | iP6000D Diect Print Guide - Page 43
5 Select the Color Balance. The color balance selection screen appears on the LCD after printing the sample. Select the number of the sample photo you like. (1) Use the buttons to select the number of the sample photo you like. (2) Press the OK button. The print confirmation screen is displayed. - Canon PIXMA iP6000D | iP6000D Diect Print Guide - Page 44
Printing All Photos You can print all photos saved on a memory card. 1 Prepare to print. (1) Turn on the printer and load the paper. See "Loading Paper" on page 15. (2) Ensure the paper source. See page 22. (3) Insert the memory card into the card slot. See "Inserting a Memory Card" on page 11. 2 - Canon PIXMA iP6000D | iP6000D Diect Print Guide - Page 45
Printing a Photo List - Print Index You can print an index of all photos saved in the memory card known as an index print. 1 Prepare to print. (1) Turn on the printer and load the paper. See "Loading Paper" on page 15. (2) Ensure the paper source. See page 22. (3) Insert the memory card into the - Canon PIXMA iP6000D | iP6000D Diect Print Guide - Page 46
you use. The shooting date format is as specified in the DPOF setting from DPOF printing. 1 Prepare to print. (1) Turn on the printer and load the paper. See "Loading Paper" on page 15. (2) Ensure the paper source. See page 22. (3) Insert the memory card containing DPOF information into the card - Canon PIXMA iP6000D | iP6000D Diect Print Guide - Page 47
press the OK button. The print confirmation screen is displayed. 3 Start printing. (1) Confirm the print settings. To change any of the settings, press the Settings button. See "Changing the Print Settings" on page 27. (2) Press the Print button. The photos will be printed according to the DPOF - Canon PIXMA iP6000D | iP6000D Diect Print Guide - Page 48
items in the Tool Box menu below. "Adjusting Contrast of the LCD" on page 47 "Reducing the Sound of Printer Operation" on page 48 "Setting the Date Display Format" on page 49 "Resetting All the Settings" on page 50 "Changing the Language Displayed" on page 51 Adjusting Contrast of the LCD You - Canon PIXMA iP6000D | iP6000D Diect Print Guide - Page 49
from a memory card or from a digital camera connected to this printer. If you are printing with your computer connected, specify the required settings in the Printer Driver. 1 Turn on the printer. 2 Select Tool Box from the Menu. (1) Press the Menu button. (2) Use the buttons to select Tool - Canon PIXMA iP6000D | iP6000D Diect Print Guide - Page 50
the date. Note The shooting date format is as specified in the DPOF setting from DPOF printing. 1 Turn on the printer. 2 Select Tool Box from the Menu. (1) Press the Menu button. (2) Use the buttons to select Tool Box and then press the OK button. The Tool - Canon PIXMA iP6000D | iP6000D Diect Print Guide - Page 51
All the Settings You can reset all settings, other than the display language and the print head position, to the initial state. 1 Turn on the printer. 2 Select Tool Box from the Menu. (1) Press the Menu button. (2) Use the buttons to select Tool Box and then press the OK button. The Tool - Canon PIXMA iP6000D | iP6000D Diect Print Guide - Page 52
Changing the Language Displayed You can change the language displayed on the LCD. 1 Turn on the printer. 2 Select Tool Box from the Menu. (1) Press the Menu button. (2) Use the buttons to select Tool Box and then press the OK button. The Tool - Canon PIXMA iP6000D | iP6000D Diect Print Guide - Page 53
printer allows you to print recorded photos directly without using a computer. This printer supports both PictBridge and Canon Bubble mode manually after connecting the camera to the printer. Perform necessary operations according to the instruction manual supplied with your camera. When printing - Canon PIXMA iP6000D | iP6000D Diect Print Guide - Page 54
" on page 15. 3 Ensure the paper source. See page 22. 4 Connect the digital camera to the printer. (1) Connect the camera to the printer using the USB cable (for connection to a computer) supplied with the camera. (2) Turn on and set up the camera for direct printing. When the connection between the - Canon PIXMA iP6000D | iP6000D Diect Print Guide - Page 55
be printed based on the current printer setting. Names of settings that are displayed on Canon PictBridge-compliant cameras are used in the description given below. Different names may be displayed on your camera depending on the brand or model. For details, refer to your camera's instruction manual - Canon PIXMA iP6000D | iP6000D Diect Print Guide - Page 56
Paper Credit Card Letter Photo Photo Photo Paper Plus Glossy Photo Paper Plus Semi-gloss Fast Photo Photo Paper Pro Photo Glossy Photo Paper About "Layout" When "Default setting" (selections based on the printer setting) is selected, the printer operates based on the "Borderless Printing - Canon PIXMA iP6000D | iP6000D Diect Print Guide - Page 57
the digital camera and printer, follow the instructions given in the Instruction Manual of the camera. Controls of the digital camera cannot be used for the following: - Print quality setting - Printer maintenance For the digital camera operation method and troubleshooting, refer to your digital - Canon PIXMA iP6000D | iP6000D Diect Print Guide - Page 58
size Photo Paper Pro A4 size Photo Paper Plus Glossy A4 size Photo Paper Plus Semi-gloss A4 size Glossy Photo Paper A4 size Notes For the digital camera operation method and troubleshooting, refer to your digital camera's manual. By operating the digital camera, you can make the following prints - Canon PIXMA iP6000D | iP6000D Diect Print Guide - Page 59
sets and supports hardware and software standards which create infrared communication links. The IrDA standard is the de facto standard of the infrared communication and the word IrDA is used as the infrared interface name. Setting the Media Type, Paper Size, and Layout When Printing From a Mobile - Canon PIXMA iP6000D | iP6000D Diect Print Guide - Page 60
Mixed 1, 2, 3, 4. Printing on paper other than sticker: Bordered x 1, x 2, x 4, x 8 Borderless x 1, x 2, x 4, x 8. Note When printing on Canon-brand Sticker, make the settings as below. Media Type Paper Size [Photo Stickers] Sticker Paper Type Photo Paper Plus Glossy Layout Photo x 16 59 - Canon PIXMA iP6000D | iP6000D Diect Print Guide - Page 61
use. For this distance, refer to your mobile phone manual. Infrared port of printer Effective angle (in both vertical and horizontal direction): About 10°. Less than 8 inches (Do not block with any obstacle.) Infrared port of mobile phone (2) Select the photo to print and send the data to the - Canon PIXMA iP6000D | iP6000D Diect Print Guide - Page 62
not to interrupt infrared communication with the printer. If it is interrupted, turn off the printer and cancel printing on the mobile phone. Following limitations apply on transmittable data. - It does not support printing a downloaded content or photo and a photo attached to an email for security - Canon PIXMA iP6000D | iP6000D Diect Print Guide - Page 63
To use the Easy-PhotoPrint Startup button, connect the printer to the computer and install the printer driver, Memory Card Utility, and Easy-Photo Print. For more information on installation, refer to the Quick Start Guide. 1 Ensure that the printer and the computer are turned on. 2 Press the Easy - Canon PIXMA iP6000D | iP6000D Diect Print Guide - Page 64
. The photos will be saved in the location specified below. A folder will be created with a name and the date of the photos were saved (YYYY_MM_DD). Windows XP/Windows 2000/Windows Me: My Pictures folder Windows 98: My Documents folder Mac OS X v.10.2.1 to 10.3: Pictures folder Mac OS 9.x: Desktop - Canon PIXMA iP6000D | iP6000D Diect Print Guide - Page 65
on page 13. (2) Select All Programs (or Program) from the Start menu. Next, select Canon Utilities, PIXMA iP6000D Memory Card Utility, and then USB Memory Card Settings. The USB Memory Card Settings window appears. 3 Specify the read/write attribute. (1) Click Next. The Read/write attribute setting - Canon PIXMA iP6000D | iP6000D Diect Print Guide - Page 66
where the printer driver was installed, and then the Applications (or Applications (Mac OS 9)) folder. (3) Double-click PIXMA iP6000D Memory Card select this mode when printing photos. Read/write mode ...The card slot is used as the memory card drive of the computer. Photo data can be written - Canon PIXMA iP6000D | iP6000D Diect Print Guide - Page 67
. The printer will not print properly if the wrong ink tank is used, or installed in the incorrect position. With this printer, ink tanks must be installed from the right in the order indicated below. Magenta: BCI-6M PhotoMagenta: BCI-6PM Yellow: BCI-6Y Black: BCI-6BK Cyan: BCI-6C Photo Cyan - Canon PIXMA iP6000D | iP6000D Diect Print Guide - Page 68
NO and then press the OK button. Replacing Ink Tanks When ink tanks run out of ink, replace them using the following steps. 1 Ensure that the printer is on, and then open the cover. The print head holder moves to the center. 2 Open the paper output tray and pull down to open the inner cover - Canon PIXMA iP6000D | iP6000D Diect Print Guide - Page 69
removed, do not touch the open ink port. Ensure that all the orange tape has been peeled off along the perforation. If there remains a part of the orange tape, ink may not be ejected correctly. 5 Install the ink tank. (1) Insert the ink tank in the print head holder. (2) Press on the "PUSH" mark - Canon PIXMA iP6000D | iP6000D Diect Print Guide - Page 70
black-and-white or grayscale printing is specified. Color ink is consumed in the head cleaning and deep cleaning, which are necessary to maintain the printer's capabilities. When you start printing after replacing the ink tank, the printer executes print head cleaning automatically. Do not perform - Canon PIXMA iP6000D | iP6000D Diect Print Guide - Page 71
Colors are Incorrect When printing becomes faint or colors are incorrect, even if ink remains in the ink tanks, the print head nozzles are probably clogged. Follow the procedures below to clean the nozzles. If the ruled lines are shifted after running the print head maintenance, align the print head - Canon PIXMA iP6000D | iP6000D Diect Print Guide - Page 72
blurred or the color is incorrect. Notes Ensure that the inner cover is closed. Nozzle check pattern printing can be performed also from the printer itself. (1) With the printer on, load a sheet of Letter-sized plain paper in the sheet feeder or cassette. (2) Press the paper feed switch to select - Canon PIXMA iP6000D | iP6000D Diect Print Guide - Page 73
The nozzle check pattern should appear as follows when ink is discharged properly. Examine the nozzle check pattern output by the printer. (1) (1) Examining the nozzle check pattern. The Pattern Check screen appears on the LCD after printing the nozzle check pattern. (2) Use the buttons to select - Canon PIXMA iP6000D | iP6000D Diect Print Guide - Page 74
if you suspect that the nozzles might be clogged. Cleaning the print head consumes ink, so perform print head cleaning only when necessary. Note Ensure that the inner cover is closed. 1 Ensure that the printer is on. 2 Print Head Cleaning. (1) Press the Menu button. (2) Use the buttons to select - Canon PIXMA iP6000D | iP6000D Diect Print Guide - Page 75
specific color only does not print, see "Replacing Ink Tanks" on page 67. If the problem remains, make sure that ink remains in the ink tank. Then turn off the printer's power for at least 24 hours, and perform deep cleaning of the print head again. If the problem still remains, the print head may - Canon PIXMA iP6000D | iP6000D Diect Print Guide - Page 76
can adjust the print head manually. See "Adjusting the Print Head Manually" on page 78. Note Ensure that the inner cover is closed. 1 With the printer on, load a sheet of Letter-sized paper in the sheet feeder. Caution The cassette does not feed paper for aligning the print head. Load paper in the - Canon PIXMA iP6000D | iP6000D Diect Print Guide - Page 77
are clean. See "Printing the Nozzle Check Pattern" on page 71. 4. Move the printer so that the paper output slot is not in direct sunlight and try automatic print head aligning again. 5. If the error persists, adjust the print head manually. See "Adjusting the Print Head Manually" on page 78. 76 - Canon PIXMA iP6000D | iP6000D Diect Print Guide - Page 78
on the LCD, take the corresponding countermeasure described below. Message No photos in memory card. Waste ink absorber* almost full. Read-write mode enabled. Failed to align print head. Press Resume and see manual. Cannot communicate with a connected device. Please remove it and press Resume - Canon PIXMA iP6000D | iP6000D Diect Print Guide - Page 79
the printer for about 10 minutes. Then plug the power cord back in, and turn on the printer again. If the same error persists, contact the Customer Care Center. * The waste ink absorber absorbs ink used during cleaning. Note Adjusting the Print Head Manually If the automatic print head adjustment - Canon PIXMA iP6000D | iP6000D Diect Print Guide - Page 80
: See "Aligning Print Head - Auto head align" on page 75. Check that your paper is loaded with the correct print side facing up. Note Follow the instructions packaged with your specialty media for loading and handling. Close the inner cover and click the RESUME button on the printer. Ensure that the - Canon PIXMA iP6000D | iP6000D Diect Print Guide - Page 81
is used. • Check to see if the paper you are printing on is too thick. See "Print Media to Avoid" on page 15. • If paper is curled, it may be smudged or may not feed properly. Make the paper flat. Refer to "Uncurling the Media" on the User's Guide. • Note that smudging may occur at the top - Canon PIXMA iP6000D | iP6000D Diect Print Guide - Page 82
touch the components inside the printer. (3) Reload the paper into the printer and press the RESUME button on the printer. (4) If the error persists, adjust the print head manually. • If you have turned off the printer in step (1), you will need to retry printing, because this operation cancels any - Canon PIXMA iP6000D | iP6000D Diect Print Guide - Page 83
If you have turned off the printer in step (2), you will need to retry printing, because this operation cancels any print jobs in progress. • If you cannot remove the paper or the paper tears inside the printer, or if the paper jam error continues after removing the paper, contact the Customer Care - Canon PIXMA iP6000D | iP6000D Diect Print Guide - Page 84
the following procedure. (1) Remove the cassette. If the paper is loaded in the sheet feeder, remove the paper from the sheet feeder. Warning Support the cover and the paper support with your hands when standing the printer. (2) Stand the printer with the rear side down. (3) Slowly pull the jammed - Canon PIXMA iP6000D | iP6000D Diect Print Guide - Page 85
Guide. When there is a print head installed, the print head is defective. Contact the Customer Care Center. The waste ink absorber*2 is nearly full. The printer has a built-in waste ink absorber to hold the ink used during print head cleaning. This error message indicates that the waste ink absorber - Canon PIXMA iP6000D | iP6000D Diect Print Guide - Page 86
between the printer and the camera. Then, turn the camera on, if it does not automatically turn on. If the problem is still unresolved, select some other photo and check if it can be printed or not. The print head nozzles may be clogged if printing becomes faint or colors are incorrect. See "When - Canon PIXMA iP6000D | iP6000D Diect Print Guide - Page 87
Media (sheet feeder 17 Low Ink 67 M Maintenance 70 Manual head align 7, 78 Media Types (Bubble Jet Direct 57 Media Types (card direct printing 21 Media Types (Infrared print 58 Media Types (PictBridge 55 Memory Card 10, 11, 13 Memory Card (Browsing its photos on the computer) ... 62 Memory - Canon PIXMA iP6000D | iP6000D Diect Print Guide - Page 88
Simulate illustration 29 SmartMedia Card 10 SmartMedia card 12, 13 Sticker print 6, 37 T Thick paper 7, 80 Tool Box 6 Trimming 32 Trimming Button 4, 32 Trimming Guide 32 U USB Memory Card Settings 64 V VIVID 56 Vivid Photo 29 VIVID+NR 56 W Waste ink absorber 77, 78 White Streaks 79
-
 1
1 -
 2
2 -
 3
3 -
 4
4 -
 5
5 -
 6
6 -
 7
7 -
8
-
9
-
10
-
11
-
12
-
13
-
14
-
15
-
16
-
17
-
18
-
19
-
20
-
21
-
22
-
23
-
24
-
25
-
26
-
27
-
28
-
29
-
30
-
31
-
32
-
33
-
34
-
35
-
36
-
37
-
38
-
39
-
40
-
41
-
42
-
43
-
44
-
45
-
46
-
47
-
48
-
49
-
50
-
51
-
52
-
53
-
54
-
55
-
56
-
57
-
58
-
59
-
60
-
61
-
62
-
63
-
64
-
65
-
66
-
67
-
68
-
69
-
70
-
71
-
72
-
73
-
74
-
75
-
76
-
77
-
78
-
79
-
80
-
81
-
82
-
83
-
84
-
85
-
86
-
87
-
88
 |
 |

Photo Printer
Photo Printer
Photo Printer
Photo Printer
Direct Printing Guide
Direct Printing Guide
Direct Printing Guide
Direct Printing Guide