Canon i960 Series i960 Quick Start Guide
Canon i960 Series Manual
 |
View all Canon i960 Series manuals
Add to My Manuals
Save this manual to your list of manuals |
Canon i960 Series manual content summary:
- Canon i960 Series | i960 Quick Start Guide - Page 1
i 960 Series Photo Printer Quick Start Guide - Canon i960 Series | i960 Quick Start Guide - Page 2
Series Desktop Photo Printer Quick Start Guide - Canon i960 Series | i960 Quick Start Guide - Page 3
when you connect a PictBridge-compatible digital camera and digital video camcorder, refer to the leaflet titled "PictBridge Instruction Sheet". Trademarks • Canon is a registered trademark of Canon Inc. • PhotoRecord is a trademark of Canon Information System Research Australia. • Macintosh - Canon i960 Series | i960 Quick Start Guide - Page 4
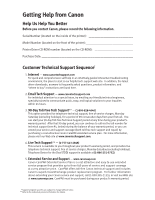
on the front of the printer Printer Driver CD-ROM number (located on the CD-ROM Purchase Date Customer Technical Support Sequence* 1. Internet - www.canontechsupport.com For quick and comprehensive self-help in an intuitively guided interactive troubleshooting environment, the place to start - Canon i960 Series | i960 Quick Start Guide - Page 5
7980A019 7980A006 8386A008 8386A007 5699A005 1029A014 1029A004 1043A004 Call 1-800-OK-CANON to locate a dealer near you, or visit the Canon eStore at www.estore.usa.canon.com. ©2003 Canon U.S.A., Inc. Canon is a registered trademark of Canon Inc. All other product and brand names are trademarks of - Canon i960 Series | i960 Quick Start Guide - Page 6
72 Cannot Print Properly from the Digital Camera 74 Appendix Installing the Printer Driver When Using Mac OS 9.x 76 User's Guide Table of Contents 77 Specifications 78 Safety Precautions 80 Regulatory Information 82 Canon Printer and Scanner Limited Warranty --- (USA Only 83 Index 85 1 - Canon i960 Series | i960 Quick Start Guide - Page 7
and how to use them. For more information, view the i960 User's Guide on the Setup Software & User's Guide CD-ROM, or use the online help within your printer driver interface: While in the printer's Properties window, press the F1 key, or click ? in the upper right corner. Then click the feature - Canon i960 Series | i960 Quick Start Guide - Page 8
such paper will not only produce unsatisfactory results, but can also cause the printer to jam or malfunction. • Folded, curled or wrinkled paper • Damp Excessively thick paper* (more than 105 gsm or 28 lb) *non-Canon branded paper • Picture postcards • Postcards affixed with photos or stickers - Canon i960 Series | i960 Quick Start Guide - Page 9
printer. • For detailed information on the specialty media Canon provides for use with its various printers, refer to the section "Using Specialty Media" on page 6. • Consult the User's Guide for detailed instructions and then the paper rest flap to support the paper. ➀ ➂ ➁ (2) Open the cover and pull - Canon i960 Series | i960 Quick Start Guide - Page 10
Do not load paper beyond this Load Limit Mark. (2) Align the paper stack against the right side of the Auto Sheet Feeder. (3) Pinch the paper guide and slide it against the left side of the stack of paper. Note z Do not stack more than 50 sheets in the paper output tray - Canon i960 Series | i960 Quick Start Guide - Page 11
Basic Printing Using Specialty Media Canon recommends that you use genuine Canon media to ensure optimal print quality. „ Photo Quality Media • Photo Paper Pro • Photo Paper Pro Perforated • Photo Paper Plus Glossy • Photo Paper Plus Semi-gloss • - Canon i960 Series | i960 Quick Start Guide - Page 12
Canon loaded. Select Plain Paper from the printer driver Media Type. z For detailed description of print media types, refer to the User's Guide. * When paper does not feed the Setup Software & User's Guide CD-ROM when printing with Photo Paper Pro Perforated. For instructions on how to print from - Canon i960 Series | i960 Quick Start Guide - Page 13
will generate spectacular results for printing photographs, especially when used with Canon specialty media. All images are susceptible to fading over time, but proper care of prints made from your i960 Photo Printer will ensure that print quality lasts long into the future. Many environmental - Canon i960 Series | i960 Quick Start Guide - Page 14
in Windows XP. 1 Create a document or open a file to print. 2 Open the Printer Properties dialog box. (1) Select Print from the application software's File menu. The print dialog box opens. (2) Ensure that Canon i960 is selected. (3) Click Preferences or Properties. Note In Windows 2000, click the - Canon i960 Series | i960 Quick Start Guide - Page 15
Set on the Main tab. You can control the print quality in the Set Print Quality dialog box. z For details about other printer driver functions, refer to the User's Guide or Help. z Select Preview before printing by clicking the check box. This displays a preview screen that allows you to confirm the - Canon i960 Series | i960 Quick Start Guide - Page 16
4 Print the document. Basic Printing (1) Click Print or OK. Note You can cancel a print job in progress by simply pressing the RESUME/ CANCEL button on the printer. 11 - Canon i960 Series | i960 Quick Start Guide - Page 17
Basic Printing Printing with Macintosh Note z The menu screens and dialog boxes that appear may vary, depending on the software application you are using. z The steps described in this section are for printing in Mac OS X. 1 Create a document or open a file to print. 2 Select Paper Size. (1) Select - Canon i960 Series | i960 Quick Start Guide - Page 18
from the pull-down menu. (5) Select the type of the document from the Print Type pull-down menu. (6) Click Print. Note z For details about other printer driver functions, refer to the User's Guide or Help. z The print settings are automatically changed according to the type of paper loaded in the - Canon i960 Series | i960 Quick Start Guide - Page 19
Use the USB cable that came with your digital camera to connect to the printer. Note z To print directly from a digital camera or digital video camcorder, use only "PictBridge" or Canon "Bubble Jet Direct" compatible digital cameras or digital video camcorders. This section describes how to print - Canon i960 Series | i960 Quick Start Guide - Page 20
Advanced Printing „ Media Types for Digital Camera You can use the following Canon media: Digital Camera Setting Media Type Card #1 Photo Paper Pro 4" x 6" / 101.6 or Photo Paper Plus Glossy A4 „ Printing from a Digital Camera 1 Ensure that the printer is turned on. 2 Load the paper. (1) - Canon i960 Series | i960 Quick Start Guide - Page 21
it on manually. 4 Start printing using the print function of the digital camera. (1) Set the camera to Replay mode. The "D" will appear on the LCD monitor when the printer is connected correctly. If the Replay mode does not appear automatically, refer to the digital camera's user guide for changing - Canon i960 Series | i960 Quick Start Guide - Page 22
messages, refer to "Cannot Print Properly from the Digital Camera" on page 74. z For the digital video camcorder operation, print error messages, and troubleshooting, refer to your digital video camcorder user's manual. z By operating the digital camera, you can make the following prints: - You can - Canon i960 Series | i960 Quick Start Guide - Page 23
photo paper while another type of paper is loaded through the Auto Sheet Feeder of the printer. You can simply select which to use, without having to change the paper to be fed Photo Paper Tray is attached to the printer. „ Attaching the Photo Paper Tray 1 Open the paper rest and move the paper - Canon i960 Series | i960 Quick Start Guide - Page 24
rest and insert it until it clicks into place. Put the protrusions of the Photo Paper Tray all the way into the slots of the printer. 3 Load the paper. (1) Open the cover on the Photo Paper Tray. (2) Load the paper with its printing side facing up. 19 - Canon i960 Series | i960 Quick Start Guide - Page 25
Advanced Printing (3) Set the edge of the paper to the right end of the Photo Paper Tray. Up to 20 sheets of paper can be loaded at once. (4) Pinch the paper guide on the Photo Paper Tray and set it to the left edge of the paper. Paper guide (5) Close the cover on the Photo Paper Tray. 20 - Canon i960 Series | i960 Quick Start Guide - Page 26
to the left until it points at the "PRINT" arrow on the Photo Paper Tray. Slide the tray into the Auto Sheet Feeder, and the printer is now ready for feeding paper from the Photo Paper Tray. Important z Turning the knob switches the source from where the paper is fed. Turning - Canon i960 Series | i960 Quick Start Guide - Page 27
Advanced Printing „ Removing the Photo Paper Tray 1 Turn the knob to the right until it points at the Photo Paper Tray to lift up the Photo Paper Tray. "REMOVE" arrow on the 2 Slide the lever (A), on the right side of the Photo Paper Tray, upwards to remove it. (A) 22 - Canon i960 Series | i960 Quick Start Guide - Page 28
Create a document or open a file to print. 3 Open the Printer Properties dialog box. 4 Specify the required settings. (1) Click Media Type to select the type of media loaded in the printer. (2) Ensure that the Auto Sheet Feeder is selected in Paper Source. - Canon i960 Series | i960 Quick Start Guide - Page 29
Advanced Printing 1 Turn the knob on the Photo Paper Tray to the left until it points at the "PRINT" arrow on the Photo Paper Tray. Slide the tray into the Auto Sheet Feeder. 2 Create a document or open a file to print. 3 Select Paper Size. (1) Select Page Setup... from the application software's - Canon i960 Series | i960 Quick Start Guide - Page 30
software's File menu. (2) Select Quality & Media from the pop-up menu. (3) Click Media Type to select the type of media loaded in the printer. (4) Ensure that the Auto Feeder is selected in Paper Source. (5) Select Print Mode. (6) Click Print. Printing will now begin. 5 Pull up the tray - Canon i960 Series | i960 Quick Start Guide - Page 31
Printer Driver The Printer manual for your application. „ Opening the Printer Properties Dialog Box from Your Application Program 1 In your application, select the command to print a document. The Print dialog box can usually be opened by selecting Print from the File menu. 2 Ensure that Canon - Canon i960 Series | i960 Quick Start Guide - Page 32
can significantly improve the quality of your print-outs. See the inside back cover for a list of Canon Specialty Papers and ink tanks for this printer. Printer Driver Settings The printer driver has a variety of settings that can be used to creatively enhance the colors and output of your - Canon i960 Series | i960 Quick Start Guide - Page 33
Advanced Printing To manually adjust Print Quality settings: 1 Open the Printer Properties dialog box. See"Opening the Printer Properties Dialog Box from Your Application Program" on page 26. 2 Select Custom in Print Quality, then click Set... to open the Set Print Quality dialog - Canon i960 Series | i960 Quick Start Guide - Page 34
PRO automatically adjusts the photographs taken with a digital camera. Use this feature to compensate for unsatisfactory color balance and over- or underexposure before printing. 1 Open the Printer Properties dialog box. See"Opening the Printer Properties Dialog Box from Your Application Program" on - Canon i960 Series | i960 Quick Start Guide - Page 35
Advanced Printing To use Vivid Photo option: Vivid Photo intensifies background colors like fields, trees, oceans and skies, while maintaining natural skin tones in the images. Note In Windows Me or Windows 98 If Background Printing has been disabled, the Vivid Photo function is not available. To - Canon i960 Series | i960 Quick Start Guide - Page 36
: The Photo Noise Reduction function reduces noise from blue portions, such as the sky and dark portions of the images taken with your digital camera. Note In Windows Me or Windows 98 If Background Printing has been disabled, the Photo Noise Reduction function is not available. To use Photo Noise - Canon i960 Series | i960 Quick Start Guide - Page 37
Advanced Printing „ Saving and Recalling Driver Settings When you change printer driver settings for a specific print job, such as printing black and white photos, or printing documents with a special background, you can save and name these settings - Canon i960 Series | i960 Quick Start Guide - Page 38
function. 1 Open the Print dialog box. See "Printing with Macintosh" on page 12. 2 Select all of the necessary settings. 3 Register the new printer driver settings. (1) Click Save As... from Presets. The Save Preset screen opens. (2) Enter a name under which to register your settings. 4 Click OK - Canon i960 Series | i960 Quick Start Guide - Page 39
at any time. z Retrieving print settings: Select the name of the print settings to retrieve from the Presets in the Print dialog. z Changing drivers settings: When registered print settings are selected, you can delete them. Select the name of settings to delete from the Presets in the Print dialog - Canon i960 Series | i960 Quick Start Guide - Page 40
features offered by your printer driver. Note For detailed descriptions of the printer driver functions, refer to the User's Guide included in the Setup Software & User's Guide CD-ROM. Printing with Borderless Printing Reducing Noise from Images Taken with Digital Camera Smoothing the Rough Edges - Canon i960 Series | i960 Quick Start Guide - Page 41
Advanced Printing Resizing the Image by Selecting the Scaling Ratio Adding Illustrated Effect to Documents Reducing the Sound of Printer Operation 36 - Canon i960 Series | i960 Quick Start Guide - Page 42
or pages from the User's Guide (on-screen manual of this printer) in full size. Easy-WebPrint digital camera can record data tags for specific camera settings and functions such as whether the flash was on or off, whether the camera was in portrait or night scene mode, etc. Canon BJ Printers support - Canon i960 Series | i960 Quick Start Guide - Page 43
printer. - Borderless Printing may not assure high print quality on the edges of the print or may cause the edges of the print blurred. Follow the steps below to produce color prints of digital camera photographs with EasyPhotoPrint using the Borderless Printing function. Easy-PhotoPrint supports - Canon i960 Series | i960 Quick Start Guide - Page 44
2 Select photographs. Advanced Printing (1) Select the folder containing the photograph you want to print. All photographs in the selected folder are displayed. Guidance Thumbnail Folder window (2) Click the [ ] [ ] button on the thumbnail of the photograph you want to print and specify the - Canon i960 Series | i960 Quick Start Guide - Page 45
Advanced Printing 4 Select the layout. (1) Click the Layout/Print tab. (2) Select Borderless (full). (3) Load the media specified in the Paper Selection tab. (4) Click Print. 40 - Canon i960 Series | i960 Quick Start Guide - Page 46
printer. - Boarderless Printing may not assure high print quality on the edges of the print or may cause the edges of the print blurred. Follow the steps below to produce color prints of digital camera photographs with EasyPhotoPrint using the Borderless Printing function. Easy-PhotoPrint supports - Canon i960 Series | i960 Quick Start Guide - Page 47
Advanced Printing 2 Select photographs. (1) Select the folder containing the photograph you want to print. All photographs in the selected folder are displayed. Guidance Thumbnail Folder window (2) Click the [ ] [ ] button on the thumbnail of the photograph you want to print and specify the number - Canon i960 Series | i960 Quick Start Guide - Page 48
3 Select the paper. 4 Select the layout. Advanced Printing (1) Click the Paper Selection tab. (2) Select the size of the paper you want to use from Paper Size. (3) Select the type of the paper you want to use from Media Type. (1) Click the Layout/Print tab. (2) Select Borderless (full). (3) Load - Canon i960 Series | i960 Quick Start Guide - Page 49
not print properly if the wrong ink tank is used, or installed in the incorrect position. With this printer, ink tanks must be installed from the left to right in the order of Cyan, Photo Cyan, Black, Yellow, Photo Magenta, Magenta. • Cyan: BCI-6C • - Canon i960 Series | i960 Quick Start Guide - Page 50
printing with an empty ink tank. When printing is finished, replace the ink tank immediately. If you continue printing with an empty ink tank, problems may occur. • Menu screens will vary to some degree, depending on your software environment. Note When Low Ink is Detected The BJ Status Monitor - Canon i960 Series | i960 Quick Start Guide - Page 51
ink tank immediately. If you continue printing with an empty ink tank, problems may occur. Note When Low Ink is Detected Ink tank with low ink level (1) Double-click the hard disk icon where the printer driver was installed, the Applications folder, and then the Utilities folder. (2) Double-click - Canon i960 Series | i960 Quick Start Guide - Page 52
Printing Maintenance „ Replacing Ink Tanks When an ink tank runs out of ink, replace it using the following steps. 1 Ensure that the printer is on, and then open the front cover. The print head holder moves to the center. 2 Remove the empty ink tank. (1) Push the tab and - Canon i960 Series | i960 Quick Start Guide - Page 53
remove it from the printer and leave it out in the open. This will cause the ink tank to dry out and the printer may not function properly if consumed in the head cleaning and deep cleaning, which are necessary to maintain the printer's capabilities. z When an ink tank runs out of ink, replace the - Canon i960 Series | i960 Quick Start Guide - Page 54
securely. z Increase the Print Quality setting in the printer driver settings. Step 1 "Printing the Nozzle Check Pattern" problem remains Step 2 "Aligning the Print Head" on page 57 Step 3 "Print Head Deep Cleaning" on page 55 Note If Print Head Deep Cleaning does not solve the problem - Canon i960 Series | i960 Quick Start Guide - Page 55
. Hold the RESUME/CANCEL button until the POWER lamp flashes twice. 1 With the printer on, load a sheet of Letter-sized paper in the printer. 2 Open the Printer Properties dialog box. See "Opening the Printer Properties Dialog Box Directly from the Start Menu" on page 26. 3 Print the Nozzle Check - Canon i960 Series | i960 Quick Start Guide - Page 56
on, load a sheet of Letter-sized paper in the printer. 2 Open the BJ Printer Utility dialog box. (1) Double-click the hard disk icon where the printer driver was installed, then the Applications folder, and then the Utilities folder. (2) Double-click the Print Center icon. (3) Select i960 from - Canon i960 Series | i960 Quick Start Guide - Page 57
the Nozzle Check Pattern The nozzle check pattern should appear as follows when ink is discharged properly. Examine the nozzle check pattern output by the printer. Note The nozzle check pattern will not be printed correctly if there is not enough ink. Replace the ink tank if the remaining amount of - Canon i960 Series | i960 Quick Start Guide - Page 58
hold the RESUME/CANCEL button until the POWER lamp flashes once. 1 Ensure that the printer is on. 2 Open the Printer Properties dialog box. See "Opening the Printer Properties Dialog Box Directly from the Start Menu" on page 26. 3 Start Print Head Cleaning. (1) Click the Maintenance tab. (2) Click - Canon i960 Series | i960 Quick Start Guide - Page 59
box. (1) Double-click the hard disk icon where the printer driver was installed, then the Applications folder, and then the cleaning finishes. This takes about 50 seconds. Note z If this does not solve the problem, clean the print heads again, up to three more times. z After print head cleaning - Canon i960 Series | i960 Quick Start Guide - Page 60
process. Print head deep cleaning consumes ink, so perform this procedure only when necessary. 1 Ensure that the printer is on. 2 Open the Printer Properties dialog box. See "Opening the Printer Properties Dialog Box Directly from the Start Menu" on page 26. 3 Start Print Head Deep Cleaning - Canon i960 Series | i960 Quick Start Guide - Page 61
Utility dialog box. (1) Double-click the hard disk icon where the printer driver was installed, the Applications folder, and then the Utilities folder. (2) Double-click the Print Center icon. (3) Select i960 from the Name list and click Configure. (4) - Canon i960 Series | i960 Quick Start Guide - Page 62
section deals with the manual print head alignment that allows you to precisely align the print head. For details on simple (semi-automatic) print head alignment, refer to the Easy Setup Instructions. Note Ensure that the ink tanks are correctly installed. 1 With the printer on, load a sheet of - Canon i960 Series | i960 Quick Start Guide - Page 63
Printing Maintenance (3) Select Align heads manually check box, and then click Send. When the confirmation message is displayed, click OK. (4) Click Print Head Alignment. (5) When the confirmation message is displayed, click OK. (6) After the pattern is printed, click Yes. 58 - Canon i960 Series | i960 Quick Start Guide - Page 64
4 Align the Print Head. Printing Maintenance (1) Look at the print out. From the patterns, select the most even, least irregular patterns and enter their numbers. (2) Enter the numbers. (3) Click OK. (4) Click OK. 59 - Canon i960 Series | i960 Quick Start Guide - Page 65
paper in the printer. 2 Open the BJ Printer Utility dialog box. (1) Double-click the hard disk icon where the printer driver was installed, the Select Custom Settings from the pull-down menu. (2) Select Align heads manually check box, and then click Send. When the confirmation message is dispayed - Canon i960 Series | i960 Quick Start Guide - Page 66
4 Align the Print Head. Printing Maintenance (1) Look at the print out. From the patterns, select the most even, least irregular patterns and enter their numbers. (2) Enter the numbers. (3) Click Send. (4) Click Quit. 61 - Canon i960 Series | i960 Quick Start Guide - Page 67
page 64. • "Troubleshooting Printer Hardware" on page 66. • "Paper Does Not Feed Properly" on page 68. • "Handling Error Messages" on page 70. • "An Error Message Appears on the Screen" on page 72. • "Cannot Print Properly from the Digital Camera" on page 74. Refer to the User's Guide for additional - Canon i960 Series | i960 Quick Start Guide - Page 68
Troubleshooting Cannot Install the Printer Driver Problem Possible Cause Cannot Install the Installation Printer Driver procedure not followed correctly Try This Follow the Easy Setup Instructions packaged with your printer for proper printer driver installation. If the installer was forced - Canon i960 Series | i960 Quick Start Guide - Page 69
Troubleshooting Print Quality is Poor or Contains Errors Problem up. the print-side up Note Follow the instructions packaged with your specialty media for loading and handling adjust the Quality bar for higher print quality. 1. Select Manual in the Print Mode pull-down menu in the Print dialog - Canon i960 Series | i960 Quick Start Guide - Page 70
Troubleshooting Problem Possible Cause Printed Paper Curls Paper being used is or Ink Blots too thin Try This Use Photo Paper Pro to print images that require a lot of ink (i.e. pictures with intense colors or photographs). Color Intensity setting Reduce the Intensity setting in the printer - Canon i960 Series | i960 Quick Start Guide - Page 71
Troubleshooting Troubleshooting Printer Hardware Problem Printer Does Not Start or Printer Stops During Print Jobs Possible Cause Try This Print head has overheated due to long periods of continuous printing Stop printing and turn the printer off for at least 15 minutes to allow the print head - Canon i960 Series | i960 Quick Start Guide - Page 72
Troubleshooting Problem Cannot Print to End of Job Possible Cause Try This The USB hub. Either an expansion card supporting USB 2.0 or the driver for USB 2.0 may not be installed correctly so that the printer is not recognized. 1. Read the manual supplied with the expansion card and reinstall - Canon i960 Series | i960 Quick Start Guide - Page 73
Troubleshooting Paper Does Not Feed Properly Problem Paper Does Not Feed Properly Possible Cause object, such as a paper clip or pencil, has fallen into the Auto Sheet Feeder. Turn the printer off and unplug the power cord from the power outlet before removing it. If you are unable to - Canon i960 Series | i960 Quick Start Guide - Page 74
Troubleshooting Problem Paper Jams Possible Cause Paper jams inside the printer Try This 1. Gently pull the jammed paper out of the Auto Sheet Feeder or the paper output slot, whichever is easier. Paper jams inside the Photo Paper Tray • If the paper tears and some of it is left in the printer, - Canon i960 Series | i960 Quick Start Guide - Page 75
this printer Disconnect the camera cable, press the printer's RESUME/CANCEL button and reconnect the cable. If the error is not fixed, there is a possibility that you are using a digital camera or digital video camcorder that is not supported by this printer. Use a digital camera or digital video - Canon i960 Series | i960 Quick Start Guide - Page 76
Care Center may have occurred. Disconnect the printer cable from the printer, and then turn the printer off and unplug the printer from the power supply. Plug the printer back in and turn the printer back on after leaving it about 10 minutes. If the problem remains, contact the Customer Care Center - Canon i960 Series | i960 Quick Start Guide - Page 77
Troubleshooting An Error Message Appears on the Screen Problem Paper Identification Error Possible Cause size selected Verify that the paper size setting matches the size of the paper loaded in the printer: - Check the Paper Size setting from within your application to ensure that it matches the - Canon i960 Series | i960 Quick Start Guide - Page 78
a problem with the cable(s). Replace the cable(s) and try printing again. Printer driver is not installed properly Uninstall then reinstall the printer driver. 1. Click Start, and select All Programs (or Programs), Canon i960, and Uninstall. 2. Follow the on-screen instructions to uninstall driver - Canon i960 Series | i960 Quick Start Guide - Page 79
Troubleshooting Cannot Print Properly from the Digital Camera The following messages may be displayed on the digital camera or digital video camcorder when images are printed directly from them. Correct the error according to the procedure below. Camera Error Message Possible Cause Printer in - Canon i960 Series | i960 Quick Start Guide - Page 80
Troubleshooting Note z Images can be printed directly from digital cameras and digital video camcorders that are compatible with this printer. z If the connected digital camera or digital video camcorder does not support, the POWER lamp on the printer flashes nine times. If this happens, - Canon i960 Series | i960 Quick Start Guide - Page 81
instructions. 9 When the "Installation has Finished" screen appears, click OK. 10 When prompted, restart your computer. 11 After the computer restarts, TURN THE PRINTER support. 14 To ensure highest quality output, continue with Step 7 "Align the Print Head" on the Printer Driver Guide for Mac OS - Canon i960 Series | i960 Quick Start Guide - Page 82
Properly from the Digital Camera Problems Unique to Windows Problems Unique to Macintosh Appendix Printing Area Uninstalling the Printer Drivers Uninstalling the User's Guide Transporting printer Printer Driver Functions (Windows) Printer Driver Functions (Macintosh) BJ Printer Utility Index 77 - Canon i960 Series | i960 Quick Start Guide - Page 83
Appendix Specifications Printer Printing resolution: 4800 X 2400* dpi. max. *Maximum max. (8.0 in) (for Borderless Printing: 216.0 mm / 8.5 in) Resident print control mode: Canon extended mode Receive buffer: 80 KB IInterface (USB): USB USB 2.0 Hi-Speed Acoustic noise level: Approx - Canon i960 Series | i960 Quick Start Guide - Page 84
-disk space for printer driver installation Mac OS 8.6 to 9.x: 30 MB Mac OS X v.10.2.1 to 10.2.6: 100 MB z The following functions are not supported when using Mac OS X v.10.2.1 to 10.2.6: - Duplex Printing - Photo Optimizer PRO Additional Systems Requirements for Electric Manuals z Pentium®, 75 - Canon i960 Series | i960 Quick Start Guide - Page 85
attempt to disassemble or modify the printer. There are no user serviceable parts inside the printer. The printer contains high-voltage components. Never attempt any maintenance procedure not described in this guide. Do not use flammable sprays near the printer. This could cause a fire or electric - Canon i960 Series | i960 Quick Start Guide - Page 86
clips, staples, etc.) or containers of flammable solvents (alcohol, thinners, etc.) on top of the printer. If any foreign object (metal or liquid) fall into the printer, unplug the power cord and call for service. Print heads and ink tanks For safety reasons store print heads and ink tanks out of - Canon i960 Series | i960 Quick Start Guide - Page 87
Printer accordance with the instructions, may cause harmful manual. If such changes or modifications should be made, you could be required to stop operation of the equipment. Canon U.S.A., Inc. One Canon Plaza Lake Success, NY 11042 1-516-328-5600 Canadian Radio Interference Regulations This digital - Canon i960 Series | i960 Quick Start Guide - Page 88
failure to operate the Product as set forth in the operating instructions. (b) Use of parts or supplies (other than those sold by Canon USA) that cause damage to the Product or cause abnormally frequent service calls or service problems. (c) If the Product has had it serial number or dating defaced - Canon i960 Series | i960 Quick Start Guide - Page 89
Appendix Canon offers a full range of customer technical support* options: • For interactive troubleshooting, e-mail technical support, the latest driver downloads and answers to frequently asked questions (www.canontechsupport.com) • Free live technical support Monday-Saturday (excluding holidays) - Canon i960 Series | i960 Quick Start Guide - Page 90
Printer Driver Systems Requirements 79 BJ Printer Utility dialog box 51 BJ Status Monitor 62, 66 Borderless (full 40, 43 Borderless Printing 35, 37, 38, 41, 65 Bubble Jet Direct 14 C Camera Error Message 74 Cancelling Print Jobs 11, 13 Cannot Print Properly from the Digital Camera 74 CANON - Canon i960 Series | i960 Quick Start Guide - Page 91
/CANCEL button 11, 13 S Safety Precautions 80 Saving Driver Setting 32 Speciality Media 7 Specifications 78 T Tech support 84 Transparencies 7 Troubleshooting 62 T-Shirt Transfers 7 Turning on the Printer 2 U Uninstalling the printer driver 73 Using Specialty Media 6 V Vivid Photo 30 - Canon i960 Series | i960 Quick Start Guide - Page 92
Quick Start Guide Canon U.S.A., Inc. One Canon Plaza, Lake Success, NY 11042, U.S.A. Canon Inc. 30-2, Shimomaruko 3-chome, Ohta-ku, Tokyo 146-8501, Japan Canon Canada, Inc. 6390 Dixie Road, Mississauga, Ontario, L5T 1P7, Canada Canon Latin America, Inc. 703 Waterford Way, Suite 400, Miami, FL 33126,
-
 1
1 -
 2
2 -
 3
3 -
 4
4 -
 5
5 -
 6
6 -
 7
7 -
8
-
9
-
10
-
11
-
12
-
13
-
14
-
15
-
16
-
17
-
18
-
19
-
20
-
21
-
22
-
23
-
24
-
25
-
26
-
27
-
28
-
29
-
30
-
31
-
32
-
33
-
34
-
35
-
36
-
37
-
38
-
39
-
40
-
41
-
42
-
43
-
44
-
45
-
46
-
47
-
48
-
49
-
50
-
51
-
52
-
53
-
54
-
55
-
56
-
57
-
58
-
59
-
60
-
61
-
62
-
63
-
64
-
65
-
66
-
67
-
68
-
69
-
70
-
71
-
72
-
73
-
74
-
75
-
76
-
77
-
78
-
79
-
80
-
81
-
82
-
83
-
84
-
85
-
86
-
87
-
88
-
89
-
90
-
91
-
92
 |
 |

Quick Start Guide
Photo Printer
i
960
Series