Canon iP1700 Quick Start Guide - Page 29
Print Head Cleaning
 |
UPC - 013803066173
View all Canon iP1700 manuals
Add to My Manuals
Save this manual to your list of manuals |
Page 29 highlights
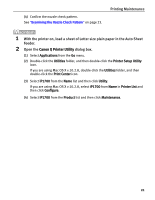
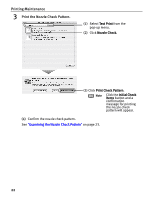
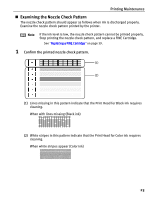
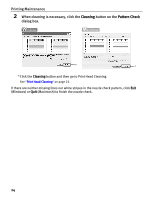
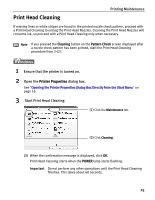
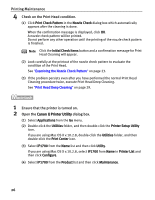
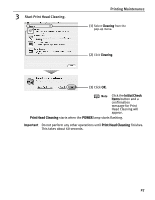
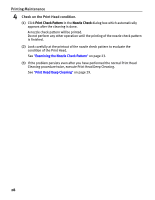
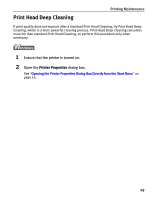
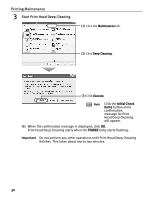
Print Head Cleaning Printing Maintenance If missing lines or white stripes are found in the printed nozzle check pattern, proceed with a Print Head Cleaning to unclog the Print Head Nozzles. Cleaning the Print Head Nozzles will consume ink, so proceed with a Print Head Cleaning only when necessary. Note If you pressed the Cleaning button on the Pattern Check screen displayed after a nozzle check pattern has been printed, start the Print Head Cleaning procedure from 3-(2). 1 Ensure that the printer is turned on. 2 Open the Printer Properties dialog box. See "Opening the Printer Properties Dialog Box Directly from the Start Menu" on page 16. 3 Start Print Head Cleaning. (1) Click the Maintenance tab. (2) Click Cleaning. (3) When the confirmation message is displayed, click OK. Print Head Cleaning starts when the POWER lamp starts flashing. Important Do not perform any other operations until the Print Head Cleaning finishes. This takes about 60 seconds. 25
-
 1
1 -
2
-
3
-
4
-
5
-
6
-
7
-
8
-
9
-
10
-
11
-
12
-
13
-
14
-
15
-
16
-
17
-
18
-
19
-
20
-
21
-
22
-
23
-
 24
24 -
 25
25 -
 26
26 -
 27
27 -
 28
28 -
 29
29 -
 30
30 -
 31
31 -
 32
32 -
 33
33 -
 34
34 -
35
-
36
-
37
-
38
-
39
-
40
-
41
-
42
-
43
-
44
-
45
-
46
-
47
-
48
-
49
-
50
-
51
-
52
-
53
-
54
-
55
-
56
-
57
-
58
-
59
-
60
-
61
-
62
-
63
-
64
-
65
-
66
-
67
-
68
-
69
-
70
-
71
-
72
-
73
-
74
-
75
-
76
 |
 |