Canon imageCLASS D880 imageCLASS D800 Series Set-Up Instructions
Canon imageCLASS D880 Manual
 |
View all Canon imageCLASS D880 manuals
Add to My Manuals
Save this manual to your list of manuals |
Canon imageCLASS D880 manual content summary:
- Canon imageCLASS D880 | imageCLASS D800 Series Set-Up Instructions - Page 1
Instructions Thank you for purchasing Canon imageCLASS D800 Series. To get your machine ready for use, please follow the instructions in this document before referring to any other documentation. Unpack the machine and its components. Check that you have the following: Machine L50 S-Cartridge - Canon imageCLASS D880 | imageCLASS D800 Series Set-Up Instructions - Page 2
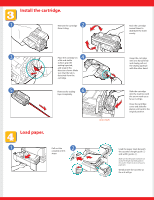
the cartridge cover and slide the platen unit back to the original position. Load the paper stack beneath the cassette's length guide 1 and width guides 2. Make sure that the paper stack does not exceed the length and width guides in the cassette. Failure to do so will cause a paper jam. Gently - Canon imageCLASS D880 | imageCLASS D800 Series Set-Up Instructions - Page 3
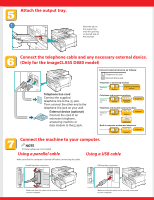
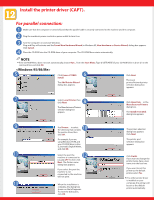
Connect the telephone cable and any necessary external device. (Only for the imageCLASS D880 model) Telephone line cord Connect the supplied telephone line to the L Computer Telephone Connect the machine to your computer. NOTE ● Printer cables are not included. Using a parallel cable Using a - Canon imageCLASS D880 | imageCLASS D800 Series Set-Up Instructions - Page 4
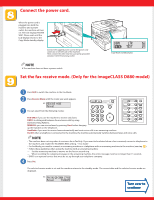
switch. Set the fax receive mode. (Only for the imageCLASS D880 model) 1 Press FAX to switch the machine to the INCOMING RING setting. → Fax Guide • For AnsMode, you need to connect an answering machine or a than 15 seconds. • DRPD is an optional service that must be set up through your telephone - Canon imageCLASS D880 | imageCLASS D800 Series Set-Up Instructions - Page 5
the cursor under the number you want to change, then enter the correct number. • Enter only the last two digits of the year. • Use the 24-hour format for the time setting (e.g.1:00 p.m. as 13:00). ex: the characters you entered. ex: 9 Press Set. 10 Press Stop/Reset to return to the standby display. - Canon imageCLASS D880 | imageCLASS D800 Series Set-Up Instructions - Page 6
box. selection dialog box appears. The Install From Disk dialog box appears. 9 11 13 10 Use Browse... to select the directory that contains the printer driver, then click OK. For example, if you are using Windows 95/98, and your CD-ROM drive is drive D:, browseD:\English\Win9x, and click OK - Canon imageCLASS D880 | imageCLASS D800 Series Set-Up Instructions - Page 7
5 Click Canon iC D800 6 Install. The Add Printer Wizard dialog box appears. Click Next. 7 Select Use the following port. Select the printer port the 8 machine is connected to (usually LPT1: (Recommended Printer Port)), then click Next. The Manufacturers/ - Canon imageCLASS D880 | imageCLASS D800 Series Set-Up Instructions - Page 8
. If the test page is printed correctly, click Yes on the dialog box that appears. For installation instructions under Windows 2000/NT 4.0 → Printer Guide For USB connection: 1 Make sure that the computer is turned off. 2 Make sure that the power cord of
-
 1
1 -
 2
2 -
 3
3 -
 4
4 -
 5
5 -
 6
6 -
 7
7 -
8
 |
 |
Set-Up Instructions
Set-Up Instructions
Thank you for purchasing Canon imageCLASS D800 Series.
To get your machine ready for use,please follow the instructions in this document before referring to any other documentation.
Series
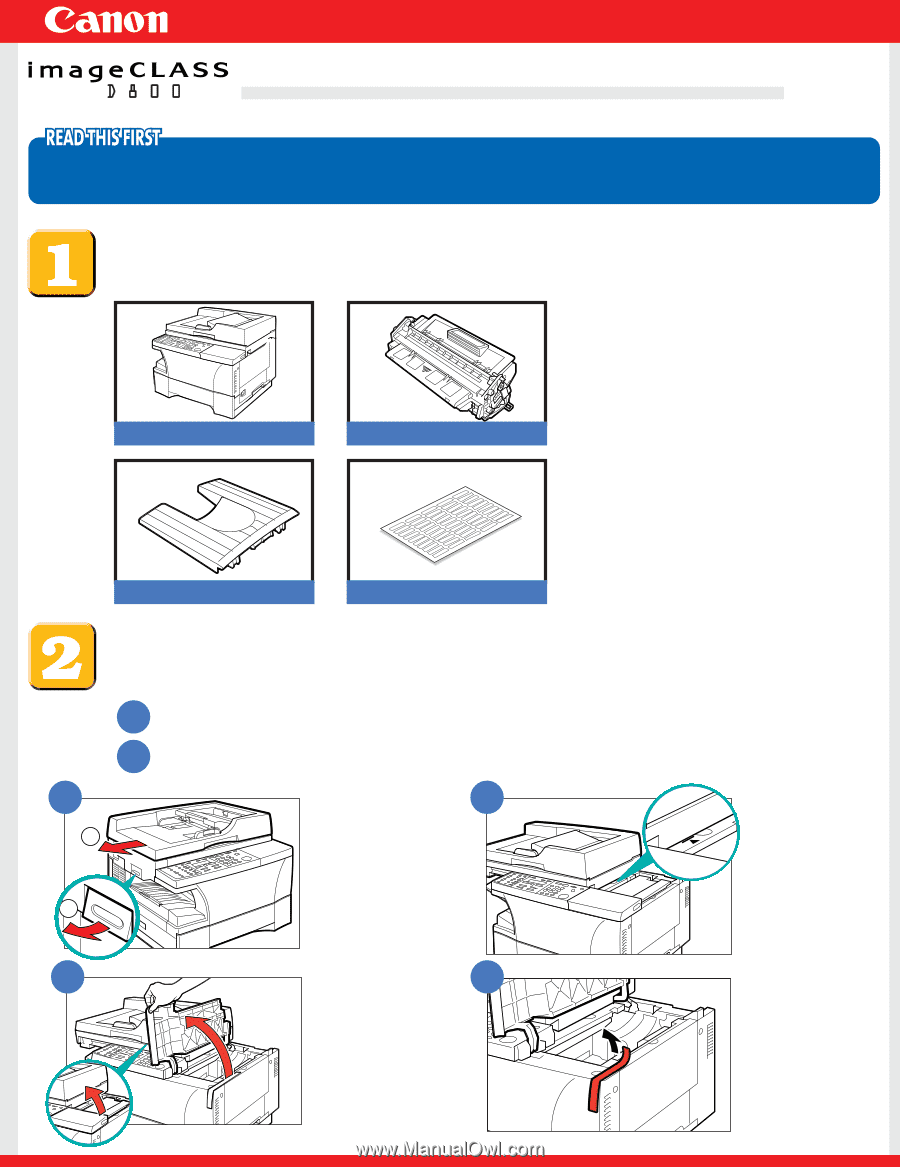
Unpack the machine and its components.
Check that you have the following:
•
Power cord
•
Telephone cable*
•
Documentation
Set-Up Instructions
Basic Guide
Fax Guide*
Registration Card**
Limited Warranty Notice
•
CD-ROM
*
imageCLASS D880 Model
** U.S.A. only
Slide the platen unit
to the left until the
I4
mark appears.
Remove the shipping
material.
2
1
Lift the platen unit
lever
1
and slide the
platen unit to the left
2
.
Open the cartridge
cover.
Machine
Output tray
L50 S-Cartridge
Destination labels*
3
4
6
5
Remove the shipping materials.
Place the machine on a flat surface.
Remove
all
shipping tapes from the
exterior
of the machine.
1
2