Canon imageCLASS MF3010 Starter Guide - Page 20
Installing the Software - installation
 |
View all Canon imageCLASS MF3010 manuals
Add to My Manuals
Save this manual to your list of manuals |
Page 20 highlights
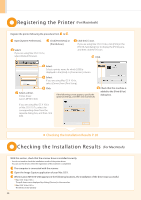
Installing the Sof tware (For Macintosh) ••Connect the USB cable after installing the software. ••The installation screen varies depending on the version of MAC OS X. Close all applications that are running. Insert the CD-ROM. Double-click the CD-ROM icon. Double-click. Click. * You cannot change the installation location. Click [Continue]. Depending on the system environment, the [Select a Destination] dialog box may not be displayed. In this case, skip to step . Click. Read the contents of the License Agreement. Click. Click. * [Change Install Location] button may appear, but you cannot change the installation location. Enter. Click. * If you are using Mac OS X 10.7.x, click [Install Software]. Depending on the system environment, the [Authenticate] dialog box may not be displayed. In this case, skip to step . Click. Click. 18
-
 1
1 -
2
-
3
-
4
-
5
-
6
-
7
-
8
-
9
-
10
-
11
-
12
-
13
-
14
-
 15
15 -
 16
16 -
 17
17 -
 18
18 -
 19
19 -
 20
20 -
 21
21 -
 22
22 -
 23
23 -
 24
24 -
 25
25 -
26
-
27
-
28
 |
 |
