Casio BE-300 Getting Started Guide
Casio BE-300 - Cassiopeia Pocket Manager Manual
 |
UPC - 079767696948
View all Casio BE-300 manuals
Add to My Manuals
Save this manual to your list of manuals |
Casio BE-300 manual content summary:
- Casio BE-300 | Getting Started Guide - Page 1
BE-300 Getting Started with the CASSIOPEIA (Hardware Manual) User documentation consists of two manuals: CASSIOPEIA User's Guide and this booklet. Be sure to read this manual first. Be sure to read the Safety Precautions contained in this manual to ensure proper operation of this product. Keep this - Casio BE-300 | Getting Started Guide - Page 2
. • CASIO COMPUTER CO., LTD. assumes no responsibility for any damage or loss resulting from the use of this manual. • CASIO COMPUTER CO CASIO COMPUTER CO., LTD. assumes no responsibility for any damage or loss caused by deletion of data as a result of malfunction, repairs, or battery replacement - Casio BE-300 | Getting Started Guide - Page 3
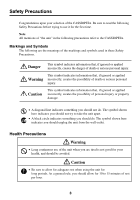
Precautions before trying to use it for the first time. Note All mentions of "the unit" in the following precautions refer to the CASSIOPEIA. Markings and Symbols The following are the meanings of the markings and symbols used in these Safety Precautions. Danger This symbol indicates information - Casio BE-300 | Getting Started Guide - Page 4
Dropping and Damage • Should the unit ever fall or otherwise become damaged, unplug the AC adapter from the power outlet, remove batteries, and contact your original dealer or an authorized CASIO service provider. Continued use creates the danger of fire and electrical shock. Disassembly • Never try - Casio BE-300 | Getting Started Guide - Page 5
medium. Note that all data stored in unit memory is deleted whenever batteries go dead. Memory contents can also become lost or corrupted due to Battery Pack Warning • Always leave built-in battery pack replacement up to an authorized service technician. Attempting to replace the battery pack - Casio BE-300 | Getting Started Guide - Page 6
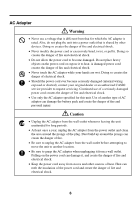
dealer or an authorized CASIO service provider to request servicing. Continued use of a seriously damaged power cord creates the danger of fire and electrical shock. • Use only the AC adapter specified for this unit. Use of another type of AC adapter can damage the battery pack and create the - Casio BE-300 | Getting Started Guide - Page 7
Display Screen Precautions Caution • Never apply strong pressure to the LCD screen or subject it to strong impact. Doing so can cause the LCD panel glass to crack or break. • Should the LCD panel glass ever crack or break, never touch the liquid inside of the panel. LCD liquid can lead to skin - Casio BE-300 | Getting Started Guide - Page 8
or cold • High humidity • Sudden temperature changes • Large amounts of dust • If you drop the CASSIOPEIA and damage it, immediately turn off power and contact your original dealer or an authorized CASIO service provider. Never continue using a damaged unit. • Never place heavy objects on top of the - Casio BE-300 | Getting Started Guide - Page 9
spilling water or drinks on the CASSIOPEIA. • Use only the stylus that comes with the CASSIOPEIA to press the [RESET] button. • Never use a power and may cause the CASSIOPEIA to become warm to the touch. This is normal and does not indicate malfunction. • To avoid certain system problems, the power - Casio BE-300 | Getting Started Guide - Page 10
." appears on the display when you turn on power or while you are using the CASSIOPEIA soon after you correctly charge the battery, it probably means that the built-in battery pack has reached the end of its normal service life. Do not remove the built-in battery pack yourself. Take the unit to your - Casio BE-300 | Getting Started Guide - Page 11
2. Disconnect the battery pack connector and remove the battery pack. Connector 11 - Casio BE-300 | Getting Started Guide - Page 12
AC Adapter ...6 Display Screen Precautions 7 Operating Precautions 8 Built-in Battery Pack Service Life 10 Disposing of Your CASSIOPEIA 10 Contents ...12 Terms and Symbols used in this manual 13 Getting Ready 14 Initial Setup ...14 Where to go for information 15 Operations ...16 General Guide - Casio BE-300 | Getting Started Guide - Page 13
Card 27 To install a CompactFlash card 28 Using a PC Card Unit 29 To connect your CASSIOPEIA to the PC Card Unit 29 To remove the CASSIOPEIA from the PC Card Unit 30 About Modem Adapter (U.S. and Canada Only 30 Software Applications 30 User Maintenance 31 About the CASSIOPEIA's built-in - Casio BE-300 | Getting Started Guide - Page 14
. 1. Use the AC adapter to charge the battery pack. Important • Make sure you charge the battery pack before using your CASSIOPEIA for the first time. The CASSIOPEIA will not work until you charge its battery pack. 2. While holding down the [Power] button, use the stylus to press the [Reset] button - Casio BE-300 | Getting Started Guide - Page 15
the troubleshooting guides on page 41 of this Hardware Manual and in the CASSIOPEIA User's Guide. How can I connect my CASSIOPEIA to a computer? See page 22, 23, 24 of this Hardware Manual for details about how to connect and the type of computer you can connect to. How can I install the software on - Casio BE-300 | Getting Started Guide - Page 16
to launch the program assigned to it. See the CASSIOPEIA User's Guide for details. Top Menu button Press to display the Top Menu. See the CASSIOPEIA User's Guide for details. OK button Same as a computer's ENTER key AC adapter terminal Charge indicator (Amber) Lights amber when the battery pack is - Casio BE-300 | Getting Started Guide - Page 17
holder when you are not using it. • Take care to avoid breaking the tip of the stylus. • Use only the stylus that comes with the CASSIOPEIA, or some other stylus type instrument with a soft, blunt point to perform screen operations. Never use a pen, pencil, or other sharp writing implement. 17 - Casio BE-300 | Getting Started Guide - Page 18
expected when tapping on the touch screen. To recalibrate the touch screen, press the [OK] button while holding down the [Power] button. Next, follow the instructions that appear on the screen. Adjusting Display Contrast Perform either of the following operations to adjust display contrast and make - Casio BE-300 | Getting Started Guide - Page 19
CASSIOPEIA can also be powered from an AC power source when it is placed on the cradle. • The battery pack charges while the CASSIOPEIA is on the cradle. See page 32 for more information. Important Before connecting your CASSIOPEIA to a computer, make sure you first install the PC Connect software - Casio BE-300 | Getting Started Guide - Page 20
in the illustration below. Use the position that suits the configuration of the CASSIOPEIA unit you are setting on the cradle. CASSIOPEIA + PC Card Unit CASSIOPEIA + External Power Pack CASSIOPEIA Only Important Make sure that CASSIOPEIA power is turned off before you place it onto or remove it from - Casio BE-300 | Getting Started Guide - Page 21
below. 5. Taking care to align the serial connector on the bottom of the CASSIOPEIA with the connector on the cradle, lower the CASSIOPEIA into the cradle as shown in the illustration below. Important • Make sure the CASSIOPEIA lowers securely into the cradle as far as it can go. • While the - Casio BE-300 | Getting Started Guide - Page 22
for full details on connecting cables to it. • You must have PC Connect software installed on your computer in order to exchange data with the CASSIOPEIA over a USB connection. See the Quick Start Guide for information about how to install PC Connect, and PC Connect online help for information - Casio BE-300 | Getting Started Guide - Page 23
for full details on connecting cables to it. • You must have PC Connect software installed on your computer in order to exchange data with the CASSIOPEIA over a serial connection. See the Quick Start Guide for information about how to install PC Connect, and PC Connect online help for information - Casio BE-300 | Getting Started Guide - Page 24
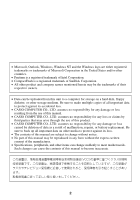
to your CASSIOPEIA. Serial port CASSIOPEIA Serial cable Required System Configuration The minimum system configuration required for running PC Connect software is described below. Minimum System Requirements for PC Connect • Microsoft® Windows® 2000 Professional Service Pack 2, Microsoft Windows NT - Casio BE-300 | Getting Started Guide - Page 25
when using the applications included on the CASSIOPEIA CD-ROM. See the documentation contained on the CD-ROM for full details. • Certain computer hardware and/or software configurations may not allow PC Connect to run properly. Important • When installing PC Connect software on a computer, check - Casio BE-300 | Getting Started Guide - Page 26
AC Adapter You can use the AC adapter to directly power the CASSIOPEIA or to supply power through the cradle. The battery pack charges while the CASSIOPEIA is directly connected to a power source by the AC adapter or while it is on the cradle. See page 32 for more information. I Direct Connection - Casio BE-300 | Getting Started Guide - Page 27
Card The CASIO Digital Camera Card (JK-710DC) in combination with the Photo Viewer application on the CASSIOPEIA CD-ROM provides you with still image recording capabilities. See the CASSIOPEIA User's Guide for more information about using Photo Viewer. Modem Card A modem card lets you connect to - Casio BE-300 | Getting Started Guide - Page 28
to the slot when pressure is applied to the CASSIOPEIA. Always insert the dummy card when you are using the CASSIOPEIA without a card. To install a CompactFlash card 1. Make sure your CASSIOPEIA is turned off. • Press the [Power] button to turn off power. 2. If there is a dummy card or another CF - Casio BE-300 | Getting Started Guide - Page 29
PCMCIA card type PC cards with your CASSIOPEIA. Important • The PC Card Unit has a built-in lithium battery that provides power to the PC card. It comes with an AC adapter that can be used to charge its built-in battery or to connect to a wall outlet for power supply. See the user documentation that - Casio BE-300 | Getting Started Guide - Page 30
the modem adapter. Low battery power can cause sudden interruption of communications, unstable communications, and loss of data. Software Applications Your CASSIOPEIA comes with a CASSIOPEIA CD-ROM that contains a number of useful applications. Note that you must install the applications you need - Casio BE-300 | Getting Started Guide - Page 31
about the current levels of your battery. See the separate CASSIOPEIA User's Guide for more information about this dialog box. • Icons appear along the bottom of the screen to let you know when battery power is low. See the separate CASSIOPEIA User's Guide for more information about these icons - Casio BE-300 | Getting Started Guide - Page 32
even when you do not use the CASSIOPEIA. Be sure to recharge the battery pack at least once a month, regardless of how much you use the CASSIOPEIA during that time. Charging the Battery Pack Attach the AC adapter to the cradle and place the CASSIOPEIA onto the cradle. • Charging starts automatically - Casio BE-300 | Getting Started Guide - Page 33
charging is complete. The following illustration shows how to connect the AC adapter directly to the CASSIOPEIA for charging. • Charging starts automatically as soon as you attach the AC adapter to the CASSIOPEIA. • Direct connection charging conditions are the same as those described for cradle - Casio BE-300 | Getting Started Guide - Page 34
perform the reset operation whenever your CASSIOPEIA behaves abnormally due to operational error or some other problem. The reset operation is not in the system tray before you press the reset button. • Performing the reset operation causes all user files and folders that are not contained in the My - Casio BE-300 | Getting Started Guide - Page 35
any one of the following procedures. • Use PC Connect to restore CASSIOPEIA data you have backed up on your computer. • Use data you backed up to a memory card to restore CASSIOPEIA data. • Use the bundled CD-ROM to restore the CASSIOPEIA to its initial factory defaults (page 39). Important • All of - Casio BE-300 | Getting Started Guide - Page 36
a computer 1. Connect the AC adapter to the CASSIOPEIA. 2. Press the [Power] button. 3. While holding down the [OK] button, use the stylus to press the [Reset] button. • This enters the Safe Mode. 4. Tap the [OK] button. • This displays the touch screen calibration screen. Follow the instructions on - Casio BE-300 | Getting Started Guide - Page 37
will turn off automatically after about 30 seconds. You can then turn power back on and perform a normal reset. To restore data backed up to a storage card 1. Connect the AC adapter to the CASSIOPEIA. 2. Press the [Power] button. 3. While holding down the [OK] button, use the stylus to press - Casio BE-300 | Getting Started Guide - Page 38
touch screen calibration screen. Follow the instructions on the display to calibrate the touch screen. • The following screen appears after you finish touch screen calibration. 5. Insert the storage card that contains the backed up data into the CASSIOPEIA's card slot. 6. Tap [Storage Card]. • This - Casio BE-300 | Getting Started Guide - Page 39
solve the problem" on page 35 do not restore normal operation • When you forget your CASSIOPEIA's password. • When you want to clear all CASSIOPEIA data and settings before selling it or transferring it to another person To restore your CASSIOPEIA to its factory defaults 1. Connect the AC adapter to - Casio BE-300 | Getting Started Guide - Page 40
performed in PC Connect on your computer. 7. Place the CD-ROM that came bundled with your CASSIOPEIA into your computer's CD-ROM drive. 8. On the PC Connect initial screen, select [Restore] on the [Tool] menu. • This displays the [Restore] dialog box. 9. Select the [Restore factory defaults], and - Casio BE-300 | Getting Started Guide - Page 41
the troubleshooting section of the CASSIOPEIA User's Guide first. Nothing happens when the [Power] button is pressed. Possible Cause Recommended Action Page The battery is weak. Charge the battery pack. 32 Internal malfunction Reset the unit. 34 Operation is disabled when the AC adapter - Casio BE-300 | Getting Started Guide - Page 42
message is on the screen. Possible Cause Recommended Action Internal malfunction Follow the instructions that appear on the screen. Page - If the reset operation does not restore normal operation, perform the steps under "What to do if resetting does not solve the problem" on page 35. 42 - Casio BE-300 | Getting Started Guide - Page 43
the function of each button under various conditions. Unit Power Off [Power] Button Turns on power. Unit Power On [Power] Button + [OK] Button Launches the touch screen calibration procedure. [Power] Button + Cursor up Makes contrast darker. [Power] Button + Cursor down Makes contrast lighter - Casio BE-300 | Getting Started Guide - Page 44
Type I/TypeII Headphone jack: ø 3.5 mm stereo output Accepts monaural earphone, stereo earphones/headphones Power Supply Rechargeable battery (Lithium-Ion battery) AC adapter (AD-C59200) Power Consumption: 3.0W Approximate Battery the unit or installing a new battery pack. Operating - Casio BE-300 | Getting Started Guide - Page 45
Proper connectors must be used for connection to host computer and/or peripherals in order to meet FCC emission limits. Connector BE-300 unit to Cradle Connector cable BE-300 unit to computer Declaration of Conformity Model Number: BE-300 Trade Name: CASIO COMPUTER CO., LTD. Responsible party - Casio BE-300 | Getting Started Guide - Page 46
CASIO ELECTRONICS CO., LTD. Unit 6, 1000 North Circular Road London NW2 7JD, U.K. - Casio BE-300 | Getting Started Guide - Page 47
CASIO COMPUTER CO., LTD. 6-2, Hon-machi 1-chome Shibuya-ku, Tokyo 151-8543, Japan PN411573-001 MO0108-A
-
 1
1 -
 2
2 -
 3
3 -
 4
4 -
 5
5 -
 6
6 -
 7
7 -
8
-
9
-
10
-
11
-
12
-
13
-
14
-
15
-
16
-
17
-
18
-
19
-
20
-
21
-
22
-
23
-
24
-
25
-
26
-
27
-
28
-
29
-
30
-
31
-
32
-
33
-
34
-
35
-
36
-
37
-
38
-
39
-
40
-
41
-
42
-
43
-
44
-
45
-
46
-
47
 |
 |
User documentation consists of two manuals:
CASSIOPEIA User’s Guide
and this booklet. Be
sure to read this manual first.
Be sure to read the Safety Precautions contained in
this manual to ensure proper operation of this
product.
Keep this manual in a safe place for future
reference.
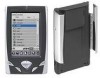
BE-300
Getting Started with
the CASSIOPEIA
(Hardware Manual)
E