Casio PV-400PLUS User Guide
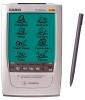
Casio PV-400PLUS - Cassiopeia Pocket Viewer Handheld Organizer Manual
 |
UPC - 079767193423
View all Casio PV-400PLUS manuals
Add to My Manuals
Save this manual to your list of manuals |
Casio PV-400PLUS manual content summary:
- Casio PV-400PLUS | User Guide - Page 1
PV Applications Manager User's Guide E - Casio PV-400PLUS | User Guide - Page 2
damage or loss resulting from the use of this manual. • CASIO COMPUTER CO., LTD. assumes no responsibility for any loss or claims by third parties which may arise through the use of PV Applications Manager. Copyright Notice Copyright © 2000 CASIO COMPUTER CO., LTD. All Rights Reserved. Please note - Casio PV-400PLUS | User Guide - Page 3
2000 Note You can download PV Applications from the CASIO Website located at http:// www.casio.co.jp/English/download/pv/. Attention PV-250X and PV-450X Users! Before you can use this software with a PV-250X or PV-450X, you must first update your Pocket Viewer's operating system. See "Updating the - Casio PV-400PLUS | User Guide - Page 4
that comes with your computer for details. 2. Place the Pocket Viewer onto the cradle. • See "Using the Cradle" in your Pocket Viewer User's Guide for more information. 3. On your computer, double click the PVM.EXE file to start up PV Applications Manager. • Double-click the PVM.EXE file. 4. On - Casio PV-400PLUS | User Guide - Page 5
Installing a PV Application on Pocket Viewer Installing a PV Application on Pocket Viewer You can install a PV Application on Pocket Viewer using drag and drop, the buttons along the top of the PV Applications Manager window, or menu commands. To install a PV Application using drag and drop 1. - Casio PV-400PLUS | User Guide - Page 6
Installing a PV Application on Pocket Viewer 4. On your computer, drag the PV Application from Windows Explorer to the Program List area of the PV Applications Manager window. • This causes the dialog box shown below to appear. 5. Make any changes you want in the Program Name and Comment data, and - Casio PV-400PLUS | User Guide - Page 7
and Data List contents accordingly. • To interrupt communication between your computer and Pocket Viewer, click the button. • Instead of clicking the button, you could click the Execute menu and then Import from PV or Update PV. • Instead of clicking the button, you could click the Execute menu and - Casio PV-400PLUS | User Guide - Page 8
drop, the buttons along the top of the PV Applications Manager window, or menu commands. To copy PV Application data using drag and drop 1. Perform the procedure under "To establish a link between Pocket Viewer and your computer." 2. On Pocket Viewer, tap Menu - Menu Bar - Option - Download to enter - Casio PV-400PLUS | User Guide - Page 9
Copying PV Application Data from Your Computer to Pocket Viewer • Instead of clicking , you could right-click inside the Data List area and then select Add File from the context menu that appears. 4. Select the data file you want to transfer to Pocket Viewer, and then click Open and click button to - Casio PV-400PLUS | User Guide - Page 10
data file 1. Perform the procedure under "To establish a link between Pocket Viewer and your computer." 2. On your computer, click the button. • Your computer reads Pocket Viewer memory contents and updates the PV Applications Manager window Program List and Data List contents accordingly. • Instead - Casio PV-400PLUS | User Guide - Page 11
data file 1. Perform the procedure under "To establish a link between Pocket Viewer and your computer." 2. On your computer, click the button. • Your computer reads Pocket Viewer memory contents and updates the PV Applications Manager window Program List and Data List contents accordingly. 3. In - Casio PV-400PLUS | User Guide - Page 12
it possible for you to update the operating system of your Pocket Viewer when required. Visit the CASIO Website at http://www.casio.co.jp/ English/download/pv/ for information about Pocket Viewer operating system updates. To update the Pocket Viewer operating system 1. Replace the batteries of your - Casio PV-400PLUS | User Guide - Page 13
know when file loading is complete. 8. Perform the following steps on your PV Unit. • The steps you should perform depend on whether your Pocket Viewer is a PV-250X or PV-450X model, or another model. PV-250X or PV-450X Model Owners 1. Tap Scheduler → Tools - icon to display the calculator. 2. If - Casio PV-400PLUS | User Guide - Page 14
your computer screen and then tap the Pocket Viewer screen once. • A message dialog box appears to let you know when system updating is complete. 10. Click OK to close the dialog box. 11. At this time, the touch screen calibration screen should be on the PV - Casio PV-400PLUS | User Guide - Page 15
window Program List and Data List contents. • Unlinks with Pocket Viewer. Add Program or Data Delete Program or Data • Displays a dialog box for selection of a PV Application or data file to download it to Pocket Viewer memory. • Deletes the PV Application or data file whose name is highlighted in
-
 1
1 -
 2
2 -
 3
3 -
 4
4 -
 5
5 -
 6
6 -
 7
7 -
8
-
9
-
10
-
11
-
12
-
13
-
14
-
15
 |
 |

PV Applications Manager
User’s Guide
E