Casio WK3800F3 User Guide - Page 62
To record to Tracks 2 through 6 using, step recording, Track Contents After Real-time, Recording
 |
View all Casio WK3800F3 manuals
Add to My Manuals
Save this manual to your list of manuals |
Page 62 highlights
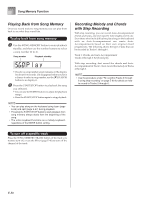
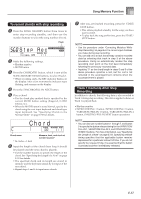
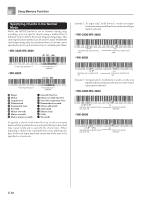
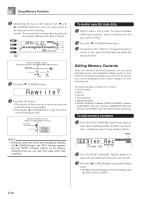
Song Memory Function 3 Make the following settings. • Tone number • Tempo 4 Press the START/STOP button to start recording. • At this time, the contents of any tracks that are already recorded start to play back. • Optional pedal, pitch bend and modulation operations are also recorded. 5 Use the keyboard to play what you want to record the track you selected. 6 Press the START/STOP button to end recording when you are finished. Track Contents After Real-time Recording In addition to keyboard notes, the following data is also recorded to the selected track during real-time recording. This data is applied whenever the track is played back. • Tone number • Pedal operations (option) The following data is recorded in the header whenever you start a recording of a track. • Mixer settings of other tracks • Effect type • Accompaniment volume • Reverb Level • Chorus Level • DSP Hold On/Off • Mixer Hold On/Off • Pitch bend wheel operation • Modulation wheel operation (WK-3800/WK-8000) • Modulation button operation (WK-3300) • Pitch bend range To record to Tracks 2 through 6 using step recording This procedure describes how to input notes one-by-one, specifying each note's pitch and length. 1 Press the SONG MEMORY button three times to enter real-time record standby, and then use the number buttons to select a song number (0 to 4). • The song number you select should be the one where you previously input Track 1. S t ep Rec 2 Use the SONG MEMORY TRACK buttons to select the track you want to record to (2 through 6). Example: Select Track 2. Flash 3 Specify a tone number. • Pressing a TONE button or the DRAWBAR ORGAN button displays the tone number and name on the display. You can then use the number buttons, or the [+] (increase) and [-] (decrease) buttons to change the tone. • After changing the tone number, press any keyboard key to clear the tone number and name screen, and return to the note input screen. 4 Use the keyboard keys to input notes, or the [0] button to input rests. • At this time, the display shows the keyboard pressure (velocity). Use the [+] (increase) and [-] (decrease) buttons to change the velocity. • You can also input a chord. 5 Use the number buttons to input the length of the note or rest (page E-59). 6 Repeat steps 4 and 5 to input more notes. 7 Press the START/STOP button to end recording when you are finished. E-60
-
 1
1 -
2
-
3
-
4
-
5
-
6
-
7
-
8
-
9
-
10
-
11
-
12
-
13
-
14
-
15
-
16
-
17
-
18
-
19
-
20
-
21
-
22
-
23
-
24
-
25
-
26
-
27
-
28
-
29
-
30
-
31
-
32
-
33
-
34
-
35
-
36
-
37
-
38
-
39
-
40
-
41
-
42
-
43
-
44
-
45
-
46
-
47
-
48
-
49
-
50
-
51
-
52
-
53
-
54
-
55
-
56
-
 57
57 -
 58
58 -
 59
59 -
 60
60 -
 61
61 -
 62
62 -
 63
63 -
 64
64 -
 65
65 -
 66
66 -
 67
67 -
68
-
69
-
70
-
71
-
72
-
73
-
74
-
75
-
76
-
77
-
78
-
79
-
80
-
81
-
82
-
83
-
84
-
85
-
86
-
87
-
88
-
89
-
90
-
91
-
92
-
93
-
94
-
95
-
96
-
97
-
98
-
99
-
100
-
101
-
102
-
103
-
104
-
105
-
106
-
107
-
108
 |
 |