Cisco SPA504 User Guide - Page 2
Installing Your IP Phone
 |
View all Cisco SPA504 manuals
Add to My Manuals
Save this manual to your list of manuals |
Page 2 highlights
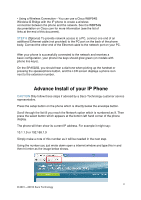
Installing Your IP Phone Use these procedures to install the phone and connect it to your network. 2 STEP 1 Turn the phone body over to expose the ports on the back of the unit. CAUTION Do not insert a telephone line cord into the auxiliary port. STEP 2 Insert the long end of the phone cord into the handset port on the phone body that is marked with a phone symbol. STEP 3 (Optional) Route the phone cord through the cable slot. STEP 4 Insert the other end of the phone cord into the port at the bottom of the handset (not shown). STEP 5 (Optional) Connect the phone stand by lining up the tabs on the stand with the slots on the phone body. Slide the bottom tabs into the lower slots on the phone body and lightly press down on the stand. It should easily slide into the upper stand slots. Do not force. STEP 6 If you are using an external power source, insert one end of the power cord into an outlet and insert the other end of the power cord into the power port on the phone body. STEP 7 Connect your phone to the network: • Using an Ethernet Connection-Insert one end of the Ethernet cable into the network port on the phone body marked ―SW.‖ Insert the other end of the Ethernet cable into the appropriate device, such as a network switch, on your network. 2 © 2001 - 20010 Saco Technology
-
 1
1 -
 2
2 -
 3
3 -
 4
4 -
 5
5 -
 6
6 -
 7
7 -
 8
8
 |
 |
