Coby CX-R122 Operating Instructions - Page 4
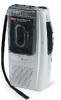
Stop/eject
 |
View all Coby CX-R122 manuals
Add to My Manuals
Save this manual to your list of manuals |
Page 4 highlights
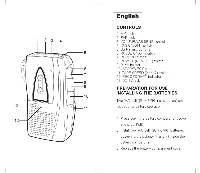
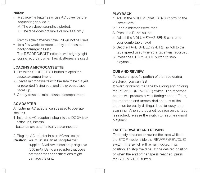
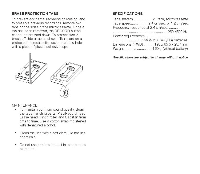
RECORDING MANUAL RECORDING 1. Set the VAS ON/OFF switch to OFF. 2. Press the RECORD button. The PLAY button will also be locked down, and recording starts with the RECORD/BATT indicator lit, Recording will continue until the STOP/EJECT button is pressed. Notes: • Before recording, confirm that the PAUSE ON/OFF switch is set to OFF. • The recording level is set automatically (Automatic Level Control). • Adjusting the VOLUME/VAS SENS control does not change the recording level. 3. Press the STOP/EJECT button to stop recording. VOICE ACTIVATED SYSTEM (VAS) RECORDING 1. Set the VAS ON/OFF switch to ON. 2. Press the RECORD button. The PLAY button will also be locked down. Note that the PAUSE ON/OFF switch is set to OFF. 3. Adjust the microphone sensitivity with the VOLUMENAS SENS control until the sound source level just activates the unit (recording begins) VOLUME/VAS SENS CONTROL Vvhen the unit is in playback mode, this control adjusts the playback volume level. Vvhen the unit is in record mode, this control adjusts the microphone sensitivity. At 10 (maximum), a soft sound can turn on the recorder. At 0 (minimum), a louder sound is required. CONNECTING AN EXTERNAL MICROPHONE Insert the plug of an external microphone(not supplied) into the MIC jack. This disconnects built-in microphone. PAUSE CONTROL This convenient Pause feature is most helpful while recording because you can stop the recorder momentarily without setting the control buttons. Slide the switch to ON to stop operation in PLAY, RECORD, F.F./CUE or REW/REV modes. Slide the switch to OFF to resume the current operation TAPE SPEED CONTROL 2.4 Normal speed. Compatible with most single-speed microcassette recorders. Sound quality is better than that of 1.2. 1.2 For longer recording. You will get the double playback time. Note: You can change the tape speed at anytime. EARPHONE JACK When the plug of the earphone is inserted into the EAR jack, the built-in speaker is automatically disconnected.
-
 1
1 -
 2
2 -
 3
3 -
 4
4 -
 5
5
 |
 |
