Coby KCD150 User Manual - Page 5
Mounting the Unit - mounting template
 |
UPC - 716829631508
View all Coby KCD150 manuals
Add to My Manuals
Save this manual to your list of manuals |
Page 5 highlights
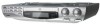
English Mounting the Unit When choosing an installation site, make sure that: an electrical outlet is available and within reach of the unit the unit will not be exposed to water the unit will not be exposed to heat or open flames. Do not mount the unit near a sink. Do not mount the unit above a stove. What you will need: Screwdriver (cross-head) Drill with 0.6mm bit Pencil Installation template (included) 4 mount adapters (included) 4 mount screws (included) To mount the unit: 1. Place the mount adapters into the four, notched sockets of the unit. Make sure that the adapters match the notches of the socket upon insertion. 2. Use the installation template to mark the mounting positions, then use a 0.6mm drill bit to drill 4 holes where marked. www.cobyusa.com Page 5
-
 1
1 -
 2
2 -
 3
3 -
 4
4 -
 5
5 -
 6
6 -
 7
7 -
 8
8 -
 9
9 -
 10
10 -
 11
11 -
12
-
13
-
14
-
15
-
16
-
17
-
18
-
19
-
20
-
21
-
22
-
23
-
24
-
25
-
26
-
27
-
28
-
29
-
30
-
31
-
32
-
33
-
34
-
35
-
36
-
37
-
38
-
39
-
40
-
41
-
42
-
43
-
44
-
45
-
46
-
47
-
48
-
49
-
50
-
51
-
52
-
53
-
54
-
55
-
56
-
57
-
58
-
59
-
60
-
61
-
62
-
63
-
64
-
65
-
66
-
67
-
68
-
69
-
70
-
71
-
72
-
73
-
74
-
75
-
76
-
77
-
78
-
79
-
80
 |
 |
