Coby TFDVD1993 User Manual - Page 11
Function
 |
UPC - 716829961933
View all Coby TFDVD1993 manuals
Add to My Manuals
Save this manual to your list of manuals |
Page 11 highlights
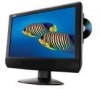
TV Function TV Function Preparations 1. Connect the antenna to the antenna jack on the unit side panel. 2. Connect the power supply cord. Press POWER to turn on the the player. 3. Press MODE to select TV. 4. Press CH+/- buttons to skip channels or press numeric buttons to input channel directly. Setup Menu Various features can be preset through the TV setup menu. TV setup menu consists of six menus. They are Picture Menu, Audio Menu, Time Menu, Option Menu, Lock Menu as well as Channel Menu. 1. Press LCD SETUP to show the menu window. 2. Press the left/right button to select the menu, press OK to enter the menu. PICTURE AUth Pkture Mods Contrast Brightness li, Sharpness LTont Color a 41. Up rij/4 Personal 51 50 13 0 SO staromiaiiiimilli e Aim" While working with the menu, 1. Press the up/down direction button to select the item. 2. Press the left/right direction button to adjust 3. Press LCD SETUP to exit. 7
-
 1
1 -
2
-
3
-
4
-
5
-
 6
6 -
 7
7 -
 8
8 -
 9
9 -
 10
10 -
 11
11 -
 12
12 -
 13
13 -
 14
14 -
 15
15 -
 16
16 -
17
-
18
-
19
-
20
-
21
-
22
-
23
-
24
-
25
-
26
 |
 |
